Bitcoin Transaction Report Application
The Bitcoin Transaction Report app leverages the Blockbook Add-on to query the Bitcoin blockchain, filter transaction data, calculate key metrics, and display the results.


Introduction
This application is designed to fetch and analyze Bitcoin transactions associated with a specific address, leveraging the capabilities of Quicknode's Blockbook add-on. It provides users with detailed reports within a specified date range, offering insights into transaction history, balances after each transaction, and the USD value of Bitcoin movements.
For an in-depth walkthrough on how to fetch data and develop further functionalities, refer to our comprehensive guide or our script files.
Tech Stack
- Frontend Framework/Library: React
- Language: TypeScript
- Build Tool/Development Server: Vite
Features
- Balance Calculation: Calculates the BTC balance before and after each transaction.
- Transaction Direction: Identifies whether transactions are incoming or outgoing.
- Confirmation Status: Determines whether transactions are confirmed.
- USD Conversion: Computes the USD value of each transaction at the time it occurred.
- Transaction Filtering: Excludes internal wallet transactions that are not relevant to the address in question.
- Date Range Filtering: Generates reports for transactions within a specified date range.
- Time Zone Selection: Performs date filtering according to the selected timezone.
- CSV Support: Ability to export or copy result as CSV file.
Getting Started
Prerequisites
To run this app, you'll need:
- Node.js installed on your system.
- A Quicknode account with the Blockbook RPC add-on enabled. Note that Blockbook RPC is a paid add-on. Please refer to the Marketplace page for more information on pricing.
- A code editor or an IDE (e.g., VS Code)
- TypeScript and ts-node
Run the commands below to install TypeScript and ts-node globally to have TypeScript available across all projects.
npm install -g typescript
npm install -g ts-node
Installation Dependencies
- Clone the repository to your local machine:
git clone https://github.com/quiknode-labs/qn-guide-examples.git
- Navigate to the project directory:
cd sample-dapps/bitcoin-transaction-report-generator
- Install the necessary dependencies:
npm install
Setting Environment Variables
Rename .env.example to .env and replace the YOUR_QUICKNODE_BITCOIN_ENDPOINT_URL placeholder with your Quicknode Bitcoin Endpoint. Make sure that the Blockbook RPC add-on is enabled.
VITE_QUICKNODE_ENDPOINT = "YOUR_QUICKNODE_BITCOIN_ENDPOINT_URL"
Please note that while we utilize
dotenvfor environment variable management, sensitive information like endpoints can still be visible on the frontend. This configuration is not recommended for production environments as-is.
Running the Application
Run the development server:
npm run dev
Open http://localhost:5173/ in your browser to see the application.
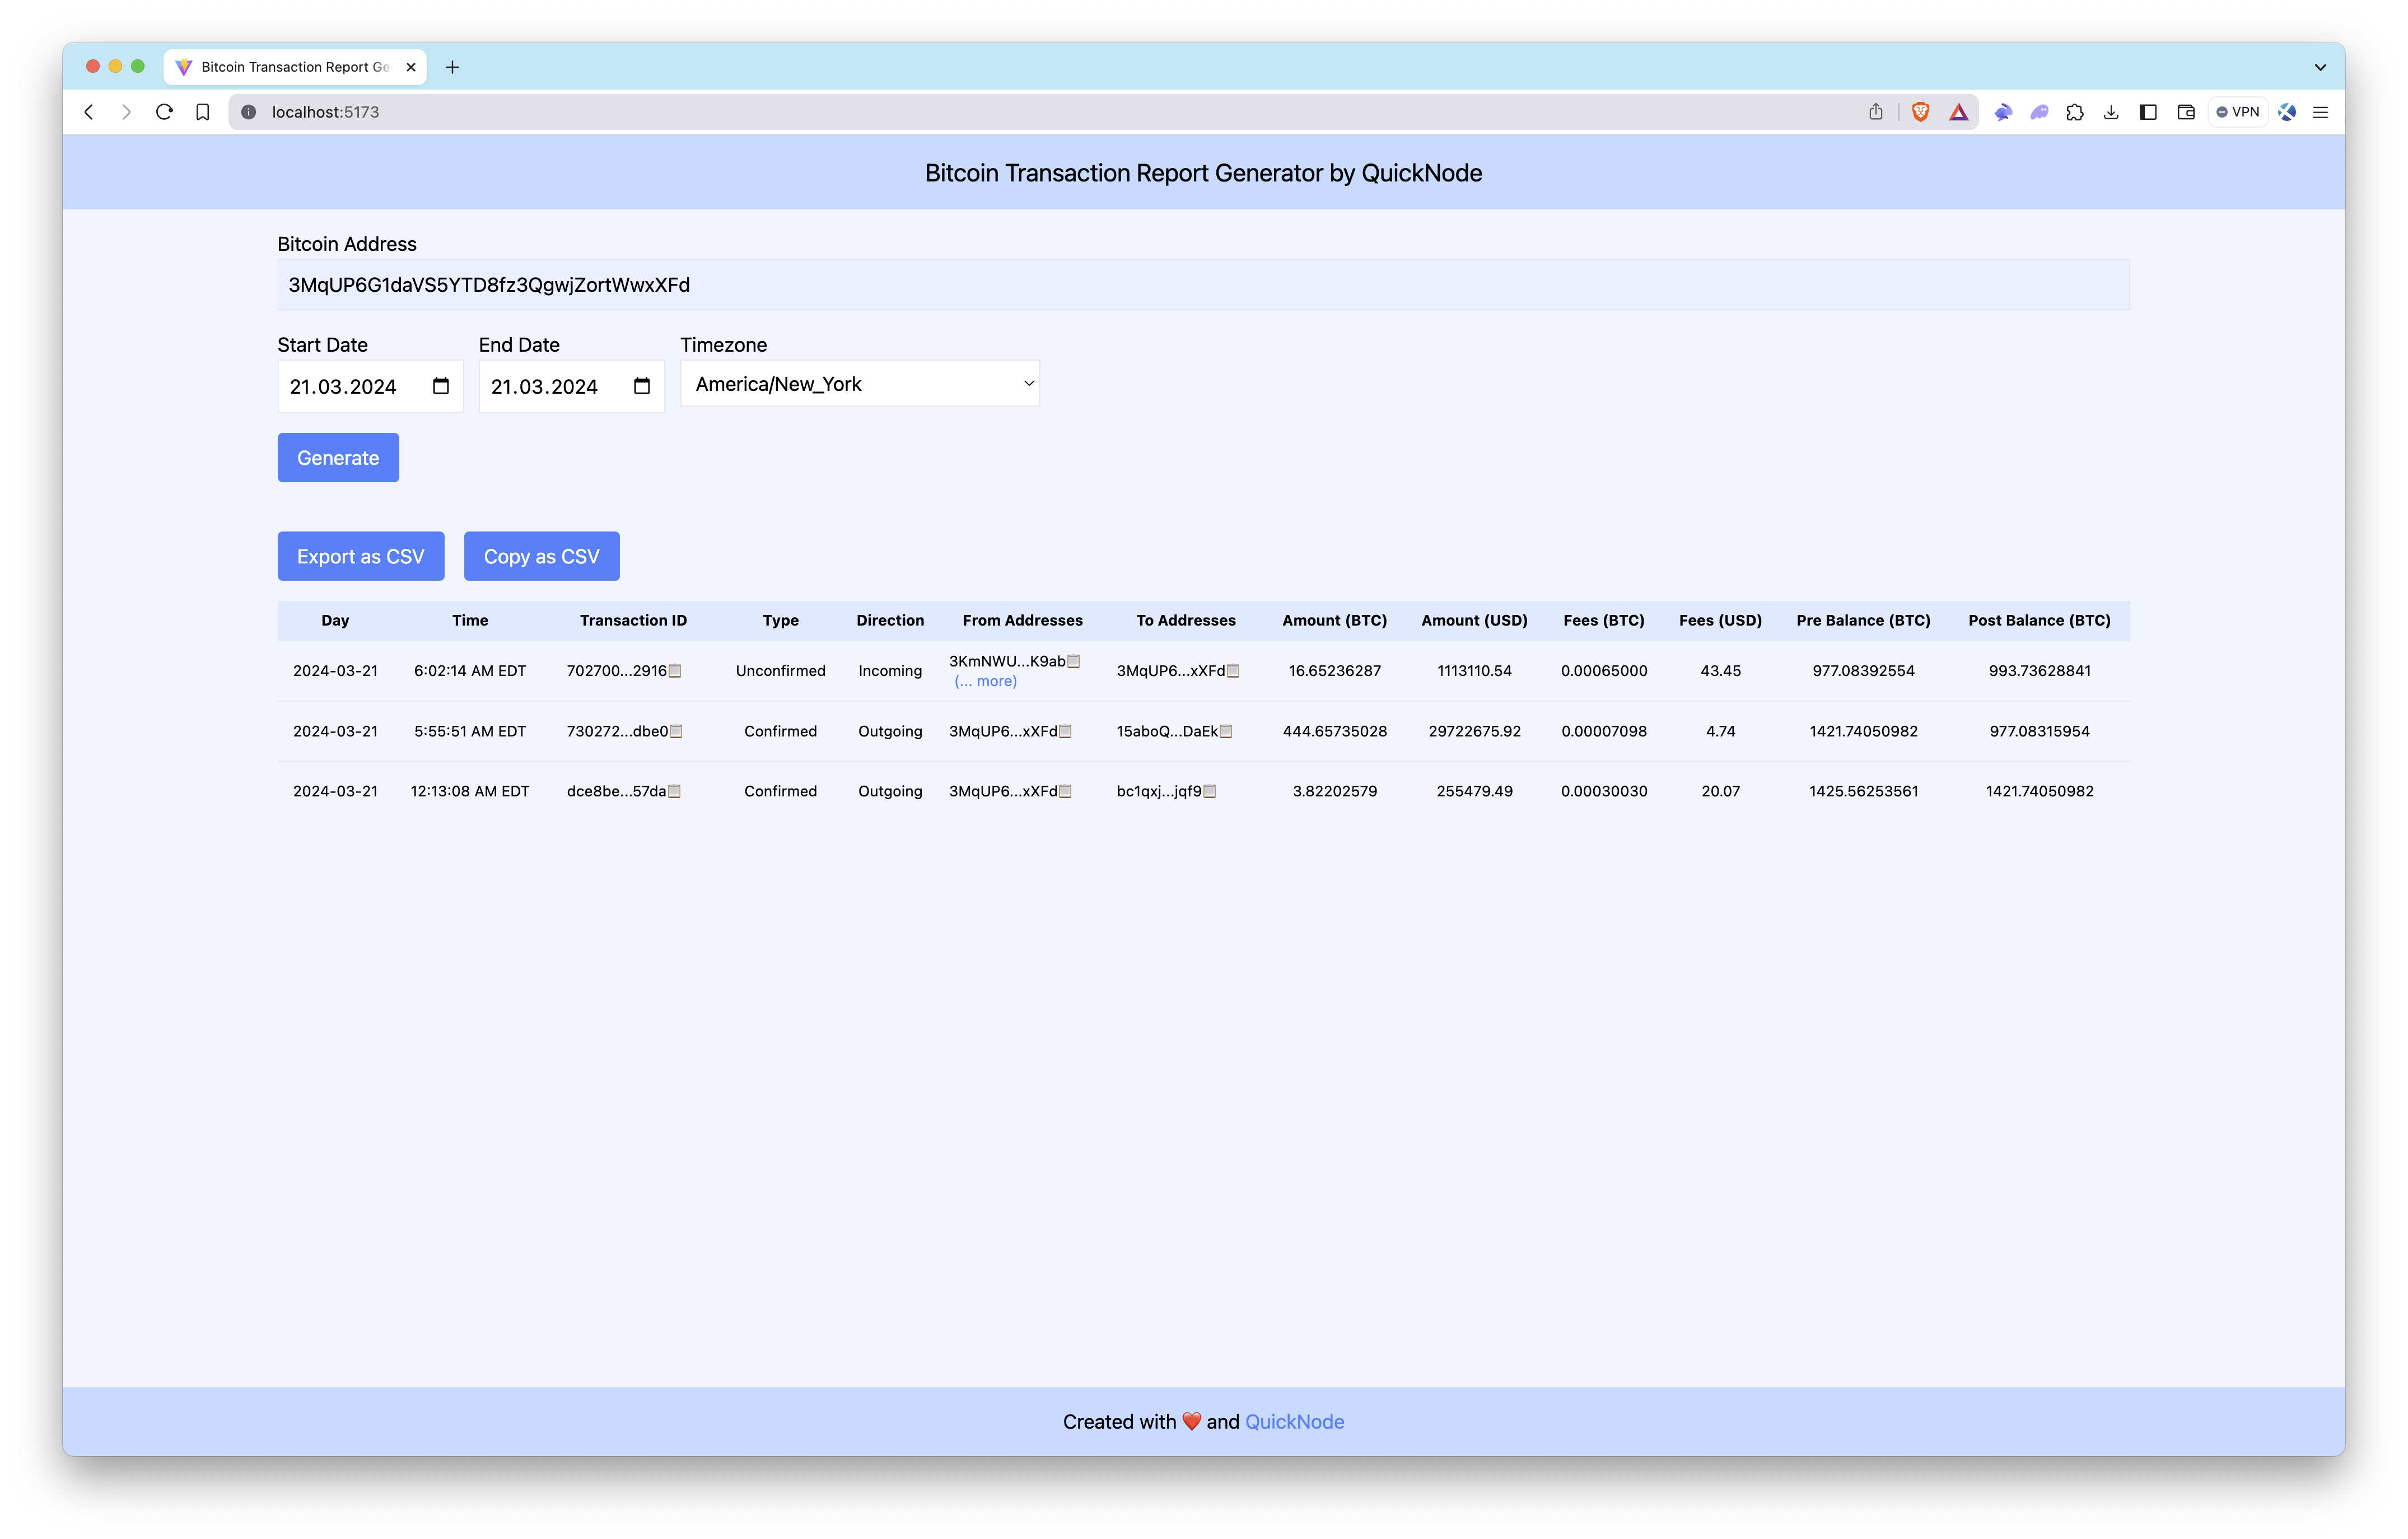
Using the App
- Input a Bitcoin wallet address.
- (Optional) Select the date range and time zone.
- Press
Generate. - (Optional) Export or copy results as CSV.
The Bitcoin Transaction Report Generator queries the Bitcoin blockchain for a wallet’s transactions, filters the data, calculates key metrics, and displays the results.
Preview
Conclusion
Quicknode's Blockbook add-on facilitates the creation of detailed Bitcoin transaction reports for developers and businesses alike. While this application covers the fundamentals, there's a vast scope for customization and extended functionalities. Whether for audit purposes, regulatory compliance, or market analysis, the Blockbook add-on streamlines the process of extracting blockchain data.
To discover more about how Quicknode assists auditing firms and individuals in extracting this type of data from blockchains, please contact us; we're eager to engage with you!
- Fork the repository
- Create a feature branch:git checkout -b feature/amazing-feature
- Commit your changes:git commit -m "Add amazing feature"
- Push your branch:git push origin feature/amazing-feature
- Open a Pull Request.


