Ethereum Wallet Explorer
The Ethereum Wallet Explorer uses Quicknode's Ethereum endpoint and APIs to query the blockchain for tokens, transactions, and NFTs associated with a given wallet.


Overview
The Ethereum Wallet Explorer demonstrates how to use your Quicknode Ethereum Node Endpoint and APIs from the Quicknode Marketplace to query the Ethereum blockchain for tokens, transactions, and NFTs associated with a given wallet.
To run this demo to its full capabilities, you will need both the Token and NFT API v2 bundle (free) and EVM Blockbook add-ons from the Quicknode Marketplace installed.
The demo uses Next.js 14 project bootstrapped with create-next-app.
Getting Started
Install Dependencies
First, install the dependencies:
npm install
# or
yarn
# or
pnpm install
# or
bun install
Set Environment Variables
Rename .env.example to .env.local and update with your Quicknode Ethereum Node Endpoint.
ETHEREUM_RPC_URL=https://example.ethereum-mainnet.quiknode.pro/123456/
First, run the development server:
npm run dev
# or
yarn dev
# or
pnpm dev
# or
bun dev
Open http://localhost:3000 with your browser to see the result.
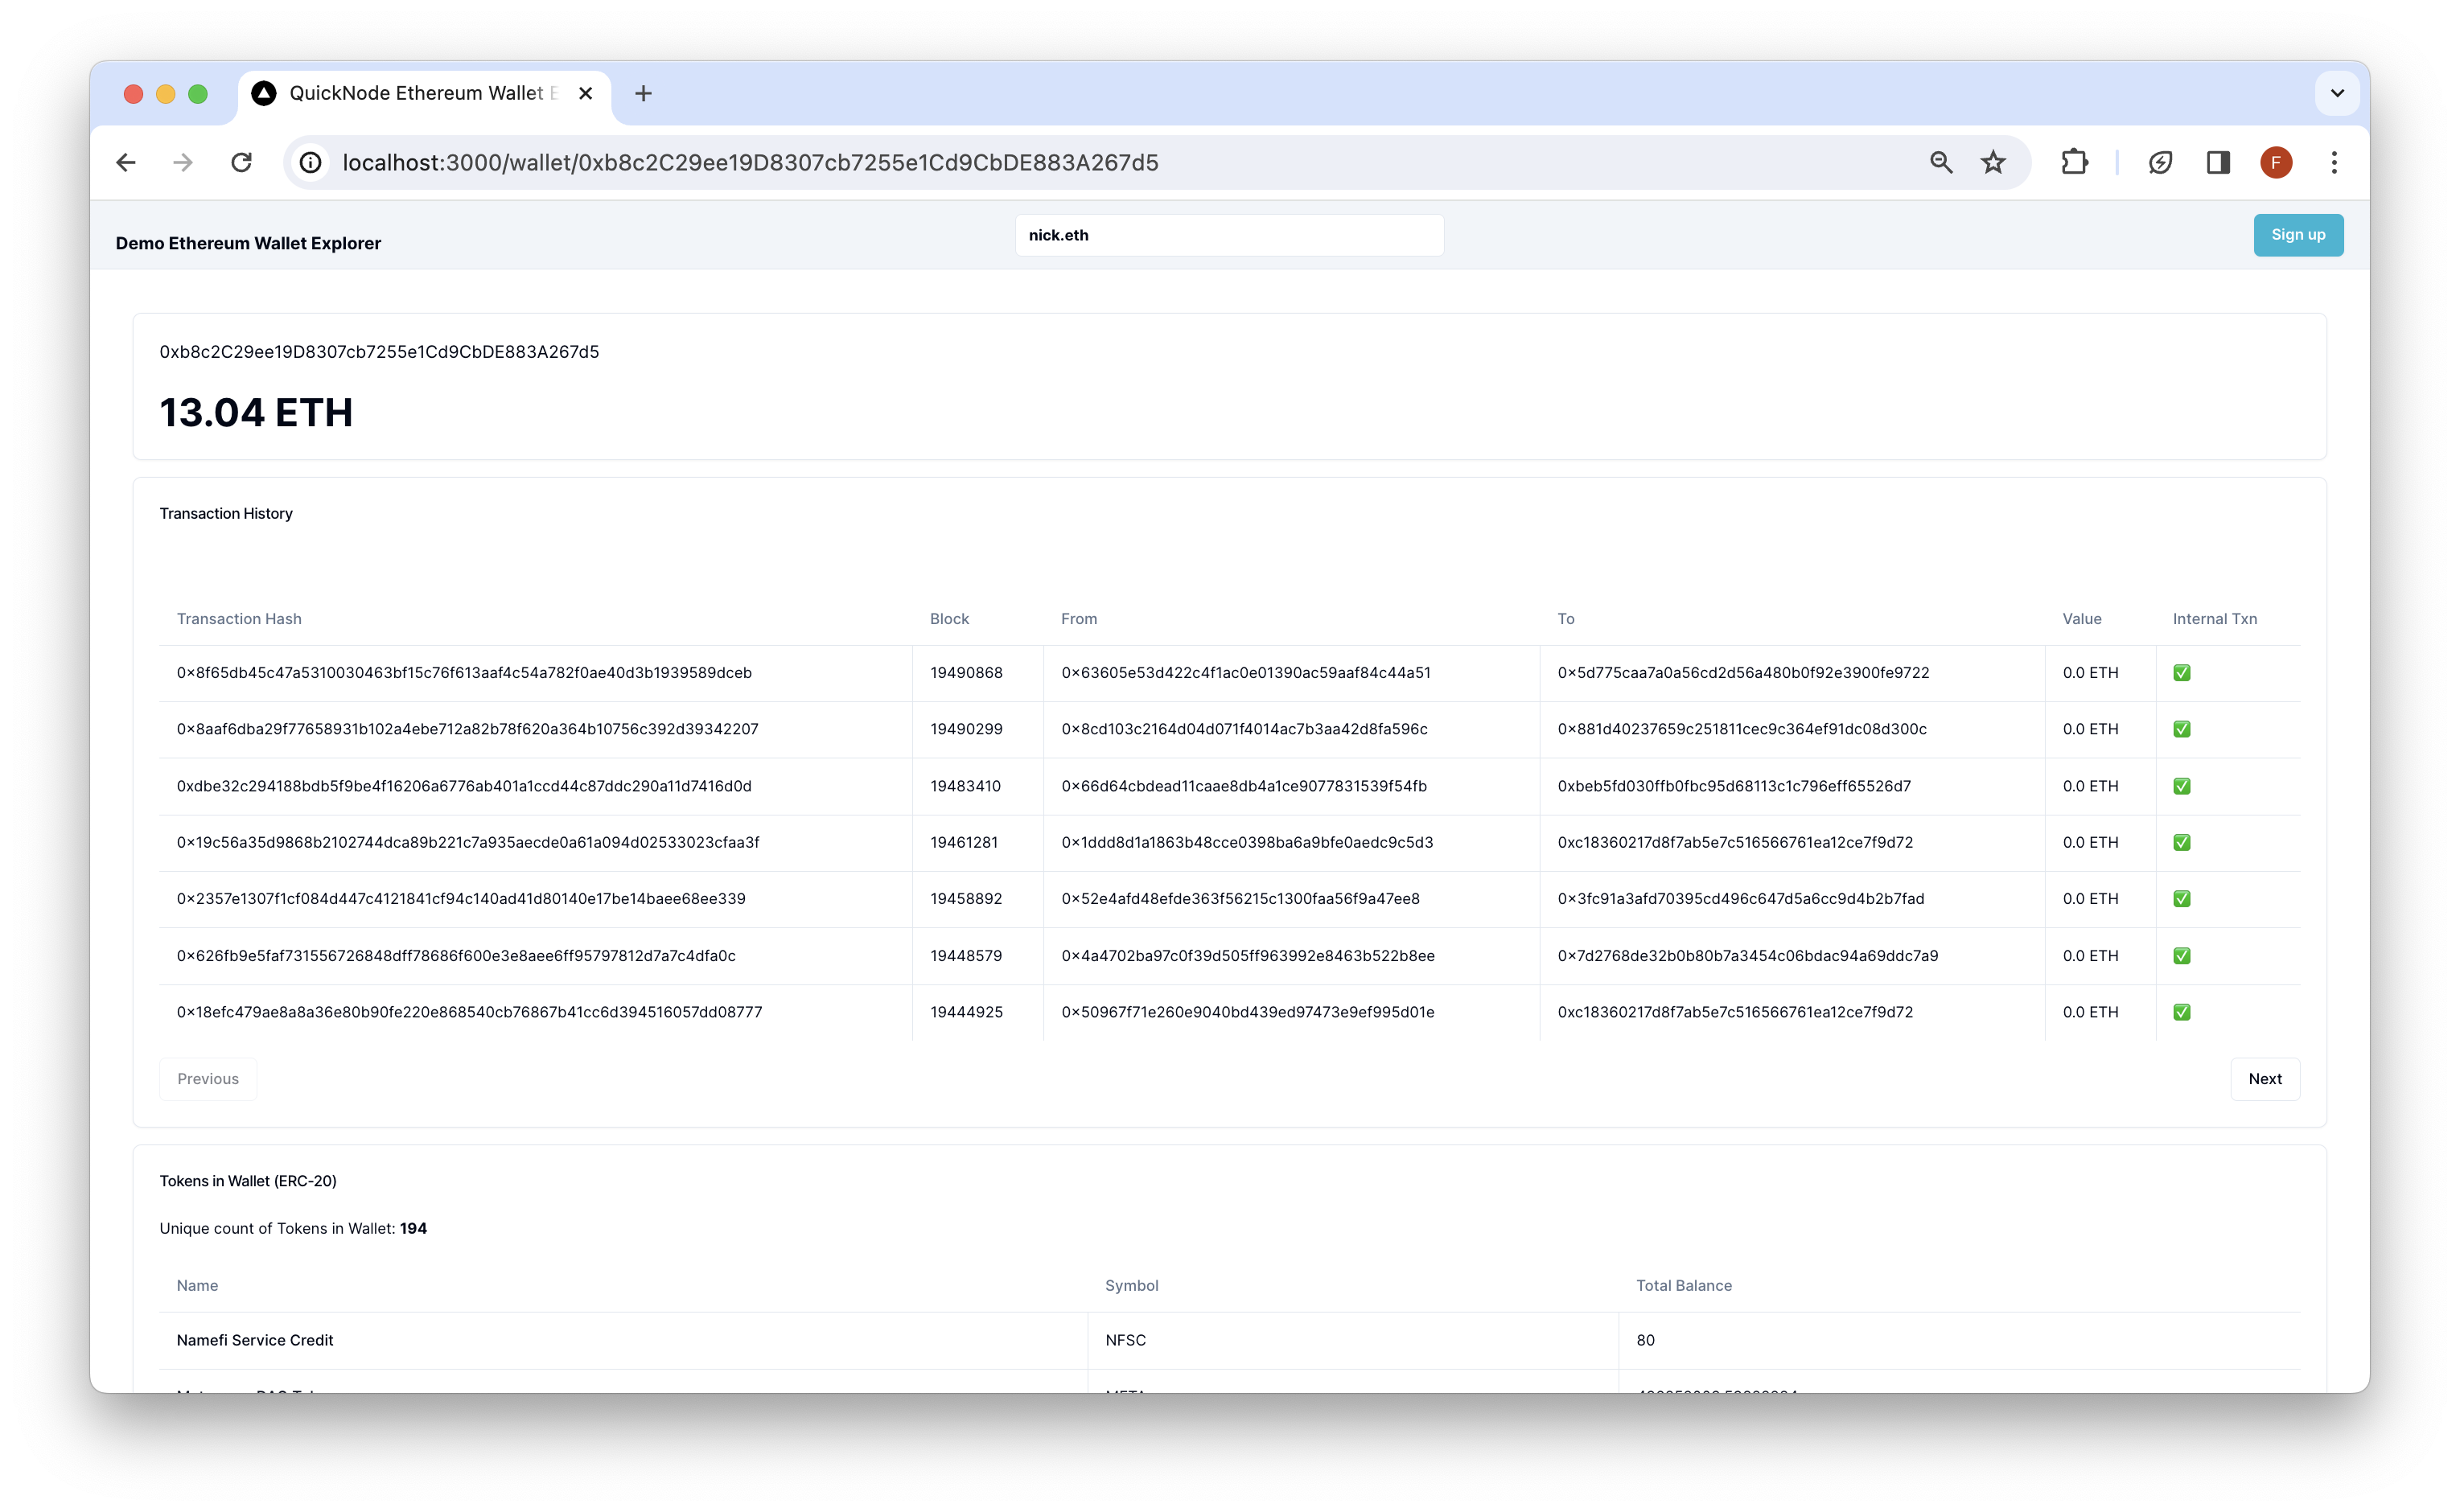
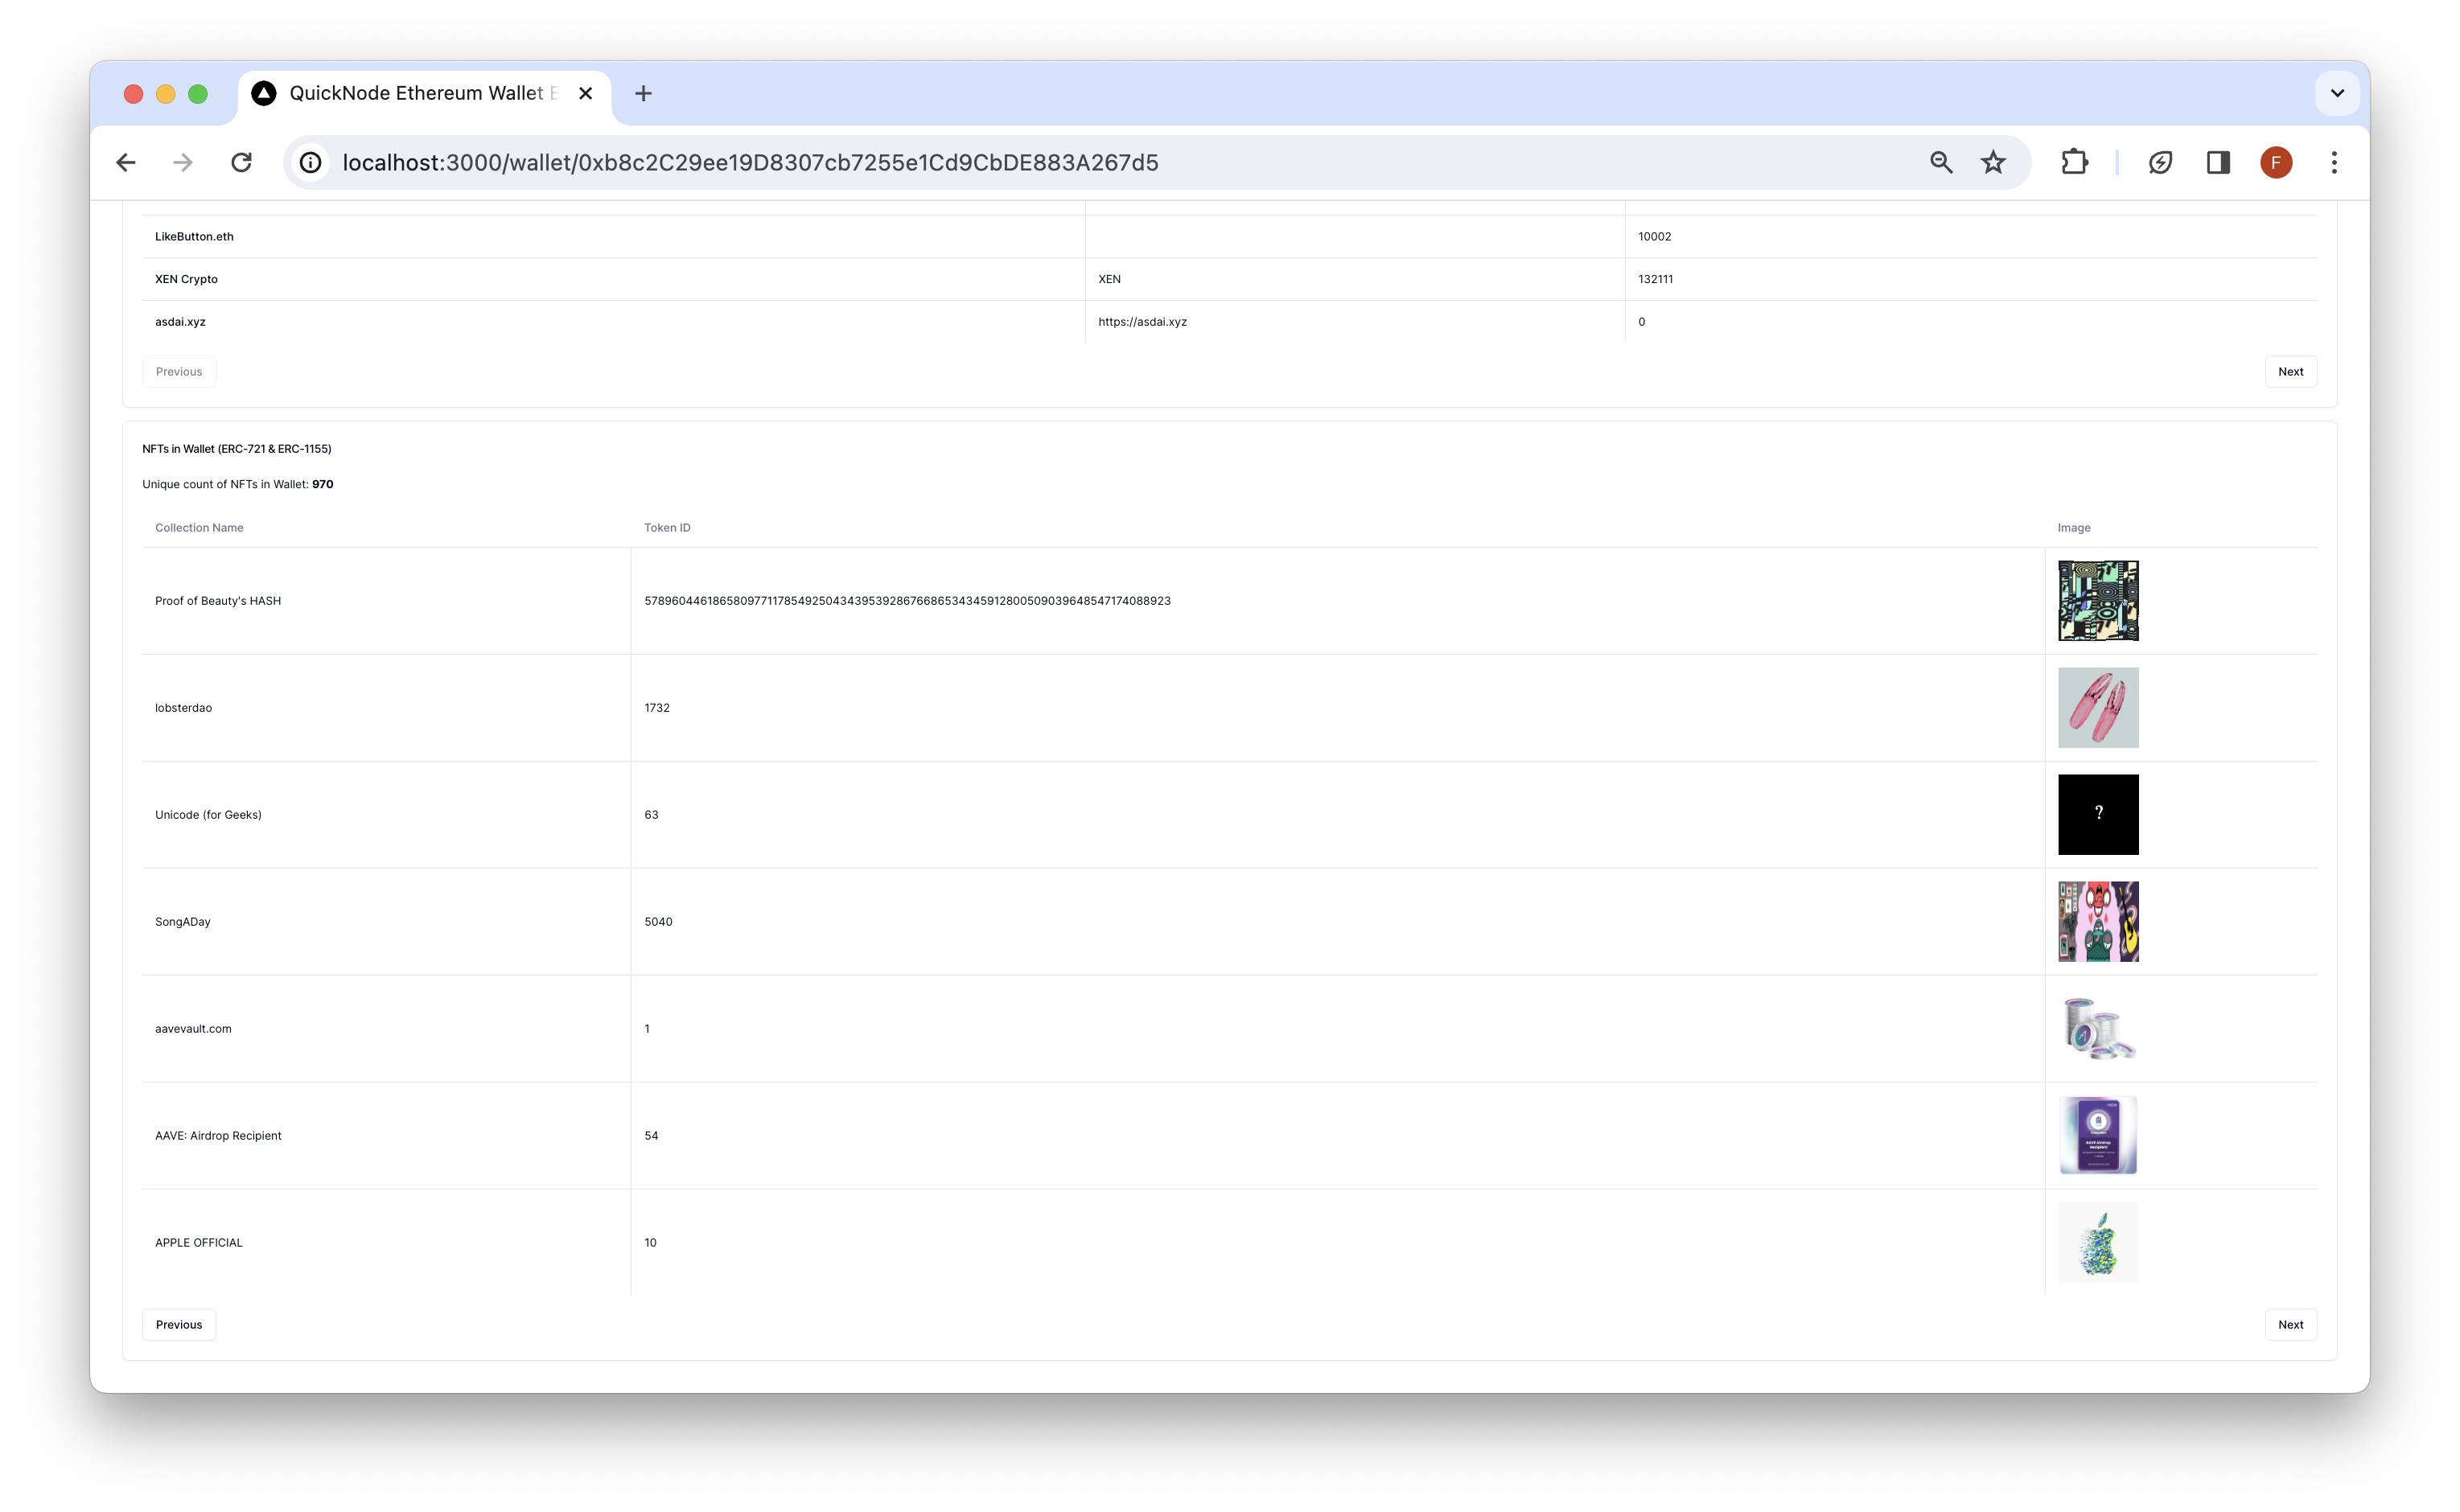
Using the Dapp
Search for an Ethereum wallet address and press enter. The Dapp will redirect to /wallet/[address] and query the Ethereum blockchain for the wallet's token balances, transactions, and NFTs. Results are rendered in respective cards.
Architecture
src/
├── app/
│   └── api/
│       └── wallet/
├── components/
    ├── explorer/
    └── header/
-
api- Contains the API routes for the Ethereum RPC calls. These can be accessed from the client via/api/wallet/[method]?walletAddress=[address]. These GET requests utilize theEtherslibrary, which lets us interact with Ethereum via our RPC URL and helps us parse and decode data, theToken and NFT API v2 bundleadd-on from the Quicknode Marketplace to get information about NFTs and ERC-20 Tokens via simple RPC request, and theEVM Blockbookadd-on to obtain transaction history for any Ethereum address. -
components- Contains the React components for the dapp.- The
explorercomponent contains client-side components that call the API routes and render the results. - The
headercomponent contains the search bar for the dapp.
- The
Deploy on Vercel

Preview
Next.js Documentation
To learn more about Next.js, take a look at the following resources:
- Next.js Documentation - learn about Next.js features and API.
- Learn Next.js - an interactive Next.js tutorial.
You can check out the Next.js GitHub repository - your feedback and contributions are welcome!
- Fork the repository
- Create a feature branch:git checkout -b feature/amazing-feature
- Commit your changes:git commit -m "Add amazing feature"
- Push your branch:git push origin feature/amazing-feature
- Open a Pull Request.


