11 min read
Overview
Airdropping tokens and NFTs have been a go-to for web3 projects to attract liquidity and increase community engagement. This guide will show you how to airdrop NFTs to a large number of users. We'll be using OpenZeppelin's token implementations for building the smart contracts and Foundry as our smart contract development kit.
Let's get started!
What You Will Need
- Intermediate knowledge of Ethereum and smart contracts (particularly NFTs & Tokens)
- An EVM wallet (e.g., MetaMask, Coinbase Wallet) with access to your private key
- Node.js (v20+) installed
- Foundry installed
What You Will Do
- Learn the basics of airdropping tokens to users
- Create a QuickNode node endpoint (create an account here)
- Create and deploy an NFT/Airdrop smart contract using OpenZeppelin and Foundry
- Test your deployed NFT/Airdrop smart contract on Sepolia testnet
| Dependency | Version |
|---|---|
| node.js | 20.14.0 |
| foundryup | 0.2.0 |
| forge-std | 1.8.2 |
| openzeppelin-solidity | 5.0.2 |
What are Airdrops?
Airdrops involve distributing digital assets such as tokens or NFTs to wallet addresses, typically to those who have engaged in specific activities like interacting with a DeFi platform or participating in events. Airdrops have become increasingly popular among web3 projects as a way to boost visibility and draw liquidity. Airdrops serve not only as a reward for community members but also as a strategic tool to attract new users and maintain engagement.
For example, the Uniswap airdrop, which was held on September 1, 2020, rewarded users with UNI tokens who had interacted with the Uniswap protocol before a set date. Recipients had to actively claim their tokens, a common method in web3 projects that shifts the burden of gas costs from the project to the users. This "claim" method helps manage the financial impact on the projects while distributing rewards at scale.
Benefits of Airdrops
- Community Engagement: Airdrops can boost community involvement by rewarding active participants or early adopters. This can also attract more volume and liquidity into your web3 project
- Promotion and Awareness: Distributing free NFTs can attract attention and generate buzz around your project
- Decentralization: By airdropping NFTs to a wide audience, you can help decentralize the ownership, avoiding concentration in a few addresses
Challenges of Airdrops
- Scalability: Handling airdrops for a large number of addresses can be technically challenging due to the number of addresses involved. Using an L1 like Ethereum mainnet could cost users hundreds of dollars (as of 2024); while other L2 chains like Optimism and Base offer substantially cheaper transaction costs, web3 projects are still looking for alternatives to save on gas fees such as making users claim their airdrop (vs sending to them as bearing the gas cost), or making gasless mints, powered by tools like account abstraction. Blockchain infrastructure is also an important factor to keep in mind during bigger airdrops. You must ensure your UI and the RPC node(s) it communicates with can handle your user's traffic. This is where QuickNode can assist, where it can automatically scale to your usage and provide performance and reliability when it matters.
- Regulatory Concerns: Depending on the location, airdrops can face legal scrutiny, mainly if they are seen as a form of financial promotion. We've seen an increase of web3 projects geo-block users from claiming their NFTs (although they may have technically qualified for the airdrop)
Project Set Up Prerequisite: Create a QuickNode Endpoint
To communicate with a blockchain, you'll need access to a node. You're welcome to use public nodes or deploy and manage your own infrastructure; however, if you'd like 8x faster response times, you can leave the heavy lifting to us. Sign up for a free account here.
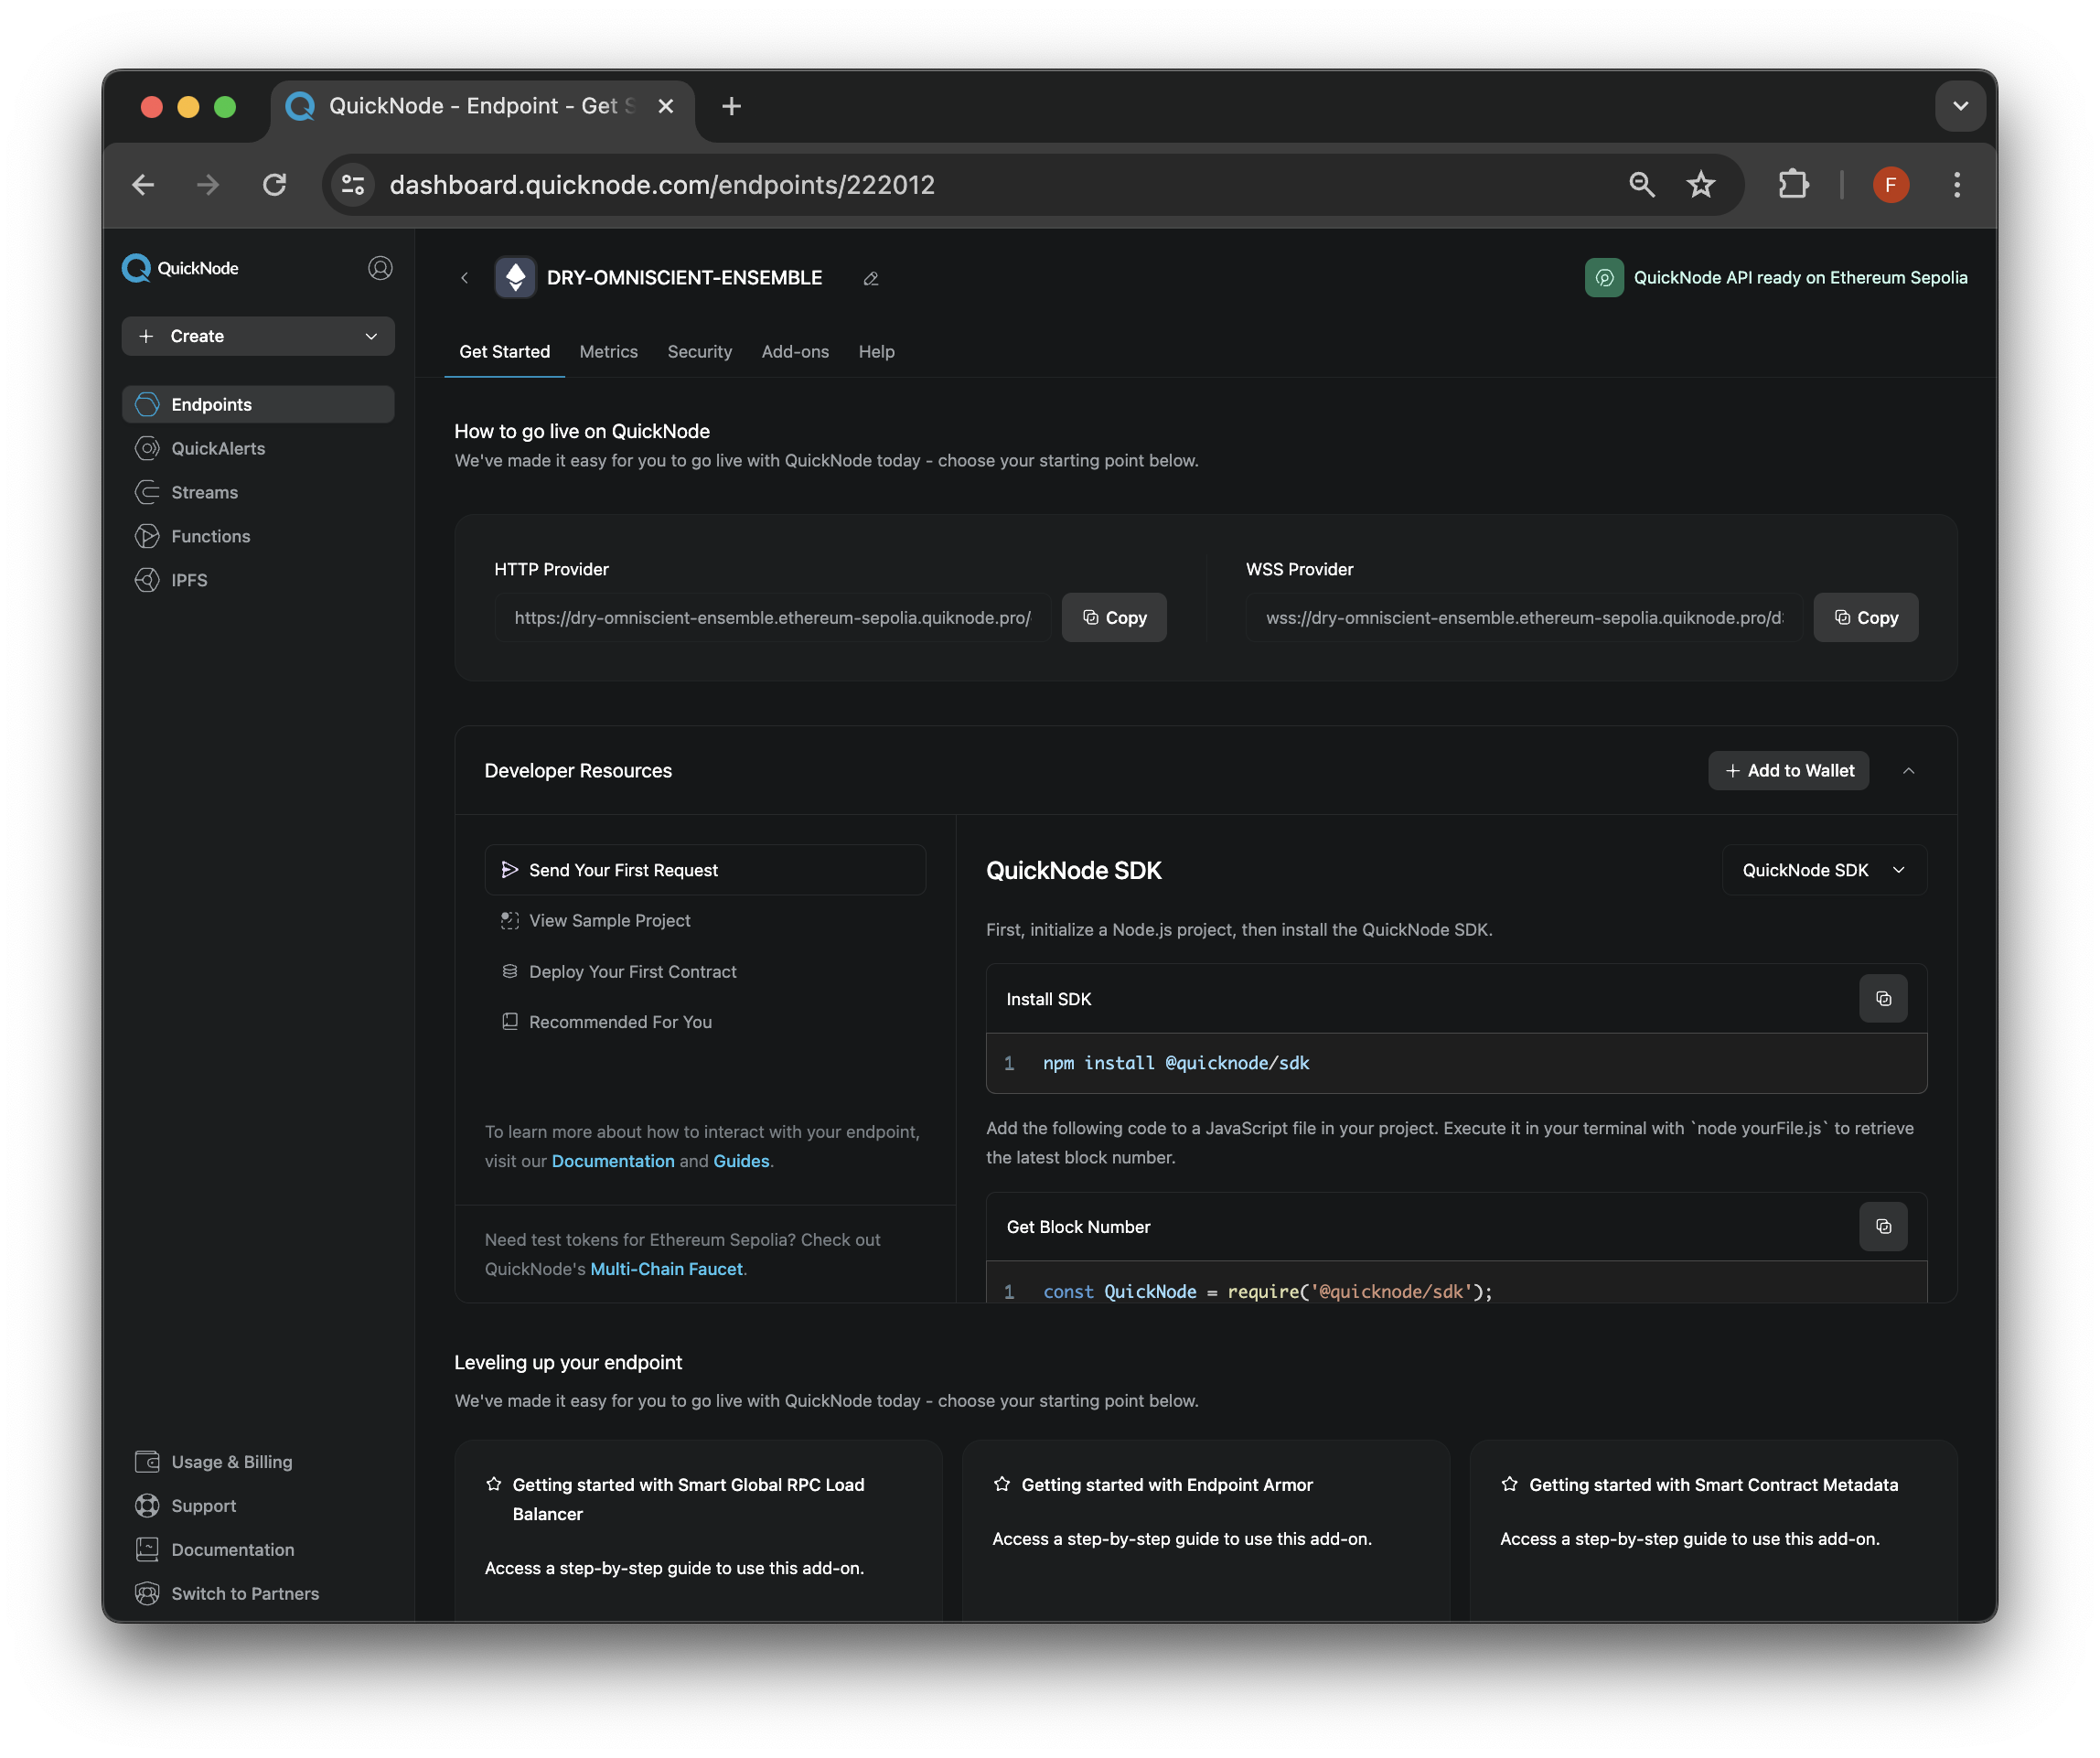
Once logged into QuickNode, click the Create an endpoint button, then select the Ethereum chain and Sepolia network.
After creating your endpoint, copy the HTTP Provider URL link and keep it handy, as you'll need it when developing the airdrop code.
Project Set Up Prerequisite: Fund Your Wallet via QuickNode Faucet
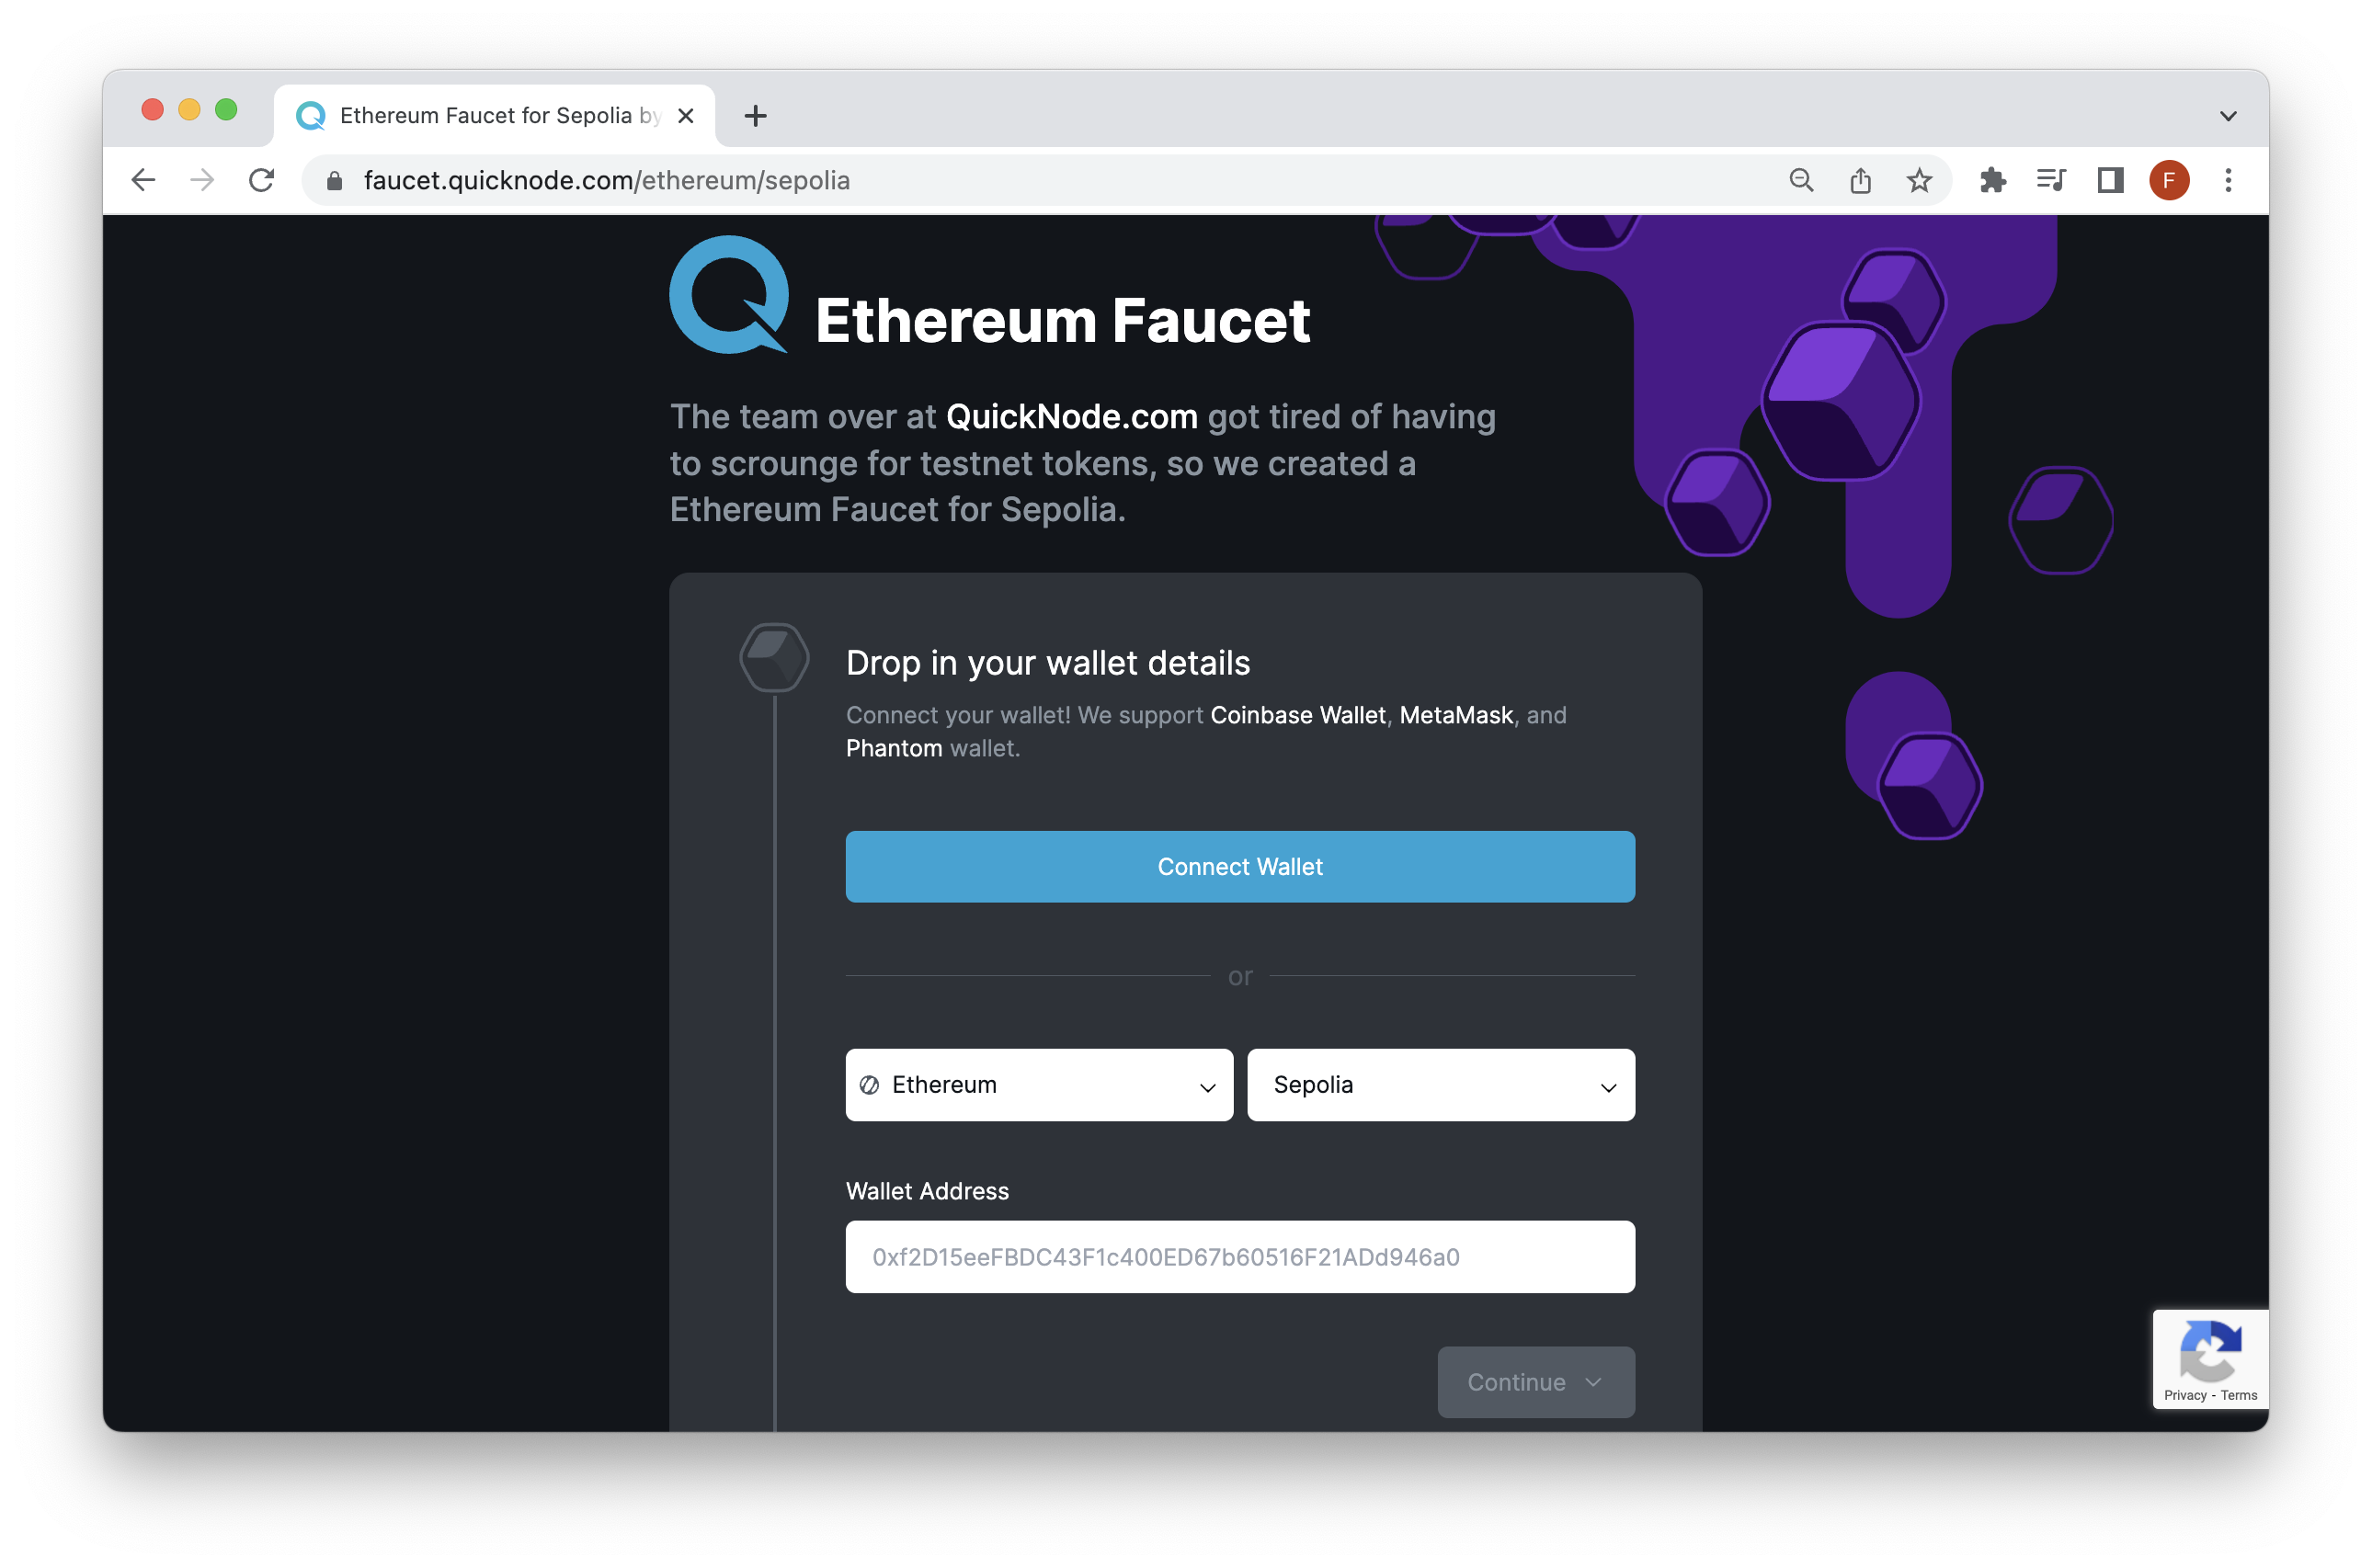
In order to deploy the NFT contract to Sepolia testnet, you'll need Sepolia testnet ETH to pay the gas fees. The Multi-Chain QuickNode Faucet makes it easy to obtain test ETH!
Navigate to the Multi-Chain QuickNode Faucet and connect your wallet (e.g., MetaMask, Coinbase Wallet) or paste in your wallet address to retrieve test ETH. Note that there is a mainnet balance requirement of 0.001 ETH on Ethereum Mainnet to use the EVM faucets. You can also tweet or login with your QuickNode account to get a bonus!
Project Set Up Prerequisite: Initialize and Install Dependencies
Before we start coding, ensure that you have Node.js (v20+) and Foundry installed. Next, let's set up the project directory by running the following commands:
forge init airdrop
Next, navigate inside the project directory, create the required files, and install dependencies:
cd airdrop
touch src/NFT.sol
touch test/NFT.t.sol
touch script/Claim.s.sol
touch remappings.txt
forge install OpenZeppelin/openzeppelin-contracts --no-commit
We'll need to set up remappings so that our smart contracts (.sol files) can access the OpenZeppelin libraries properly. Add the following configuration to the remappings.txt file.
@openzeppelin/contracts/=lib/openzeppelin-contracts/contracts/
One method of configuring the RPC endpoint in this project is to also include it in the foundry.toml file, but if you plan to open source this code, we recommend keeping it out and just including it in the command-line instruction. Let's create environment variables to include our RPC endpoint and private key (which we'll be using to deploy the smart contracts):
export RPC_URL=<Your RPC endpoint>
export PRIVATE_KEY=<Your wallets private key>
With the project directory set up and dependencies installed, let's move on to creating the smart contracts.
Creating the Airdrop Smart Contract
The NFT contract will contain the airdrop (e.g., claim logic) that users can interact with to claim their NFTs. The NFT smart contract has the following functionality:
- Upon deployment of the NFT contract, the deployer will need to set the
owneraddress, an array of addressesinitialWhitelist, and abaseTokenURIused for metadata. - Users on the whitelist can call the
claimNFTfunction to mint their NFT. Users not on the whitelist that try to call this function will revert in an error. - The contract admin (e.g., owner) can add/remove more addresses to the whitelist by calling the
addToWhitelistandremoveFromWhitelistfunctions. - The contract admin can call the
pausefunction anytime to pause claims whenever needed. Aunpausefunction is also included to resume claims. - The mappings
whitelistandhasClaimedstore the list of whitelisted and claimed addresses. - Optionally, the NFT contract inherits
ERC721URIStoragefor metadata usage andERC721Burnablefor burnability.
NFT Contract
Open the src/NFT.sol file and add the following code:
// SPDX-License-Identifier: MIT
pragma solidity ^0.8.20;

import "@openzeppelin/contracts/token/ERC721/ERC721.sol";
import "@openzeppelin/contracts/token/ERC721/extensions/ERC721URIStorage.sol";
import "@openzeppelin/contracts/token/ERC721/extensions/ERC721Burnable.sol";
import "@openzeppelin/contracts/security/Pausable.sol";
import "@openzeppelin/contracts/access/Ownable.sol";

contract NFT is ERC721, ERC721URIStorage, ERC721Burnable, Pausable, Ownable {
    uint256 private _nextTokenId;
    mapping(address => bool) public whitelist;
    mapping(address => bool) public hasClaimed;
    string private _baseTokenURI;

    constructor(address initialOwner, address[] memory initialWhitelist, string memory baseTokenURI)
        ERC721("NFT", "NFT")
        Ownable(initialOwner)
 {
        transferOwnership(initialOwner);
        addToWhitelist(initialWhitelist);
        _baseTokenURI = baseTokenURI;
 }

    function claimNFT() public whenNotPaused {
        address to = msg.sender;
        require(whitelist[to], "Caller is not whitelisted");
        require(!hasClaimed[to], "Caller has already claimed an NFT");

        uint256 tokenId = _nextTokenId++;
        _safeMint(to, tokenId);
        hasClaimed[to] = true;
 }

    function addToWhitelist(address[] memory addresses) public onlyOwner {
        for (uint i = 0; i < addresses.length; i++) {
            if (!whitelist[addresses[i]]) {
                whitelist[addresses[i]] = true;
 }
 }
 }

    function removeFromWhitelist(address[] memory addresses) public onlyOwner {
        for (uint i = 0; i < addresses.length; i++) {
            if (whitelist[addresses[i]]) {
                whitelist[addresses[i]] = false;
 }
 }
 }

    function pause() public onlyOwner {
        _pause();
 }

    function unpause() public onlyOwner {
        _unpause();
 }

    // The following functions are overrides required by Solidity.
    function tokenURI(uint256 tokenId)
        public
        view
        override(ERC721, ERC721URIStorage)
        whenNotPaused
        returns (string memory)
 {
        return super.tokenURI(tokenId);
 }

    function supportsInterface(bytes4 interfaceId)
        public
        view
        override(ERC721, ERC721URIStorage)
        returns (bool)
 {
        return super.supportsInterface(interfaceId);
 }
}
You can now access Logs for your RPC endpoints, helping you troubleshoot issues more effectively. If you encounter an issue with your RPC calls, simply check the logs in your QuickNode dashboard to identify and resolve problems quickly. Learn more about log history limits on our pricing page.
Testing
Before deploying the contracts to testnet, let's test to ensure the smart contracts are working as intended.
Add the following test code to the test/NFT.t.sol file:
// SPDX-License-Identifier: MIT
pragma solidity ^0.8.20;

import "forge-std/Test.sol";
import "../src/NFT.sol";

contract NFTTest is Test {
    NFT nft;
    address owner;
    address[] initialWhitelist;

    function setUp() public {
        owner = address(this);
        initialWhitelist = [vm.addr(1), vm.addr(2), vm.addr(3), vm.addr(4)];
        nft = new NFT(owner, initialWhitelist, "https://api.example.com/");
        nft.transferOwnership(owner);  // Ensure the owner is correctly set
 }

    function testClaimNFT() public {
        vm.startPrank(vm.addr(1));  // Simulate the whitelisted user
        nft.claimNFT();
        assertTrue(nft.balanceOf(vm.addr(1)) == 1, "Should have minted 1 NFT");
        vm.stopPrank();
 }

    function testFailClaimNFTNotWhitelisted() public {
        vm.startPrank(vm.addr(5));  // Non-whitelisted user
        nft.claimNFT();  // This should fail
        vm.stopPrank();
 }

    function testFailClaimNFTTwice() public {
        vm.startPrank(vm.addr(1));
        nft.claimNFT();
        nft.claimNFT();  // Trying to claim a second time should fail
        vm.stopPrank();
 }

    function testPauseUnpause() public {
        nft.pause();
        assertTrue(nft.paused(), "Contract should be paused");

        nft.unpause();
        assertFalse(nft.paused(), "Contract should be unpaused");
 }
}
Then run the test with the forge test command:
forge test
The output will look like this:
Ran 4 tests for test/NFT.t.sol:NFTTest
[PASS] testClaimNFT() (gas: 107481)
[PASS] testFailClaimNFTNotWhitelisted() (gas: 13262)
[PASS] testFailClaimNFTTwice() (gas: 106417)
[PASS] testPauseUnpause() (gas: 17536)
Suite result: ok. 4 passed; 0 failed; 0 skipped; finished in 1.96ms (1.02ms CPU time)

Ran 1 test suite in 176.35ms (1.96ms CPU time): 4 tests passed, 0 failed, 0 skipped (4 total tests)
Deployment
Now it's time to deploy the smart contracts to testnet. Run the forge create command below to deploy the smart contract.
The environment variables RPC_URL and PRIVATE_KEY were previously set up in the project setup section. However, you must include the constructor arguments below before executing the command.
intialOwner: The owner of the NFT contract that can do admin functions like add/remove whitelist addresses, pause/unpause the contractarray of whitelist addresses: An array of EVM-compatible addresses. There isn't a specific limit on the length of an array you can use in your contracts. However, there are practical limits based on gas costs and block gas limits based on the blockchain you are deploying on.metadataURI: A URL that points to your NFT projects metadata. You can use providers like IPFS on QuickNode to host metadata in a decentralized manner.
Important: Ensure that you include your own address in the whitelist array in order to test the claim capability in the next section.
forge create --rpc-url=$RPC_URL --private-key=$PRIVATE_KEY src/NFT.sol:NFT --constructor-args "intialOwnerAddress" "[0xAddr1, 0xAddr2, 0xAddr3]" "http://examplemetadatauri.com"
You should see an output like this:
No files changed, compilation skipped
Deployer: 0xe0f2b924422909626D539b0FBd96239B31767400
Deployed to: 0xf4Bc97338Ddc886c5DA20f0fF91cF1c7Ea4e2760
Transaction hash: 0x664741640fb13b3ffdc659251fc8ba43a5d141d7b5c4d789820bf41485218c8c
Now that your NFT contract is deployed on a testnet, we can interact with it.
If you want to verify (open-source) your smart contract on a block explorer like Etherscan, check out this guide: Different Ways to Verify Your Smart Contract Code
Airdrop Claim Example
Now, to test claiming an airdrop on Sepolia testnet, input the following code in the script/Claim.s.sol file:
// SPDX-License-Identifier: MIT
pragma solidity ^0.8.20;

import "forge-std/Script.sol";
import "forge-std/console.sol";
import "../src/NFT.sol";

contract ClaimScript is Script {
    NFT public nftContract;

    function setUp() public {
        // Initialize NFT contract interface with the deployed contract address
        nftContract = NFT("INSERT_DEPLOYED_CONTRACT_ADDRESS");  // Replace with actual contract address
 }

    function run() public {
        vm.startBroadcast();  // Start a transaction broadcast session
        nftContract.claimNFT();
        vm.stopBroadcast();
 }
}
Then to execute the script, run the command below:
forge script script/Claim.s.sol --rpc-url $RPC_URL --private-key $PRIVATE_KEY --broadcast
Important: Ensure that the private key you include above corresponds to a whitelisted address you included during deployment.
You'll see an output like:
## Setting up 1 EVM.
==========================
Chain 11155111
Estimated gas price: 14.618536578 gwei
Estimated total gas used for script: 162145
Estimated amount required: 0.00237032261343981 ETH
==========================
##
Sending transactions [0 - 0].
⠁ [00:00:00] [#####################################################################################################################################################################] 1/1 txes (0.0s)##
Waiting for receipts.
⠉ [00:00:12] [#################################################################################################################################################################] 1/1 receipts (0.0s)
##### sepolia
✅  [Success]Hash: 0x7832ddd563e757e57aadb2fb55d16f282b9f4419a38feace946cbd3c56d4777b
Block: 5997706
Paid: 0.001167971638330575 ETH (117391 gas * 9.949413825 gwei)
==========================
ONCHAIN EXECUTION COMPLETE & SUCCESSFUL.
Total Paid: 0.001167971638330575 ETH (117391 gas * avg 9.949413825 gwei)
Final Thoughts
That's it! You now know how to deploy your own NFT contract that is airdrop compatible. Remember, blockchain development is an ever-evolving field, and staying updated is 🔑. Subscribe to our newsletter for more articles and guides on Web3 and blockchain. If you have any questions or need further assistance, feel free to join our Discord server or provide feedback using the form below. Stay informed and connected by following us on Twitter (@QuickNode) and our Telegram announcement channel.
We ❤️ Feedback!
Let us know if you have any feedback or requests for new topics. We'd love to hear from you.