9 min read
Overview
This guide introduces how to optimize your Ethereum RPC usage by leveraging the native Multicall3 integration with Viem, a modern Ethereum library.
We'll walk through the process of setting up Viem, implementing Multicall for batch contract reads, and exploring the benefits of this approach for reducing RPC usage and costs. While Multicall can also be used for state-changing calls, this guide will focus exclusively on reading operations.
What You Will Do
- Learn about Multicall3 and its advantages
- Set up a TypeScript project with Viem
- Implement batch contract reads using Multicall to reduce RPC requests
- Explore the benefits of using Multicall for performance and cost optimization
What You Will Need
- Basic understanding of Ethereum and Transactions
- Node.js installed (v20 or higher)
- TypeScript and ts-node installed
- A free Quicknode account
- Familiarity with Viem library
Multicall
Multicall is a powerful smart contract that allows you to combine multiple contract calls into a single JSON-RPC request. This can significantly optimize your RPC usage by reducing the number of requests sent to the blockchain. Multicall contracts can also handle multiple state-changing transactions in a single call, although this is less common and requires caution.
Viem has a native integration for Multicall, making it easy to implement. Additionally, the Quicknode SDK includes Viem, allowing you to seamlessly leverage Multicall capabilities without additional setup,
Over the years, there have been several improvements to the Multicall contract, each adding new features and enhancements. In this guide, we will use the latest version, Multicall3, which offers more advanced features and better error handling. Multicall3 is deployed on over 70+ chains at the 0xcA11bde05977b3631167028862bE2a173976CA11 contract address. The full list of deployed chains and other details can be found at Multicall3 website.
Although this guide does not cover how to use Multicall for state-changing calls, developers should be cautious as the implementation is unaudited. See their official documentation for more details.
Why Use Multicall?
- Efficiency: Reduces the number of JSON-RPC requests, lowering RPC usage and costs.
- Consistency: Ensures all values returned are from the same block.
- Performance: Decreases round-trip times between client and node, enhancing performance.
How Multicall Works?
The Multicall3 contract has several functions for different use cases. The most commonly used function is aggregate3, which aggregates calls and ensures each returns success if required.
Functions
aggregate3: Aggregates calls and ensures each returns success if required.aggregate3Value: Similar to aggregate3, but also lets you send values with calls.aggregate: Returns a tuple of (uint256 blockNumber, bytes[] returnData) and reverts if any call fails.blockAndAggregate: Similar to aggregate, but also returns the block number and block hash.tryAggregate: Takes a bool value indicating whether success is required for all calls, and returns a tuple of (bool success, bytes[] returnData)[].tryBlockAndAggregate: Similar to tryAggregate, but also returns the block number and block hash.
aggregate3 Function
The aggregate3 function takes an array of Call3 structs and is payable, allowing it to transfer ether if needed. It returns an array of Result structs, each containing the success status and return data of the function calls. The function iterates over the input array, making calls to the specified targets and storing the results. If any call fails and failure is not allowed, the function reverts the entire transaction, ensuring all calls are executed successfully or none at all, maintaining contract state integrity.
You can check the code of aggregate3 function here.
How to Use Multicall to Reduce RPC Cost
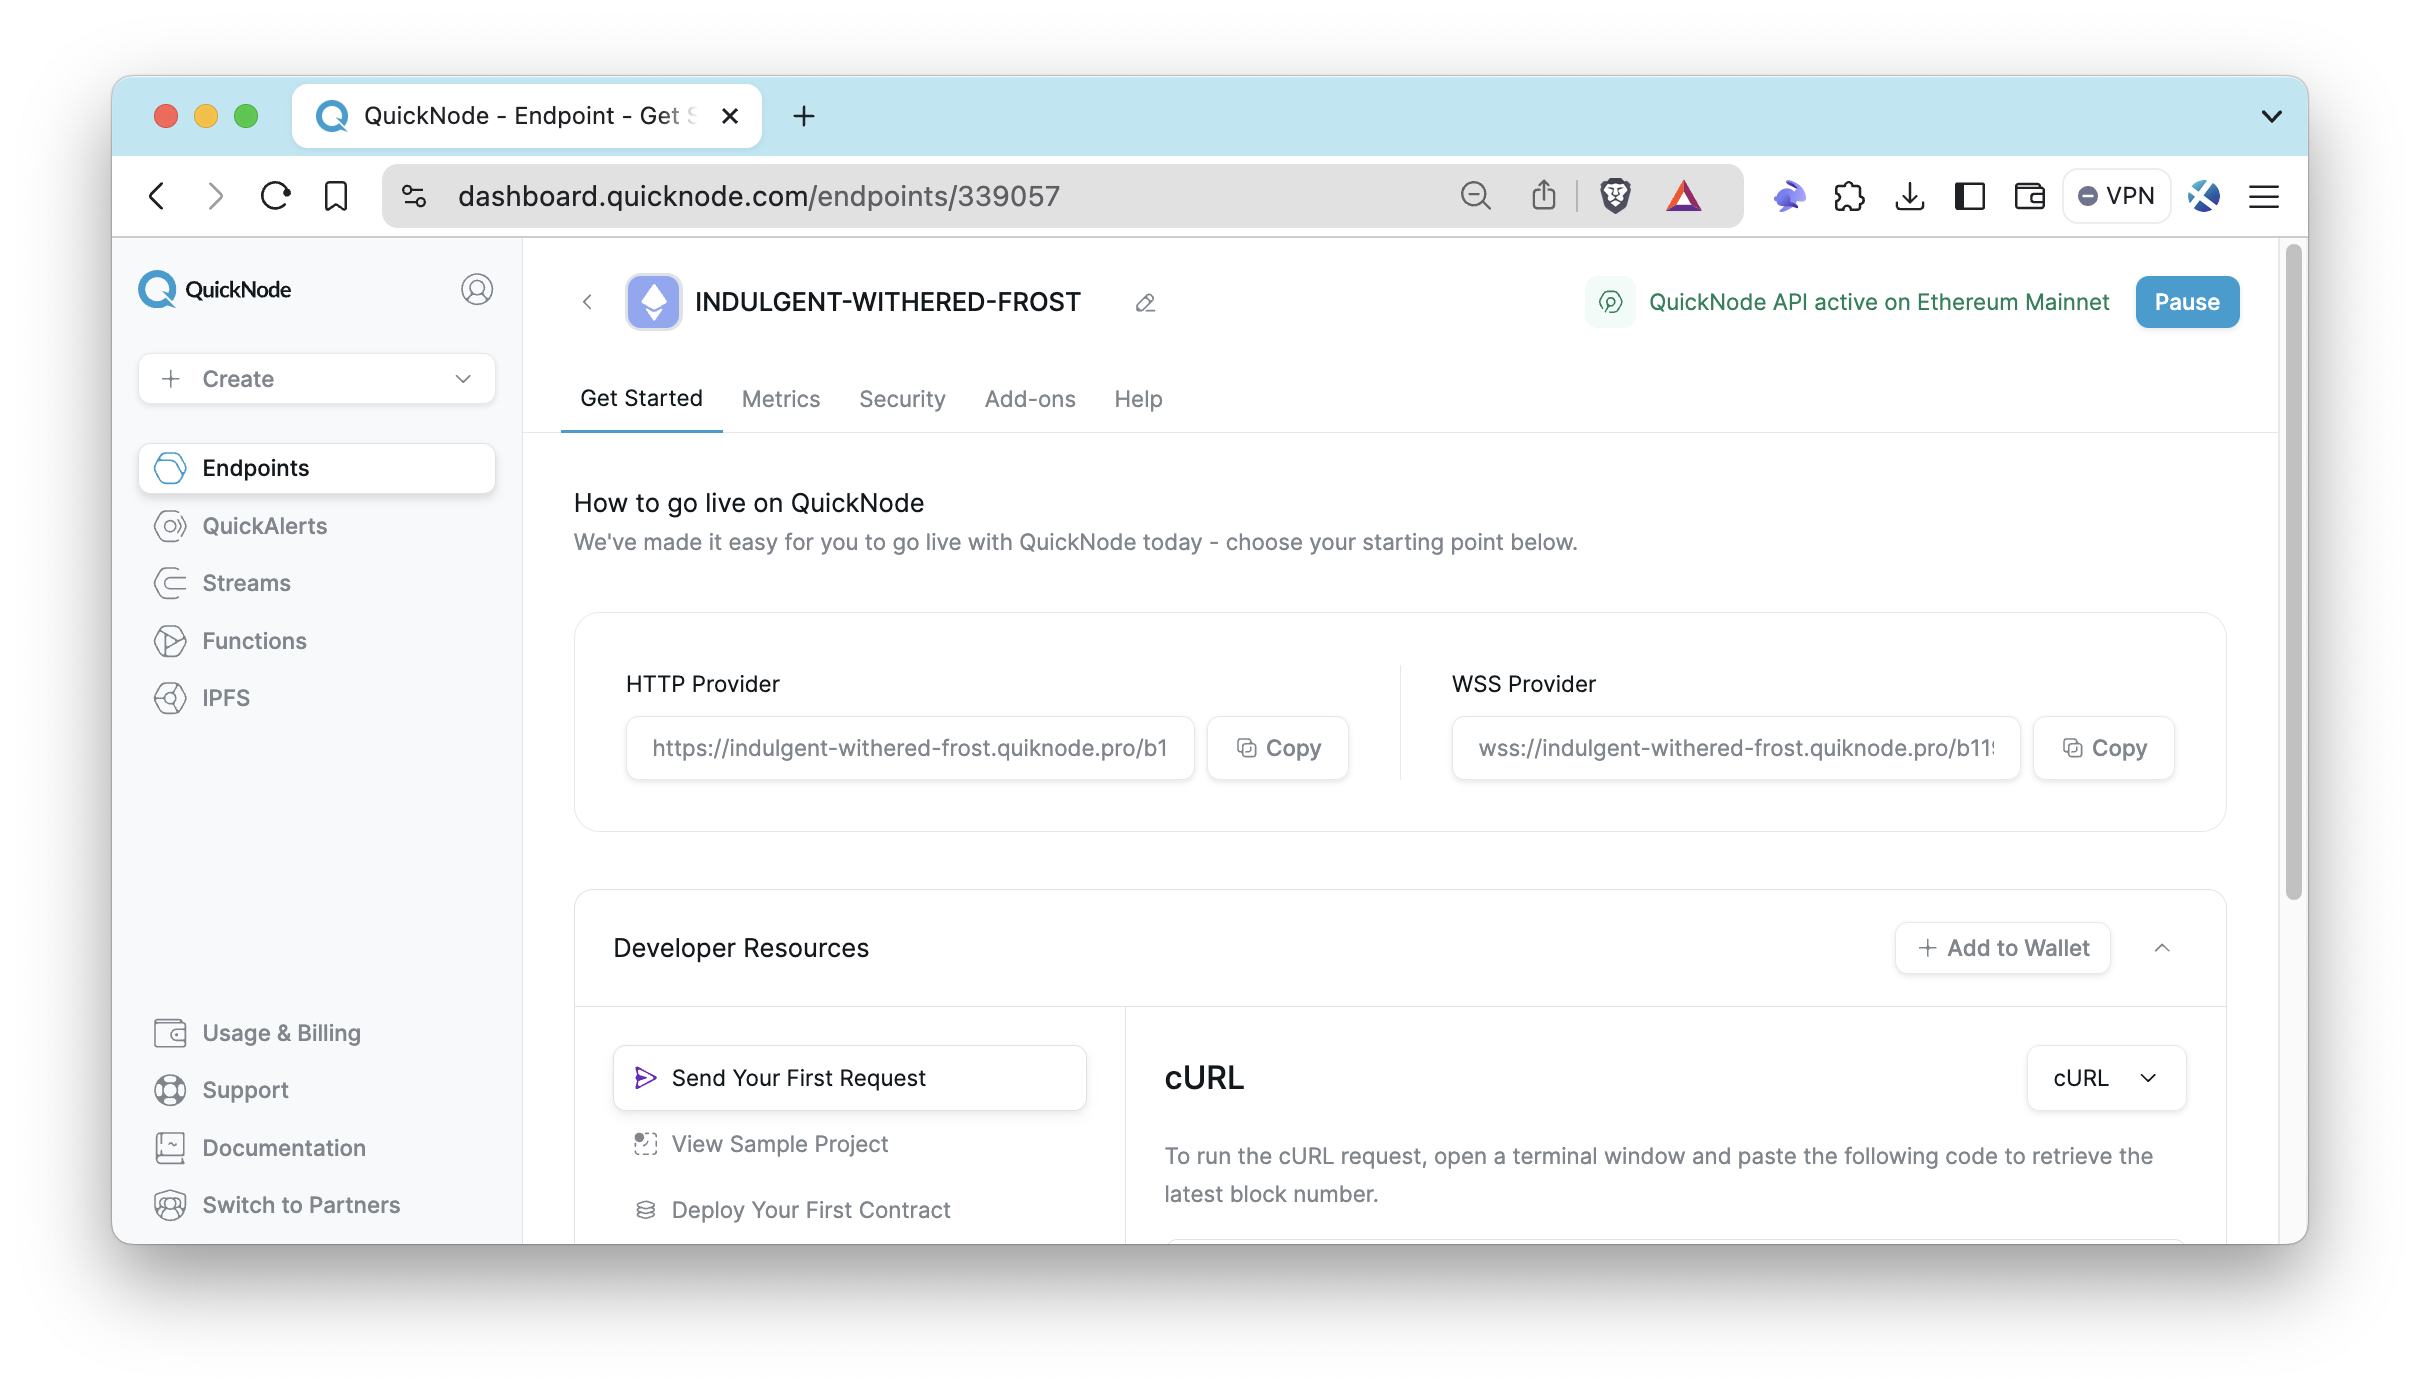
Quicknode Ethereum Endpoint
To interact with Ethereum, you'll need an API endpoint to connect with the network. You're welcome to use public nodes or deploy and manage your own infrastructure; however, if you'd like faster response times and secure RPC communication, you can leave the heavy lifting to us. Sign up for an account here.
After creating your account, click the Create an Endpoint button. Then, select the chain of your choice. We use Ethereum Mainnet in this guide.
Then, copy your HTTP Provider URL; you'll use it in the following sections to access the Ethereum blockchain.
Development Set Up
If you don't installed TypeScript yet, you can run the commands below to install TypeScript and ts-node globally to have TypeScript available across all projects.
npm install -g typescript ts-node
Step 1: Create a Project Directory
mkdir viem-multicall
cd viem-multicall
Step 2: Initialize Your Project
npm init -y
tsc -init --resolveJsonModule true
Step 3: Install Dependencies
To ensure your project has everything it needs, run the following commands. This will add viem for interacting with Ethereum and dotenv for managing environment variables. Additionally, we include @types/node to support TypeScript typings in your Node.js project, enhancing development experience and type checking.
npm install viem
npm install --save-dev dotenv @types/node
Step 4: Environment Setup
Create a .env file to store sensitive information like your wallet's private key and the Quicknode endpoint.
echo > .env
Then, modify it as below with your code editor. Replace YOUR_QUICKNODE_ENDPOINT_URL placeholder with your Quicknode endpoint URL.
QUICKNODE_ENDPOINT = "YOUR_QUICKNODE_ENDPOINT_URL"
Step 5: Create Necessary Files
Create the index.ts and contract.ts files, which will hold your main code and contract related data like ABI and contract address, respectively.
echo > index.ts
echo > contract.ts
Implementing Multicall
Now, we'll retrieve multiple pieces of information from the USDT smart contract in a single request. This includes fetching the token's name, symbol, total supply, decimals, and Vitalik Buterin's USDT balance, demonstrating efficient batch reading from a smart contract.
We'll call the functions below:
- name: Retrieves the name of the token.
- symbol: Retrieves the symbol of the token.
- totalSupply: Retrieves the total supply of the token.
- decimals: Retrieves the number of decimal places the token uses.
- balanceOf(address owner): Retrieves the USDT balance of a specific address, in this case, Vitalik Buterin's address.
Step 1: Creating the Contract Configuration
In your contract.ts file, include the address and ABI for the USDT contract. Only the related functions are included in the ABI of the USDT contract in the following code in order to keep the file concise.
Open the contract.ts file and add this code:
export const usdtContract = {
  address: "0xdAC17F958D2ee523a2206206994597C13D831ec7",
  abi: [
    {
      constant: true,
      inputs: [],
      name: "name",
      outputs: [{ name: "", type: "string" }],
      payable: false,
      stateMutability: "view",
      type: "function",
    },
    {
      constant: true,
      inputs: [],
      name: "totalSupply",
      outputs: [{ name: "", type: "uint256" }],
      payable: false,
      stateMutability: "view",
      type: "function",
    },
    {
      constant: true,
      inputs: [],
      name: "decimals",
      outputs: [{ name: "", type: "uint256" }],
      payable: false,
      stateMutability: "view",
      type: "function",
    },
    {
      constant: true,
      inputs: [{ name: "who", type: "address" }],
      name: "balanceOf",
      outputs: [{ name: "", type: "uint256" }],
      payable: false,
      stateMutability: "view",
      type: "function",
    },
    {
      constant: true,
      inputs: [],
      name: "symbol",
      outputs: [{ name: "", type: "string" }],
      payable: false,
      stateMutability: "view",
      type: "function",
    },
  ],
} as const;
Step 2: Setting Up the Client
In your index.ts file, start by importing the necessary modules and setting up the client to interact with the Ethereum mainnet.
Open the index.ts file and add this code:
// Import necessary functions and types
import { http, createPublicClient } from "viem";
// Import the mainnet configuration from viem chains
import { mainnet } from "viem/chains";
// Import the USDT contract configuration
import { usdtContract } from "./contract";

// Retrieve the Quicknode endpoint from environment variables
const QUICKNODE_ENDPOINT = process.env.QUICKNODE_ENDPOINT as string;

// Create a public client for interacting with the Ethereum mainnet
const client = createPublicClient({
  chain: mainnet,
  transport: http(QUICKNODE_ENDPOINT),
});

// Vitalik Buterin's Ethereum address
const vitalikAddress = "0xd8dA6BF26964aF9D7eEd9e03E53415D37aA96045";
Step 3: Defining Multicall Parameters
Define the parameters for the Multicall, specifying the functions you want to call on the USDT contract.
Add the following code after the previous code in the index.ts.
async function main() {
  // Perform multiple read-only calls to the USDT contract in a single request
  const results = await client.multicall({
    contracts: [
      { ...usdtContract, functionName: "name" },
      { ...usdtContract, functionName: "symbol" },
      { ...usdtContract, functionName: "totalSupply" },
      { ...usdtContract, functionName: "decimals" },
      { ...usdtContract, functionName: "balanceOf", args: [vitalikAddress] },
    ],
  });

  console.log(results);
}

// Execute the main function and log any errors
main().catch(console.error);
Step 4: Running the File
Run the index.ts file with the command below:
ts-node index.ts
This setup will allow you to perform multiple read-only contract calls in a single request using Viem and Multicall, optimizing your Ethereum RPC usage efficiently.
Checking Results
After running the code, the output should be similar to the one below. As seen, each contract call's result is returned along with a status indicating success or failure.
[
  { result: 'Tether USD', status: 'success' },
  { result: 'USDT', status: 'success' },
  { result: 51991636685165571n, status: 'success' },
  { result: 6n, status: 'success' },
  { result: 914883658n, status: 'success' }
]
Verifying a Single eth_call Request
To verify that only one eth_call request is made, you can modify the transport configuration to log the request. Update the existing code snippet below with the code snippet below it.
// Retrieve the Quicknode endpoint from environment variables
const QUICKNODE_ENDPOINT = process.env.QUICKNODE_ENDPOINT as string;

// Create a public client for interacting with the Ethereum mainnet
const client = createPublicClient({
  chain: mainnet,
  transport: http(QUICKNODE_ENDPOINT),
});
// Retrieve the Quicknode endpoint from environment variables
const QUICKNODE_ENDPOINT = process.env.QUICKNODE_ENDPOINT as string;

const transport = http(QUICKNODE_ENDPOINT, {
  onFetchRequest(request) {
    console.log(request);
  },
});

// Create a public client for interacting with the Ethereum mainnet
const client = createPublicClient({
  chain: mainnet,
  transport: transport,
});
By adding this logging, you will see the details of the eth_call request, confirming that a single request is made for the multicall operation.
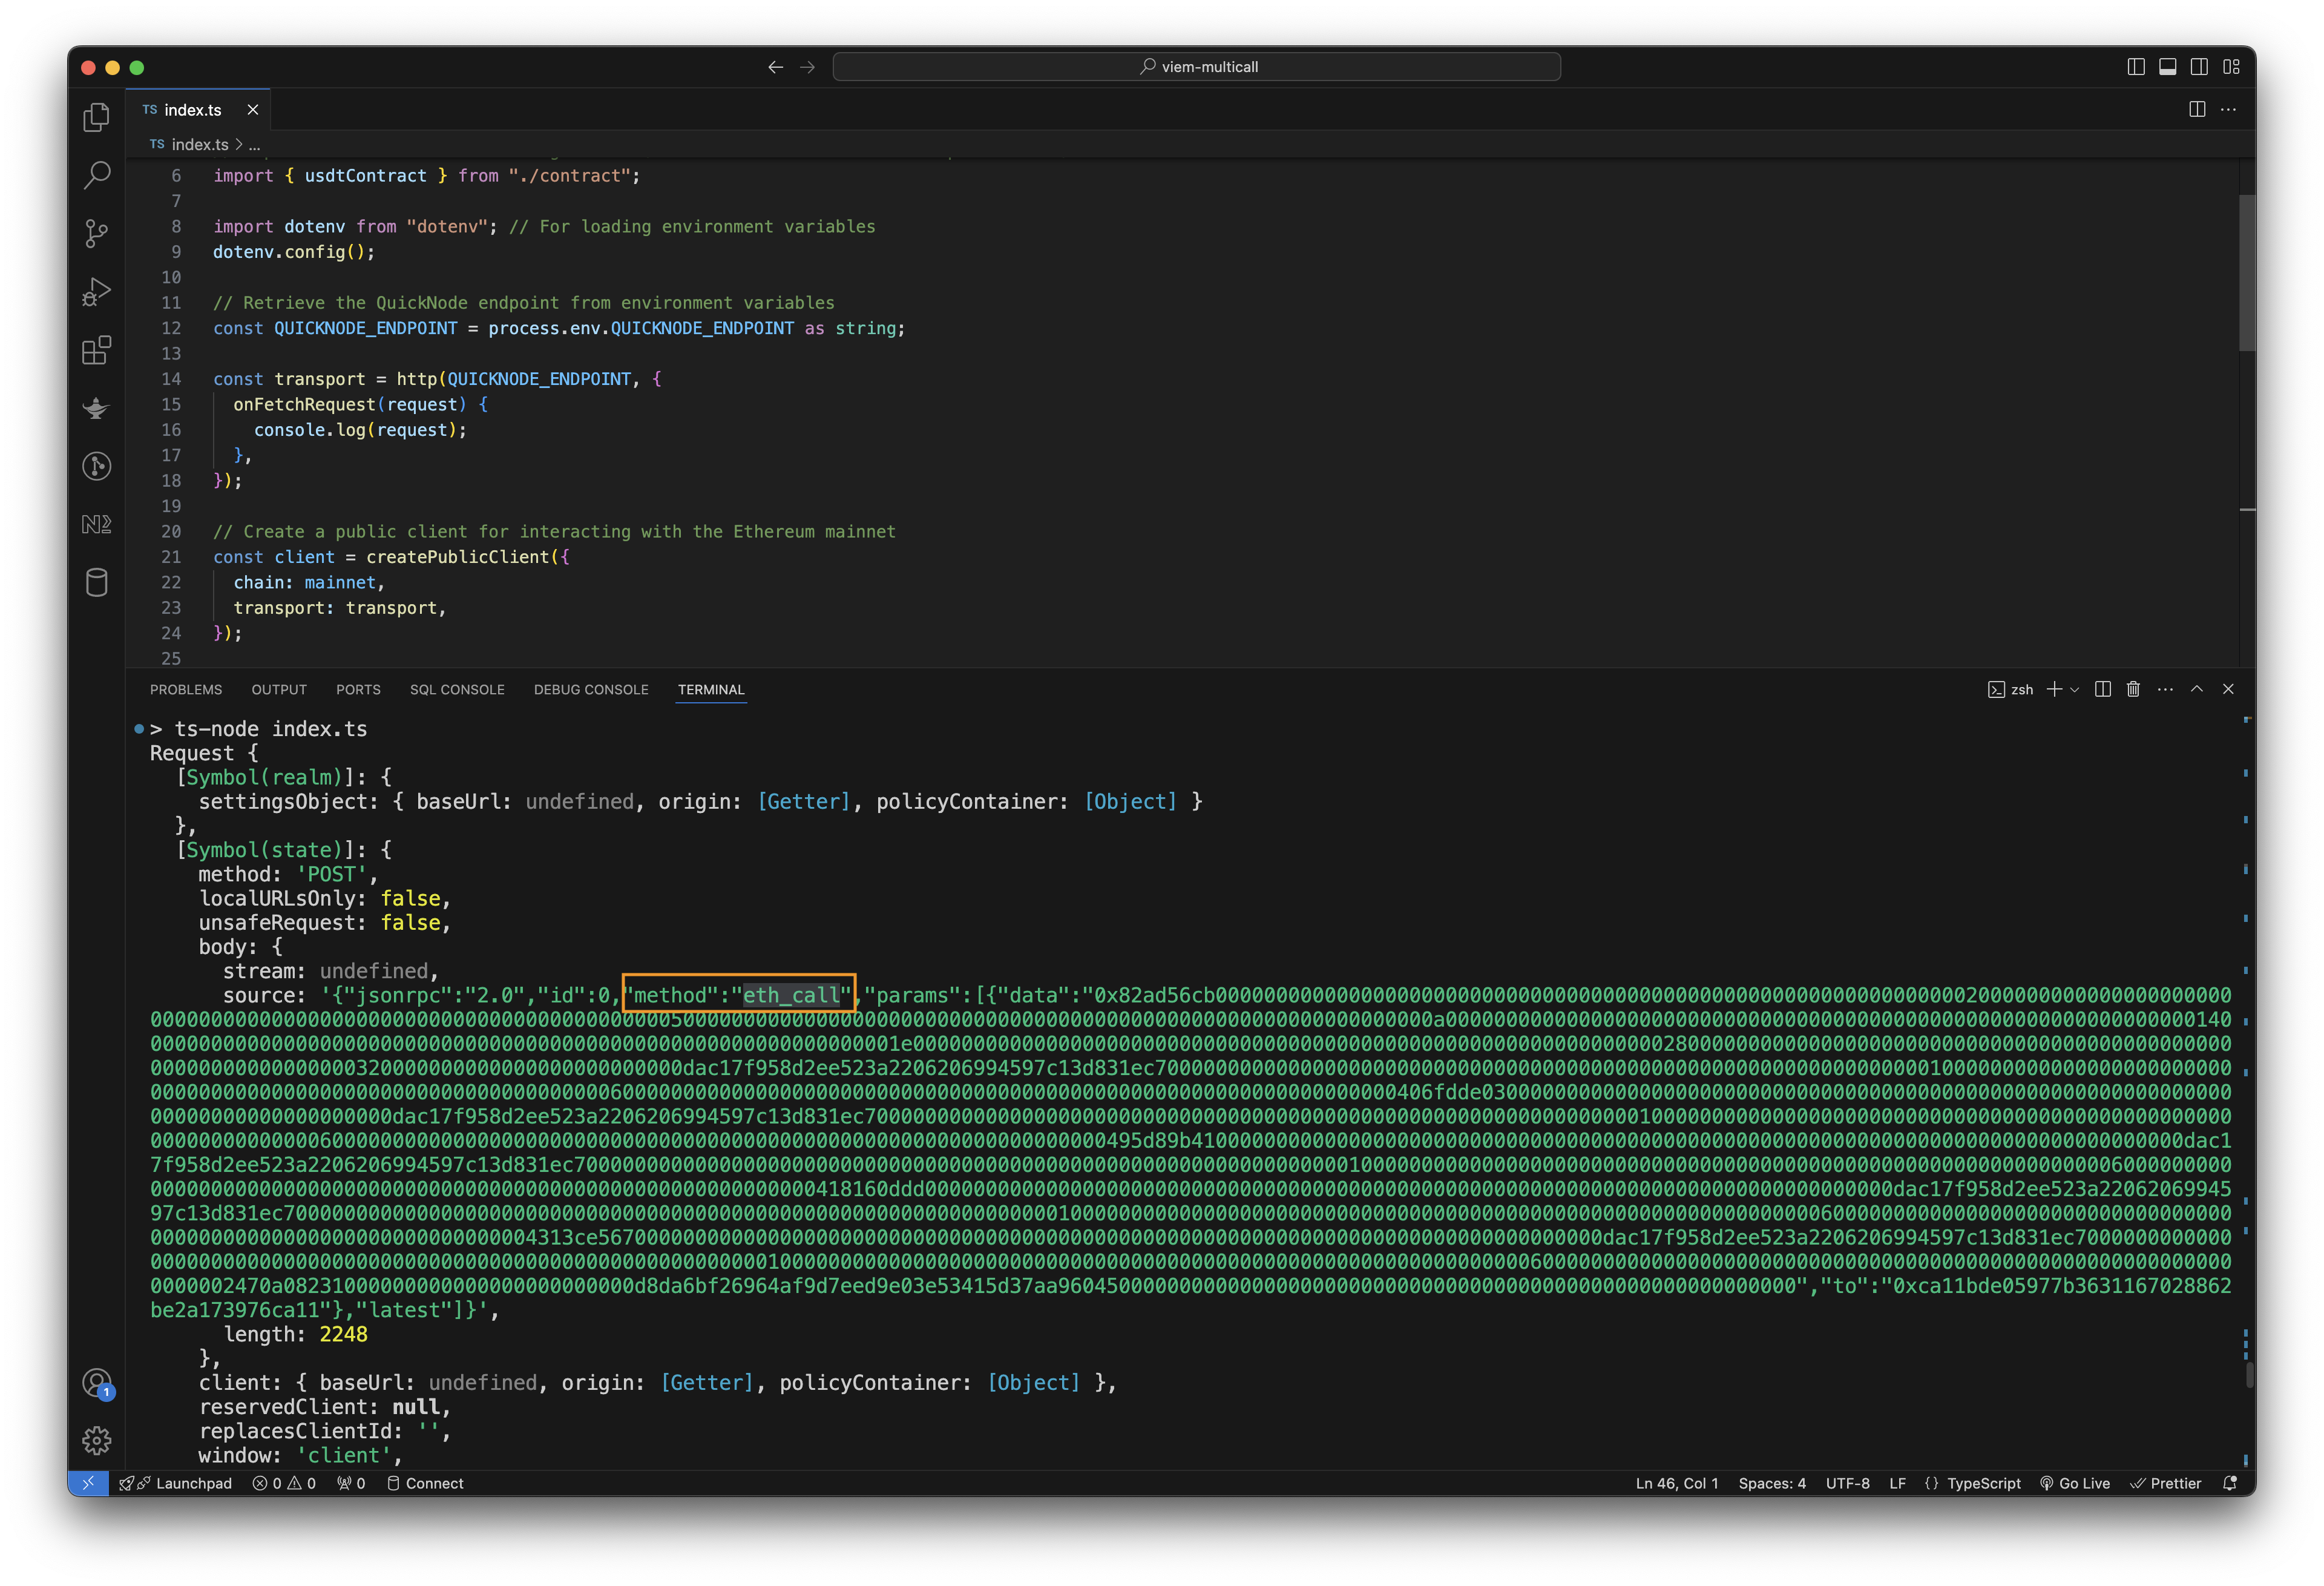
{
  "method": "eth_call",
  "params": [
    {
      "data": "0x82ad56cb0000000000000000000000000000000000000000000000000000000000000020000000000000000000000000000000000000000000000000000000000000000500000000000000000000000000000000000000000000000000000000000000a0000000000000000000000000000000000000000000000000000000000000014000000000000000000000000000000000000000000000000000000000000001e000000000000000000000000000000000000000000000000000000000000002800000000000000000000000000000000000000000000000000000000000000320000000000000000000000000dac17f958d2ee523a2206206994597c13d831ec700000000000000000000000000000000000000000000000000000000000000010000000000000000000000000000000000000000000000000000000000000060000000000000000000000000000000000000000000000000000000000000000406fdde0300000000000000000000000000000000000000000000000000000000000000000000000000000000dac17f958d2ee523a2206206994597c13d831ec700000000000000000000000000000000000000000000000000000000000000010000000000000000000000000000000000000000000000000000000000000060000000000000000000000000000000000000000000000000000000000000000495d89b4100000000000000000000000000000000000000000000000000000000000000000000000000000000dac17f958d2ee523a2206206994597c13d831ec700000000000000000000000000000000000000000000000000000000000000010000000000000000000000000000000000000000000000000000000000000060000000000000000000000000000000000000000000000000000000000000000418160ddd00000000000000000000000000000000000000000000000000000000000000000000000000000000dac17f958d2ee523a2206206994597c13d831ec7000000000000000000000000000000000000000000000000000000000000000100000000000000000000000000000000000000000000000000000000000000600000000000000000000000000000000000000000000000000000000000000004313ce56700000000000000000000000000000000000000000000000000000000000000000000000000000000dac17f958d2ee523a2206206994597c13d831ec700000000000000000000000000000000000000000000000000000000000000010000000000000000000000000000000000000000000000000000000000000060000000000000000000000000000000000000000000000000000000000000002470a08231000000000000000000000000d8da6bf26964af9d7eed9e03e53415d37aa9604500000000000000000000000000000000000000000000000000000000",
      "to": "0xca11bde05977b3631167028862be2a173976ca11"
    },
    "latest"
  ]
}
In the logged request data, the following details are important:
- Method:
eth_callindicates that this is an Ethereum call request. - To Address:
0xca11bde05977b3631167028862be2a173976ca11is the address of the Multicall3 contract. - Data: The data field contains the encoded function call. The function signature "82ad56cb" indicates that the
aggregate3function is being called.
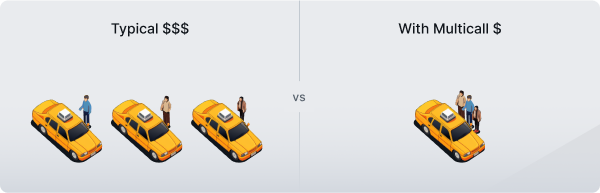
Comparing Costs: Multiple eth_call vs. Multicall
Using Multicall to aggregate multiple contract calls into a single request can significantly reduce the number of requests made to the blockchain, which in turn reduces the computational resources required and lowers costs.
Consider the cost of making five separate eth_call requests compared to a single Multicall request using Quicknode's pricing of 20 credits per call:
| Method | Number of Calls | Total Credits Used |
|---|---|---|
Separate eth_call requests | 5 | 100 |
| Multicall | 1 | 20 |
Conclusion
In this guide, we've explored how to optimize Ethereum RPC usage with Multicall and Viem. By aggregating multiple contract reads efficiently, you can reduce costs and improve the performance of your Ethereum-based applications. Explore the additional resources for more in-depth information and continue optimizing your blockchain interactions.
Subscribe to our newsletter for more articles and guides on Web3 and blockchain. If you have any questions, check out the Quicknode Forum for help. Stay up to date with the latest by following us on Twitter (@Quicknode) or Discord.
Additional Resources
- Viem Docs
- Multicall Docs
- How to Send a Transaction using Viem
- What are Ethereum Transactions?
- Quicknode SDK Docs
We ❤️ Feedback!
Let us know if you have any feedback or requests for new topics. We'd love to hear from you.