3 min read
You can now access Logs for your RPC endpoints, helping you troubleshoot issues more effectively. If you encounter an issue with your RPC calls, simply check the logs in your QuickNode dashboard to identify and resolve problems quickly. Learn more about log history limits on our pricing page.
Overview
In this guide, you'll learn how to connect QuickNode's powerful RPC endpoints with your Coinbase Wallet, enabling faster transactions and reliable network connectivity to Ethereum and many other blockchains.
What is Coinbase Wallet?
Coinbase Wallet is a non-custodial wallet app to store, manage, and trade your cryptocurrency. It offers full control over your assets, a user-friendly interface, and integration capabilities with decentralized apps.
Coinbase Wallet works with all EVM-compatible L1/L2 networks and supports these features:
- Unified asset balances across all networks
- The ability to connect your dApps to Coinbase Wallet on both mobile web (for iOS and Android) and desktop.
- Chrome Extension, iOS, Android + multiple ways to manage keys and sign transactions when interacting with applications
- Built-in faucets for funding your wallet with testnet assets
Coinbase allows providers a plethora of developer tools like the Coinbase Wallet SDK with mobile version.
Creating an HTTP/WSS RPC URL on QuickNode
You can create a free account on QuickNode.com within a few clicks to have a custom RPC endpoint. QuickNode supports over 25 chains and counting!
Once logged in, click the Create an endpoint button, then select chain and network based on your preference.
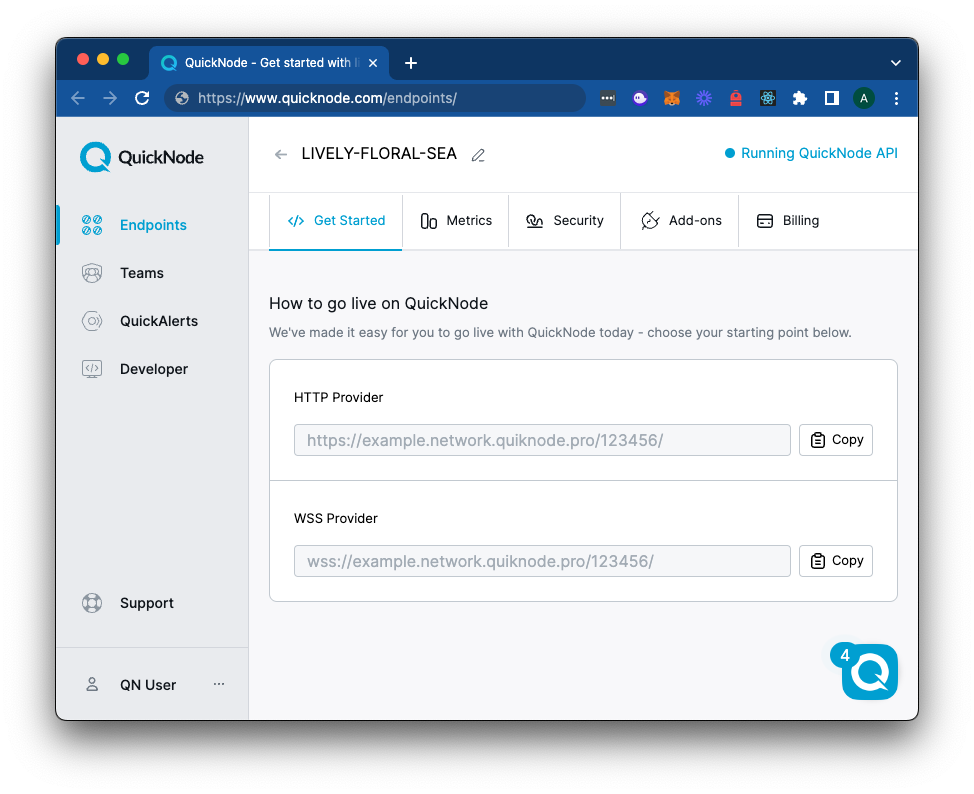
After creating your endpoint, copy the HTTP Provider link and keep it handy, as you'll need it next.

Setting Up Coinbase Wallet with QuickNode RPC URL
Download the Coinbase Wallet browser extension if you have not already. Create a new wallet or import your existing wallet if you have one. Make sure to keep your seed phrase safe.
Step 1: To add a network to your Coinbase Wallet that does not already exist, open the Coinbase Wallet extension and click the Settings tab in the bottom-right corner.

Step 2: Scroll down and click the Networks tab.

Step 4: Click the "+" sign in the top-right corner of the extension to add a custom network.

Step 5: Enter the custom network's relevant details in the fields by following the information below:
- Network Name:
{Chain Name}QuickNode - Chain ID: Ethereum Mainnet - 1; Sepolia - 11155111; Holesky - 17000; Polygon Mainnet - 137; Base - 8453; Arbitrum One - 42161
- Currency: ETH (for most Ethereum-based chains; tip to check the block explorer of whichever network you are on and see what the transaction gas is paid in to find the native currency).
- Explorer URL: https://etherscan.io/ (will change based on the chain your own)

If you receive an error related to the same network already being added to your Networks list upon saving, update the existing network with your QuickNode RPC URL.
If you want to add another network to your Networks list, you can follow the same process. Check chainlist for a list of currency and chain ID values.
Benefits of using QuickNode
QuickNode provides a suite of APIs, including a Core RPC API, Token, and NFT. QuickNode empowers developers with seamless access to blockchain data, simplifying complex tasks like managing blockchain nodes, tracking token metrics, aggregating DeFi & NFT data, and much more.
Additionally, with QuickAlerts and QuickStreams, QuickNode elevates real-time interaction with the blockchain, allowing for prompt notifications and streaming of on-chain events. These tools are crucial for developers building responsive, up-to-date applications with minimal latency.
Conclusion
That's it! You know now how to set a custom RPC provider in your Coinbase Wallet. If you'd like to check out other guides that utilize Coinbase Wallet, check out this list of guides.
If you have questions, check out our Discord server or provide feedback using the form below for help. Stay up to date with the latest by following us on Twitter (@QuickNode) and Telegram announcement channel.
We ❤️ Feedback!
Let us know if you have any feedback or requests for new topics. We'd love to hear from you.