6 min read
Overview
Mantle is a Layer 2 (L2) blockchain built on top of Ethereum, designed to offer significantly lower gas fees and faster transaction speeds compared to the Ethereum mainnet. It enables existing Ethereum contracts and tools to operate on Mantle with minimal adjustments.
In this guide, we'll teach you more about Mantle and then show you how to create and deploy your own memecoin (ERC-20 token) on the Mantle Sepolia testnet. Let's get started.
Prefer a video walkthrough? Follow along with Sahil and learn how to create a Memecoin on Mantle and add liquidity on FusionX in under 13 minutes.
What You Will Do
- Learn about Mantle
- Create a Mantle Sepolia node endpoint with QuickNode
- Add Mantle RPC URL to MetaMask
- Bridge testnet MNT from Sepolia to Mantle
- Create a memecoin (ERC-20 token) on Remix.IDE
- Add liquidity to memecoin on FusionX
What You Will Need
- Basic understanding of Ethereum and smart contracts
- A MetaMask wallet or WalletConnect compatible wallet
- An account on X (in order to use the Mantle faucet)
- A web browser (e.g., Chrome)
What is Mantle?
Mantle Network is built as a Rollup, utilizing Ethereum's validators and consensus protocols to significantly cut gas fees, reduce latency, and boost throughput. Unlike traditional monolithic chains (e.g., Ethereum L1) that handle transaction execution, consensus, settlement, and storage in one layer, Mantle adopts a modular architecture, separating these functions into individual components. This includes an EVM-compatible execution layer for transactions, with consensus and settlement processed on Ethereum, and an external data availability (DA) module.
Create a Mantle Node Endpoint with QuickNode
To deploy an ERC-20 token on the Mantle Sepolia testnet, we will need a node to communicate with. You're welcome to use public nodes or deploy and manage your own infrastructure; however, if you'd like 8x faster response times, you can leave the heavy lifting to us. Sign up for a free account here.
Once logged in, go to the Endpoints page and then click the Create Endpoint button. Then, select the Mantle chain and Sepolia network.
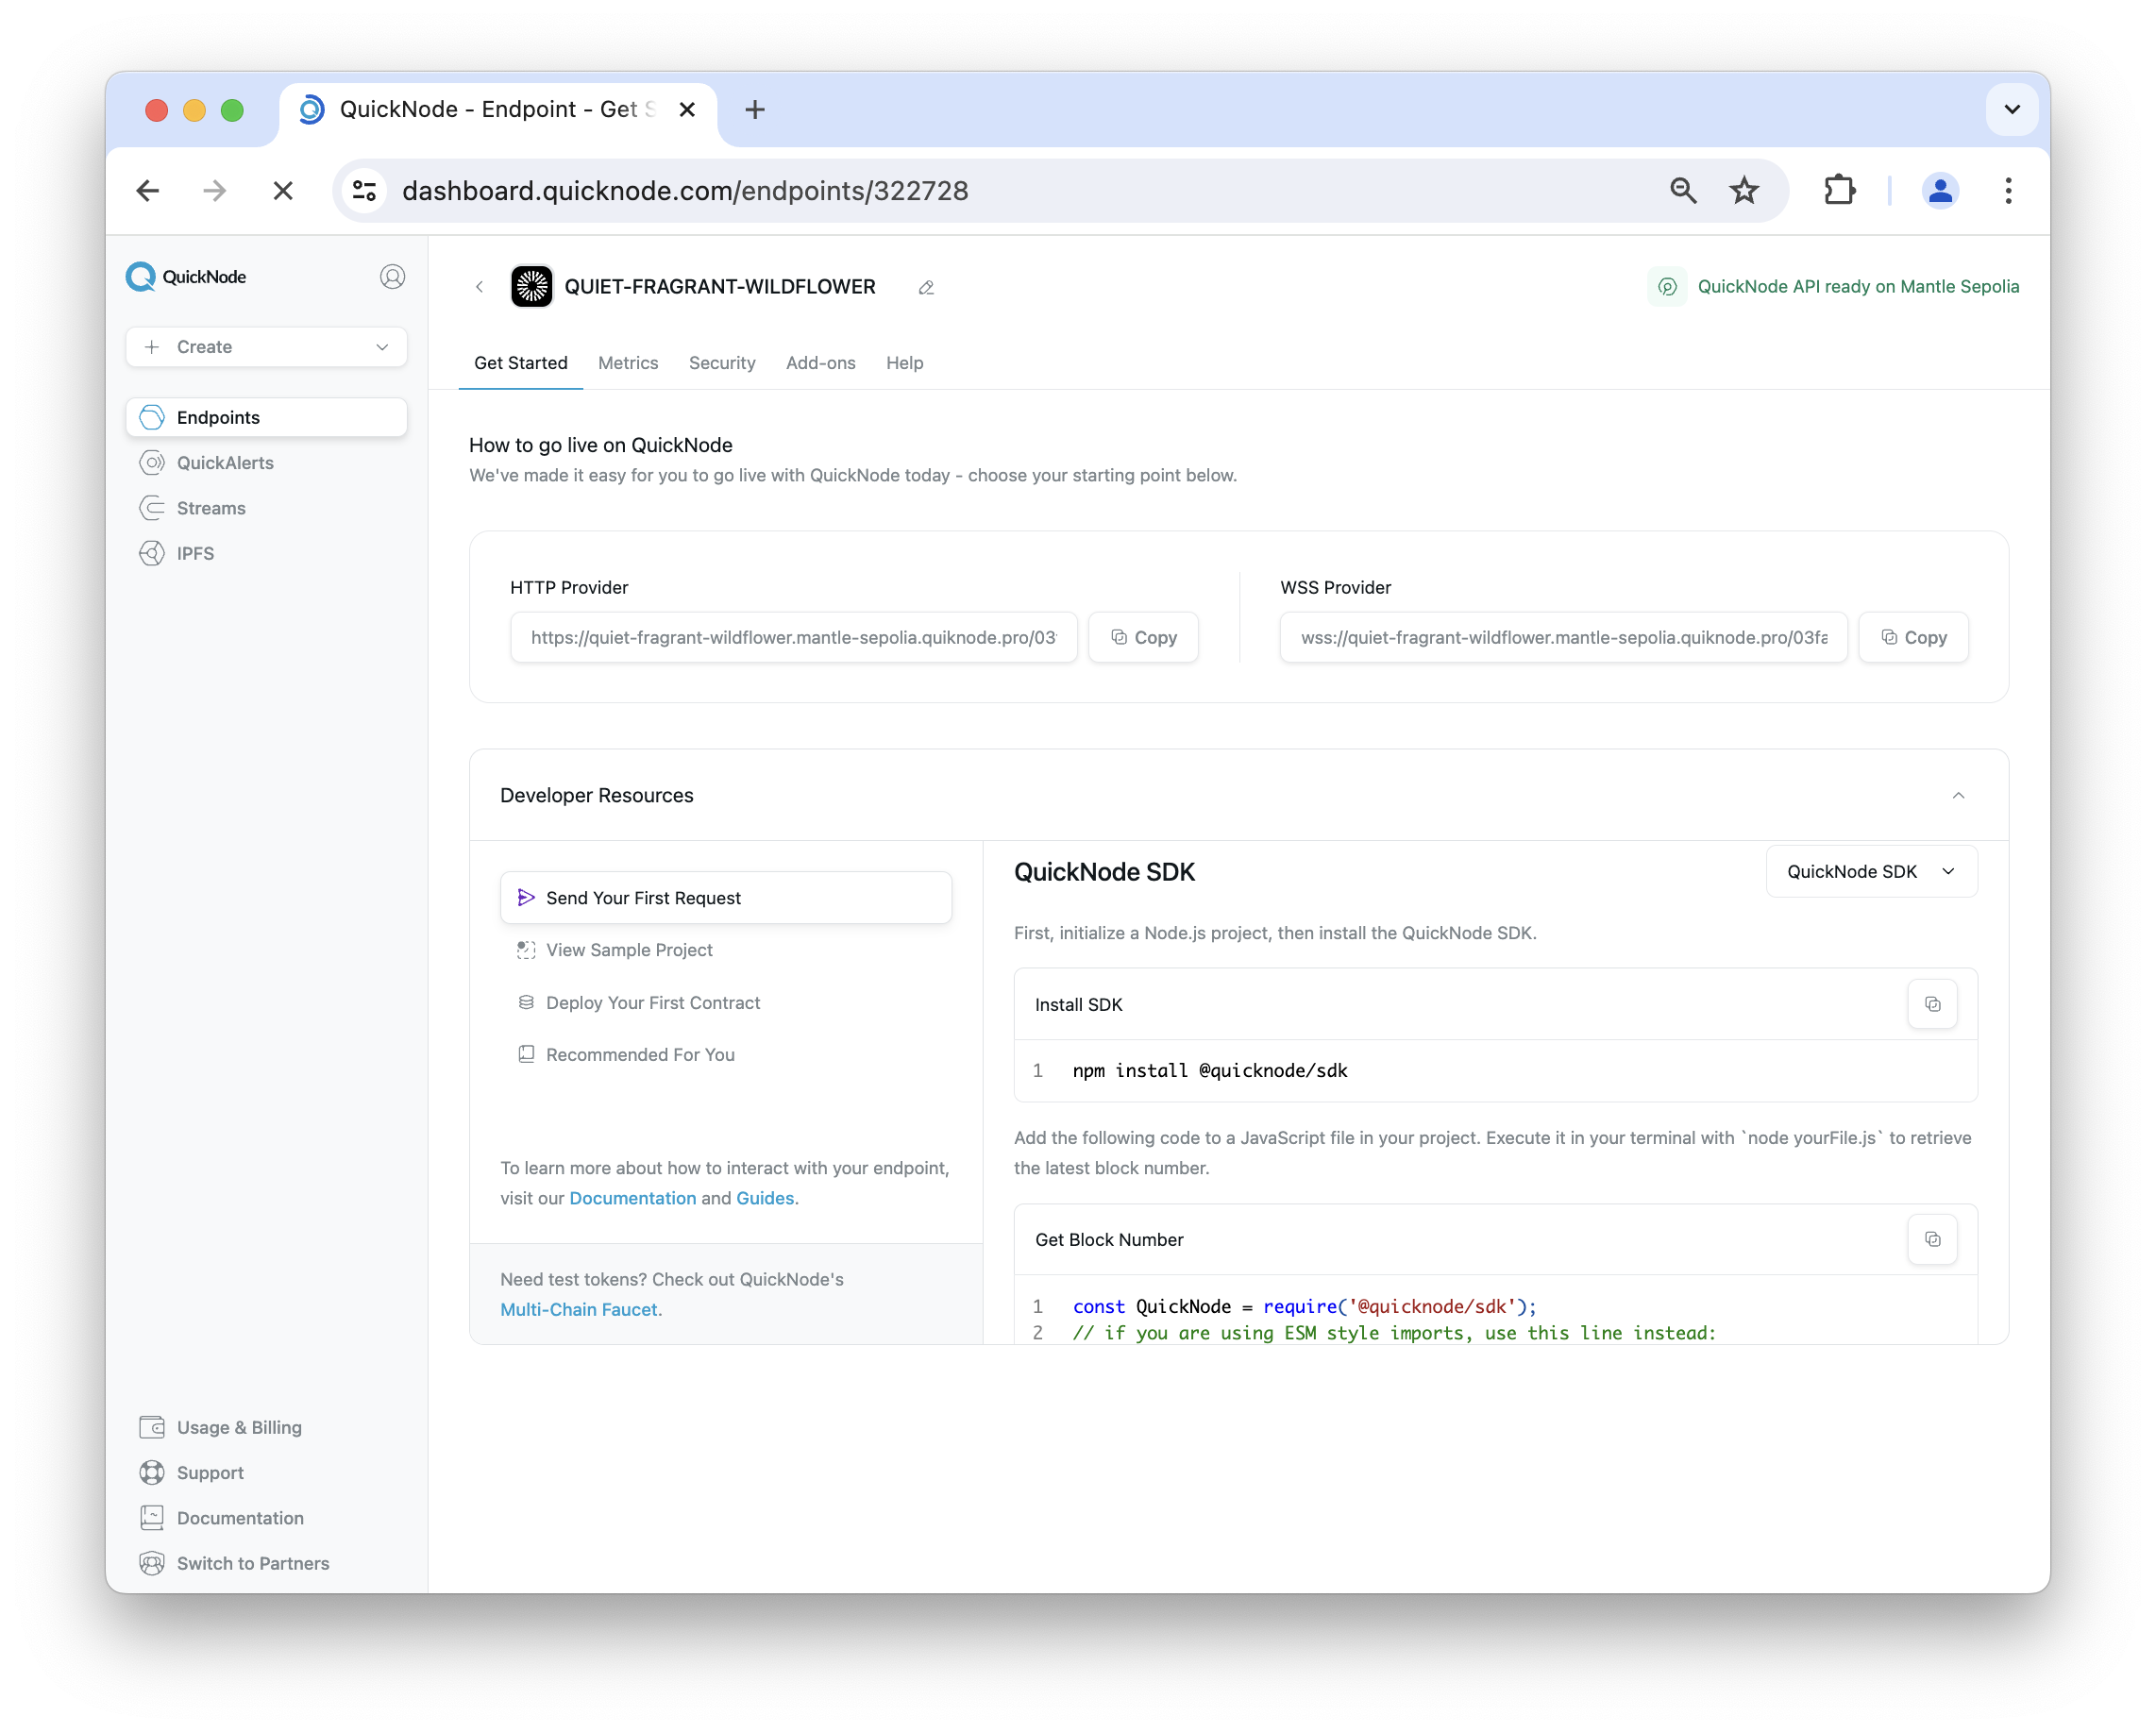
After creating your endpoint, copy the HTTP Provider URL and keep it handy, as you'll need it in the next section.
Add Mantle Node Endpoint to MetaMask
Next, let's add our previously created Mantle endpoint to MetaMask. Adding our private endpoint to MetaMask will enable more reliable and faster service when submitting transactions compared to using a public endpoint.
Open your MetaMask wallet, click the Network icon in the upper-left corner, and then click Add Network. Then, fill in the network details:
- Network name: Mantle Sepolia
- New RPC URL:
{QUICKNODE HTTP URL} - Chain ID: 5003
- Currency symbol: MNT
- Block explorer URL: https://sepolia.mantlescan.xyz/
In the next section, we'll get some testnet ETH on Sepolia then mint MNT tokens and bridge them to Mantle Sepolia testnet.
Fund Your Ethereum Sepolia Wallet
At the time of this writing, there isn't a native faucet on Mantle Sepolia to retrieve MNT (Mantle Token; the native token to pay for gas fees), therefore, we'll be minting MNT on Ethereum Sepolia, then bridging to Mantle Sepolia. In order to do this, we'll need to make sure we have enough ETH on Ethereum Sepolia to pay for gas fees.
Navigate to the QuickNode Multi-Chain Faucet and paste or connect your wallet address. Then, proceed with requesting testnet ETH.

Note: A wallet must hold at least 0.001 ETH on Ethereum Mainnet to use the EVM faucets.
Mint MNT on Ethereum Sepolia
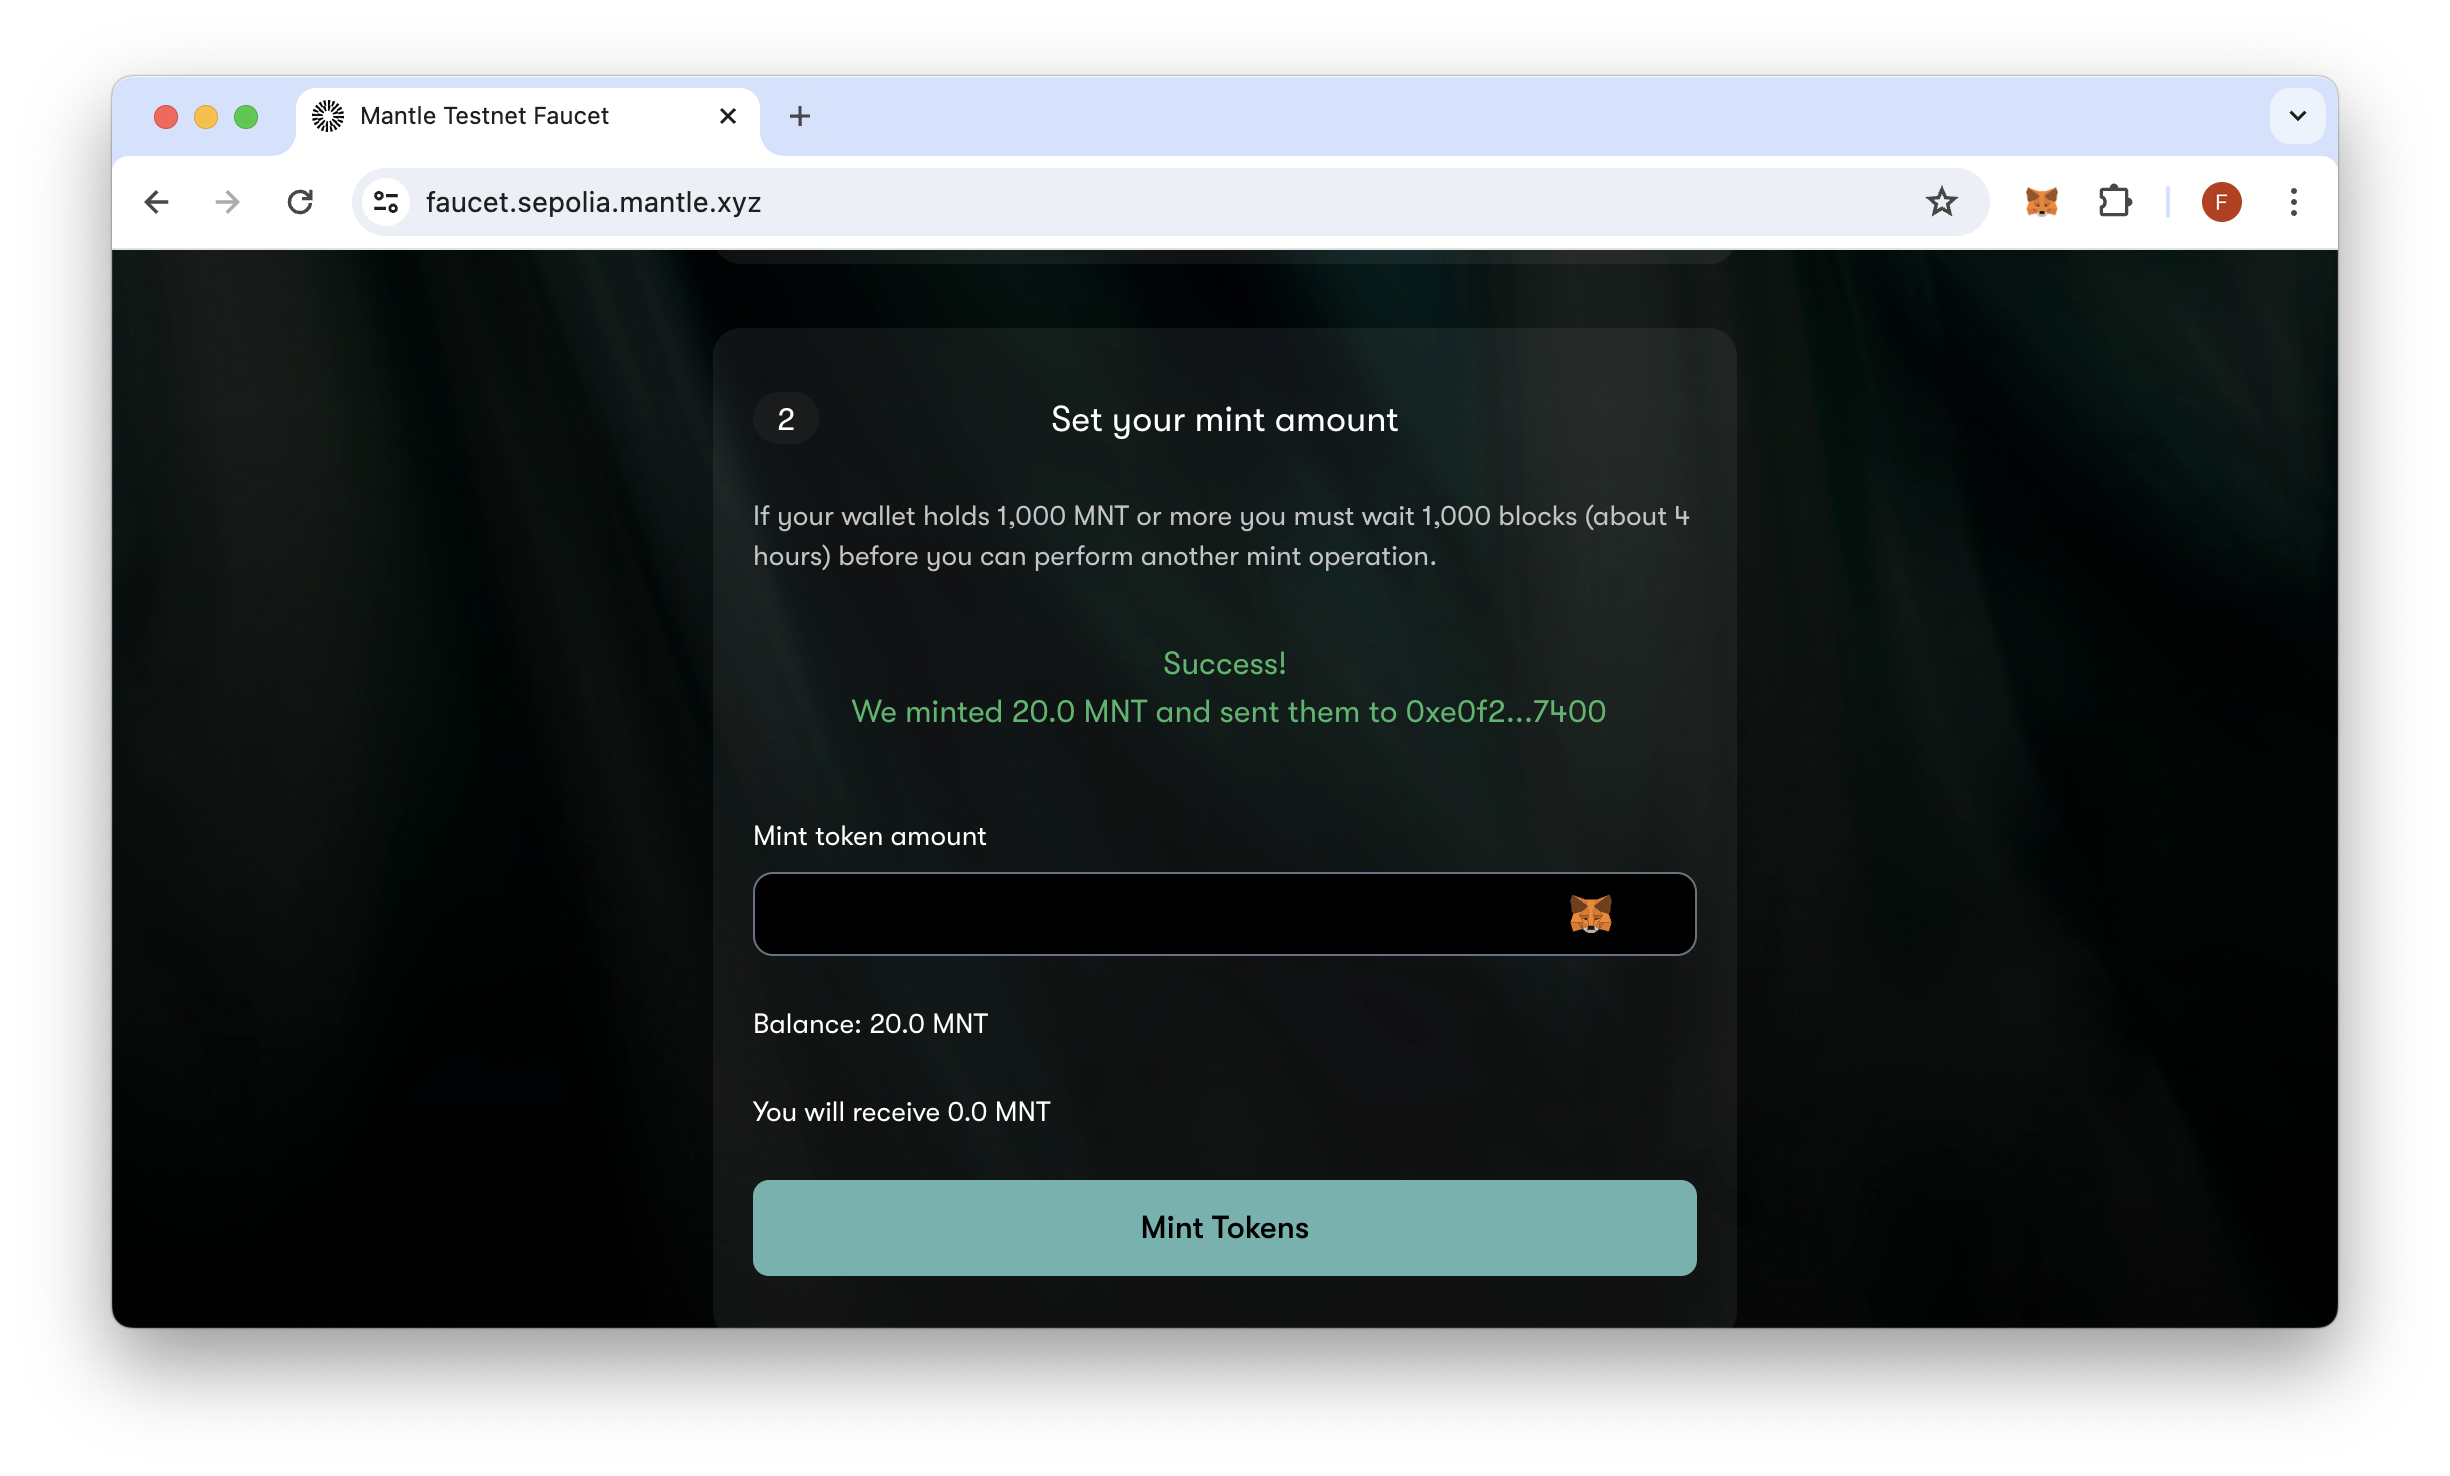
With our Ethereum Sepolia wallet funded, let's mint MNT tokens.
Navigate to the Mantle Faucet, connect your X account, and then request at least 20 MNT tokens.
Bridge to Mantle
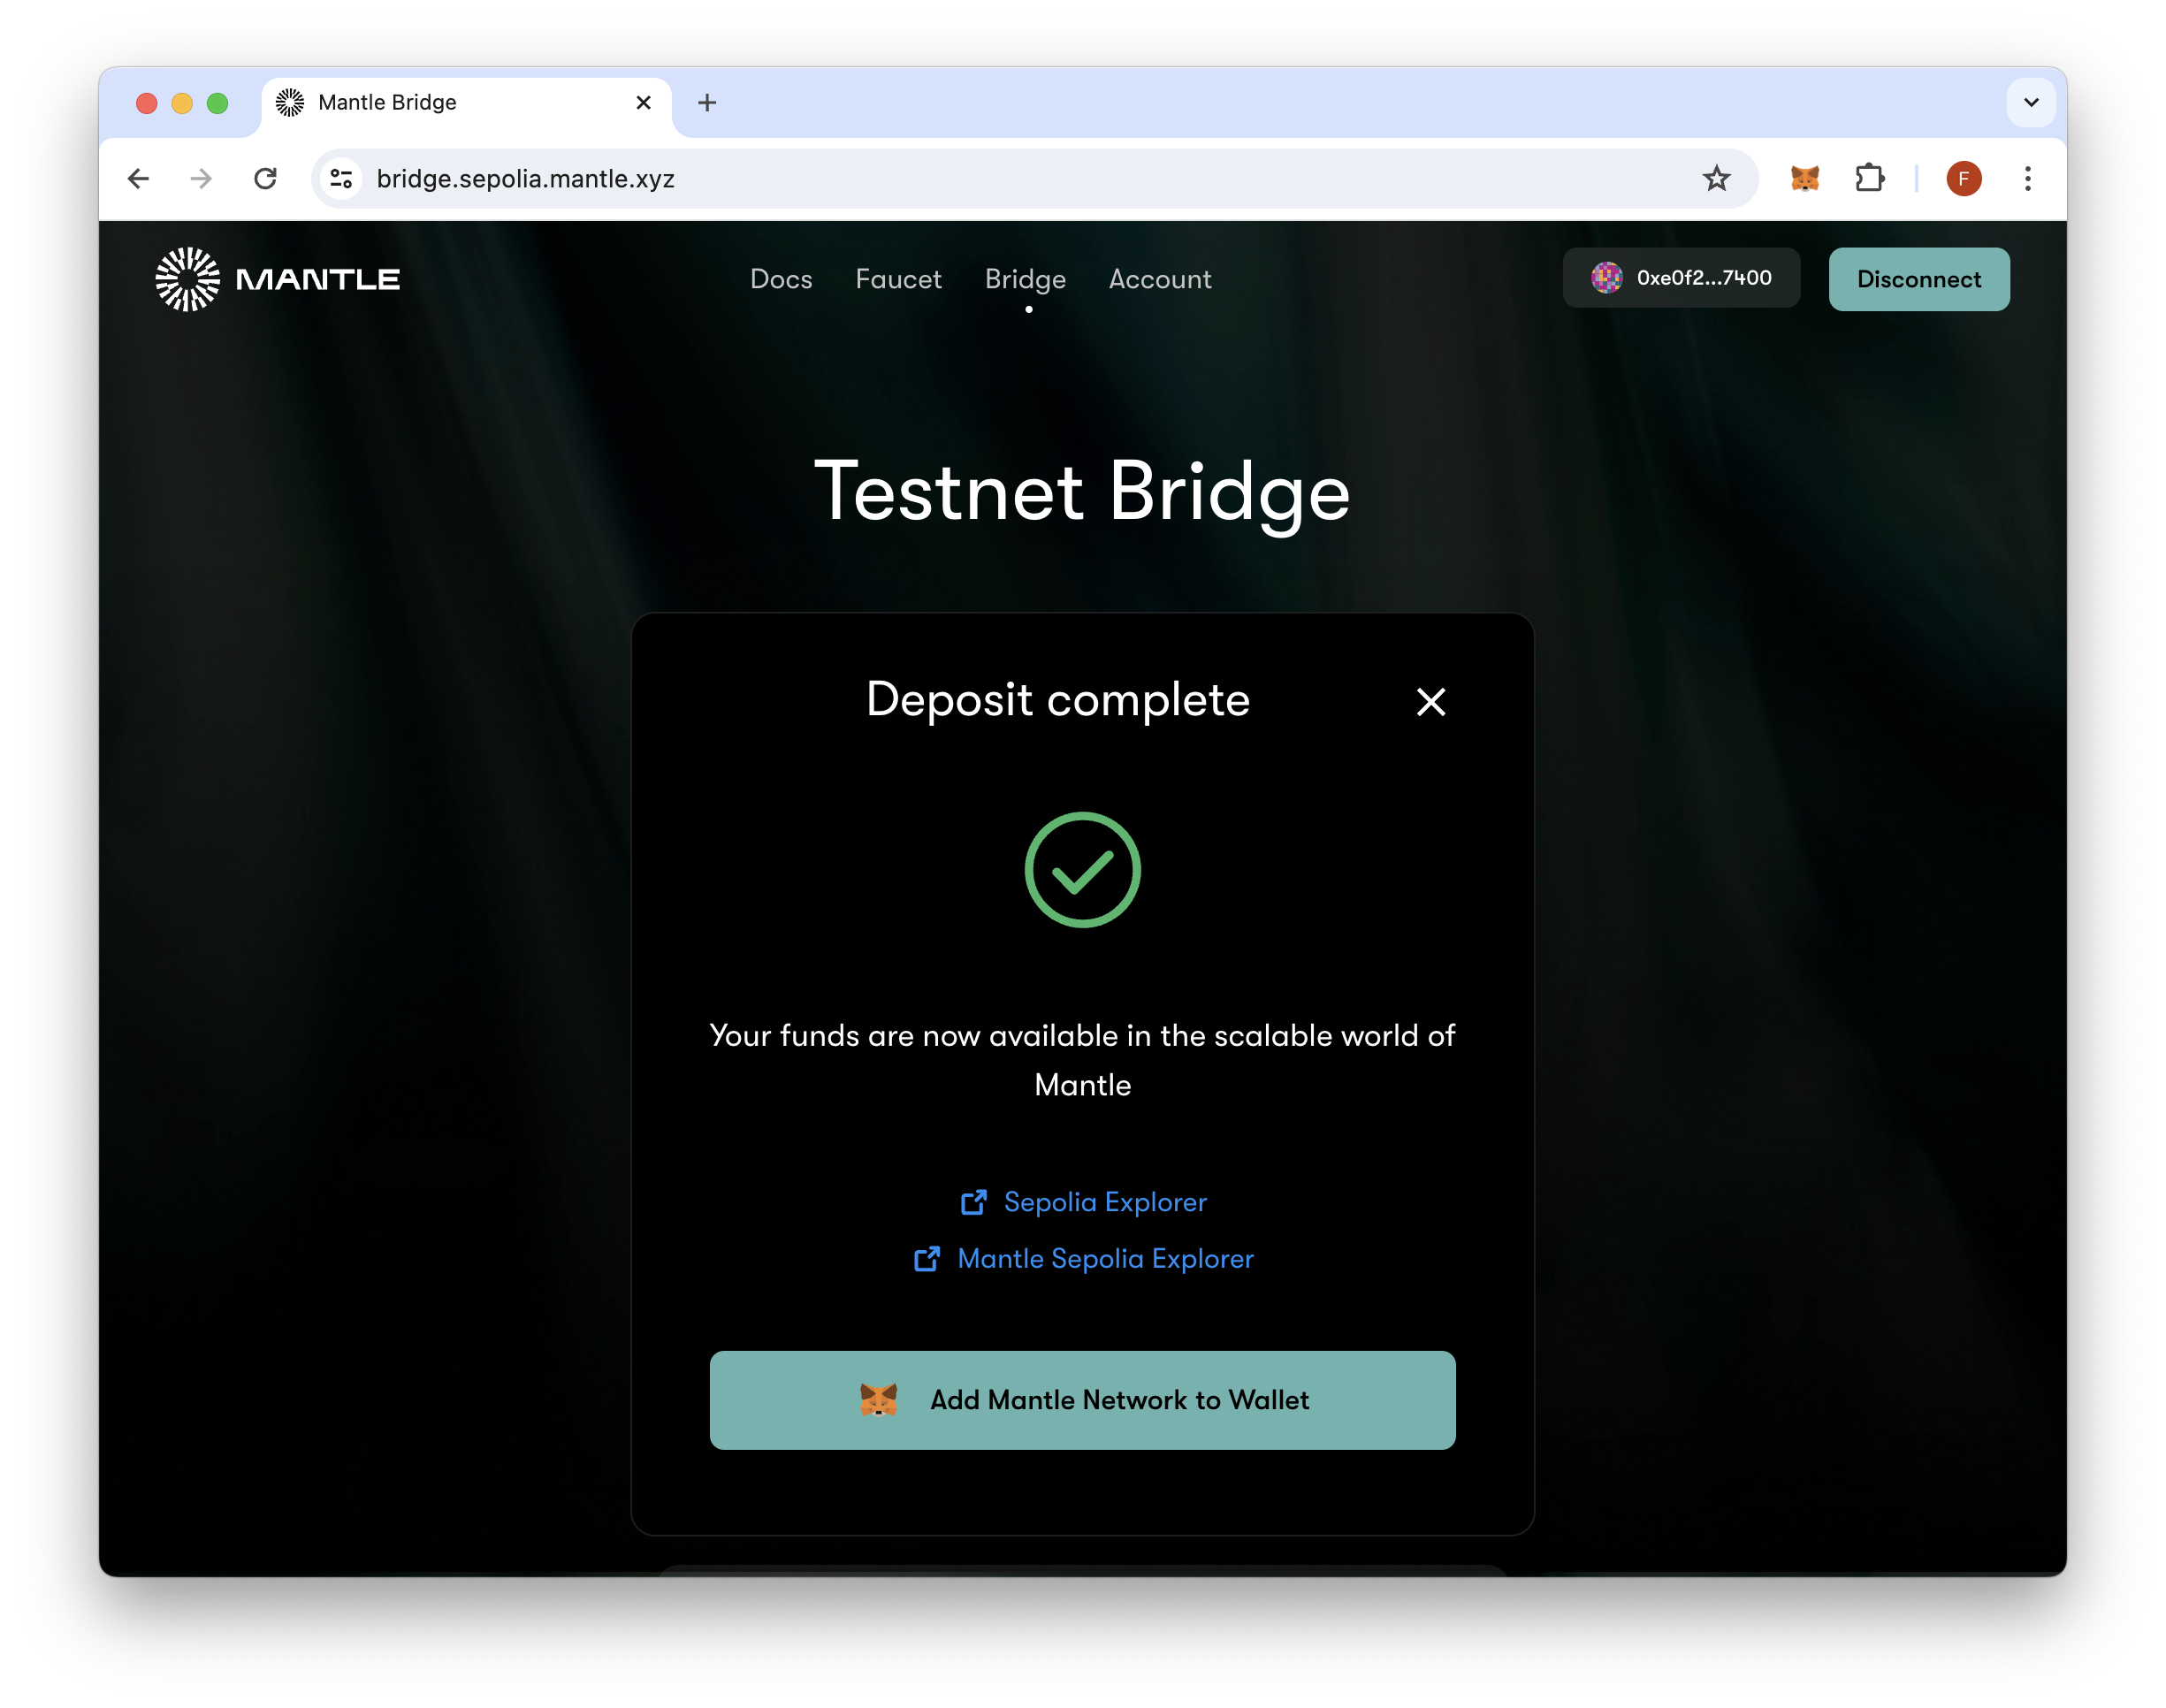
To bridge our MNT from Ethereum Sepolia to Mantle Sepolia, we'll use the Mantle Bridge.
We recommend bridging at least 20 MNT to ensure you have enough to pay for contract deployment and then adding liquidity on FusionX.
Create a Memecoin
Now that we have MNT on Mantle Sepolia, we can start creating the Memecoin. For this guide, we'll be using OpenZeppelin's ERC-20 smart contracts to create an ERC-20 token easily.
Navigate to Remix.IDE and ensure you are on the File Explorer tab 📑. Then, click the New File 📄 icon and name the file - ERC20.sol
Input the following code in the code editor:
// SPDX-License-Identifier: MIT
pragma solidity ^0.8.20;

import {ERC20} from "@openzeppelin/contracts/token/ERC20/ERC20.sol";

contract Token is ERC20 {
 constructor() ERC20("Mantle PEPE", "MPEPE") {
 _mint(msg.sender, 1000 * 10 ** decimals());
 }
}
You can now access Logs for your RPC endpoints, helping you troubleshoot issues more effectively. If you encounter an issue with your RPC calls, simply check the logs in your QuickNode dashboard to identify and resolve problems quickly. Learn more about log history limits on our pricing page.
Let's briefly cover the code.
The smart contract (Token) inherits the ERC-20 contract from OpenZeppelin and names the token Mantle PEPE with the symbol MPEPE. Then, in the constructor, the _mint function is called, minting 1000 tokens to the address deploying the ERC-20 token contract.
Compile
Next, we'll need to compile the smart contract in order to deploy it. Compiling turns the Solidity code into bytecode, which the EVM can interpret and execute (learn more here).
Navigate to the "Solidity Compiler" tab and click Compile ERC20.sol.

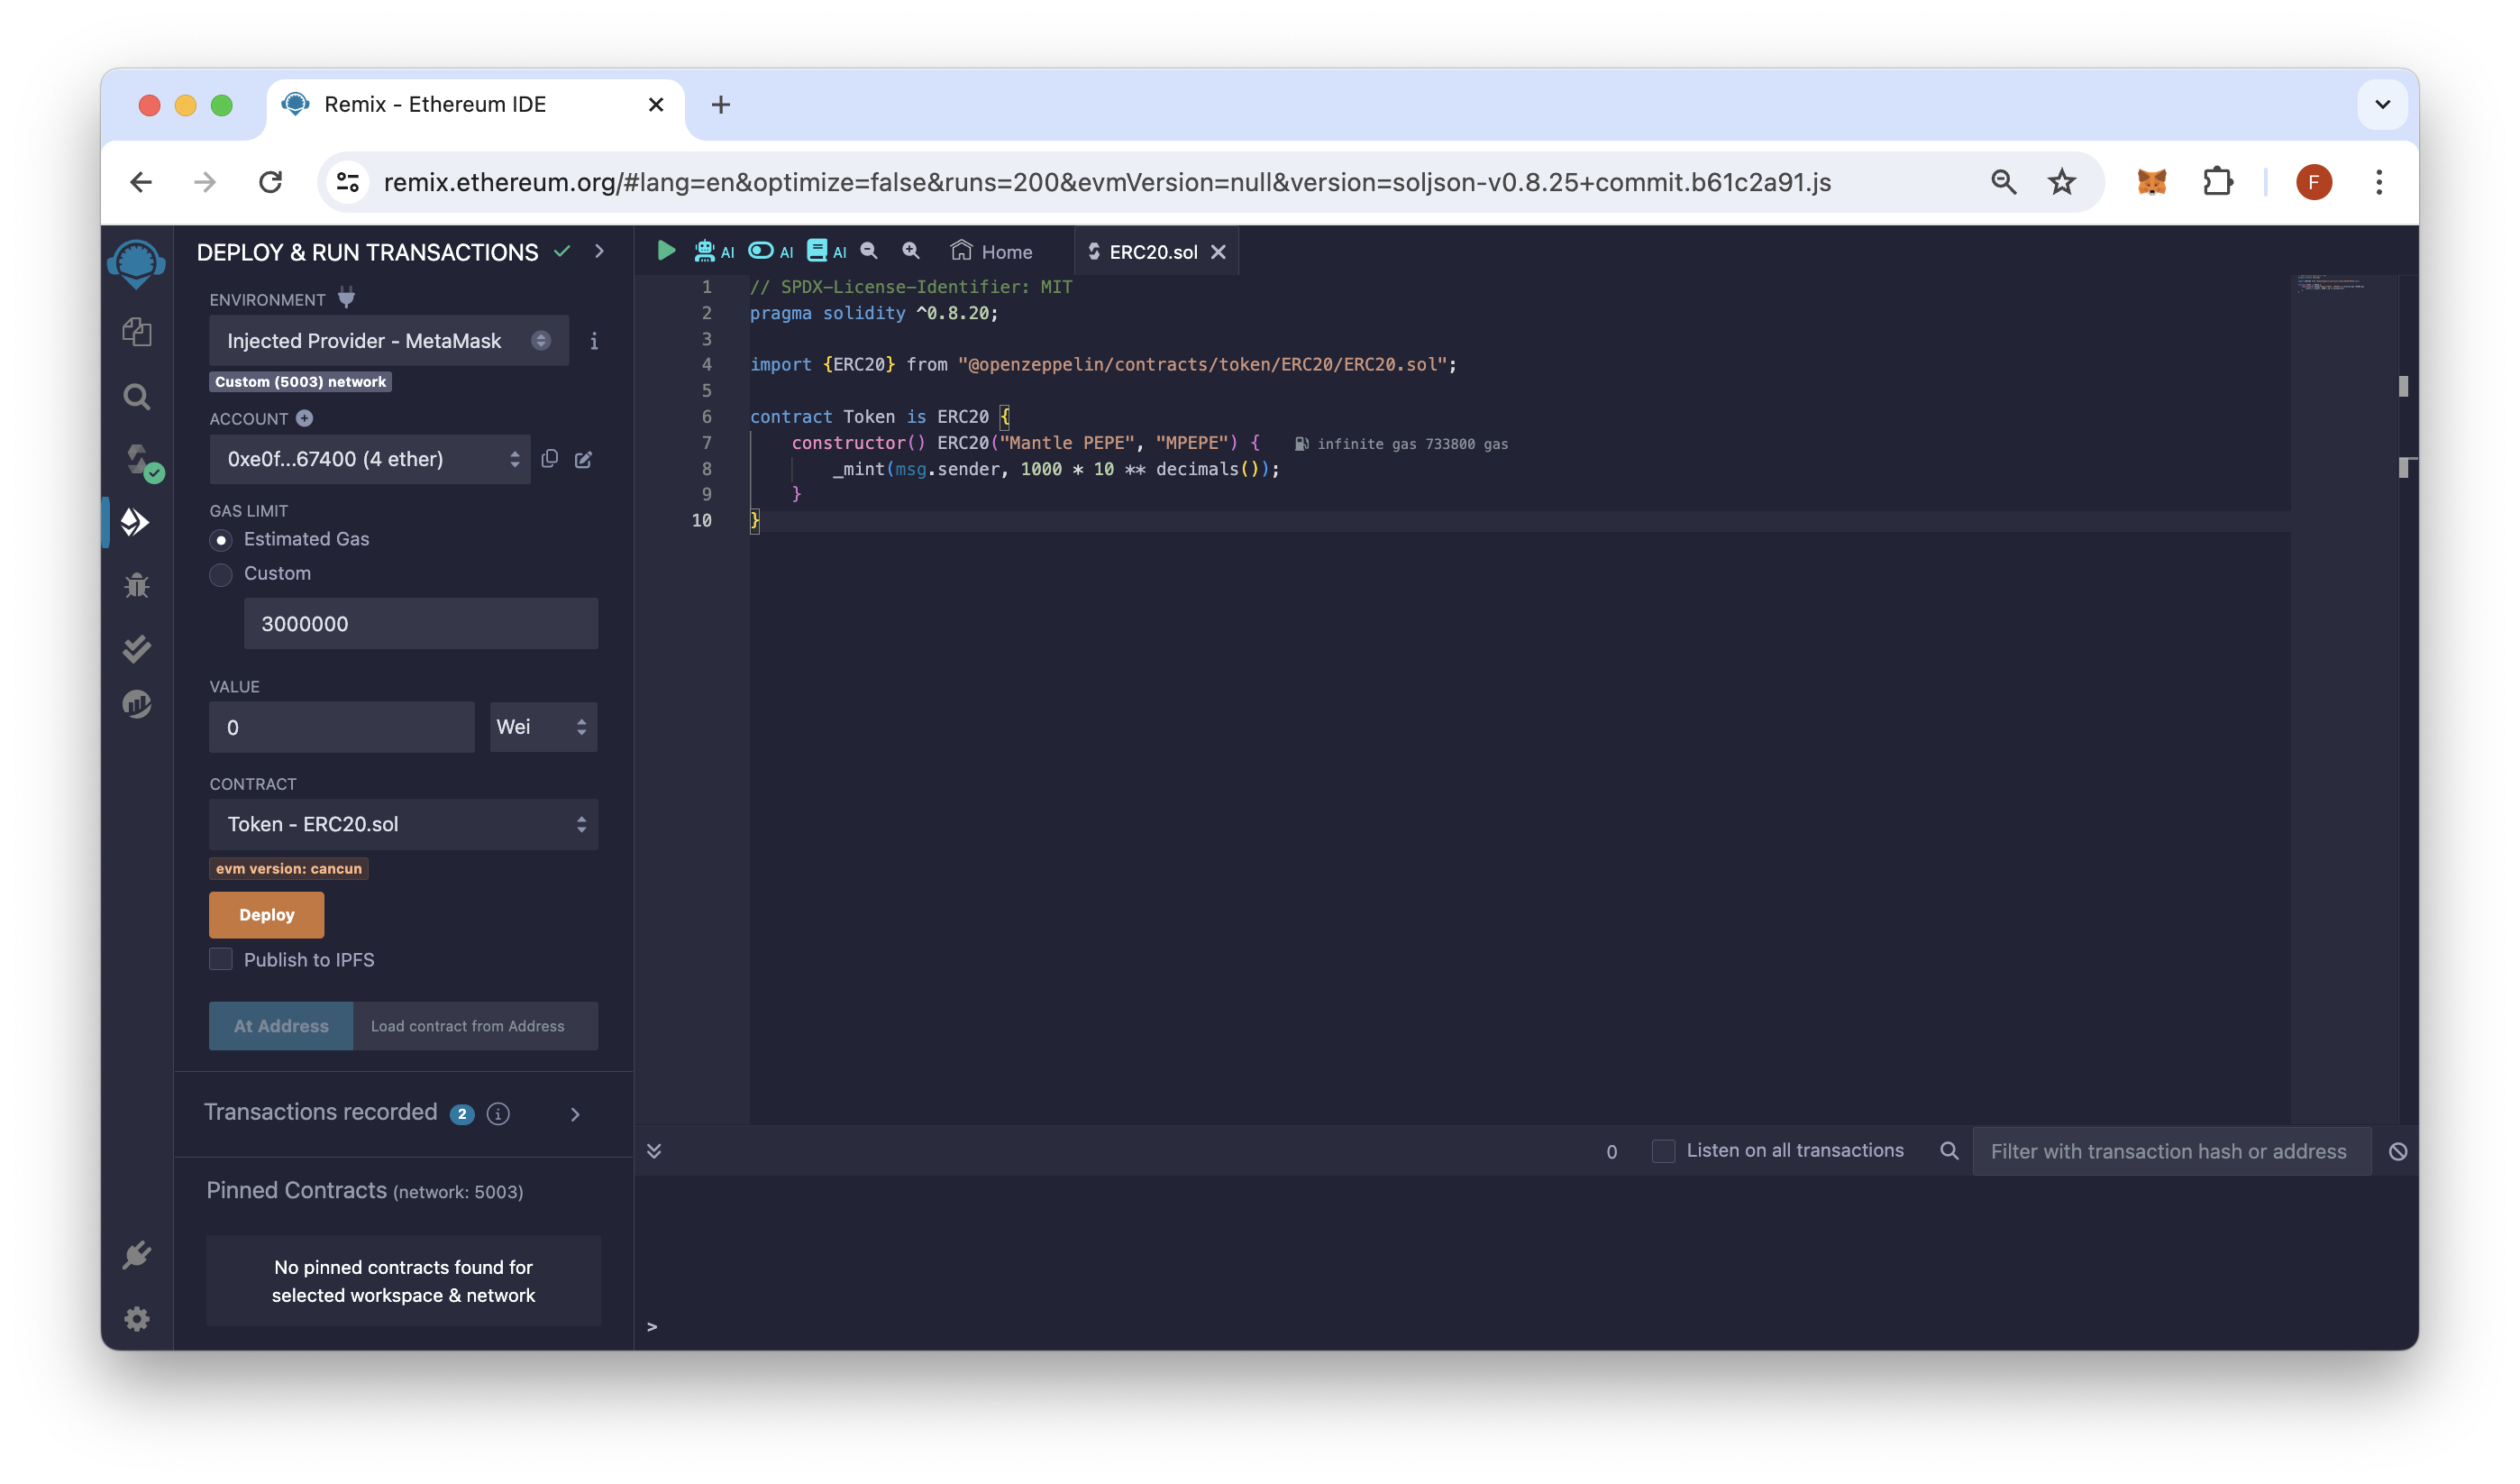
Deploy
To deploy the ERC-20 token, navigate to the "Deploy and run transactions" tab, change your environment to Injected Provider, and connect your wallet. Ensure your MetaMask wallet is connected to the Mantle Sepolia testnet (the chain ID displayed should be 5003).
Click the Deploy button and confirm the transaction in your wallet.
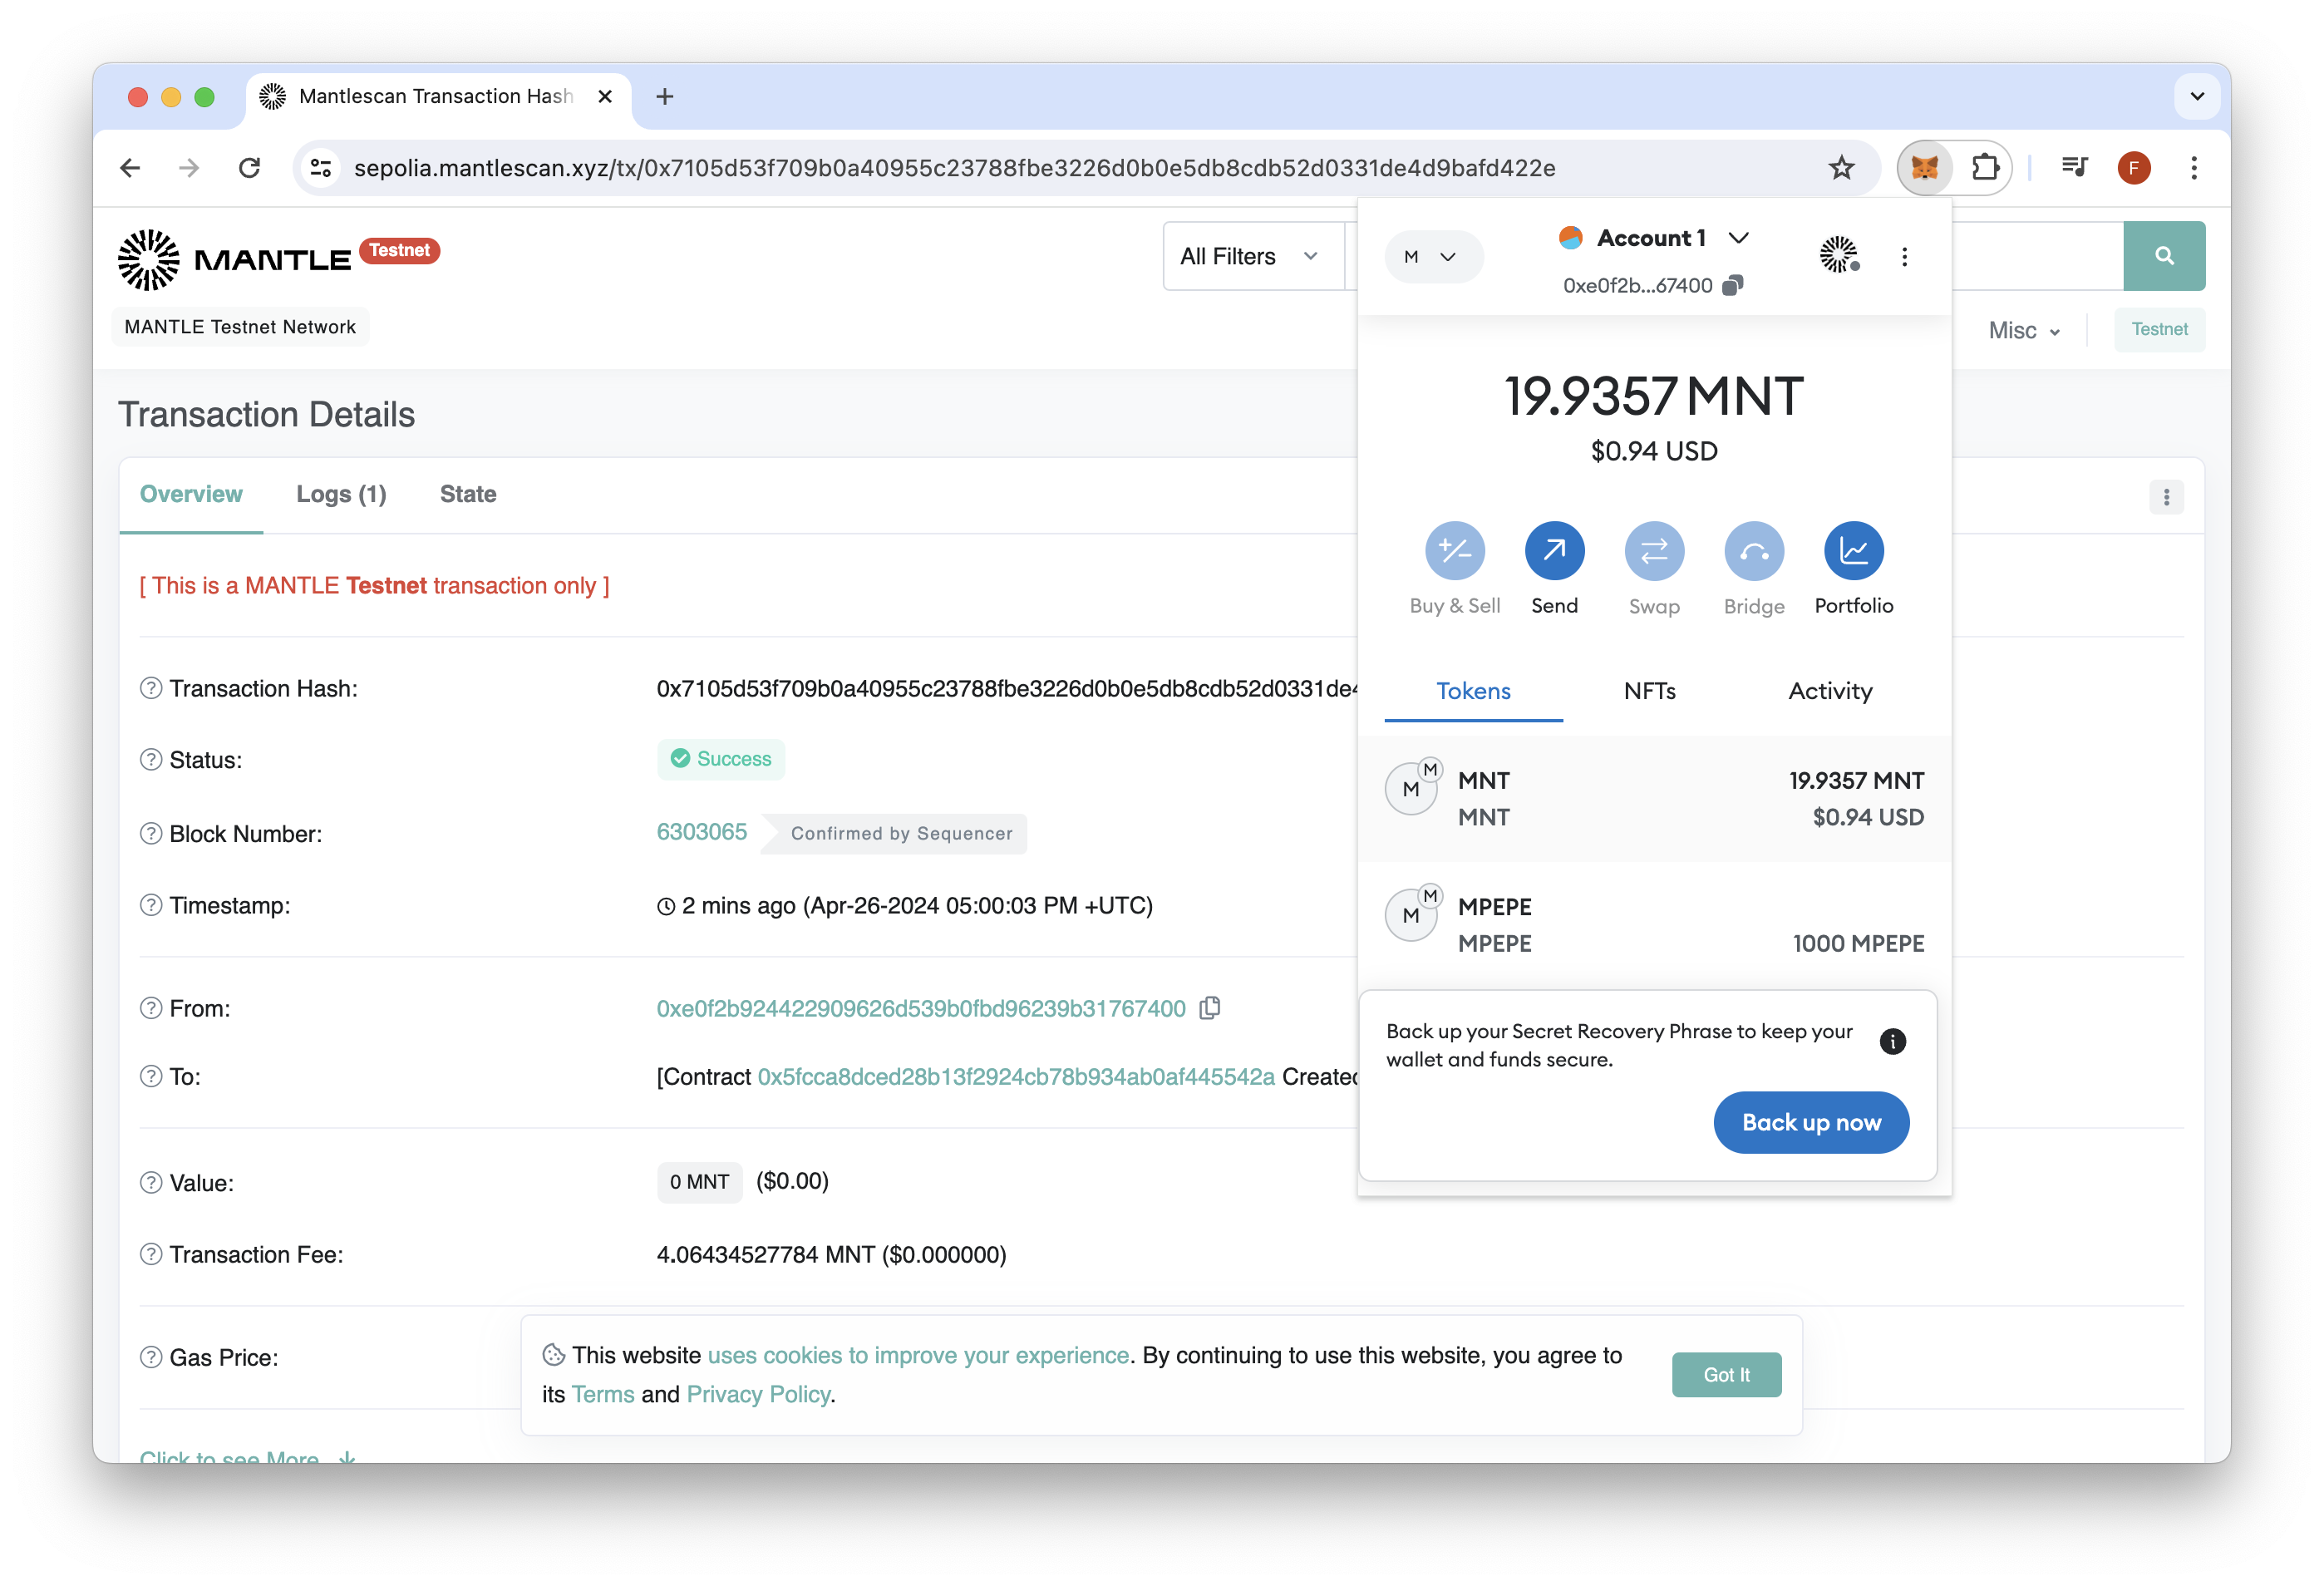
Once the transaction is executed, we can confirm that the smart contract is deployed on the Mantle Sepolia explorer. Copy the smart contract address via the "Deployed/Unpinned Contracts" section and search it at - https://sepolia.mantlescan.xyz/. Next, add the token to your MetaMask wallet by clicking "Import Tokens" and pasting your smart contract address, and inputting the token symbol (e.g., MPEPE). You should see your minted tokens:
Add Liquidity to FusionX
With our token live on Mantle testnet, let's add some liquidity via FusionX, a DeFi Ecosystem for the Mantle blockchain. Adding liquidity to our token will allow other users to swap and trade our token.
Navigate to the Liquidity tab on FusionX, connect your wallet and then click Add Liquidity (ensure you're on Mantle Sepolia). Follow the steps below to add liquidity:
- 1. Within the "Choose Token Pair" field, click "Select" and input your token address. You may be prompted to click "I understand" and then "Import".
- 2. Once the token is imported, we'll need to pick the swap fee. The swap fee is provided to liquidity providers (in this case, yourself) when a user or smart contract trades your token. For the purpose of this guide, we'll choose 0.05%.
- 3. Set the initial price. For this guide, we'll choose 10, which is equal to 10 MPEPE per MNT.
- 4. In the "Set Price Range" section, we'll select the price range we want to provide liquidity for. For simplicity, we'll choose 10%.
- 5. In the "Deposit Amount" section, we'll choose the amount of MPEPE and MNT we want to provide as liquidity. This is an arbitrary value, but it should be noted that the less liquidity you provide, the more slippage users may incur when they want to trade larger amounts.

- 6. Click "Enable MPEPE" and approve the transaction in your MetaMask wallet. Then, click "Add" to add liquidity. A window will display confirming your liquidity details:
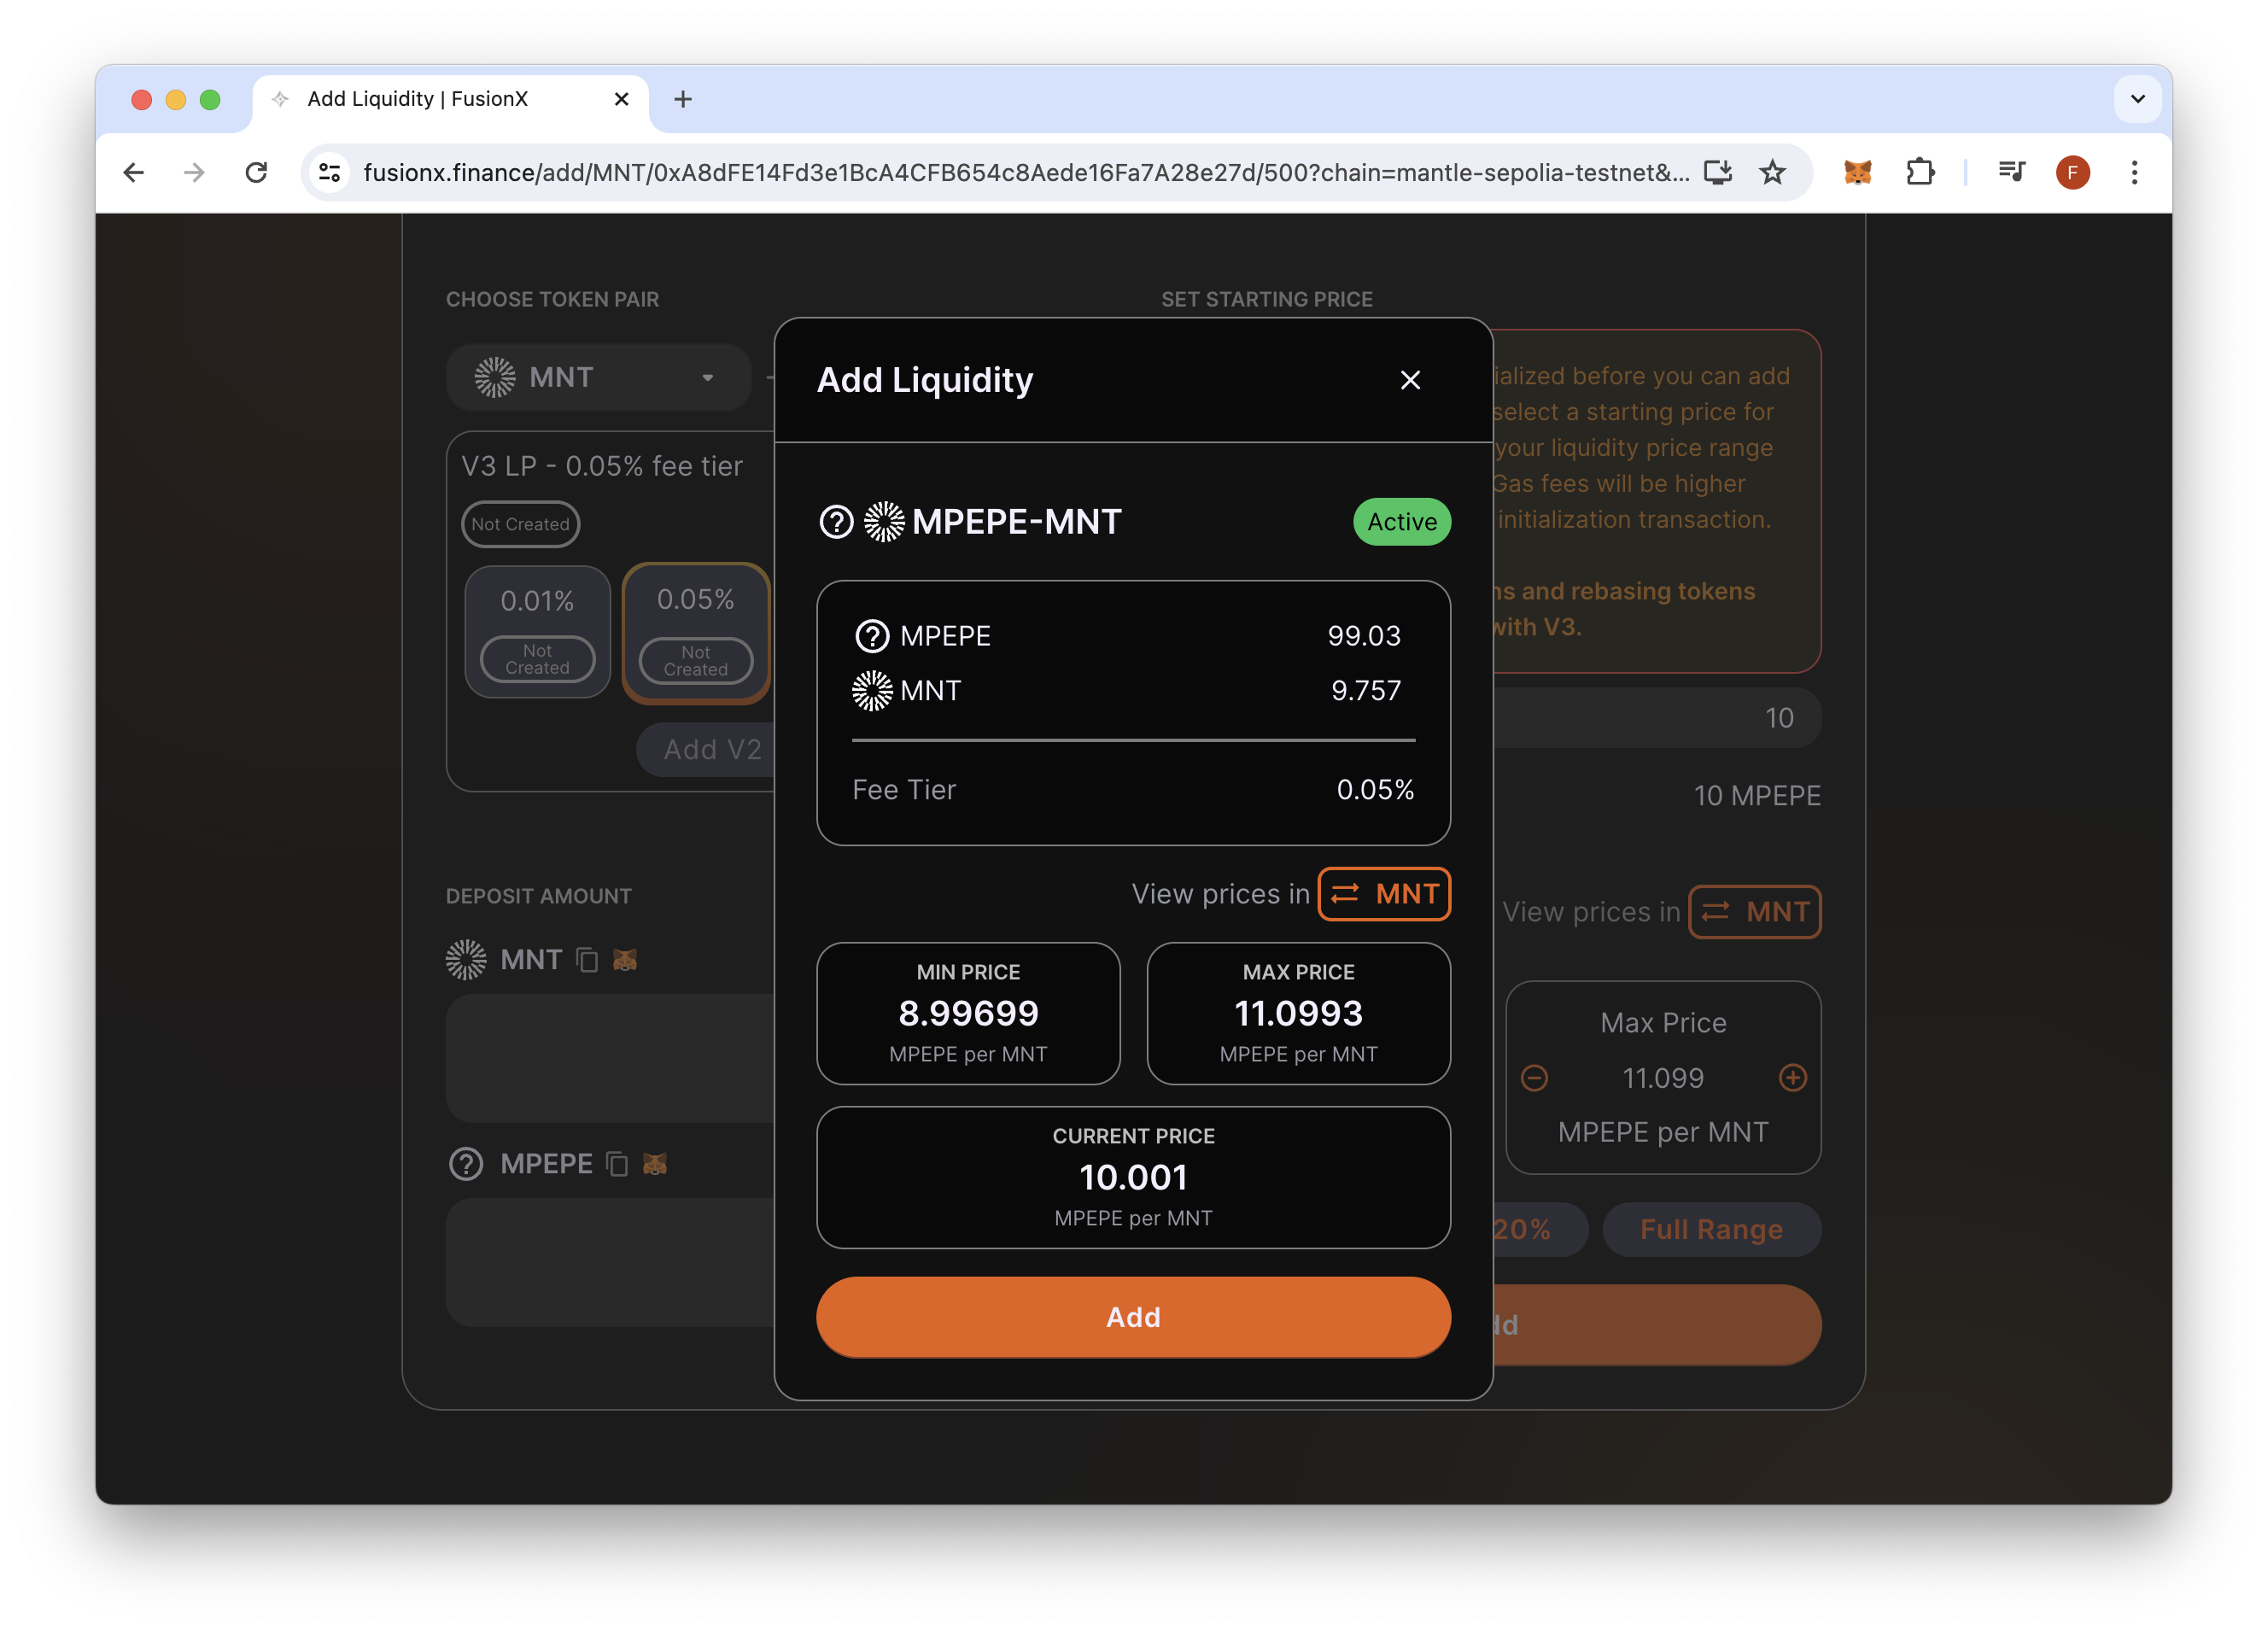
Here we see that we're deposting 99.03 MPEPE and 9.757 MNT into the pool, with a .05% swap fee tier. Also displayed is the price of MPEPE per MNT (e.g., 10) and the range of liquidity we're providing in.
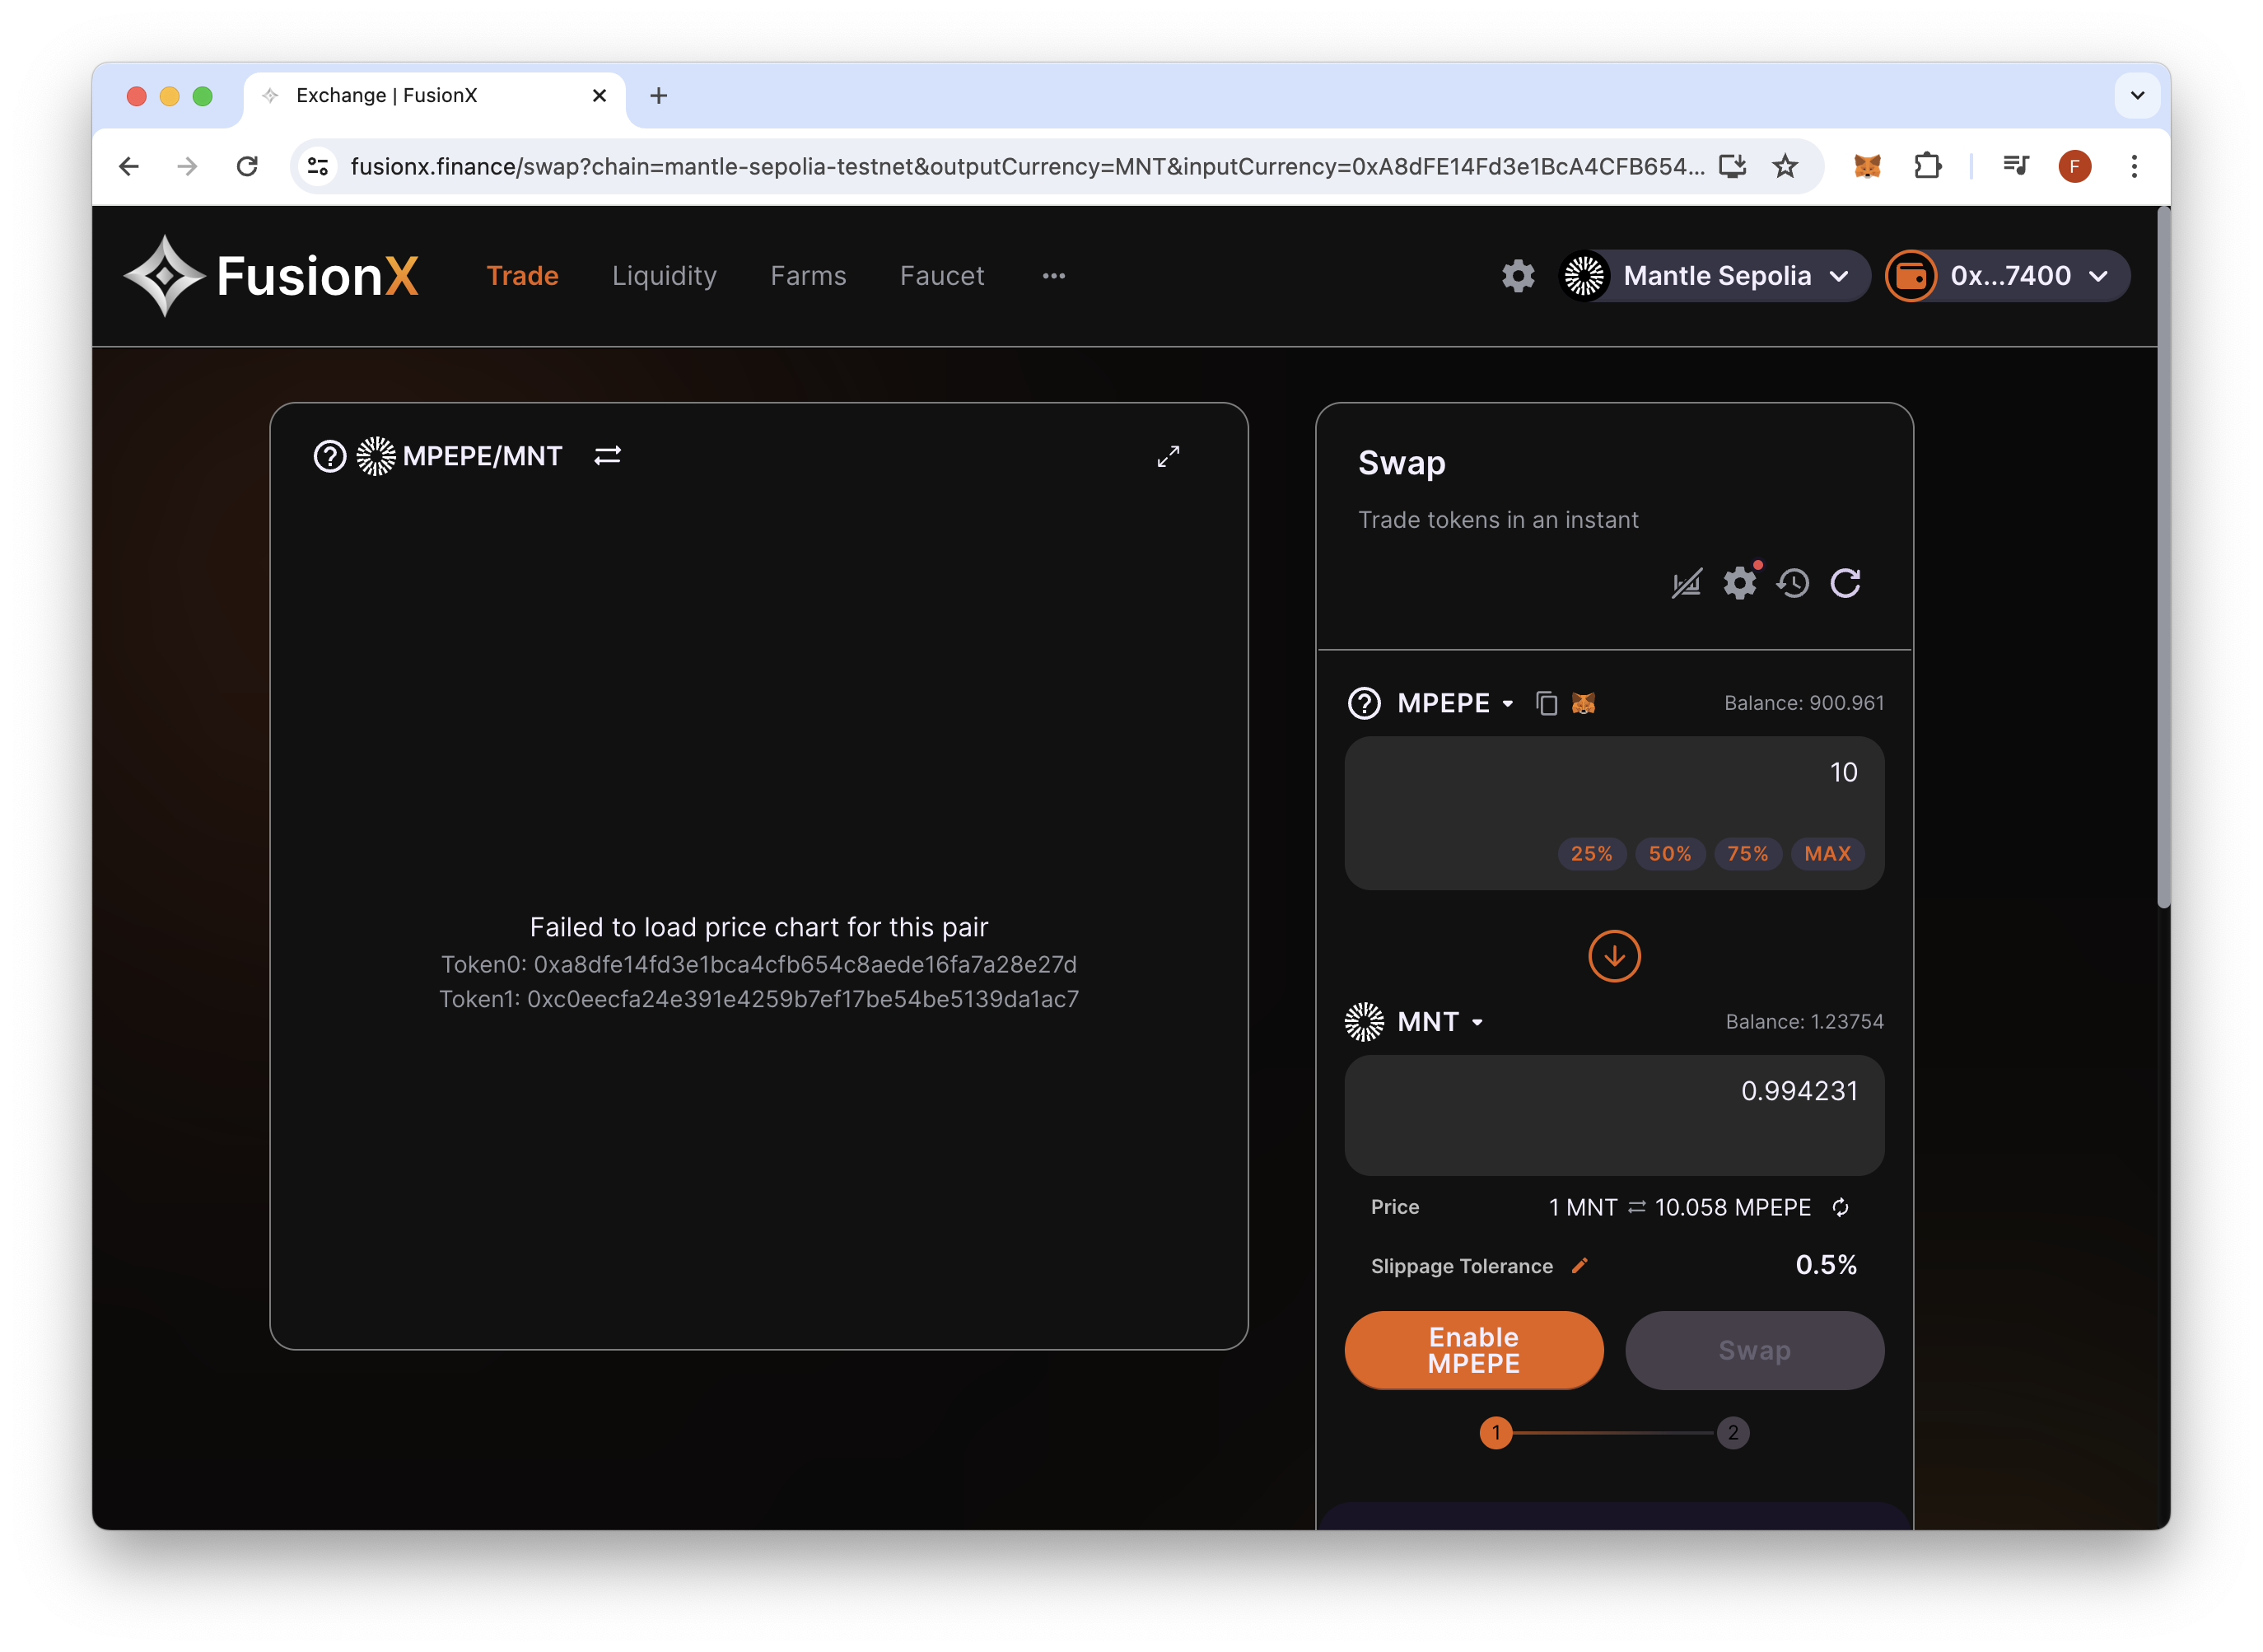
- 7. Click "Add" and confirm the transaction in your wallet. Upon completion, we can go to the Swap tab and try to conduct a swap with our token. Note that we'll only be able to conduct swaps for the pair we added liquidity to (e.g., MPEPE/MNT).
Next Steps
Creating a memecoin and adding liquidity is only one of the few steps to a successful memecoin. To continue the development of your memecoin, try the following:
- Open source your smart contract code on Mantlescan
- Create a website and social pages for your memecoin on sites like X and Farcaster
- Incentive users to incorporate your memecoin into their dApps by offering incentives (e.g., free tokens)
- Participate in hackathons and innovate on your memecoin by trying out the newest web3 tech
Final Thoughts
There you have it! You just deployed your own memecoin (ERC-20 token) on the Mantle testnet via Remix.IDE and added liquidity to it on FusionX!
If you have a question or idea you want to share, drop us a line on Discord or Twitter!
We ❤️ Feedback!
Let us know if you have any feedback or requests for new topics. We'd love to hear from you.