16 min read
Overview
Solang is a Solidity compiler for Solana. It allows developers to write smart contracts in Solidity and deploy them to Solana. Recently, Anchor (Solana's framework for building Solana programs) added support for Solang. This guide will show you how to create and test a Solana program using Solidity and Solang.
What You Will Do
- Learn some basics about building with Solang
- Create a Scoreboard program using Solidity and Solang
- Deploy the program to Solana using a local network
- Run tests to make sure the program works as expected
What You Will Need
- Basic understanding of Solidity development will be helpful but is not required
- Basic understanding of Solana fundamentals will be helpful but is not required
- Basic understanding of Program Derived Addresses (PDAs) will be helpful but is not required
- Rust and Cargo latest version installed
- Solana CLI latest version installed
- Node.js (version 16.15 or higher) installed
- Anchor CLI latest version installed
- TypeScript latest version installed
- (Optional) We are going to install the Solang VSC Extension to help with syntax highlighting.
At the time of this writing (July 2023), Anchor has added a new feature that enables Solang's latest parser, supporting new syntax for Solidity. Though this feature has been merged, it has yet to be released. You must install Anchor from the main branch to use this feature. To do this, run the following command:
cargo install --git https://github.com/coral-xyz/anchor anchor-cli --locked --force
| Dependency | Version |
|---|---|
| node.js | 18.16.1 |
| anchor cli | 0.28 (latest from main branch) |
| solana cli | 1.16.5 |
| tsc | 5.0.2 |
To ensure you are ready to start, verify that you have Solana 1.16+ and Anchor 0.28+ installed. You can do this by running the following commands:
solana --version
anchor --version
Let's get started!
Solang Basics
Solang is a compiler that allows developers to write smart contracts in Solidity and deploy them to Solana. Though Solang is working and has been recently added to Anchor, it is still in active development, so some features may be subject to change. The Solana GitHub repo can be found here. Solang is source compatible with Solidity 0.8, with some caveats due to differences in the Solana. Let's discuss a few key features of Solana and how they are implemented in Solang:
Accounts
In Solana, accounts are the fundamental unit of storage and processing. They are almost like files in a file system. There are two types of accounts, Programs (accounts with executable code) and data accounts (accounts that manage state). Programs are stateless and can only modify data accounts. Data accounts are stateful and can only be modified by the program that owns them. For using Solang, this means that the Solidity contract will utilize an account for the contract (program) itself and a constructor to create new data accounts to manage state. These data accounts are called Program Derived Addresses (PDAs). The Program's address is defined in the contract by declaring it at the start of the contract like so:
@program_id("F1ipperKF9EfD821ZbbYjS319LXYiBmjhzkkf5a26rC")
Program Derived Addresses (PDAs)
PDAs are important data-storing accounts on Solana. They are owned by a program and can only be modified by that program. PDAs are created by a program and are derived from a set of seeds and the program's address. You can think of seeds as unique identifiers for the dataset. For example, if you were creating a PDA to store a user's name, you might use the word "name" and the user's public key as the seed. This would ensure that the PDA's address is unique to that user.
In Solang, seeds are defined at the constructor with annotations:
@seed- The identifies a single seed for deriving the PDA (there can be multiple seeds)@bump- The bump is used to derive a PDA from specified seeds (this is optional)@space- The number of bytes to allocate for the PDA (this is optional)@payer- The account that will pay for the PDA (this is optional)
Example:
@program_id("Foo5mMfYo5RhRcWa4NZ2bwFn4Kdhe8rNK5jchxsKrivA")
contract Foo {

    @space(500)
    @seed("Foo")
    @payer(payer)
    constructor(@seed bytes user_wallet, @bump bytes1 bump_val) {
        // ...
    }
}
When called, this constructor will create a new PDA unique to the program, "Foo", and the supplied user_wallet. Each account will be initiated with 500 bytes (paid for by the payer). The "bump" is effectively a set distance off the ed25519 elliptic curve we use to find our PDA deterministically. To learn more about PDAs and bumps, check out our Guide: How to Use PDAs.
Note: Annotations can be paired with an empty constructor if the contract has no constructor.
The value stored in a PDA can be accessed by creating a getter function that takes the PDA's address as an argument. For example:
    function getSomeValue() public view returns (uint64) {
        return accountData.someValue;
    }
On our client side, we can use the PDA's address to get the value stored in the PDA. For example:
    const score = await program.methods.getSomeValue()
      .accounts({ dataAccount })
      .view();
Interface Definition Language (IDL)
If you are used to building on EVM, you are undoubtedly familiar with ABIs. Solana uses a similar concept called an Interface Definition Language (IDL). IDLs are used to define the interface between a program and its clients. They are used to generate client libraries for the program. For more information about IDLs, check out our Guide: What are IDLs. For this demo, it is important to know that Anchor will generate an IDL from our program when we compile it. We can then use the IDL to create a client library for our program.
Though there are other nuances to using Solang (and changes may be made in the future), these basics will help you start and write your first contract. Now, let's build something!
Create a Scoreboard Program
Initiate Project
Let's start by initiating a new Solang project using Anchor. From the directory, you would like to save your project in, run the following command:
anchor init scoreboard --solidity
This will create a new directory called scoreboard with all the files you need to get started. The --solidity flag tells Anchor that we want to use Solang to compile our program. Navigate to your new project and open it in your favorite code editor.
cd scoreboard
You should have a folder called solidity with a file, scoreboard.sol. This is where we will write our contract.
Make sure that you have a paper wallet saved to the directory listed in Anchor.toml (in the project's root directory):
[provider]
cluster = "Localnet"
wallet = "/YOUR/PATH/TO/WALLET/id.json"
Make sure you update the path and filename to reflect your wallet's location. You can ensure you have a wallet saved here by running the following command:
solana address -k /YOUR/PATH/TO/WALLET/id.json
If no address is returned, generate one by entering:
solana-keygen new --no-bip39-passphrase -o /YOUR/PATH/TO/WALLET/id.json
Make sure your Solana CLI is set to that wallet and localnet by running the following commands:
solana config set -u localhost -k /YOUR/PATH/TO/WALLET/id.json
Running solana config get should reveal the same path to the wallet we outlined in Anchor.toml and RPC URL: http://localhost:8899.
Before building our program, you should be able to run a test on the sample contract initiated by Anchor to make sure your environment is set up and working. To do this, run the following command:
anchor test
This will compile the program and run the tests in the tests directory. You should have a successful simulation of the program on your local cluster. If you have any issues, check back and make sure you did not miss any steps, or ping us on Discord to see if we can help.
Create a Scoreboard Program
We are going to create a simple program that allows users to store their score on the blockchain. Our contract should be able to:
- Initialize a PDA to store a user's current score, personal high score, and public key (each user should have their own PDA)
- Add 0-100 points to a user's current score (and update their high score if their current score is higher than their high score)
- Reset their current score to 0
- Get a user's current score and personal high score
Let's start by opening /solidity/scoreboard.sol in your code editor and replace the default starter code with:
@program_id("F1ipperKF9EfD821ZbbYjS319LXYiBmjhzkkf5a26rC")
contract scoreboard {
    // 1 - Define the data struct that will be stored in the account


    // 2 - Definite our account initializer
    constructor(

    ) {

    }

    // 3 - Add functions to interact with the data


}
We are defining our contract's program ID and framing the three steps we will follow to build this project.
Step 1 - Define the Data Struct
Let's create a new private variable, accountData, to house all of our user score information. We will use a struct to define the data we want to store in the account. Add the following code to your contract:
    // 1 - Define the data struct that will be stored in the account
    UserScore private accountData;

    struct UserScore {
        address player;
        uint64 currentScore;
        uint64 highestScore;
        bytes1 bump;
    }
Here's what we're doing:
- Defining a new private variable,
accountDataof type UserScore - Defining a new struct, UserScore, that will store the following data:
player- The user's public key (address is a base58 encoded public key.)currentScore- The user's current scorehighestScore- The user's high scorebump- The bump seed used to derive the PDA (it is usually good practice to store this value to ensure the PDA is derived correctly)
Step 2 - Define our Account Initializer
Account (PDA) initialization in Solang happens through the contract's constructor. As we discussed earlier, this is where we will need to define our payer and the seeds of our PDA. Below your UserScore enum, add the following code:
    // 2 - Definite our account initializer
    @payer(payer)
    @seed("seed")
    constructor(
        @seed bytes payer,
        @bump bytes1 bump,
        address player
    ) {
        print("New Quicknode UserScore account initialized");
        accountData = UserScore (player, 0, 0, bump);
    }
Let's break this down:
- We are using the
@payerannotation to define the payer of the PDA. This account will pay the PDA's rent. - We are using the
@seedannotation to define two seeds for the PDA:- the word "seed" (this is the first seed)
- the user's public key (this is the second seed, which we will pass in as an argument)
- We are using the
@bumpannotation to define the bump seed for the PDA. We will generate this on the client side and pass it in as an argument - We pass in the player's public key as an argument.
- We initiate our
accountDatavariable with the player's public key and 0 for their current and highest scores.
Step 3 - Add Functions
Let's create a few functions that will interact with our account data.
Create Setter Functions
Let's create two functions that will set the value of our score: one to add points and one to reset a user's current score. After your constructor, add the following:
    // 3 - Add functions to interact with the data
    function addPoints(uint8 numPoints) public {
        require(numPoints > 0 && numPoints < 100, 'INVALID_POINTS');
        accountData.currentScore += numPoints;
        if (accountData.currentScore > accountData.highestScore) {
            accountData.highestScore = accountData.currentScore;
        }
    }

    function resetScore() public {
        accountData.currentScore = 0;
    }
Let's look at what we're doing:
- We are creating a function called
addPointsthat takes auint8as an argument. The function checks that the argument received is greater than 0 and less than 100. It adds the points to the user's current score if it is. If the user's current score exceeds their highest, it updates their highest score. - We are creating a function called
resetScorethat sets the user's current score to 0 but does not update their highest score.
Create Getter Functions
Let's add two functions to make it easy to get the user's current and highest scores. After your setter functions, add the following:
    function getCurrentScore() public view returns (uint64) {
        return accountData.currentScore;
    }

    function getHighScore() public view returns (uint64) {
        return accountData.highestScore;
    }
Each function takes no arguments and returns the user's current and highest scores, respectively.
Build Your Program
With your contract complete, go ahead and make sure it compiles by running the following command:
anchor build
You should receive a notice that your LLVM IR and IDL files have been generated. Great job! Let's write some tests to ensure our program works as expected.
Test Your Program
Out of the box, Anchor comes with the Chai Assertion Library and Mocha Testing Framework installed. We will use these to write our tests.
Open the tests directory and scoreboard.ts in your code editor. You should see a test that checks that the program was initialized correctly. The test was for the default contract that Anchor initiates, so you might see some errors. Let's delete this test and write our own. Replace the default test with the following:
import * as anchor from "@coral-xyz/anchor";
import { Program } from "@coral-xyz/anchor";
import { PublicKey } from "@solana/web3.js";
import { assert, expect } from "chai";
import { Scoreboard } from "../target/types/scoreboard";


function randomPointsGenerator(min = 1, max = 100) {
  return Math.floor(Math.random() * (max - min + 1) + min)
}

describe("Scoreboard", () => {
  const provider = anchor.AnchorProvider.env();
  anchor.setProvider(provider);
  const program = anchor.workspace.Scoreboard as Program<Scoreboard>;
  const wallet = provider.wallet;
  const walletSeed = wallet.publicKey.toBuffer();
  const [dataAccount, bump] = PublicKey.findProgramAddressSync(
    [
      Buffer.from("seed"),
      walletSeed
    ],
    program.programId
  );

  it("Test 1 - Initializes a new account!", async () => {

  });

});
Here's what we're doing:
- We are importing the necessary dependencies, including our types from the IDL file generated when we compiled our program.
- We are creating a function to generate a random number between 1 and 100. We will use this to add points to our user's score.
- We are creating a new test suite called "Scoreboard" using
describe. - We are defining a
provider,program, andwallet, which are the context required to interact with our program. - We are creating a
dataAccountandbumpseed using thePublicKey.findProgramAddressSyncmethod (which requires us to pass the same seeds we defined in our program: the word "seed" and the user's public key as a buffer). We will use these to create a PDA for our user's score data. - We are creating a new test called "Test 1 - Initializes a new account!" using
it.
Test Account Initialization
Add the following code to your 1st test:
  it("Test 1 - Is initialized!", async () => {
    const tx = await program.methods.new(walletSeed, [bump], dataAccount)
      .accounts({ dataAccount })
      .rpc();
    const score = await program.methods.getCurrentScore()
      .accounts({ dataAccount })
      .view();
    expect(score.toNumber()).to.equal(0);
  });
If you are used to building programs in Anchor, this should look somewhat familiar but slightly different. Let's break it down:
- We initialize a new PDA using the
program.methods.newcommand. This command takes the arguments we defined in our constructor (buffer of our wallet, the bump, and the new PDA's publicKey) and creates a new PDA. Note that for Solana, we must pass the accounts we will be using into the transaction context--Anchor allows us to do this with theaccountsmethod. We pass in thedataAccountwe created earlier. - We send and confirm the transaction using the
rpcmethod. - We get the user's current score using the
program.methods.getCurrentScorecommand. We pass in thedataAccountwe created earlier. If you wanted to get a different user's score, you would pass in their PDA's address. - We use the
expectmethod to assert that the user's current score is 0. Notice that we use thetoNumbermethod to convert the score to a number. This is because the score is returned as aBN(Big Number) object.
You can run this test by running the following command:
anchor test
You should see the following output in your terminal:
  Scoreboard
    ✔ Test 1 - Is initialized! (413ms)
Nice job!
Test Adding Points
Let's add a test to make sure we can add points to a user's score. Add the following code to your test suite:
  it("Test 2 - Adds points!", async () => {
    const pointsToAdd = randomPointsGenerator();
    await program.methods.addPoints(pointsToAdd)
      .accounts({ dataAccount })
      .rpc();
    const score = await program.methods.getCurrentScore()
      .accounts({ dataAccount })
      .view();
    expect(score.toNumber()).to.equal(pointsToAdd);
  });
This time we use the randomPointsGenerator we created to generate an argument for our addPoints() function. We then assert that the user's current score is equal to the points we added.
Test Resetting Score
Finally, let's test our reset function and ensure that our currentScore resets to 0 and our highestScore maintains its value.
  it("Test 3 - Resets and checks high score!", async () => {
    const initialScore = (await program.methods.getCurrentScore()
      .accounts({ dataAccount })
      .view()).toNumber();

    const pointsToAdd = randomPointsGenerator();
    await program.methods.addPoints(pointsToAdd)
      .accounts({ dataAccount })
      .rpc();


    await program.methods.resetScore()
      .accounts({ dataAccount })
      .rpc();

    const updatedScore = await program.methods.getCurrentScore()
      .accounts({ dataAccount })
      .view();
    expect(updatedScore.toNumber()).to.equal(0);

    const highScore = await program.methods.getHighScore()
      .accounts({ dataAccount })
      .view();
    expect(highScore.toNumber()).to.equal(initialScore + pointsToAdd);
  });
Here's what's going on:
- We get the user's initial score and store it in a variable called
initialScore. We will need this to check that the user'shighestScoreis not reset. - We add a random number of points to the user's score.
- We reset the user's score.
- We get the user's updated score and assert that it is equal to 0.
- We get the user's
highestScoreand assert that it is equal to theinitialScoreplus the points we added.
You can run this test by running the following command:
anchor test
You should see the following output in your terminal:
  Scoreboard
    ✔ Test 1 - Is initialized! (413ms)
    ✔ Test 2 - Adds points! (474ms)
    ✔ Test 3 - Resets and checks high score! (933ms)

  3 passing (2s)

✨  Done in 1.88s.
Nice job! You've successfully created a program using Solidity and Solang. You can find the complete code for the project here.
Extra Credit
Want to practice what you have learned? Here are a few ideas to keep building on your program:
- Add an
activatedfield to youraccountDataand create a toggle to activate and deactivate the user's account. - Add additional tests to make sure your program works as expected:
- Test that we cannot reinitialize an existing account
- Test that we cannot add more than 100 points to a user's score
- Test that we cannot add less than 0 points to a user's score
- Test initializing another user account and make sure the accounts are unique (Hint: you'll need to derive a new address in your test using
anchor.web3.Keypair.generate()andfindProgramAddressSync).
- Build a simple front end to interact with your program.
- Deploy your program to mainnet (see below).
How to Deploy to Mainnet?
When your program is working how you want, and you are ready to deploy to Solana's mainnet, you just need to make a few modifications. Before doing those, you will need a mainnet endpoint:
Connect to a Solana Cluster with Your Quicknode Endpoint
To build on Solana, you'll need an API endpoint to connect with the network. You're welcome to use public nodes or deploy and manage your own infrastructure; however, if you'd like 8x faster response times, you can leave the heavy lifting to us.
See why over 50% of projects on Solana choose Quicknode and start your free trial here. We're going to use a Solana Mainnet endpoint.
Copy the HTTP Provider link: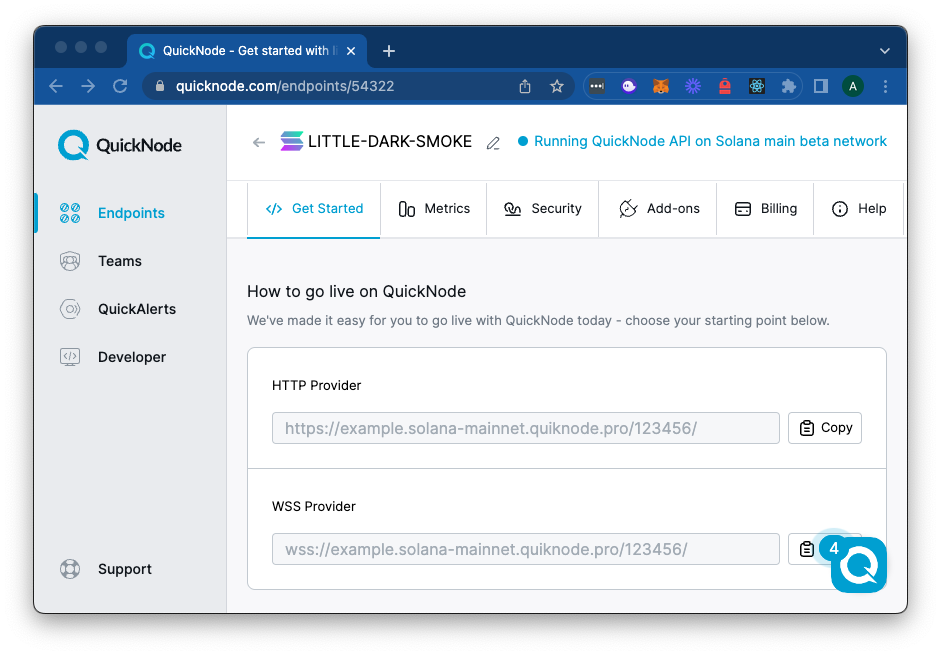
Once you have your endpoint, you will need to do the following:
- Update the
program_idin your contract. You can get this by running the following command:
solana address -k ./target/deploy/scoreboard-keypair.json
Copy the address from your terminal to the first line of your contract.
- Update
Anchor.toml:
- Add your new program id:
[programs.mainnet]
scoreboard = "YOUR_PROGRAM_ID"
- Update the cluster to your Quicknode Endpoint:
[provider]
cluster = "mainnet"
wallet = "/PATH_TO_YOUR_WALLET/id.json"
- Make sure your wallet specified in
Anchor.tomlhas enough SOL to pay for the rent of your program and the PDAs you will create. You can check your wallet's mainnet balance by running the following command:
solana balance -um
You will need a few SOL for a small program like this.
Once you have made these changes, you can deploy your program to mainnet by running the following command:
anchor build
anchor deploy
Solang, Farewell!
Great job! You've successfully created a Solana program using Solidity and Solang. We are still early in seeing what can be done with Solang, so we are excited to see what you build. Drop us a line on Discord or Twitter and let us know what you're working on!
We ❤️ Feedback!
Let us know if you have any feedback or requests for new topics. We'd love to hear from you.