9 min read
Several Pyth libraries have recently introduced breaking changes that impact this guide and the use of Solana Playground. We are working to update this guide to reflect these changes. In the meantime, you can see a sample implementation from the Pyth Documentation.
If you have any questions, drop us some feedback or reach out on Discord.
Overview
Pyth is an Oracle that brings real-time data fees on-chain in a simple and easy-to-use way. Pyth works directly with first-party data publishers to bring financial asset pricing data on-chain. Pyth aggregates data for cryptocurrencies, equities, forex currencies, and commodities. By working with many data providers, Pyth can provide high data integrity and security. In this guide, we will learn how to fetch price data from Pyth in your Solana programs.
What You Will Do
In this guide, you will learn how to use the Pyth SDK to integrate real-time pricing data into your program. You will:
- Learn the Basics of the Pyth protocol
- Build a simple Solana program that requests and logs a price feed from Pyth
- Test the program on Solana's devnet
What You Will Need
- Experience with Solana Programming using Anchor (Complete our Counter Program Guide)
- Basic knowledge of Solana Fundamentals
- Basic Rust experience
- A modern web browser (Chrome, Firefox, Safari, Edge) to use Solana Playground
- Devnet SOL (~ 5 SOL will be required to deploy the program to Devnet). Check out our Guide on Airdropping Devnet SOL.
Dependencies Used in this Guide
In this guide, we will be using Solana Playground. Our tests were performed with the following dependencies (May 30, 2023):
| Dependency | Version |
|---|---|
| anchor-lang | 0.27.0 |
| solana-program | 1.14.17 |
| pyth-sdk-solana | 0.7.0 |
How does Pyth Work?
Pyth is a data oracle that brings price feeds for various asset classes to the Solana blockchain. "Pyth price updates are created on Pythnet and streamed off-chain via the Wormhole Network, a cross-chain messaging protocol. These updates are signed so the Pyth on-chain program can verify their authenticity." *(Source: Pyth Docs) Pythnet is a private cluster powered by the Solana blockchain. Because Pyth uses Wormhole, it can bring data to multiple blockchains.
For Solana, asset and pricing data is stored and broadcast on-chain via Solana Accounts. Three main types of accounts exist in Pyth:
- Product (Metadata) Accounts: These accounts store information about the asset (e.g., symbol, asset type, description).
- Price Accounts: These accounts store the price data for the asset, a confidence interval for the price, and the time of the last update.
- Mapping Accounts: These accounts map the product account to the price account.
Today's exercise will be primarily focused on the Price Accounts. For more information on other account types, check out the Pyth Docs.
Initiate a New Anchor Project
Anchor is a popular development framework for building Programs on Solana. To get started, check out our Intro to Anchor Guide.
We will be using Solana Playground to accelerate our development. Solana Playground is a web-based IDE that allows you to write, deploy, and test Solana programs. If you prefer to use your own local Anchor project, just make sure to add
pyth-sdk-solana = "0.7.1"to yourCargo.tomlfile.
Head over to beta.solpg.io and click "➕" create a new project:
- Select "Anchor (Rust)"
- Name it "Pyth Demo" and click "Create"
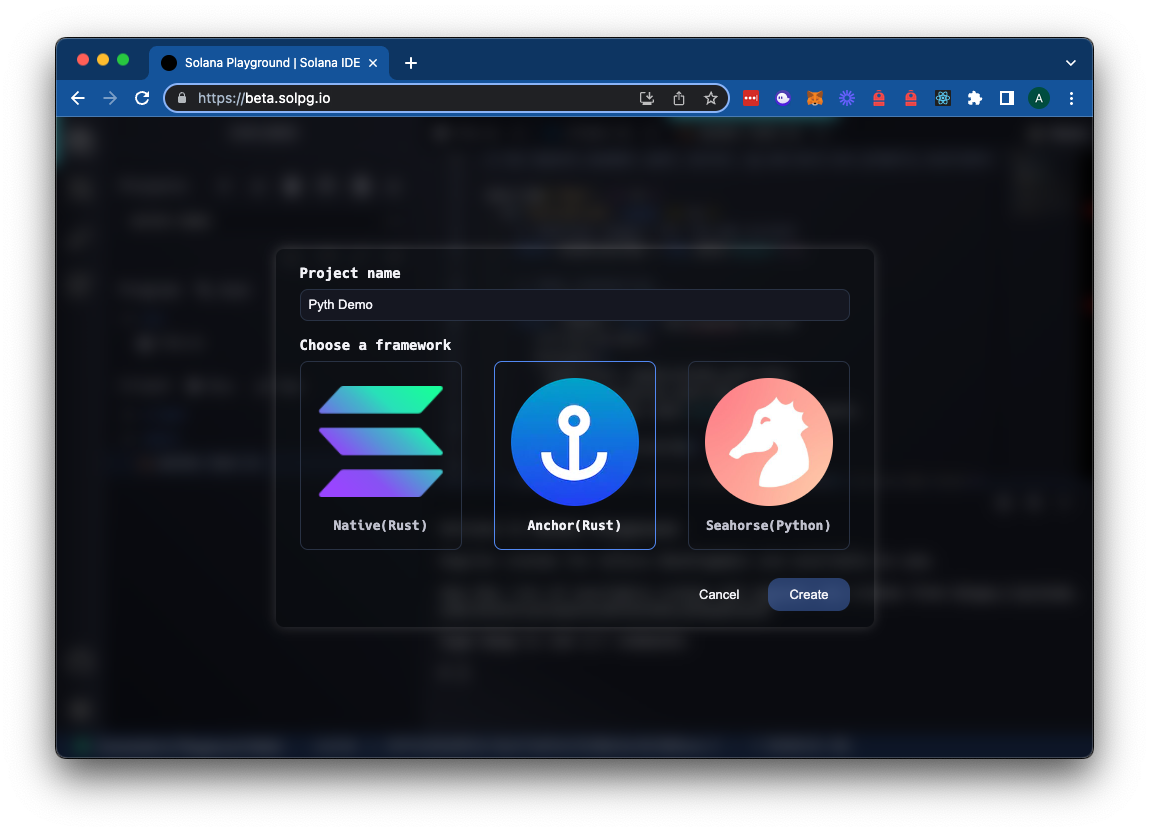
Create Your Program
Let's create a new program that will fetch a price feed from Pyth and log it to the Solana Program logs. Open src>lib.rs, which should be prepopulated with a simple program. Go ahead and delete the default content.
Let's start by importing the dependencies we will need for this program. We will need the following dependencies:
use anchor_lang::prelude::*;
use pyth_sdk_solana::{load_price_feed_from_account_info};
use std::str::FromStr;

// This is your program's public key, and it will update
// automatically when you build the project.
declare_id!("11111111111111111111111111111111");
In addition to the Anchor dependencies, we will need to import the Pyth SDK's load_price_feed_from_account_info and the FromStr trait from the Rust standard library (which will allow us to convert a string address into a public key).
Solana Playground will use and default declare_id! field to define your program ID. This will be updated automatically when you build your program.
We are going to define two constants as well:
- a price feed address (this will be the address of the price feed we want to fetch). A list of all available feeds can be found here (make sure to select "Solana Devnet" from the drop-down). For this demo, we will use the BTC/USD price feed on Solana's devnet,
HovQMDrbAgAYPCmHVSrezcSmkMtXSSUsLDFANExrZh2J. - a "staleness threshold" that will be used to determine if the price feed is stale (i.e., if the price feed has not been updated in the last 60 seconds, we will consider it stale)
Add the following declarations below your imports:
const BTC_USDC_FEED: &str = "HovQMDrbAgAYPCmHVSrezcSmkMtXSSUsLDFANExrZh2J";
const STALENESS_THRESHOLD: u64 = 60; // staleness threshold in seconds
Feel free to experiment with different price feeds and staleness thresholds, but for our example, we will be looking for BTC/USD price feeds that have been created at least within the last 60 seconds.
Create a Price Feed Struct
Let's define a struct for our price feed instruction. The struct will define which accounts we must pass to our program to fetch the price feed. Below your constants, add:
#[derive(Accounts)]
pub struct FetchBitcoinPrice<'info> {
    #[account(mut)]
    pub signer: Signer<'info>,
    #[account(address = Pubkey::from_str(BTC_USDC_FEED).unwrap() @ FeedError::InvalidPriceFeed)]
    pub price_feed: AccountInfo<'info>,
}

#[error_code]
pub enum FeedError {
    #[msg("Invalid Price Feed")]
    InvalidPriceFeed,
}
We are defining a struct called FetchBitcoinPrice that will have two accounts:
signer: This will be the account that signs the transaction and pays the transaction fees.price_feed: This will be the price feed account that we want to fetch. We use the Anchoraddressconstraint (learn more about Anchor constraints in our guide, here). We use thePubkey::from_strfunction to convert ourBTC_USDC_FEEDstring into a public key. We also define an error code,InvalidPriceFeed, that will be thrown if the price feed account is invalid.
Create a Price Feed Instruction
Let's define our program and create a function to fetch the price feed. Below your struct, add:
#[program]
mod hello_pyth {
    use super::*;
    pub fn fetch_btc_price(ctx: Context<FetchBitcoinPrice>) -> Result<()> {
        // 1-Fetch latest price

        // 2-Format display values rounded to the nearest dollar

        // 3-Log result


        Ok(())
    }
}
We are defining a program called hello_pyth and a function called fetch_btc_price that will take in a Context of type FetchBitcoinPrice and return a Result (either an Ok or an Err).
Fetch the Latest Price
To fetch the latest price, we pass our price feed address, &ctx.accounts.price_feed into the Pyth load_price_feed_from_account_info() function:
        // 1-Fetch latest price
        let price_account_info = &ctx.accounts.price_feed;
        let price_feed = load_price_feed_from_account_info( &price_account_info ).unwrap();
        let current_timestamp = Clock::get()?.unix_timestamp;
        let current_price = price_feed.get_price_no_older_than(current_timestamp, STALENESS_THRESHOLD).unwrap();
We also use the Clock struct to get the current timestamp and define a current_price variable that fetches a price as long as it is no older than the staleness threshold we specified earlier.
Format Display Values
Pyth pricing data is stored as a 64-bit signed integer with a 32-bit signed exponent.
Details
Pyth's Price struct
Here's the definition of Pyth's Price struct (source):pub struct Price {
/// Price.
#[serde(with = "utils::as_string")] // To ensure accuracy on conversion to json.
#[schemars(with = "String")]
pub price: i64,
/// Confidence interval.
#[serde(with = "utils::as_string")]
#[schemars(with = "String")]
pub conf: u64,
/// Exponent.
pub expo: i32,
/// Publish time.
pub publish_time: UnixTimestamp,
}
To log the price in a human-readable format (e.g., 27400 instead of 27400000000000 ), we will need to convert the price and confidence interval (conf) into a u64 and then divide it by the number of decimals (which we must also convert to a u64). Since Pyth stores this as a negative, we must convert it to a positive number before dividing. Add the following to your fetch_btc_price function:
        // 2-Format display values rounded to nearest dollar
        let display_price = u64::try_from(current_price.price).unwrap() / 10u64.pow(u32::try_from(-current_price.expo).unwrap());
        let display_confidence = u64::try_from(current_price.conf).unwrap() / 10u64.pow(u32::try_from(-current_price.expo).unwrap());
Finally, we will log the result to Solana's program logs using msg!. Your final instruction should look like this:
#[program]
mod hello_pyth {
    use super::*;
    pub fn fetch_btc_price(ctx: Context<FetchBitcoinPrice>) -> Result<()> {
        // 1-Fetch latest price
        let price_account_info = &ctx.accounts.price_feed;
        let price_feed = load_price_feed_from_account_info( &price_account_info ).unwrap();
        let current_timestamp = Clock::get()?.unix_timestamp;
        let current_price = price_feed.get_price_no_older_than(current_timestamp, STALENESS_THRESHOLD).unwrap();

        // 2-Format display values rounded to nearest dollar
        let display_price = u64::try_from(current_price.price).unwrap() / 10u64.pow(u32::try_from(-current_price.expo).unwrap());
        let display_confidence = u64::try_from(current_price.conf).unwrap() / 10u64.pow(u32::try_from(-current_price.expo).unwrap());


        // 3-Log result
        msg!("BTC/USD price: ({} +- {})", display_price, display_confidence);
        Ok(())
    }
}
Nice job! Let's test it out.
Build the Program
Click 🔧 Build in the left-hand menu to compile your program. You should see a success message in the console:
Building...
Build successful. Completed in 3.17s.
If you have followed the instructions, you should not get any errors, but if you do, try and follow the instructions to debug. If you need help, feel free to reach out on Discord. We're happy to help!
Deploy the Program
Since this project is just for demonstration purposes, we can use a "throw-away" wallet. Solana Playground makes it easy to create one. You should see a red dot "Not connected" in the bottom left corner of the browser window. Click it:
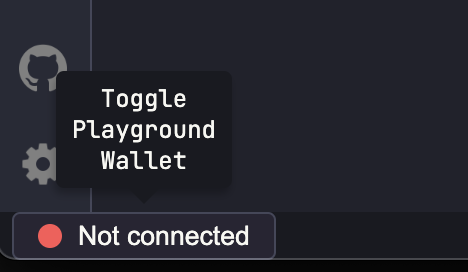
Solana Playground will generate a wallet for you (or you can import your own). Feel free to save it for later use, and click continue when you're ready. A new wallet will be initiated and connected to Solana devnet. You will need about 5 Devnet SOL to deploy the program (Check out our Guide on Airdropping Devnet SOL).
You should click the "⚙️" icon in the bottom left to verify you are on "devnet". You can also select "custom" from the drop-down list if you would like to connect to your Quicknode Devnet Endpoint.
💡 Creating a Quicknode Endpoint
Connect to a Solana Cluster with Your Quicknode Endpoint
To build on Solana, you'll need an API endpoint to connect with the network. You're welcome to use public nodes or deploy and manage your own infrastructure; however, if you'd like 8x faster response times, you can leave the heavy lifting to us.
See why over 50% of projects on Solana choose Quicknode and start your free trial here. We're going to use a Solana Devnet endpoint.
Copy the HTTP Provider link: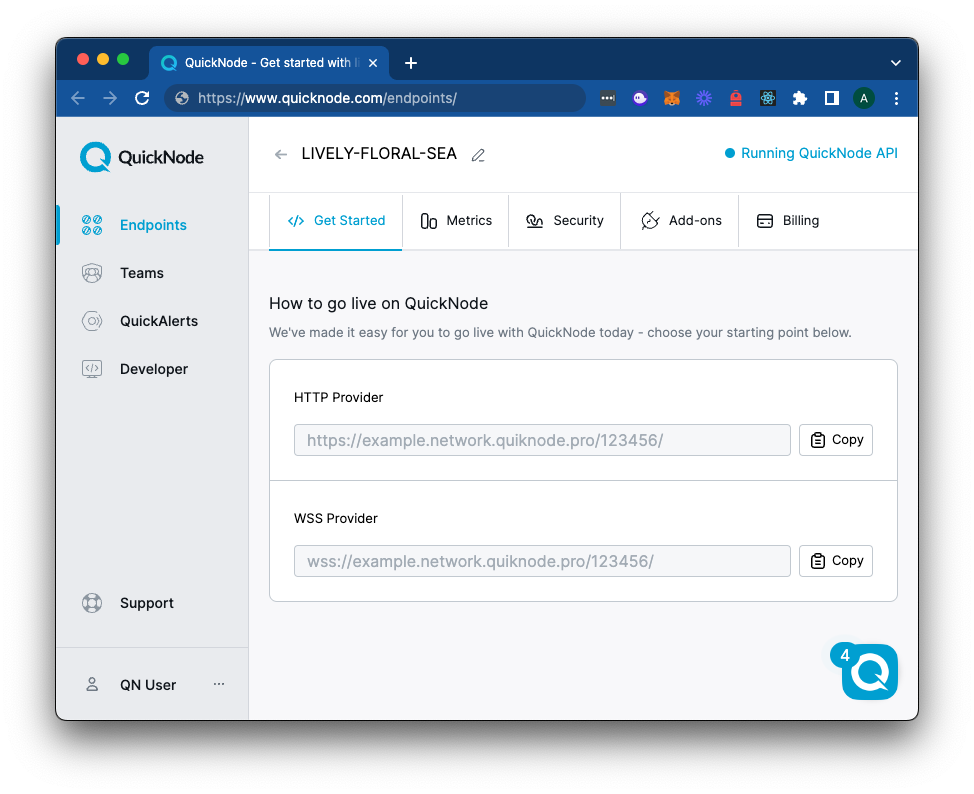
When you are ready, click the Tools Icon 🛠 on the left side of the page, and then click "Deploy." This will take a few minutes, but you should see a success message when it is complete.
Test the Program
Now that your program is on-chain let's test it out. Click the "🧪" icon on the left side of the page. Solana Playground has built an easy-to-use interface for testing programs. Expand the fetchBtcPrice instruction by clicking the toggle arrow:
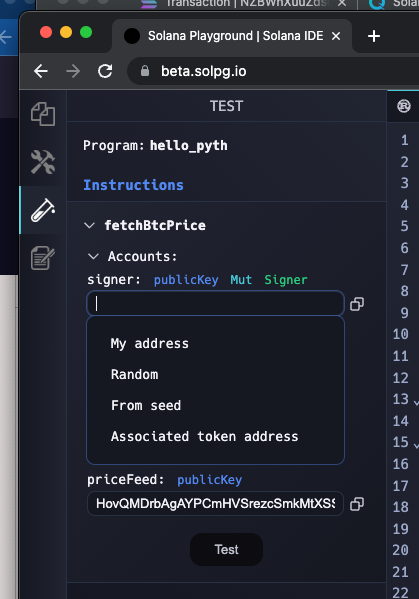
Select My address as the signer, and paste the same Pyth price feed you used in your program (we used HovQMDrbAgAYPCmHVSrezcSmkMtXSSUsLDFANExrZh2J).
Click "Test" to send the transaction to the devnet cluster. You should see a success message in the console:
Testing 'fetchBtcPrice'...
✅  Test 'fetchBtcPrice' passed.
You'll also see a notification pop-up with a Solana Explorer link. Open it. If the notification disappeared before you clicked it, you can either test your instruction again or find the transaction in the Solana Explorer by searching for your program ID on devnet (e.g., explorer.solana.com/address/YOUR_PROGRAM_ID?cluster=devnet). Your program ID is available in the 🛠️ Tools menu under "Program ID" and in your declare_id statement in lib.rs.
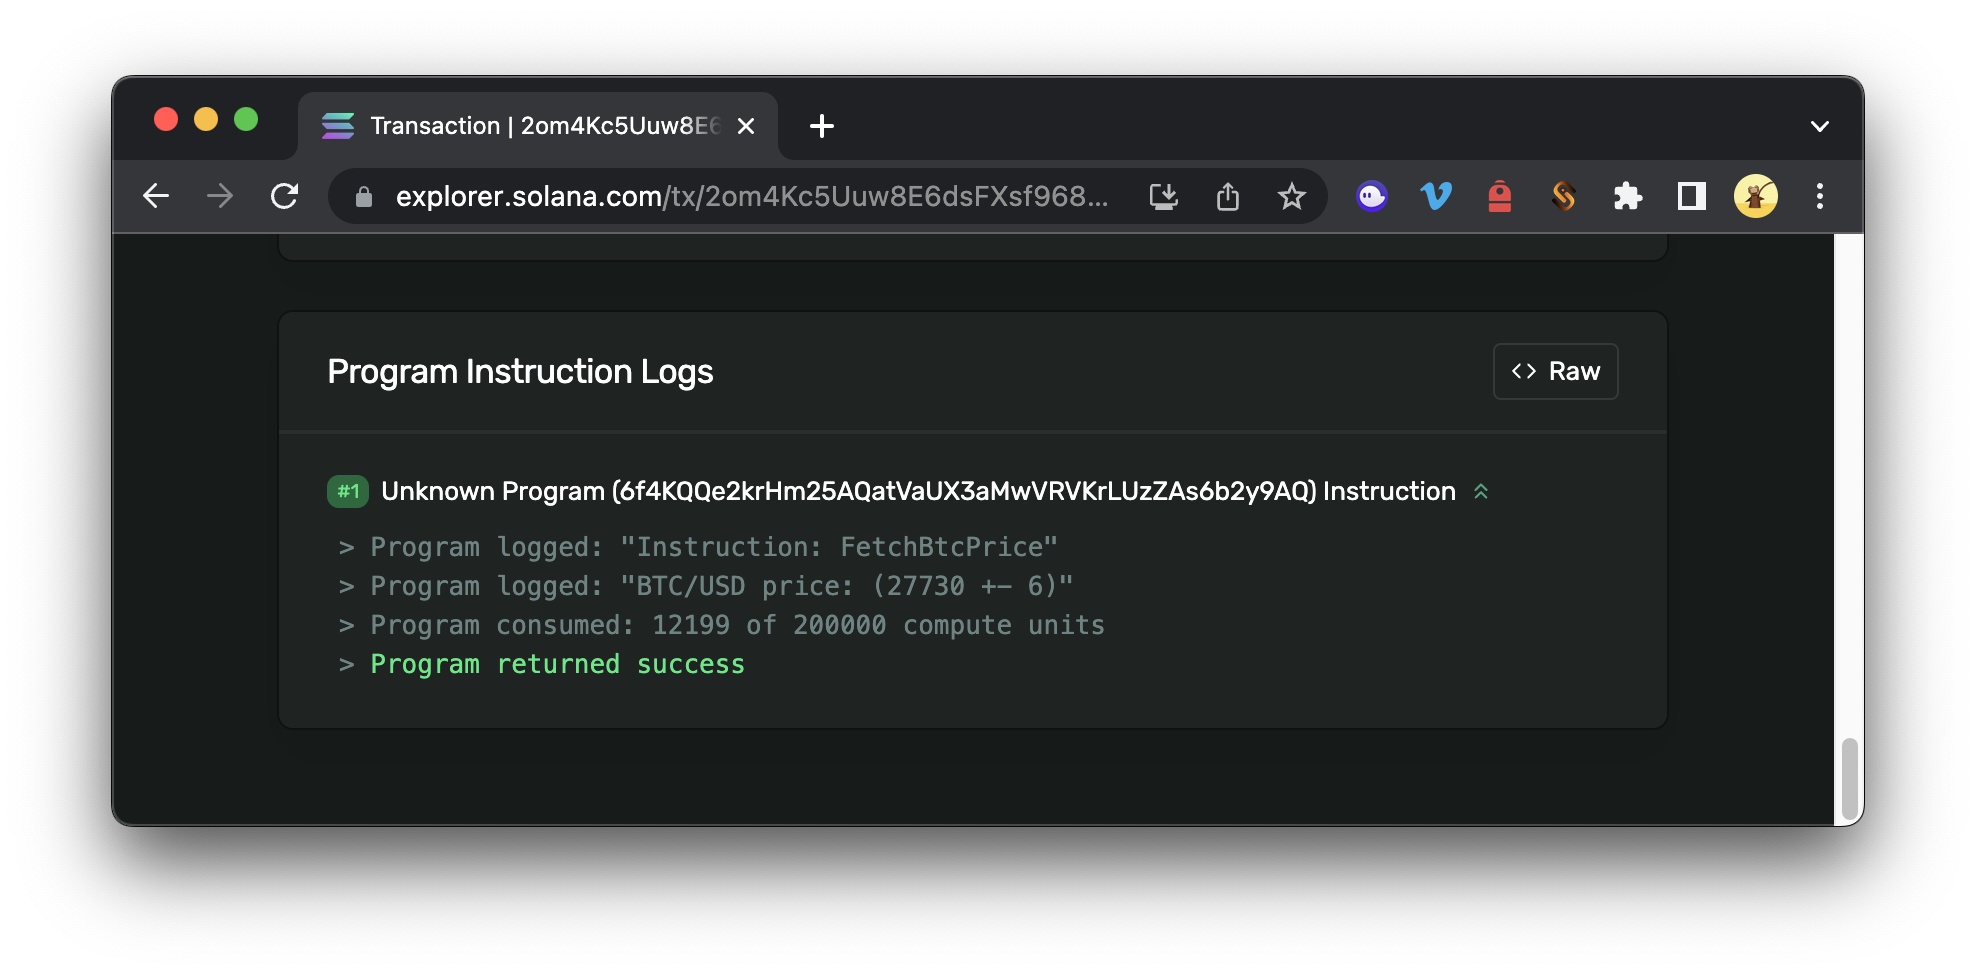
When you open the transaction in the Solana Explorer, you should see a "Program Instructions Logs" section that includes the price of BTC in USD:
Nice job!
You can access our complete code on Solana Playground.
Wrap Up
You just built a program that fetches the price of BTC from Pyth and logs it to Solana's program logs. You can use this same pattern to create programs that fetch any data from Pyth and use it as a starting point for building more complex programs.
Got a question or idea you want to share, drop us a line on Discord or Twitter!
We ❤️ Feedback!
Let us know if you have any feedback or requests for new topics. We'd love to hear from you.
Resources
- Pyth
- Pyth Docs
- Pyth Feeds (Solana Devnet)
- Pyth Rust SDK (GitHub Crate)
- Solana Playground