16 min read
Overview
Shipping NFTs has never been easier. Whether you are a Web2 company looking to get started with NFTs or if you have a Web3 community that you would like to reward with NFTs, Crossmint's Mint API allows you to mint NFTs to your users with a single POST request. Crossmint's NFT API is available directly through Quicknode's Marketplace, so getting started is even easier. In this guide, you will create a simple script that will allow you to mint and deliver NFTs directly to a list of customers (via wallet address or email address 👀).
What You Will Do
In this guide, we will:
- Create a Quicknode endpoint with the Crossmint API Add-on
- Create NFT Metadata
- Airdrop NFTs to a combined list of Solana wallets and email addresses using the Crossmint API (using TypeScript)
- Verify that the airdrops were successful
- Log airdrop details to a
.jsonfile
What You Will Need
To follow along with this guide, you will need the following:
- Basic knowledge of the JavaScript/TypeScript programming languages
- Nodejs installed (version 16.15 or higher)
- npm or yarn installed (We will be using yarn to initialize our project and install the necessary packages. Feel free to use npm instead if that is your preferred package manager)
- TypeScript experience and ts-node installed
Set Up Your Project
Create a new project directory in your terminal with the following:
mkdir crossmint-drop
cd crossmint-drop
Create a file for your app, app.ts:
echo > app.ts
Initialize your project with the "yes" flag to use default values for your new package:
yarn init --yes
#or
npm init --yes
Create a tsconfig.json with .json importing enabled:
tsc -init --resolveJsonModule true --target es2020
Create a results folder that we will use to save the output of our airdrops:
mkdir results
Install Solana Web3 Dependency
Though not required for this exercise, we will use the Solana-Web3 library to verify wallet addresses before calling the Crossmint API. We will also use Axios to make our HTTP requests to Crossmint. In your terminal, enter:
yarn add @solana/web3.js@1 axios
#or
npm install @solana/web3.js@1 axios
We will need a few components from these libraries and fs for writing our results to a file. Open the crossmint-drop folder in an IDE of choice (we'll be using VSCode) and add the following import statements in app.ts on line 1:
import { PublicKey } from '@solana/web3.js';
import axios from 'axios';
import fs from 'fs';
Connect to a Solana Cluster with Your Quicknode Endpoint
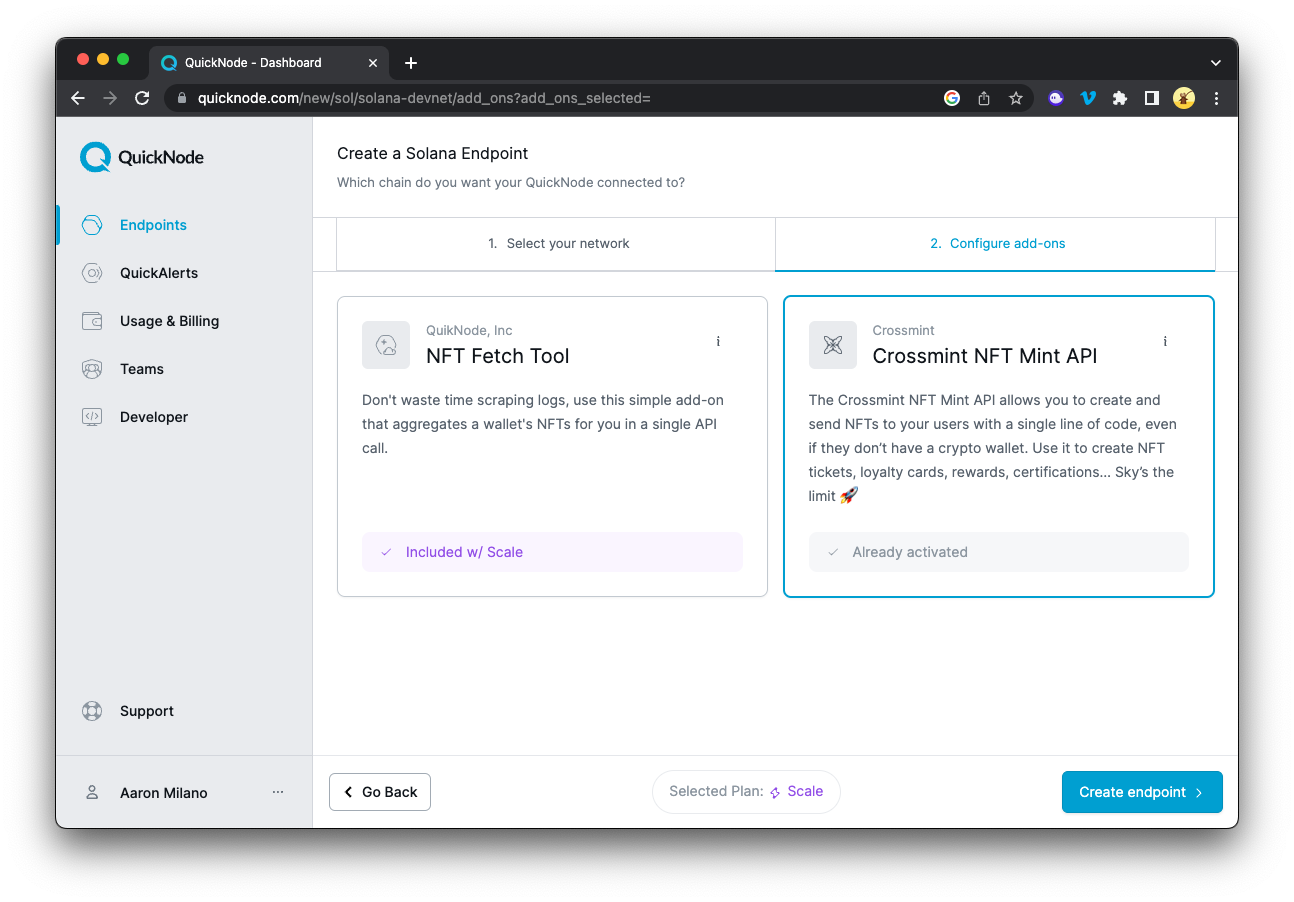
To get quick access to the Crossmint API, which allows you to create and send NFTs to your users with a single line of code, even if they do not have a crypto wallet, you will need to create a Quicknode endpoint with the Crossmint add-on. Sign up for an account here. Create a new Solana Devnet Endpoint and make sure to configure it with the Crossmint NFT Mint API:

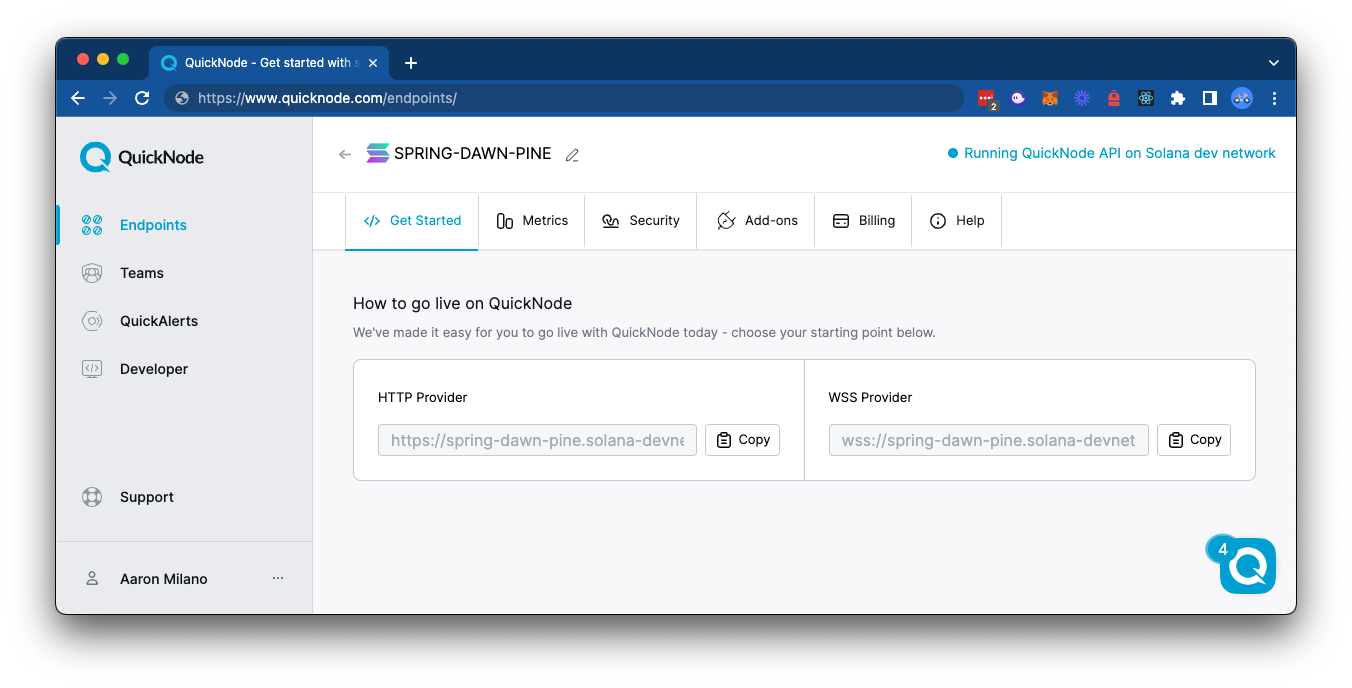
Copy the HTTP Provider link:

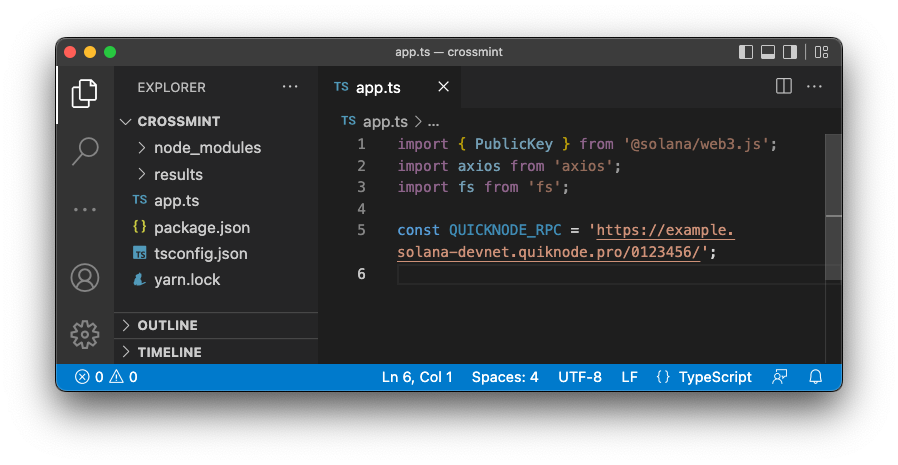
Inside app.ts under your import statements, declare your RPC (we will need this when we run our script):
const QUICKNODE_RPC = 'https://example.solana-devnet.quiknode.pro/0123456/';
Your environment should look like this.

You are all set. Let's build our app!
Declare Types
We will use TypeScript for our script, so we will define a few types and interfaces to help keep our code clean and accurate. If you are a JavaScript developer or prefer not to use TypeScript, that is okay.
Create a section in your code, // Types and add the following code at the top of your app, below your imports:
// TYPES

type Email = string;
type StringPubKey = string;
type Destination = Email | StringPubKey;

interface NftMetadata {
    name: string,
    image: string,
    description: string
    attributes: {trait_type: string, value: string}[],
    properties: {
        files: {uri: string, type: string}[],
        category: string
    }
}

interface MintNftProps {
    destination: Destination,
    qnEndpoint: string,
    collectionId: string,
    nftInfo: NftMetadata
}

interface FetchMintProps {
    qnEndpoint: string,
    collectionId: string,
    crossmintId: string
}

interface MintResult {
    destination: string,
    crossmintId: string,
    mint: string
}
Here is a little about each declaration:
- First, we declare our Destination as an Email or StringPubKey (this will be where we want our users' NFTs to go).
- Next, we define our NftMetadata, which accepts basic information about our NFT, including an array of traits.
- MintNftProps defines the inputs we will use for our mint function. We will need a destination, a Quicknode endpoint, the collection ID, and the metadata of the NFT being minted.
- FetchNftProps defines the inputs we will use to check the status of our mint.
- MintResult outlines how we will log our results (including the destination, a unique ID from CrossMint, and the mint address--a unique public key on the Solana blockchain).
Define Key Constants
Let's define a few key constants for our project. Below your types, add:
// CONSTANTS

const QUICKNODE_RPC = 'https://example.solana-devnet.quiknode.pro/0123456/';
const COLLECTION_ID = 'default-solana';
const DROP_LIST: Destination[] = [
    'quickguides@test.com',
    'CTrLzkrcnqgqSTmzJ146ZTRkLAvwcjnxGSZBvqC5BH3w',
    'quickdemo@test.com',
    'DemoKMZWkk483hX4mUrcJoo3zVvsKhm8XXs28TuwZw9H'
];
const DELAY = 1000;
- We first moved our
QUICKNODE_RPCto be with the rest of our constants. - We then set our
COLLECTION_IDtodefault-solana. This is the default value for Crossmint NFT mints on Solana. If you are planning to launch a collection of NFTs, it may make sense to create your own collection. You can do so using thecm_createCollectionmethod (docs). We will use the default for this example. - A list of email addresses and Solana wallet addresses that we want to send NFTs to (we will set up our app to be able to handle both). Crossmint's Mint API creates wallets for new users, enabling you to send NFTs to their email addresses and easily on-board new users.
- We will add a simple delay between each mint request to Crossmint to prevent hitting any rate limits. We recommend reviewing the Crossmint best-practices if you plan on launching any sizeable NFT drop. We will set a
DELAYto 1 second (1,000 ms).
Let's add one additional utility constant, a wait function. We will use this to create a delay between API calls:
async function wait(ms: number):Promise<void> {
    return new Promise<void>((resolve) => {
      setTimeout(() => {
        resolve();
      }, ms);
    });
}
Alright! Let's jump into the Crossmint API.
Create Mint Function
Let's create our HTTP request to Crossmint to mint our NFT. The function will do three things:
- Validate our destination as a valid email address or Solana PublicKey
- Assemble post request
- Send post request and handle the response
In app.ts, add a requestCrossMintNft function:
const requestCrossMintNft = async ({ destination, qnEndpoint, collectionId, nftInfo }: MintNftProps) => {
    // Regular expression to validate an email address
    const emailRegex: RegExp = /^[a-zA-Z0-9.!#$%&'*+/=?^_`{|}~-]+@[a-zA-Z0-9](?:[a-zA-Z0-9-]{0,61}[a-zA-Z0-9])?(?:\.[a-zA-Z0-9](?:[a-zA-Z0-9-]{0,61}[a-zA-Z0-9])?)*$/;

    // Validate & define recipient (as either email address or Solana wallet else throw an error)
    let recipient: string;
    if (emailRegex.test(destination)) {
        recipient = `email:${destination}:sol`;
    } else if (new PublicKey(destination)) {
        recipient = `solana:${destination}`;
    }
    else {
        throw new Error('Invalid destination address (must be a valid email address or a Solana Wallet address).');
    }

    // Assemble POST Request
    const metadata = {
        "name": nftInfo.name,
        "image": nftInfo.image,
        "description": nftInfo.description
    };
    const data = {
        jsonrpc: "2.0",
        id: 1,
        method: "cm_mintNFT",
        params: [collectionId, recipient, metadata], // https://docs.crossmint.com/docs/cm-mintnft
    };
    const config = {
        headers: {
            "Content-Type": "application/json",
        },
    };

    // Send Post Request
    return new Promise<string>(async (resolve, reject) => {
        try {
          let response =  await axios.post(qnEndpoint, data, config);
          resolve(response.data.result.id as string);
        } catch (error) {
          reject("Error sending request to CrossMint. Check your inputs.");
        }
      });
}
Here's what we are doing:
- First, we use a JavaScript Regular Expression (RegExp) and Solana PublicKey class to check that the supplied address is a valid destination. Feel free to modify this based on your distribution list (e.g., if you are only sending to email addresses, you do not need the Solana PublicKey check and vis versa). If invalid, we throw an error.
If you have never used a Regular Expression before, the emailRegex pattern checks that the input string starts with one or more characters from the set a-z, A-Z, 0-9, .!#$%&'*+/=?^_{|}~-, followed by the @ symbol, then one or more characters from the set a-z, A-Z, 0-9, and hyphen -, with a maximum of 61 characters and the option of having a dot . followed by more characters, up to a maximum of 61 characters, from the set a-z, A-Z, 0-9, and hyphen -.
-
We then assemble our POST request based on the Crossmint documentation. Note that our
metadatais compiled using ournftInfoparameter. This means we can create custom attributes for each NFT we mint! -
Finally, we return a promise to POST the
cm_mintNFTmethod. If a successful response is received, the promise returns the Crossmint ID (a unique transaction identifier).
Create a Fetch Mint Function
After we have sent the mint request to Crossmint, we will need a way to verify that our mint succeeded (up until now, all we know is that Crossmint successfully received our request and not that Solana has confirmed the minted NFT). To do this, we can do a status check with Crossmint using the ID returned from the previous step.
Create a new function, fetchMintAddress:
const fetchMintAddress = async ({ collectionId, qnEndpoint, crossmintId }: FetchMintProps) => {

    // Assemble POST Request
    const data = {
        jsonrpc: "2.0",
        id: 1,
        method: "cm_getNFTMintStatus",
        params: [collectionId,crossmintId], //https://docs.crossmint.com/docs/cm-getnftmintstatus
    };
    const config = {
        headers: {
            "Content-Type": "application/json",
        },
    };

    // Send POST Request
    return new Promise<string>(async (resolve, _reject) => {
        try {
          let response =  await axios.post(qnEndpoint, data, config);
          resolve(response.data.result.onChain.mintHash as string);
        } catch (error) {
          //reject("Error fetching mint address.");
        }
      });
}
Structurally, this is pretty similar to our previous step:
- We assemble the POST request (this time calling the
cm_getNFTMintStatusand passing in thecrossmintIdreturned from the previous step). - Send the POST request, and, if successful, return the unique on-chain mint hash of the minted NFT.
Combined, you can run these two functions to mint a single NFT, but we want to have some fun--let's airdrop a bunch 👇
Create Bulk Airdrop Function
We have all the tools to mint and confirm NFTs using the Crossmint API--we need a way to perform a bulk drop with some ability to customize each NFT. We need to create a dropNfts function that will:
- Use
.mapto create a promise from each Destination in ourdropList. - Define our metadata based on some unique characteristic (in this case, we will use the index,
i, to give a unique name and trait to each NFT. Feel free to update the metadata to something that suits your style! - Create a promise that:
- Requests Crossmint to mint an NFT using
requestCrossMintNft - Waits 1 minute for the minting to take place by calling. Note: this is a simple method for our demo. Depending on your needs, you may want to set up some query/retry logic).
- Verifies the mint was successful using
fetchMintAddress - Returns information about the dropped NFT
- Requests Crossmint to mint an NFT using
- Execute all of the promises using
Promise.allSettled() - Create a log of our results in the
resultsdirectory
This following function is a little long, but we have already done all the heavy lifting in our previous steps! In app.ts create a dropNfts function that accepts a list of Destinations, your Quicknode endpoint, and your Collection ID:
const dropNfts = async (dropList: Destination[], qnEndpoint: string, collectionId: string) => {
    console.log('Generating promises...');
    let promises = dropList.map((drop, i) => {
        // 1-Define Custom Metadata
        const nftNumber = (i+1).toString();
        const nftInfo = {
            name: `Demo Airdrop # ${nftNumber}`,
            image: 'https://arweave.net/UTFFfaVA3HoFcxwoMHEcvBLq19HrW6FuzpyygXqxduk',
            description: 'Demo airdrop NFT using Crossmint Mint API via the Quicknode add-on',
            attributes: [
                {
                    trait_type: "background",
                    value: "blue"
                },
                {
                    trait_type: "type",
                    value: "pixel"
                },
                {
                    trait_type: "id",
                    value: nftNumber
                }
            ],
            properties: {
                files: [
                    {
                        "uri": "https://arweave.net/UTFFfaVA3HoFcxwoMHEcvBLq19HrW6FuzpyygXqxduk",
                        "type": "image/png"
                    }
                ],
                category: "image"
            }
        };
        // 2-Create Promise
        return new Promise< MintResult >(async (resolve, reject)=>{
            setTimeout(async ()=>{
                try {
                    let crossmintId = await requestCrossMintNft({
                      destination: drop,
                      qnEndpoint,
                      collectionId,
                      nftInfo
                    });
                    if (!crossmintId) throw new Error('No CrossMint ID received.');
                    await wait(60000); // wait 1 min
                    let mint = await fetchMintAddress({
                        collectionId,
                        qnEndpoint,
                        crossmintId
                    });
                    resolve({
                        destination: drop,
                        crossmintId: crossmintId,
                        mint: mint ?? ''
                    });
                } catch (error) {
                    reject('Unknown Error sending request to CrossMint.');
                }
            },i * DELAY);
        })
    });
    // 3-Execute Promises
    console.log('Executing promises...(this will take 1min +)');
    let results = await Promise.allSettled(promises);
    // 4-Save Results
    console.log('Writing results to ./results/results.json');
    let data = JSON.stringify(results);
    fs.writeFileSync('./results/results.json',data);
}
Epic! Let's fire it up.
Drop Your NFTs 🪂
At the end of your app.ts, call your dropNfts function:
dropNfts(DROP_LIST, QUICKNODE_RPC, COLLECTION_ID);
Inside your terminal, enter the following:
ts-node app
After about a minute, you should see a new results.json generated that contains an array of your mint results:
[
    {
        "status": "fulfilled",
        "value": {
            "destination": "quickguides@test.com",
            "crossmintId": "60f33f72-a8d8-41ce-b28a-bc899aa7b929",
            "mint": "AbJjT4j9MYQTya9aZ9qmCd36dspwoMnhfsEpZL91sFwG"
        }
    },
    {
        "status": "fulfilled",
        "value": {
            "destination": "DemoKMZWkk483hX4mUrcJoo3zVvsKhm8XXs28TuwZw9H",
            "crossmintId": "0c4836cb-26dc-48a2-a55f-5d3ca40699da",
            "mint": "5RRDSrq6ME5Yz9qXcKRvSQeGD1F2AEnURnjfCs7BTEvN"
        }
    },
    // etc.
]
Nice job!
Wrap Up
And just like that, you can bulk airdrop NFTs to your web2 and web3 customers! If you had any trouble with this guide or just want to show off your NFT project, drop us a line on Discord or Twitter and let us know what you are up to!
We ❤️ Feedback!
If you have any feedback on this guide, let us know. We’d love to hear from you.