In the following section, we'll show you how to set up a Stream and configure your destination settings to use Amazon S3.
Streams Settings
On your Quicknode dashboard, navigate to the Streams page by clicking the Streams tab on the left side-panel. After, click the Create Stream button in the top-right corner. You'll be prompted to first configure your Stream settings:

- Chain and Network: Begin by selecting a target Chain and Network from the list of supported chains and networks. You can check the supported chains and network here
- Dataset: Once you've chosen the network and chain, proceed to select a Dataset that defines the type of data you intend to stream. See the full list of supported data schemas here.
- Stream name: A stream name will be populated by default but you can modify this if needed.
- Region: By default, the region most closest to you will be populated, however, you can modify this if needed.
- Batch size: Configure the batch size for your Stream. By default this will be set to 1 (for minimal latency), however you can update this if needed. Note that Streams will not proceed to the next batch until receiving confirmation that the current batch was successfully written to S3.
- Stream start: By default, your stream will start at the tip of the chain (e.g., latest block number), however if you are backfilling (retrieving historical data), you can update this value to start from a specific block number.
- Stream end: If you want your Stream to end a specific block number, update this value. Otherise, by default the Stream won't end.
Reorg Handling
Streams can be configured to handle reorgs. You can enable the Latest block delay and Restream on reorg settings to properly manage reorgs to your preferences. Check out the Reorg handling page to learn more about Reorgs and how to properly manage them.

Destination Settings
To initiate the stream creation process through S3, follow these steps:

For optimal performance, especially during backfills, we strongly recommend enabling S3 Transfer Acceleration on your S3 bucket. Without acceleration, S3 can become a significant bottleneck in your data pipeline, particularly when processing large amounts of historical data.
To enable Transfer Acceleration:
- Go to your S3 bucket properties
- Scroll down to "Transfer Acceleration"
- Click "Enable" and save the changes
The acceleration endpoint will be in the format: https://<bucket-name>.s3-accelerate.amazonaws.com
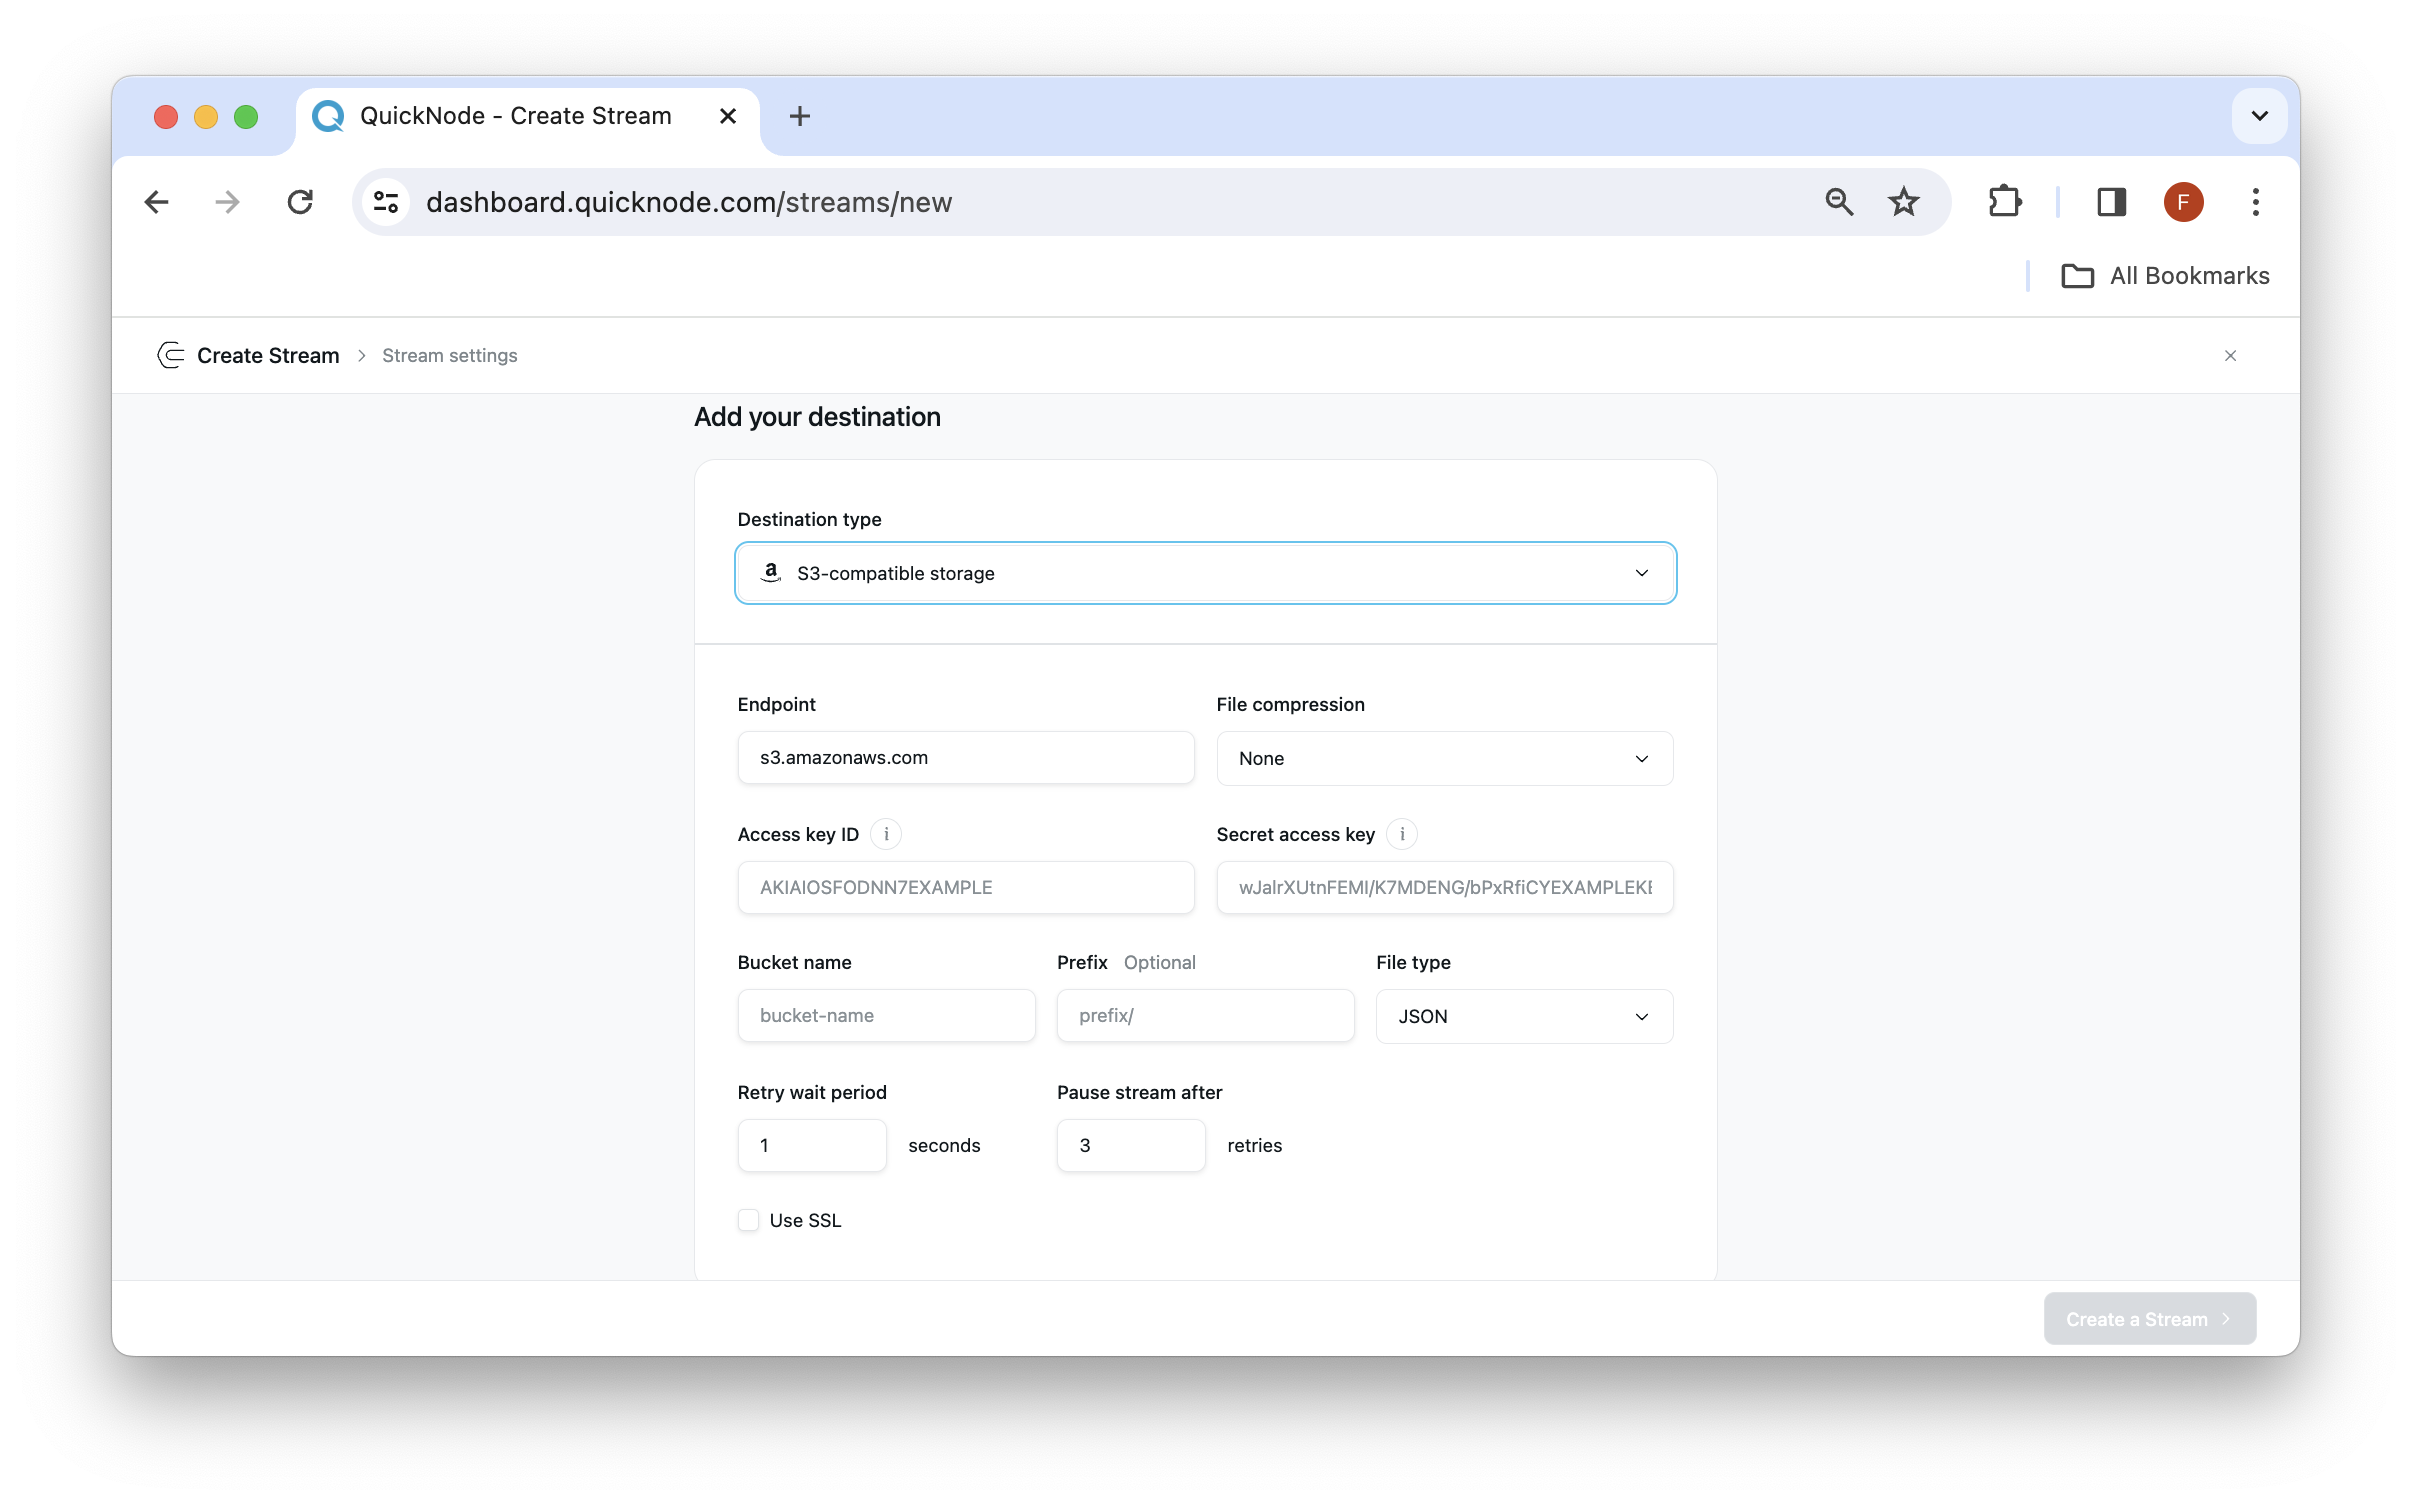
- Destination: Select the destination type as S3-compatible storage. It will open a new sections for adding destination settings.
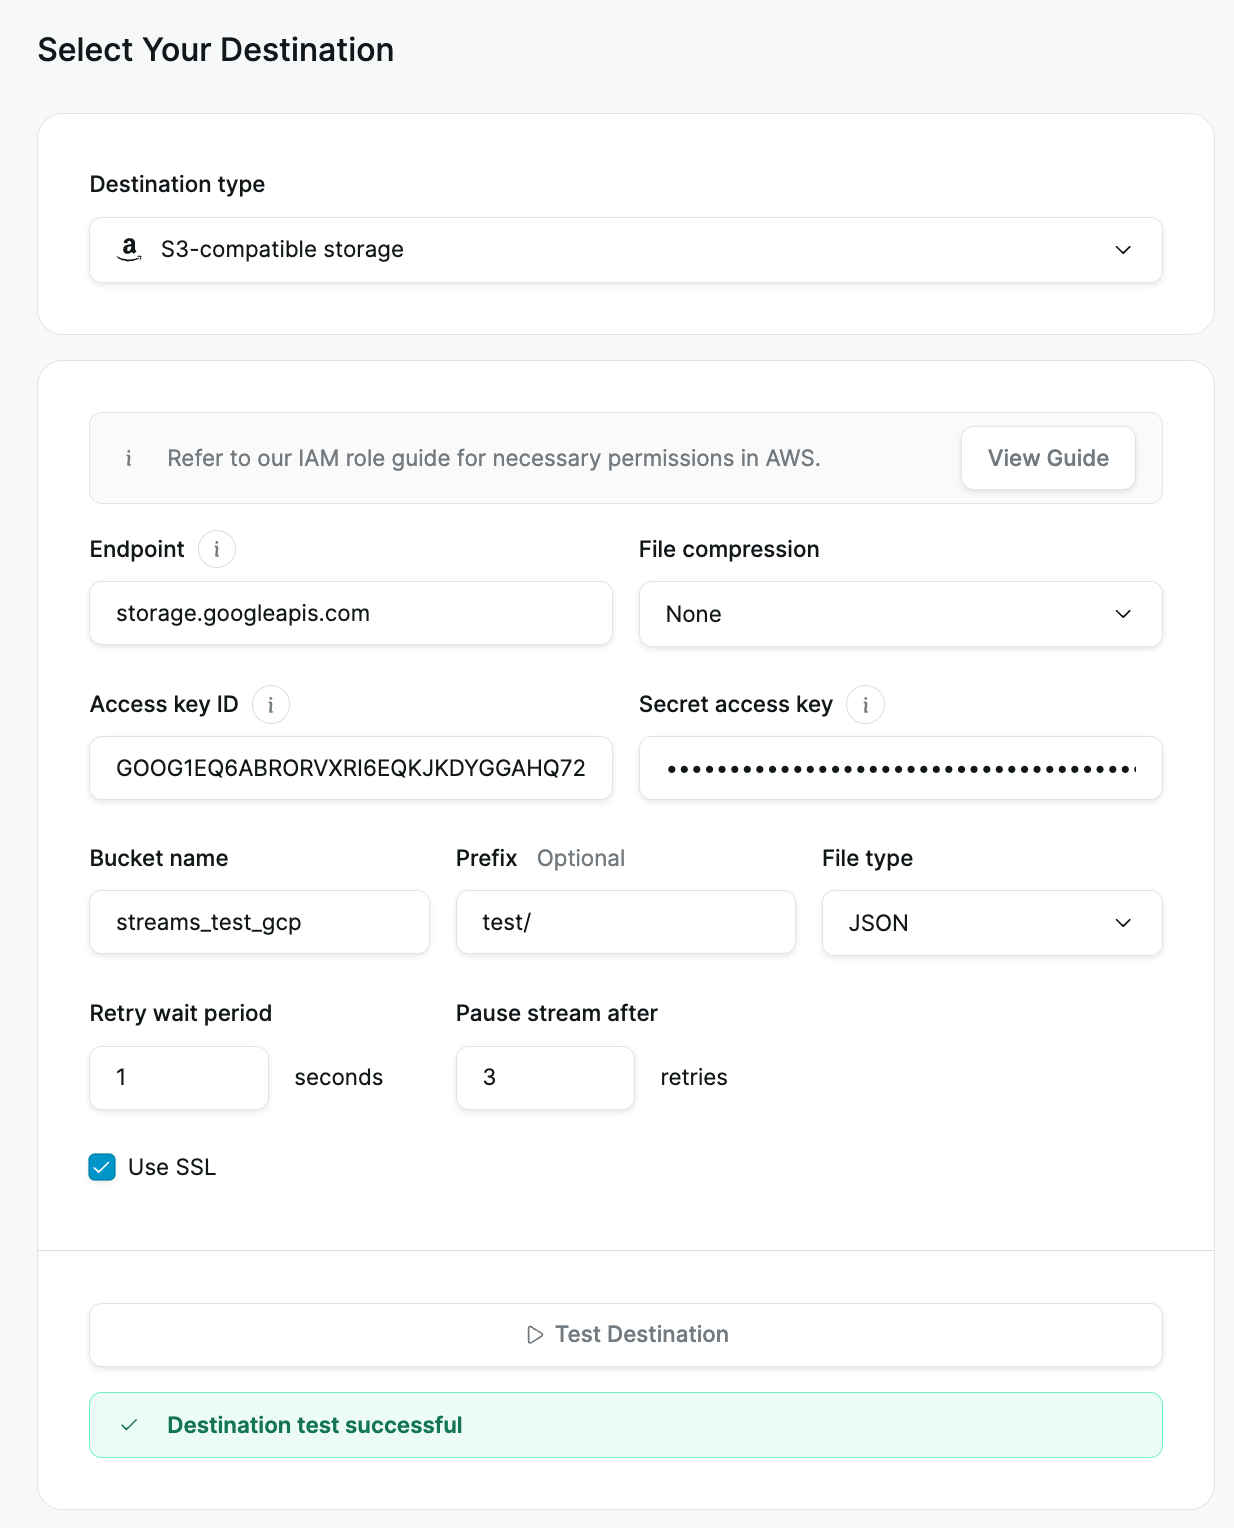
- S3 Endpoint: Put the S3 endpoint in S3 Endpoint section. For Amazon S3, leave the field as it is, for GCP use https://storage.googleapis.com, and other endpoint URLs depending on the service you're streaming files to.
- Payload compression: Available on all paid plans, compression optimizes bandwidth usage in production. You can leave this value as
Noneif you prefer human-readable messages from Streams - Access Key ID and Secret Access Key: Provide your unique identifier for storage access (found in your storage service's IAM section or account settings) and the corresponding secret access key for authentication (retrieve at creation in your storage service settings). Some services may call it differently, e.g.
Access Key IDis aProject IDin GCP,Secret Access Keybecomes anAuthorization codein GCP. To know where to find the key ID for AWS here. - Bucket name - Provide the bucket name that your credentials (Access Key ID and Secret Access Key) have write rights to.
- Prefix - The prefix, if any. You can use prefixes to organize objects in your bucket, similarly to folders in a regular file system. To know more on how to use prefixes check here.
- File type - Select the file type from the drop down. Currently streams supports JSONs as the primary format of files.
- Retry wait period - Determine the time for which it should wait to retry to stream the data again. This is the time between retry attempts when a write to S3 fails.
- Pause stream after - Determine the number of tries after which the stream should should pause. When we exhaust retries, we would terminate your stream that you'd be able to resume anytime the delivery setbacks are resolved. This helps prevent data loss while maintaining sequential processing guarantees.
- Use SSL: Check mark the Use SSL checkbox if your service requires this setting (If not selected, you will see an error while trying to create a stream if S3 service requires you to use SSL).
Streams processes blocks sequentially and will not proceed to the next block or batch until receiving confirmation that the current block or batch was successfully written to S3. This ensures data consistency but means your S3 bucket must be able to handle the write operations within a reasonable timeframe.
You can consider using any of the S3-compatible service such as:
Using Azure Blob with Streams S3-compatible storage requires you setting up and running a proxy https://github.com/gaul/s3proxy.
After configuring all the settings according to your preferences, click on the Create a Stream button located in the bottom right corner. This action will create a stream for you, feeding data into the S3-compatible storage you configured earlier.
Creating a key for GCP Cloud Storage

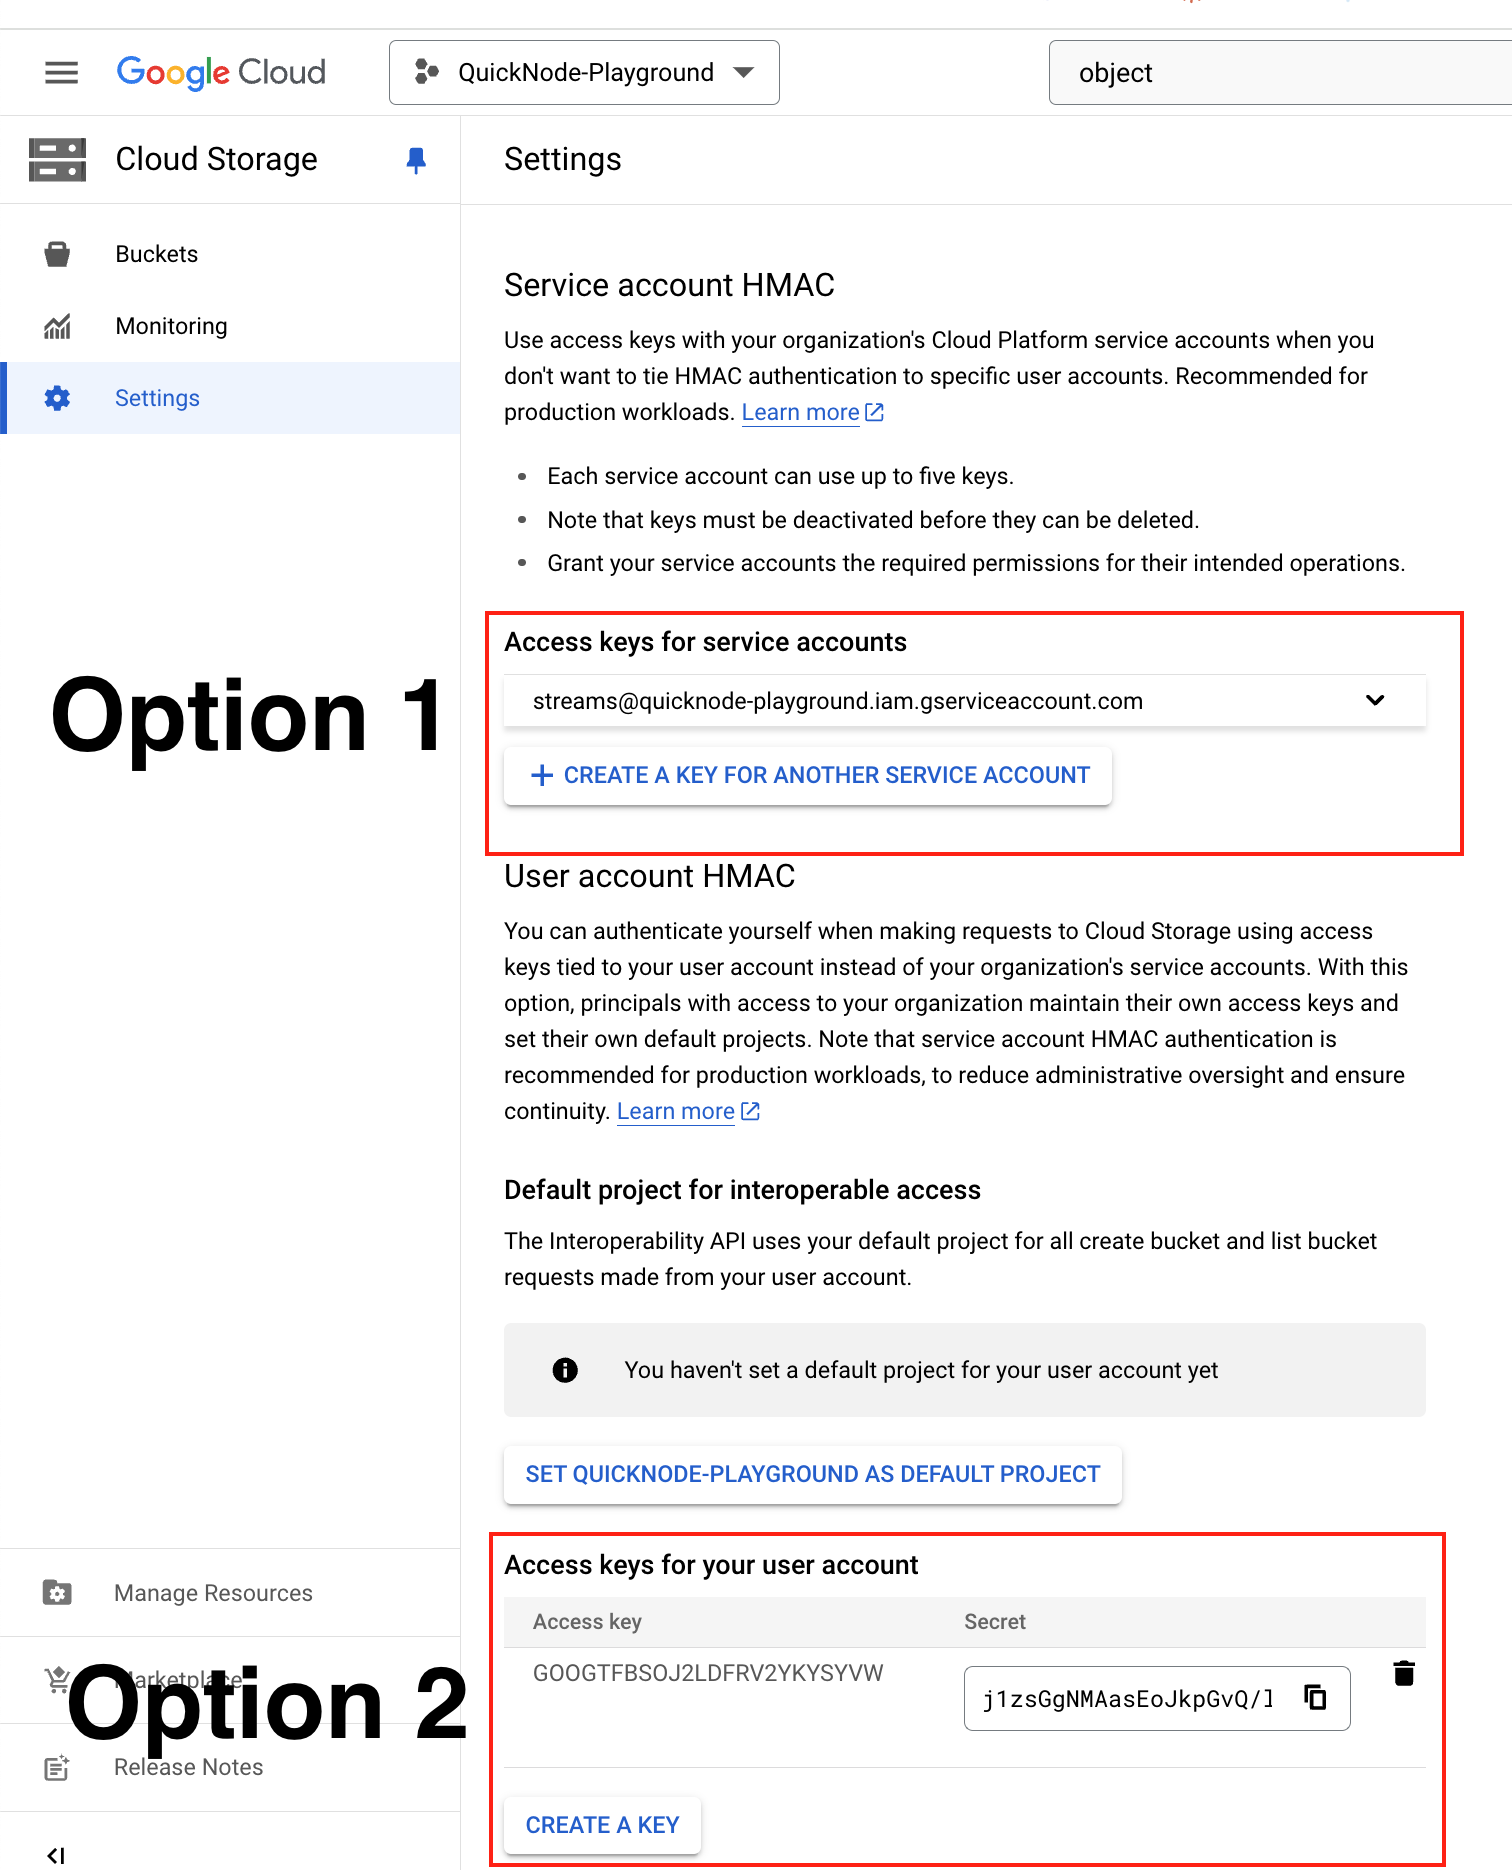
In GCP, users can generate access keys in the Cloud Storage settings under the Interoperability tab. There are two options:
-
Service account HMAC: Recommended for production workloads. This option allows the creation of access keys tied to your organization's Cloud Platform service accounts, ensuring continuity and reducing administrative oversight. Learn more.
-
User account HMAC: This allows authentication with access keys tied to your user account. This is less recommended for production, as it ties access directly to individual user accounts. Learn more.

AWS Permissions
When setting up Quicknode Streams to upload data directly to an AWS S3 bucket, it's essential to configure the correct permissions for the IAM policy applied to a set of secrets you're using with Streams.
Steps to Create IAM Policy for S3 Access
-
Step 1: Log in to AWS Management Console
- Open the AWS Management Console.
- In the navigation bar, click on Services and select IAM.
-
Step 2: Create a New IAM Policy
- In the IAM Dashboard, click on Policies in the left navigation pane.
- Click on the Create policy button.
- Select the JSON tab to define the policy.
-
Step 3: Define the IAM Policy
Copy and paste the following JSON policy document. Replaceyour-s3-bucket-namewith the name of your S3 bucket.- GetBucketLocation allows us to retrieve the location of the bucket
- PutObject lets us upload objects to the specified S3 bucket and folder
- DeleteObject gives Streams a way to delete objects in the specified S3 bucket and folder. This is necessary to enable overwriting of existing objects.
- NOTE: Consider versioning on the S3 bucket. This way, old versions of objects are retained.
{
  "Version": "2012-10-17",
  "Statement": [
    {
      "Effect": "Allow",
      "Action": [
        "s3:GetBucketLocation"
      ],
      "Resource": [
        "arn:aws:s3:::your-s3-bucket-name"
      ]
    },
    {
      "Effect": "Allow",
      "Action": [
        "s3:PutObject",
        "s3:DeleteObject"
      ],
      "Resource": [
        "arn:aws:s3:::your-s3-bucket-name/*"
      ]
    }
  ]
}
-
Step 4: Review and Create Policy
- After pasting the JSON, click on the Review policy button.
- Provide a Name and Description for the policy.
- Click on Create policy.
-
Step 5: Attach Policy to IAM User
- Go to Users in the IAM Dashboard.
- Select the user that will be uploading to S3.
- In the Permissions tab, click on Add permissions.
- Choose Attach policies directly.
- Search for and select the policy you just created.
- Click on Next: Review and then Add permissions.
You have now set up the necessary IAM policy to allow your Quicknode Streams to upload data to your S3 bucket. If you encounter any issues or have further questions, please refer to the AWS IAM documentation or contact our support team.