5 min read
Overview
Team management is available to all QuickNode account holders who are part of a team. This guide covers the essential features for managing teams—including creating teams, inviting users, moving members, and removing users. Additionally, for Enterprise customers, it details Role-Based Access Control (RBAC), an enterprise-grade security feature that allows customers to finely manage user permissions and access controls for enhanced security and compliance.
What You Will Learn
- How to manage teams and users as an admin
- How RBAC roles (
AdminandViewer) govern access to the application and dashboard (Enterprise only)
What You Will Need
- A QuickNode account (RBAC is exclusive to Enterprise plans)
- Familiarity with basic team management concepts
Team Management
Team management allows admins to organize users and maintain control over team activities. These features are available to all QuickNode accounts with team functionality. Below are step-by-step instructions for common team management tasks.
Getting Started: Access the Teams Page
- Log in to your QuickNode account.
- From the dashboard, click the avatar icon in the top-left corner.
- Select Teams to open the Teams page.
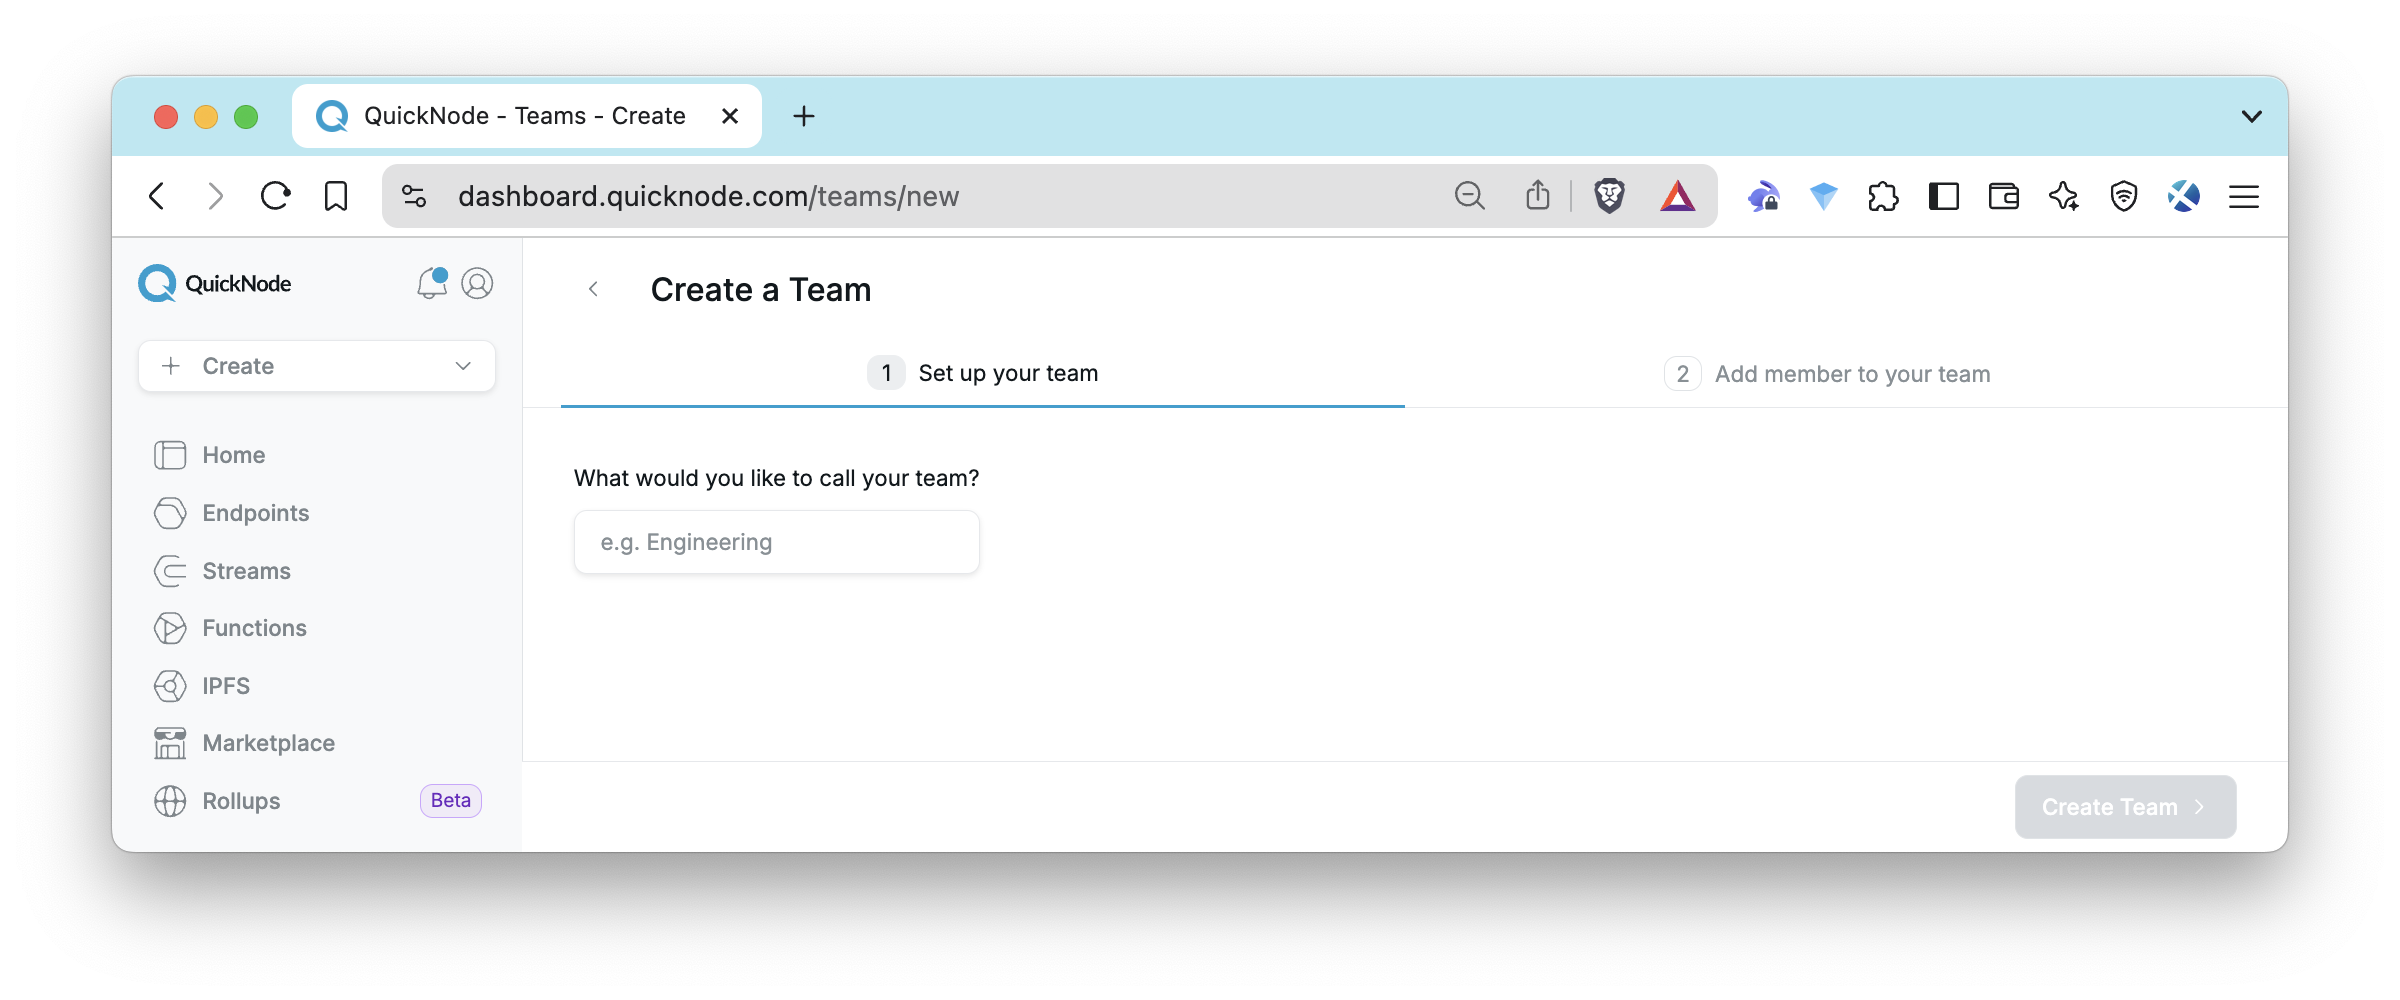
Create a New Team
- Go to the Teams page.
- Click Create Team.
- Enter a team name and click Create Team.
- (Optional) Invite users by adding their names and email addresses.
Note: For non-RBAC users, only the primary user of an organization can create a new team, while any
Admincan create a new team in RBAC enabled organizations.
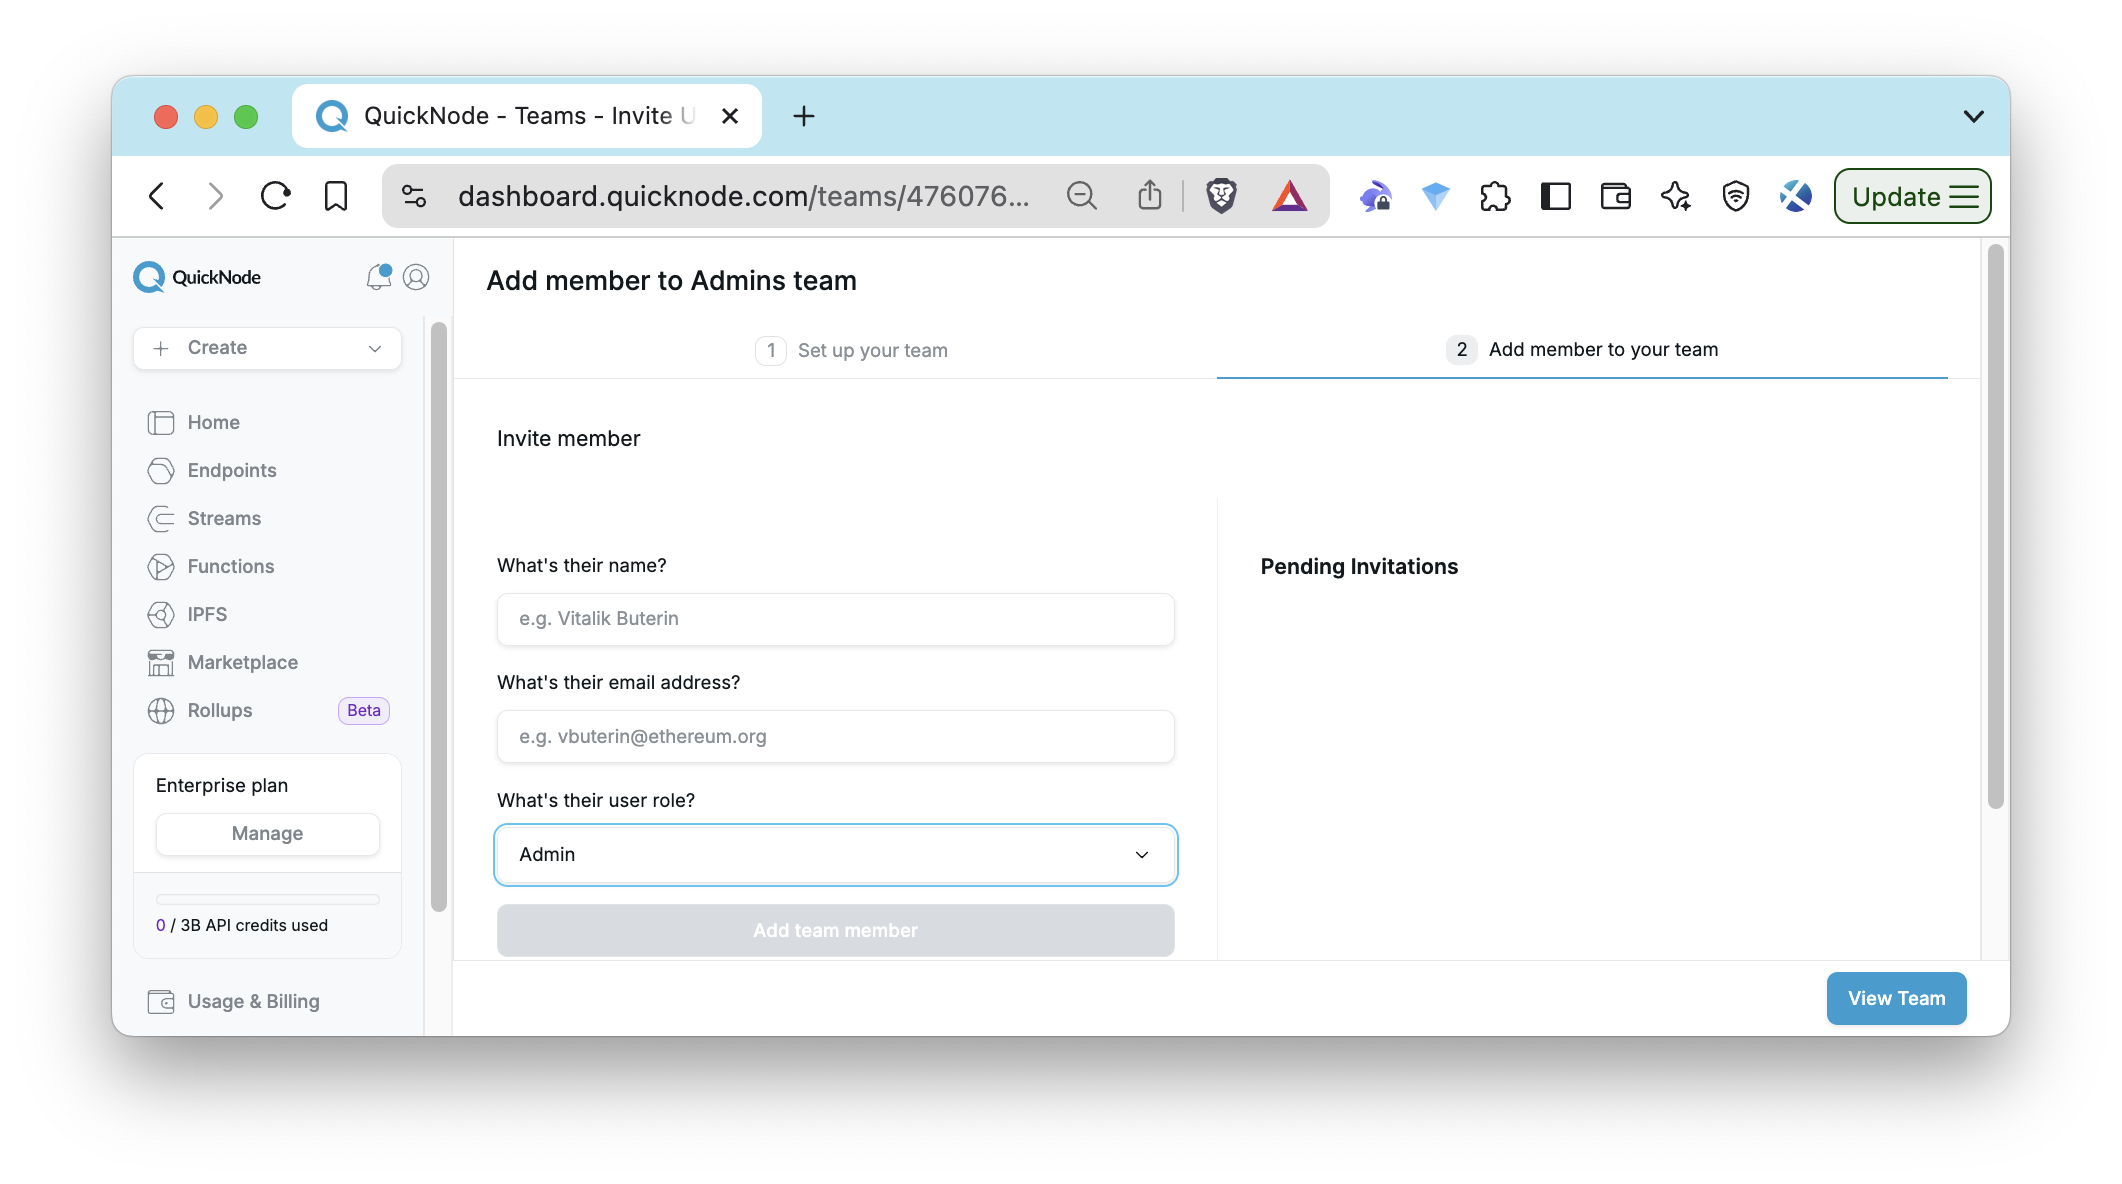
Invite Users
- Navigate to the Teams page.
- Select the team you want to invite users to.
- Click Invite member.
- Enter the user’s name and email address.
- Click Add team member to send an email to the user.
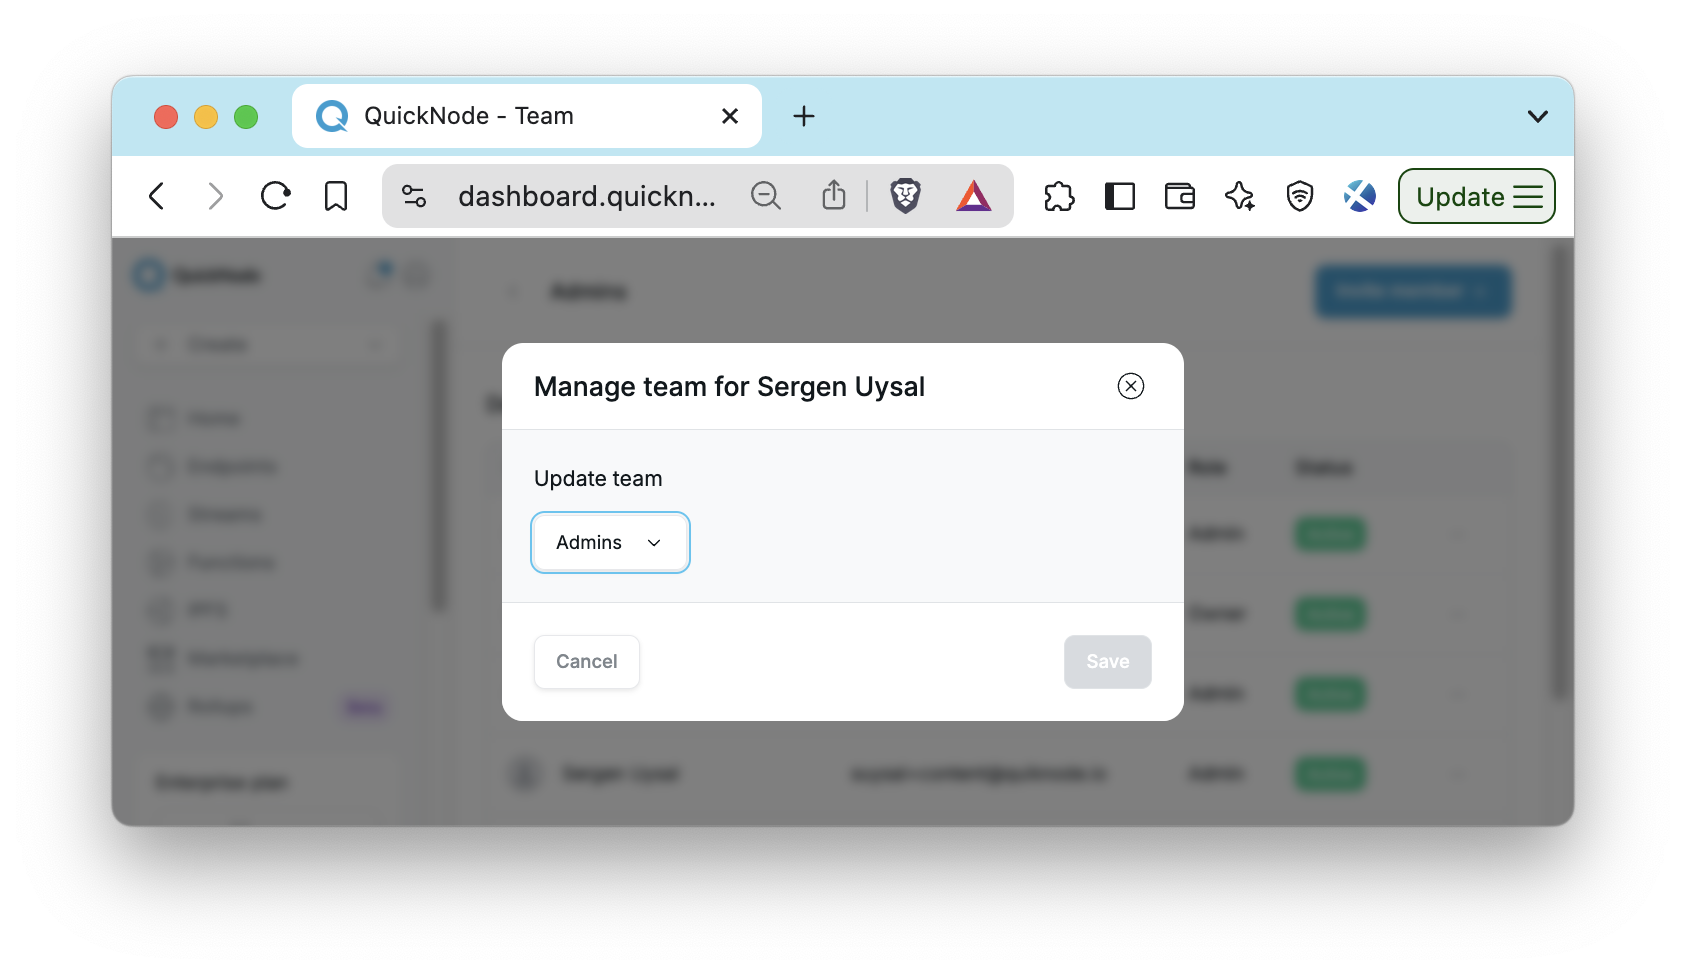
Move Users Between Teams
- Navigate to the Teams section.
- Select the current team of the user you want to move.
- Find the user in the member list and click on the three dots (
⋯) next to their name. - Select Update Team from the dropdown menu.
- Choose the new team you want to move the user to.
- Confirm the move.
Remove Users from a Team
- Navigate to the Teams section.
- Select the team containing the user you want to remove.
- Locate the user in the member list and click on the three dots (
⋯) next to their name. - Select Remove User from the dropdown menu.
- Confirm the removal. The user will no longer be a member of the team.
Role-Based Access Control (RBAC) for Enterprise Customers
Role-Based Access Control (RBAC) is an Enterprise-only feature that builds on team management by adding role-based permissions. With RBAC, Enterprise customers can assign specific roles (Admin or Viewer) to users and API keys, ensuring granular control over access to functionality and data. This section covers RBAC-specific features.
Benefits of RBAC for Enterprises
RBAC empowers Enterprise organizations to:
- Protect Sensitive Data: Restrict access to critical areas, such as billing and API keys, to authorized personnel only.
- Streamline Team Management: Define roles based on job responsibilities, minimizing errors and over-permissions.
- Accelerate Onboarding: Automate secure role assignments for new users, especially in SSO setups, for a fast and efficient start.
- Ensure Compliance: Enforce least-privilege access to meet audit and regulatory standards effortlessly.
- Scale with Confidence: Control permissions for expanding teams and API integrations without sacrificing security.
RBAC is automatically enabled for all Enterprise customers.
When RBAC is enabled for existing accounts:
- If a user was in the Admins team, they were automatically converted into an
Adminrole. - If a user was in any other team, they were automatically converted into a
Viewerrole.
RBAC introduces two roles for users and API keys: Admin and Viewer. These roles dictate the level of access across applications and the dashboard.
User and API Key Roles
| Category | Permission/Action | Admin | Viewer |
|---|---|---|---|
| User Roles | Access Level | Full access to all functionality in the application and dashboard | Read-only access in the application and dashboard |
| Dashboard Permissions | Can create, read, update, and delete items | Can view items only; cannot modify or delete them | |
| Application Actions | Can perform all actions, including: | Limited to viewing pages only: | |
| - Products | Creating and managing products | View only | |
| - Teams | Creating and updating teams | View only | |
| - Users | Inviting, moving, and removing users | View only | |
| - Billing | Updating billing details, changing plans, and managing payment methods | Cannot access billing plans, payment history, or payment methods | |
| - API Keys | Accessing and managing API keys | Cannot access API keys page | |
| API Key Roles | API Request Permissions | Can perform all actions (e.g., POST, PUT, DELETE, GET requests) | Restricted to GET requests for viewing data only; prevents modifications or deletions |
Team Default Roles
Teams include a default role assigned to users upon invitation or when moved between teams:
- Inviting New Users: Admins can invite new users and define a role for them in the invite form. The invite form will default to the team’s default role (e.g.,
Viewerfor most teams,Adminfor the Admins team), but admins can change it toAdminorViewerbefore sending the invitation. - Moving Users Between Teams: When a user is moved to another team, they are automatically assigned the default role of the new team. Admins can update the user’s role afterward if needed.
- Configurable Defaults: New teams default to the
Viewerrole (except the Admins team, which defaults toAdminand cannot be changed). Admins can modify a team’s default role as needed.
SSO Onboarding Integration
For teams using Single Sign-On (SSO):
- Automatic Grouping:New SSO users are automatically added to an Onboarding group with a default
Viewerrole, with auto creation of the group if it doesn’t exist. - Security Assurance: This prevents inadvertent assignment of
Adminprivileges to new users. - Flexibility: Admins can later move SSO users to other groups or update their roles as required.
Managing RBAC as an Admin
Below are step-by-step instructions for leveraging RBAC features, assuming you have full administrative privileges as an Admin. These actions build on the team management capabilities by adding role-specific controls.
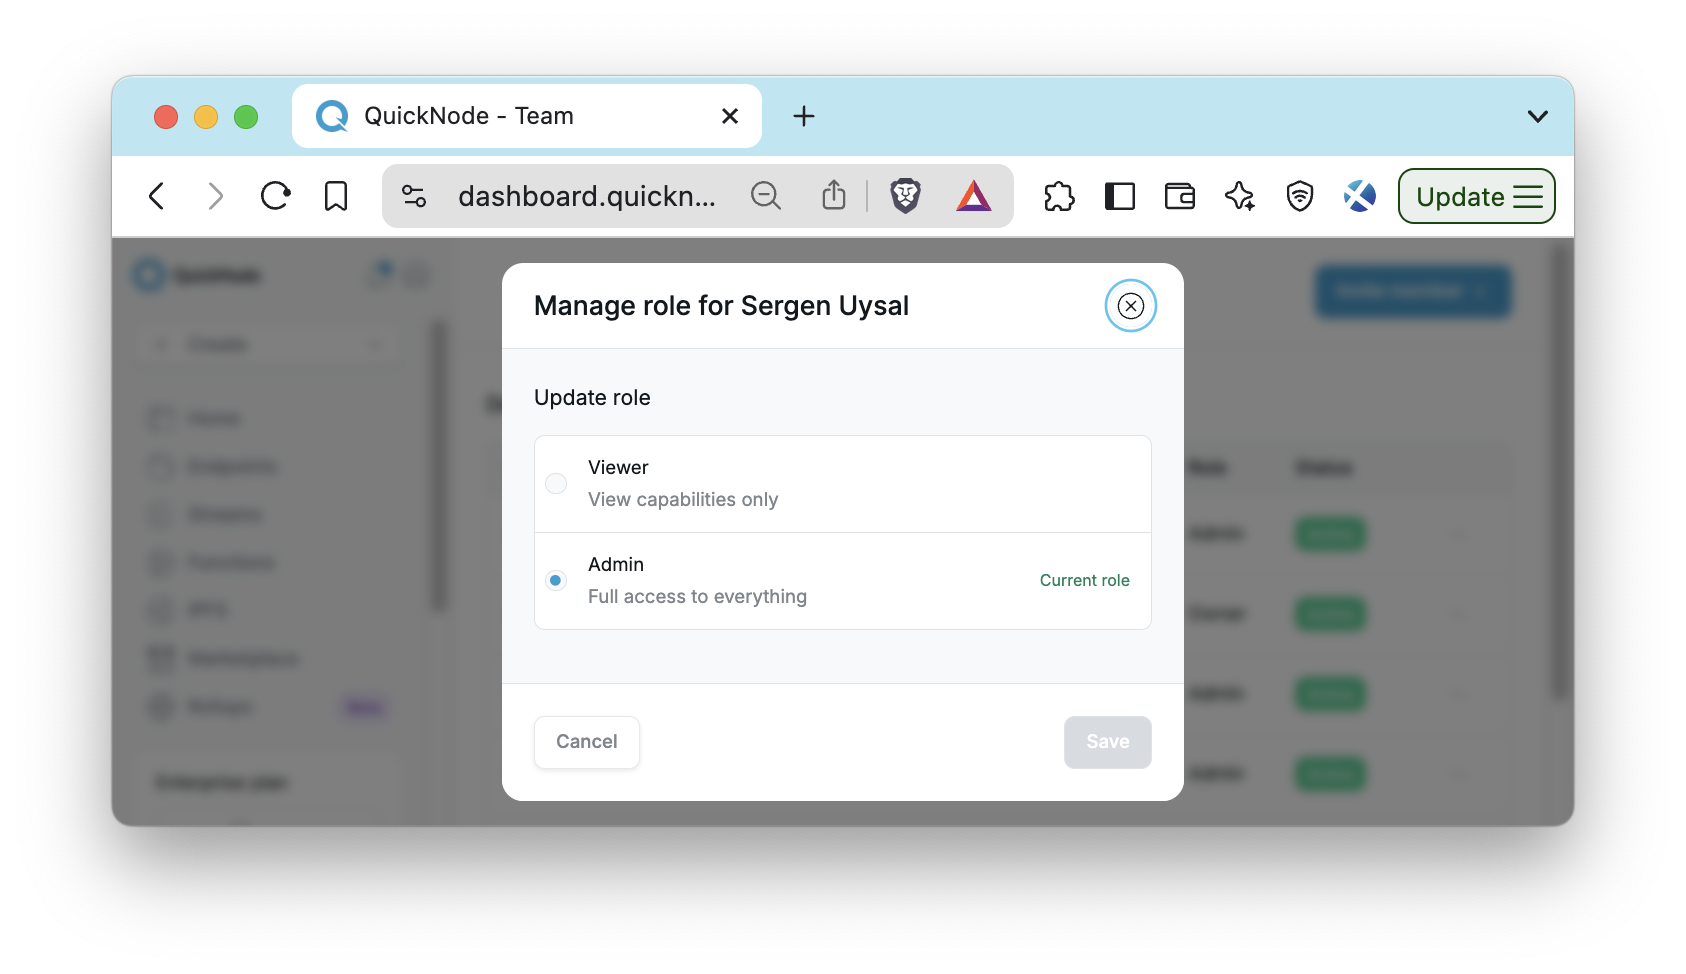
Update User Roles
- Navigate to the Teams page and select the team you want to manage.
- Locate the user whose role you want to update.
- Open the user's settings by clicking on the three dots (
⋯) next to their name. - Select Update Role from the dropdown menu.
- Choose a new role (
AdminorViewer) based on their responsibilities. - Confirm the change to update the user's role.
Note: Admins can update the role of other admins.
Manage API Keys with RBAC
- Access the API Keys page by clicking on the avatar icon on the top left and selecting API Keys.
- Click on Add API Key to generate a new key.
- (Optional) Restrict the key to specific applications
- Assign a role (
AdminorViewer) to the key. - Click Create API Key and keep the key secure.
Generated API keys and their roles are visible for Admins in the API Keys section.
Conclusion
Team management provides a foundation for collaboration across all QuickNode accounts, while RBAC enhances this with enterprise-grade security and role-based control. By clearly defining roles and providing straightforward management options, RBAC helps maintain high levels of security and efficiency. This guide has outlined the key concepts of RBAC and provided detailed steps for managing teams and user permissions from an Admin perspective.
For further assistance or more detailed instructions, please contact us directly. Our team is ready to assist you in implementing RBAC effectively and ensure your organization's security and compliance needs are met.
Also, stay up to date with the latest by following us on Twitter and joining our Discord and Telegram announcement channel.
We ❤️ Feedback!
Let us know if you have any feedback or requests for new topics. We'd love to hear from you.