9 min read
Overview
In this guide, we'll walk you through how to leverage the Quicknode Admin API to manage your Quicknode endpoints programmatically. We'll cover how to create and update endpoints, set method-based and global rate limits, and control your spending by monitoring usage.
What You Will Do
- Manage your Quicknode endpoints programmatically using the Admin API
- Monitor and control your spend and API usage efficiently
What You Will Need
- A paid Quicknode account
- An understanding of REST APIs and how to interact with them
The Admin API is available for all paid accounts. Check pricing for details.
Introduction to the Quicknode Admin API
The Quicknode Admin API offers powerful programmatic access to all actions available within the User Dashboard, enabling you to manage your infrastructure, monitor performance, and control your costs more effectively. This API allows for full endpoint management, usage monitoring, and security configuration.
Why Use the Admin API?
- Complete Control: Manage all aspects of your Quicknode setup without manually interacting with the User Dashboard.
- Automation: Automate endpoint creation, security configurations, rate limit adjustments, and team management operations.
- Team Organization: Programmatically create teams, manage memberships, and control endpoint access at scale.
- Cost Management: Monitor your usage and spending in real-time, enabling you to set up alerts or even programmatically disable endpoints if you approach a usage threshold.
- Enhanced Monitoring: Utilize Prometheus to build a customized Grafana dashboard for better visibility.
Quicknode Admin API Resources Overview
Below is a summary of all REST API resources available for interacting with the Quicknode User Dashboard:
- Billing: Retrieve billing information, including invoices and payments.
- Chains: Fetch a list of all Quicknode-supported chains.
- Endpoints: Create, retrieve, update, and archive Quicknode endpoints to manage your infrastructure programmatically.
- Endpoint Metrics: Access detailed metrics for specific Quicknode endpoints over a designated time period, including method calls, response status, breakdowns, and maximum response times.
- Endpoint Rate Limits: Update rate limits for a specific Quicknode endpoint.
- Endpoint Security: Manage security settings, including referrer, token, IP, domain mask, and JWT configurations.
- Teams: Create, retrieve, and delete teams; invite and remove team members; list and update endpoint access for teams.
- Usage: Retrieve usage data, including total usage for a specified time range, and view usage data grouped by endpoint, method, or chain.
For detailed documentation, please refer to our Admin API documentation.
Prerequisites
Quicknode Account and API Key
Creating your API key is straightforward. If you haven't signed up already and created any endpoint, you can create an account here.
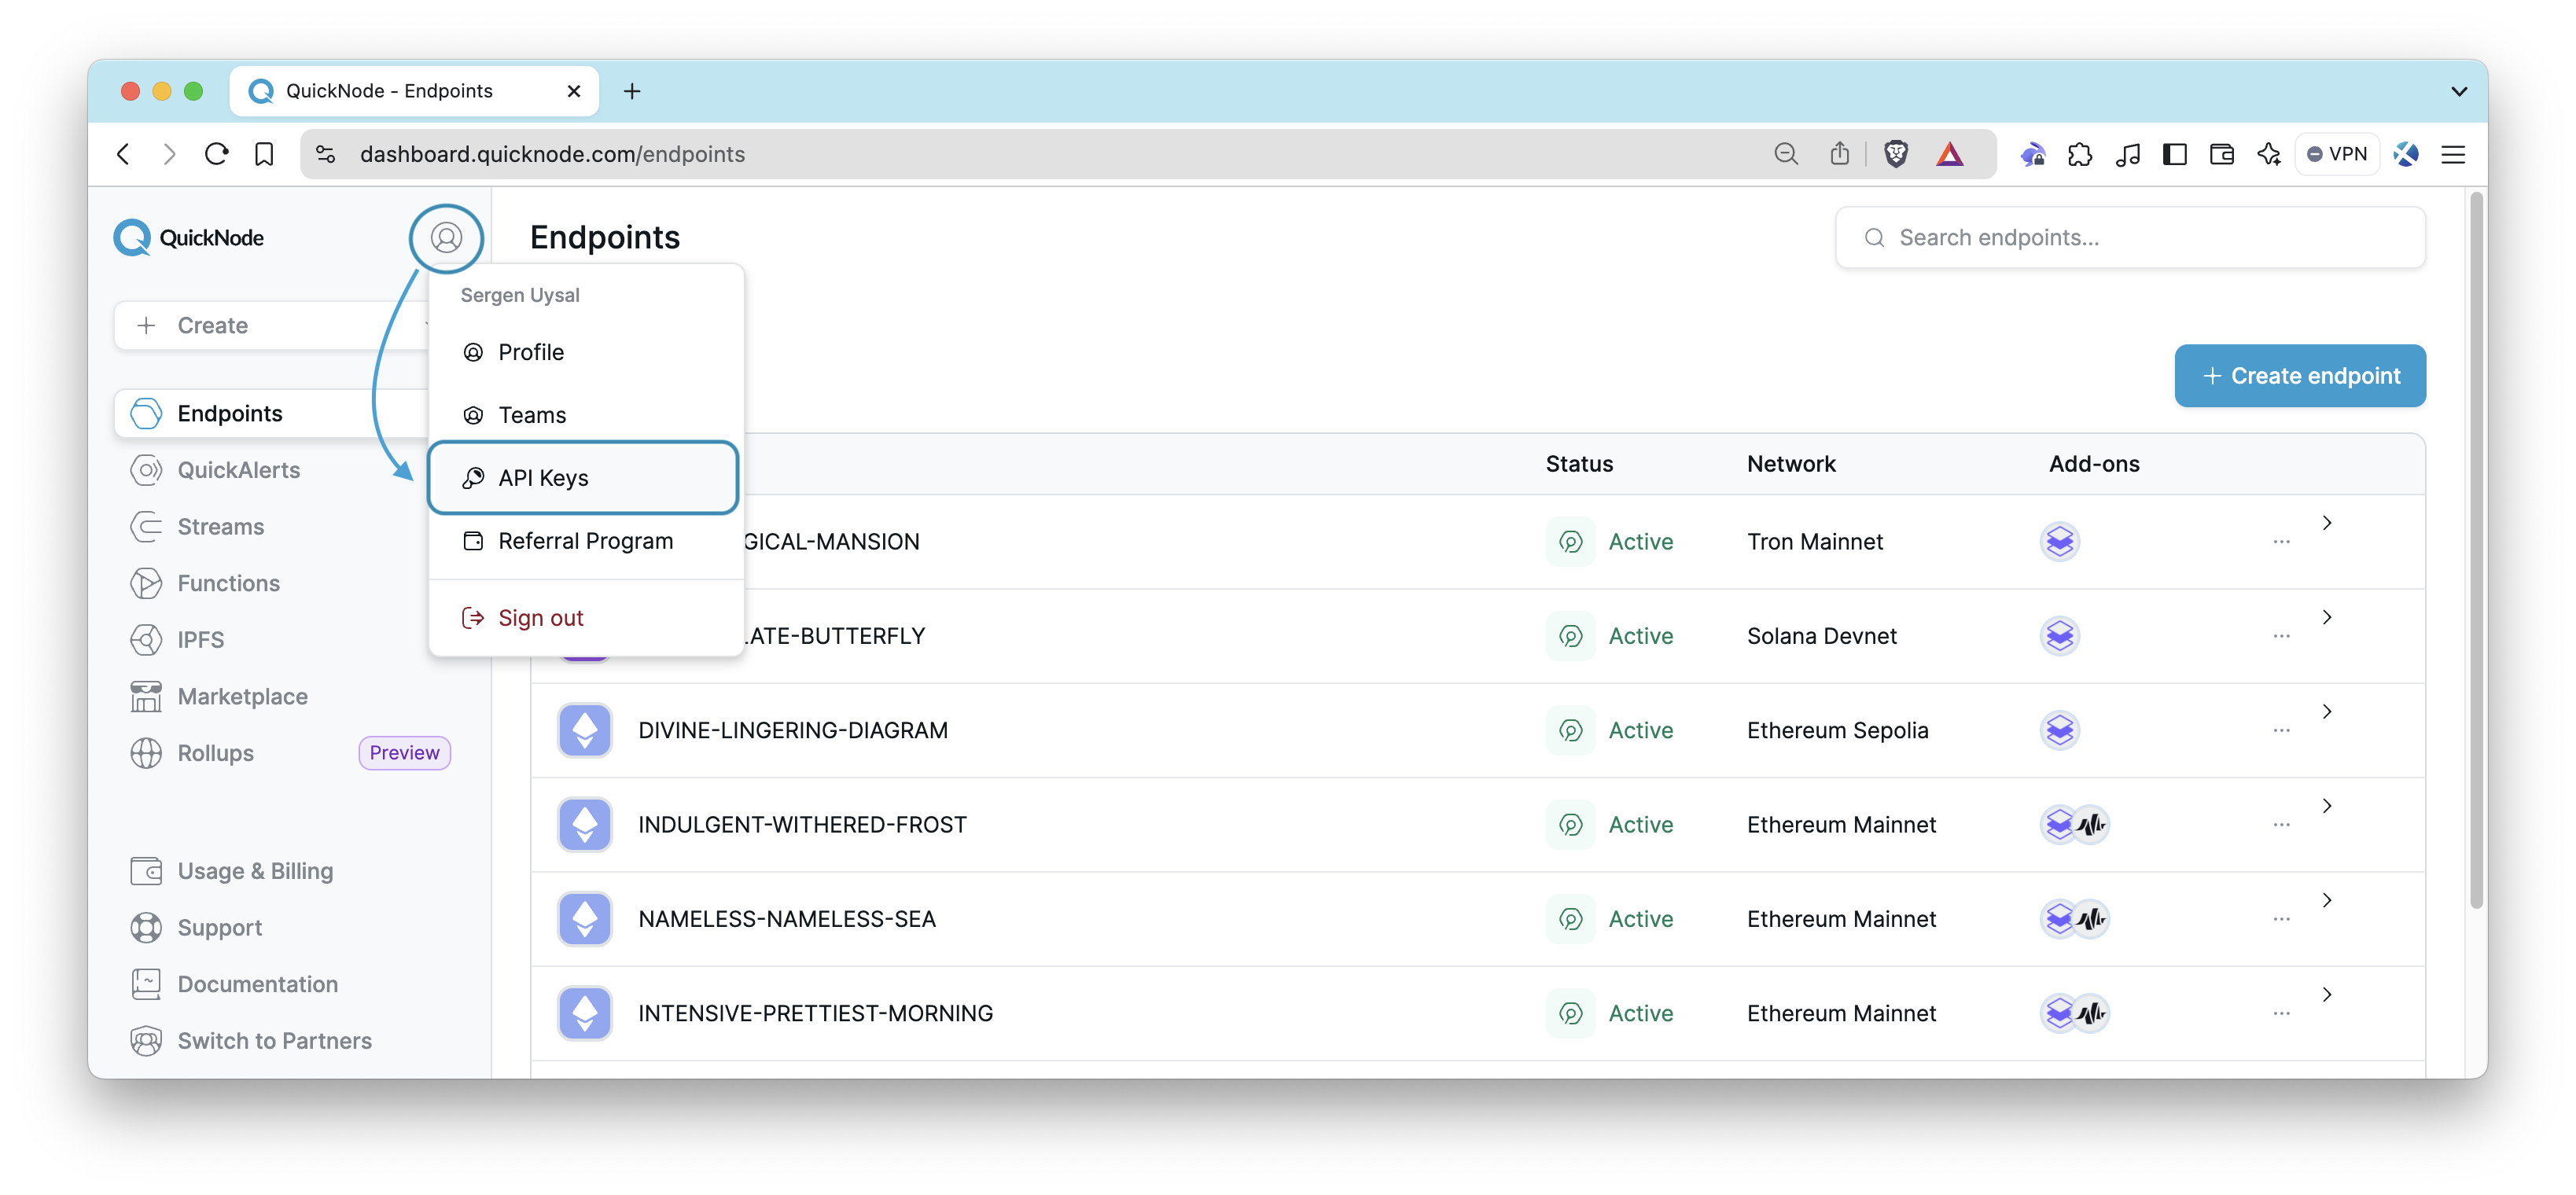
To create your keys, log in to your Quicknode Account, click on the avatar icon on the top left, and select API Keys. It will bring you to the API Keys page.
Generate an API key with appropriate permissions (you'll need CONSOLE_REST to use the Admin API) and keep your API key handy as you'll use it.
Managing Endpoints with the Admin API
To use the Admin API, you must authenticate your requests by including your API key in the HTTP headers like the one below:
curl -X GET 'https://api.quicknode.com/v0/usage/rpc' \
     -H 'accept: application/json' \
     -H 'x-api-key: YOUR_API_KEY_HERE'
Don't forget to update YOUR_API_KEY_HERE section with your own API Key in all cURL commands that will be shared in this guide.
Before creating or managing endpoints, it's important to retrieve the list of available blockchain networks using the /chains endpoint, as you'll need this information for various actions.
You can explore all endpoint details and parameters using our Swagger documentation for more customization options.
Retrieving Supported Chains and Networks
To get a list of all supported chains and their networks, use the following cURL command:
curl -X GET 'https://api.quicknode.com/v0/chains' \
     -H 'accept: application/json' \
     -H 'x-api-key: YOUR_API_KEY_HERE'
The response will provide you with slug values for each chain and network, which you’ll use when creating or managing endpoints. For example:
{
    "data": [
        {
            "slug": "linea",
            "networks": [
                {
                    "slug": "linea-mainnet",
                    "name": "Linea Mainnet"
                }
            ]
        },
        {
            "slug": "avax",
            "networks": [
                {
                    "slug": "avalanche-mainnet",
                    "name": "Avalanche Mainnet"
                }
            ]
        }
    ]
}
Creating an Endpoint
To create a new endpoint, use the POST method. You’ll need to specify the chain and network values retrieved from the /chains endpoint.
curl -X POST 'https://api.quicknode.com/v0/endpoints' \
     -H 'accept: application/json' \
     -H 'x-api-key: YOUR_API_KEY_HERE'
    --data '{
        "chain": "avax",
        "network": "avalanche-mainnet",
    }'
The response will include details of the newly created endpoint, including its id, which you’ll use for further management.
Retrieving Your Endpoint ID
If you already have an endpoint and need to find its id, you can do so in two ways:
Using the Admin API
You can list all your endpoints associated with your account using the following command:
curl -X GET 'https://api.quicknode.com/v0/endpoints' \
     -H 'accept: application/json' \
     -H 'x-api-key: YOUR_API_KEY_HERE'
The response will include all your endpoints, along with their respective id values.
Using the Quicknode Dashboard
- Log in to your Quicknode dashboard.
- Navigate to the page of your desired endpoint.
- The
idwill be visible in the URL, formatted as:https://dashboard.quicknode.com/endpoints/{id}.
Retrieving Endpoint Details
To get detailed information about a specific endpoint, use its id:
curl -X GET 'https://api.quicknode.com/v0/endpoints/{id}' \
     -H 'accept: application/json' \
     -H 'x-api-key: YOUR_API_KEY_HERE'
Don't forget to replace {id} with your endpoint ID.
The response will provide details about your endpoint, including:
id: The unique identifier for your endpoint.chainandnetwork: The blockchain network your endpoint is connected to.http_urlandwss_url: The HTTP and WebSocket URLs for accessing the endpoint.security: Information about the endpoint's security settings, such as whether tokens, referrers, JWTs, IPs, domain masks, and other security measures are enabled.rate_limits: The rate limits set for the endpoint, includingrps(requests per second),rpm(requests per minute),rpd(requests per day), and whether the rate limit is applied by IP.
Updating Endpoint Rate Limits
You can update rate limits on an endpoint for requests per second (rps), requests per minute (rpm), and requests per day (rpd). These are all available at the endpoint level.
The following command updates the rate limits (250 rps, 1,000 rpm, and 10,000 rpd) for a specific endpoint:
curl -X PUT 'https://api.quicknode.com/v0/endpoints/{id}/rate-limits' \
     -H 'accept: application/json' \
     -H 'x-api-key: YOUR_API_KEY_HERE'
     --data '{
    "rate_limits": {
        "rps": 250,
        "rpm": 1000,
        "rpd": 10000
    }
}'
Managing Method Rate Limits
To create specific rate limits for particular methods on your endpoint:
curl -X POST 'https://api.quicknode.com/v0/endpoints/{id}/method-rate-limits' \
     -H 'accept: application/json' \
     -H 'x-api-key: YOUR_API_KEY_HERE' \
     -d '{
           "interval": "second",
           "methods": [
            "eth_getLogs",
            "eth_chainId"
            ],
           "rate": 100
         }'
- interval: Specifies the time interval for the rate limit. In this example, it's set to "second", meaning the rate limit applies per second.
- methods: Lists the specific methods to which the rate limit will apply. Here, the methods
eth_getLogsandeth_chainIdare being rate-limited. - rate: Defines the maximum number of requests allowed for the specified methods within the chosen interval. In this example, the rate limit is set to 100 requests per second for each listed method.
Controlling Spend with the Admin API
The Admin API allows you to track your usage and manage spending effectively. By regularly monitoring your API usage, you can prevent unexpected overages and take proactive actions.
Fetching Your Current API Credit Usage
To retrieve your total usage within a specified time range:
curl -X GET 'https://api.quicknode.com/v0/usage/rpc' \
     -H 'accept: application/json' \
     -H 'x-api-key: YOUR_API_KEY_HERE'
The API provides a response containing key details such as credits_used, credits_remaining, and limit for your specified time range.
If you don't specify a time range by providing start_time or end_time, the current billing period is used, and the remaining credits for the period are returned.
Ensure you use Unix timestamps in second for start_time and end_time when specifying a custom range.
Example: https://api.quicknode.com/v0/usage/rpc?start_time={START_TIME}&end_time={END_TIME}
You can retrieve your total usage once per minute or hour to understand how your usage is trending. This regular polling enables you to monitor your consumption and avoid surprises.
If you wish to break down usage by endpoint, method, or blockchain:
By Endpoint: Check which specific endpoints are consuming the most credits.
curl -X GET 'https://api.quicknode.com/v0/usage/rpc/by-endpoint' \
     -H 'accept: application/json' \
     -H 'x-api-key: YOUR_API_KEY_HERE'
By Method: Identify the most frequently called methods.
curl -X GET 'https://api.quicknode.com/v0/usage/rpc/by-method' \
     -H 'accept: application/json' \
     -H 'x-api-key: YOUR_API_KEY_HERE'
By Chain: Analyze usage across different blockchain networks.
curl -X GET 'https://api.quicknode.com/v0/usage/rpc/by-chain' \
     -H 'accept: application/json' \
     -H 'x-api-key: YOUR_API_KEY_HERE'
If you’re looking to visualize your Quicknode metrics in a real-time dashboard, check out our guide on How to Build a Grafana Dashboard to Monitor Your RPC Infrastructure. It’s perfect for Enterprise plan users who want to monitor their usage with advanced visualization tools like Grafana and Prometheus. This guide walks you through setting up a comprehensive dashboard to track your endpoint performance effectively.
Conclusion
Congratulations! 🎉 You've just learned how to use the power of the Quicknode Admin API to manage your endpoints, control spending, and monitor your usage effectively.
If you are stuck or have questions, drop them in our Discord. Stay up to date with the latest by following us on Twitter (@Quicknode) or our Telegram announcement channel.
We ❤️ Feedback!
Let us know if you have any feedback or requests for new topics. We'd love to hear from you.