17 min read
Stake with the premier Solana RPC provider—experience unmatched reliability and speed with Quicknode's high-performance Validator.
- 100% Uptime: Proven reliability with no downtime in the last 30 days.
- 0% Commission: All staking rewards, including JITO tips, go directly to stakers.
- High-Performance Staking: Reliable and efficient infrastructure trusted by the Solana ecosystem.
- Compliance: SOC 1 Type 2, Soc 2 Type 2 Compliance
Learn more: StakeWiz | Solana Compass | Validators.app | Solscan | Solana Beach
Overview
Staking native tokens is a common way for blockchain networks to incentivize validators to secure the network. Validators are rewarded with a portion of the network's native token for their work. Staking is also an excellent way for token holders to earn passive income on their holdings. In this guide, we will cover four ways to stake SOL on Solana:
- Using a Solana wallet (e.g., Phantom or Solflare)
- Using Solana's Command Line Interface (Solana CLI)
- Using Solana's JavaScript API
- Using Liquid Staking
What You Will Need
- Solana CLI latest version installed
- Nodejs (version 16.15 or higher) installed
- Basic JavaScript experience
- A modern web browser (e.g., Google Chrome)
- A Solana wallet (e.g., Phantom) or Squad
- Some SOL tokens for staking and account rent/transaction fees
What is Staking?
Integral to Solana's security and incentive structure, staking enables validators to lock a certain amount of their SOL tokens in a staking account to participate in consensus through a Proof-of-Stake (PoS) mechanism. Validators contribute to transaction confirmation and block production, earning rewards proportional to their staked amount. This mechanism enhances network security by imposing a risk of loss for any validator acting maliciously.
Creating a stake account on Solana necessitates generating a new staking account, then transferring SOL tokens from a funded wallet to the account. Stake and withdraw authorities, controlling the account's functionality, can be assigned during creation or modified later for optimal flexibility. Each stake account is delegated to a single validator; however, a user/authority can have multiple stake accounts to allocate their stake across numerous validators. Changes to stakes (e.g., activation, delegations, and deactivations) take effect at the next epoch (an epoch is ~2 days). This gradual process promotes network stability and predictability, preventing sudden, drastic changes in stake distribution.
For more information on staking, check out the Solana Documentation. If you need help finding a validator, there are a few resources available to help you find one:
Let's stake some SOL!
Method 1 - Using a Wallet
One of the easiest ways to stake your SOL is directly in your wallet. Most major wallets have a staking interface that allows you to delegate your SOL to a validator with just a few clicks. Here's how to do it with a few popular wallets:
Stake with Phantom
Staking in Phantom is easy. Open your Phantom wallet extension:

You should see some details about Solana. Scroll until you see a "Start earning SOL" button. Click it to start staking.
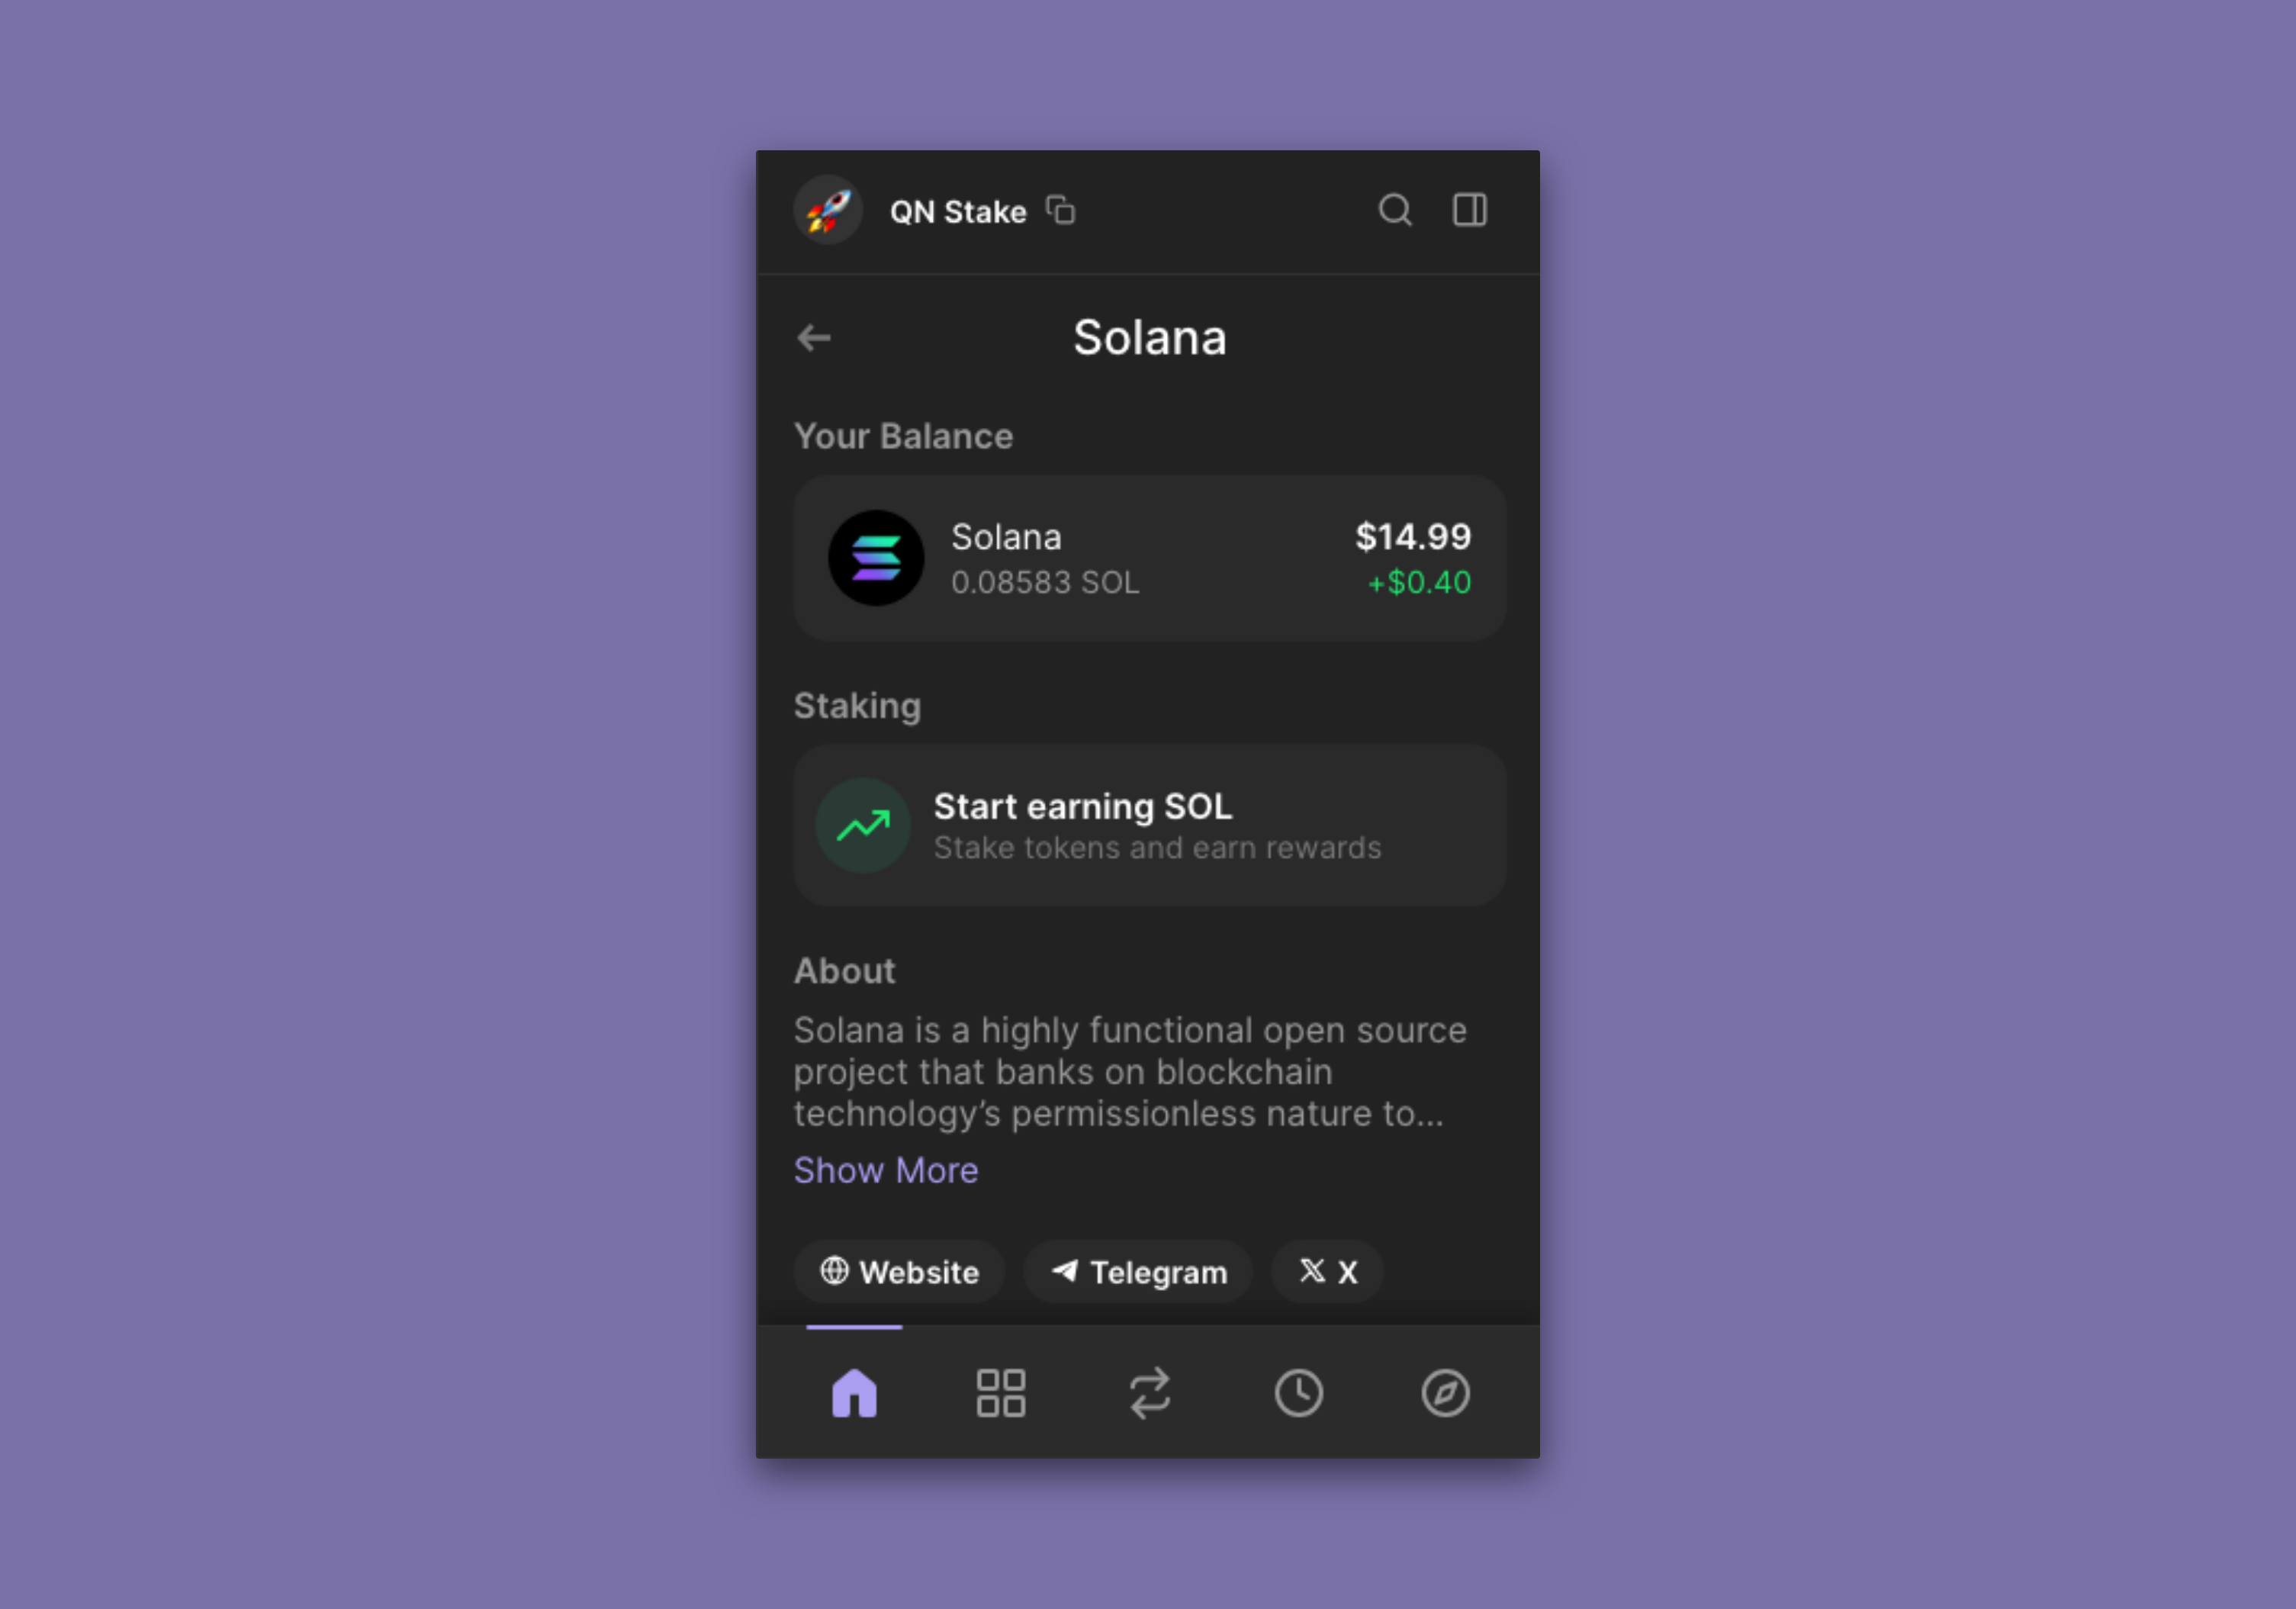
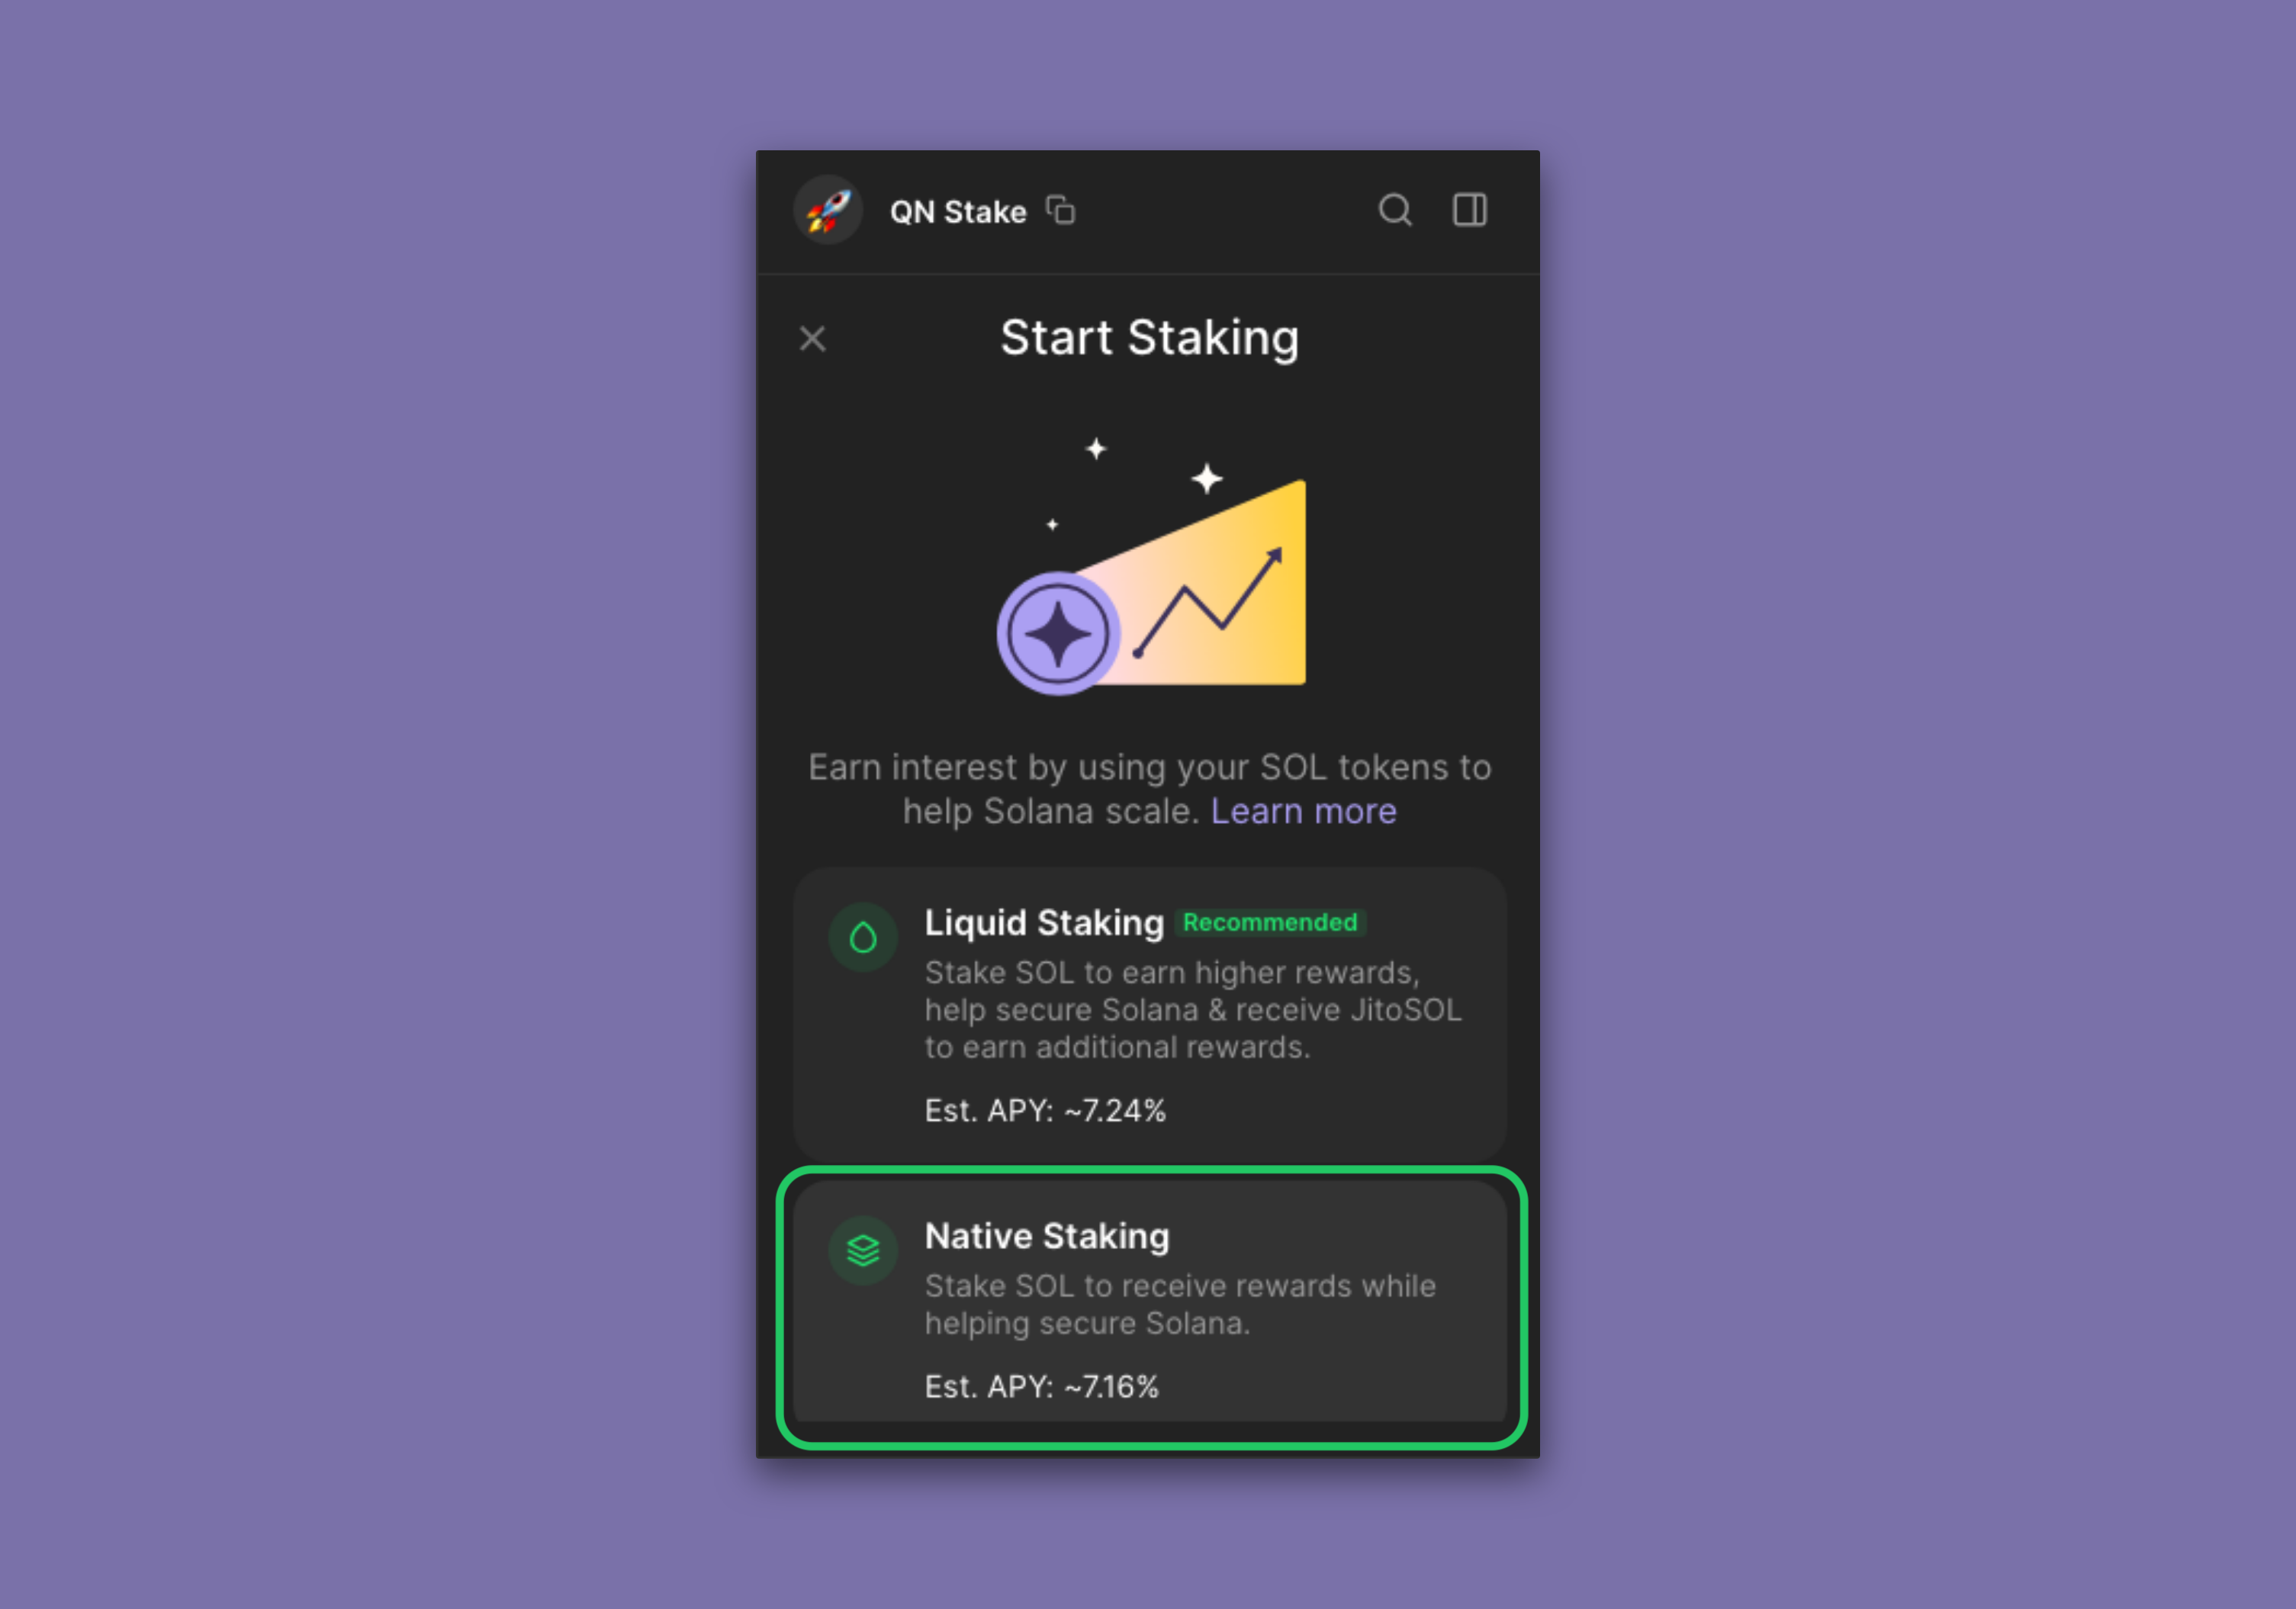
Select "Native Staking" from the options presented to you:
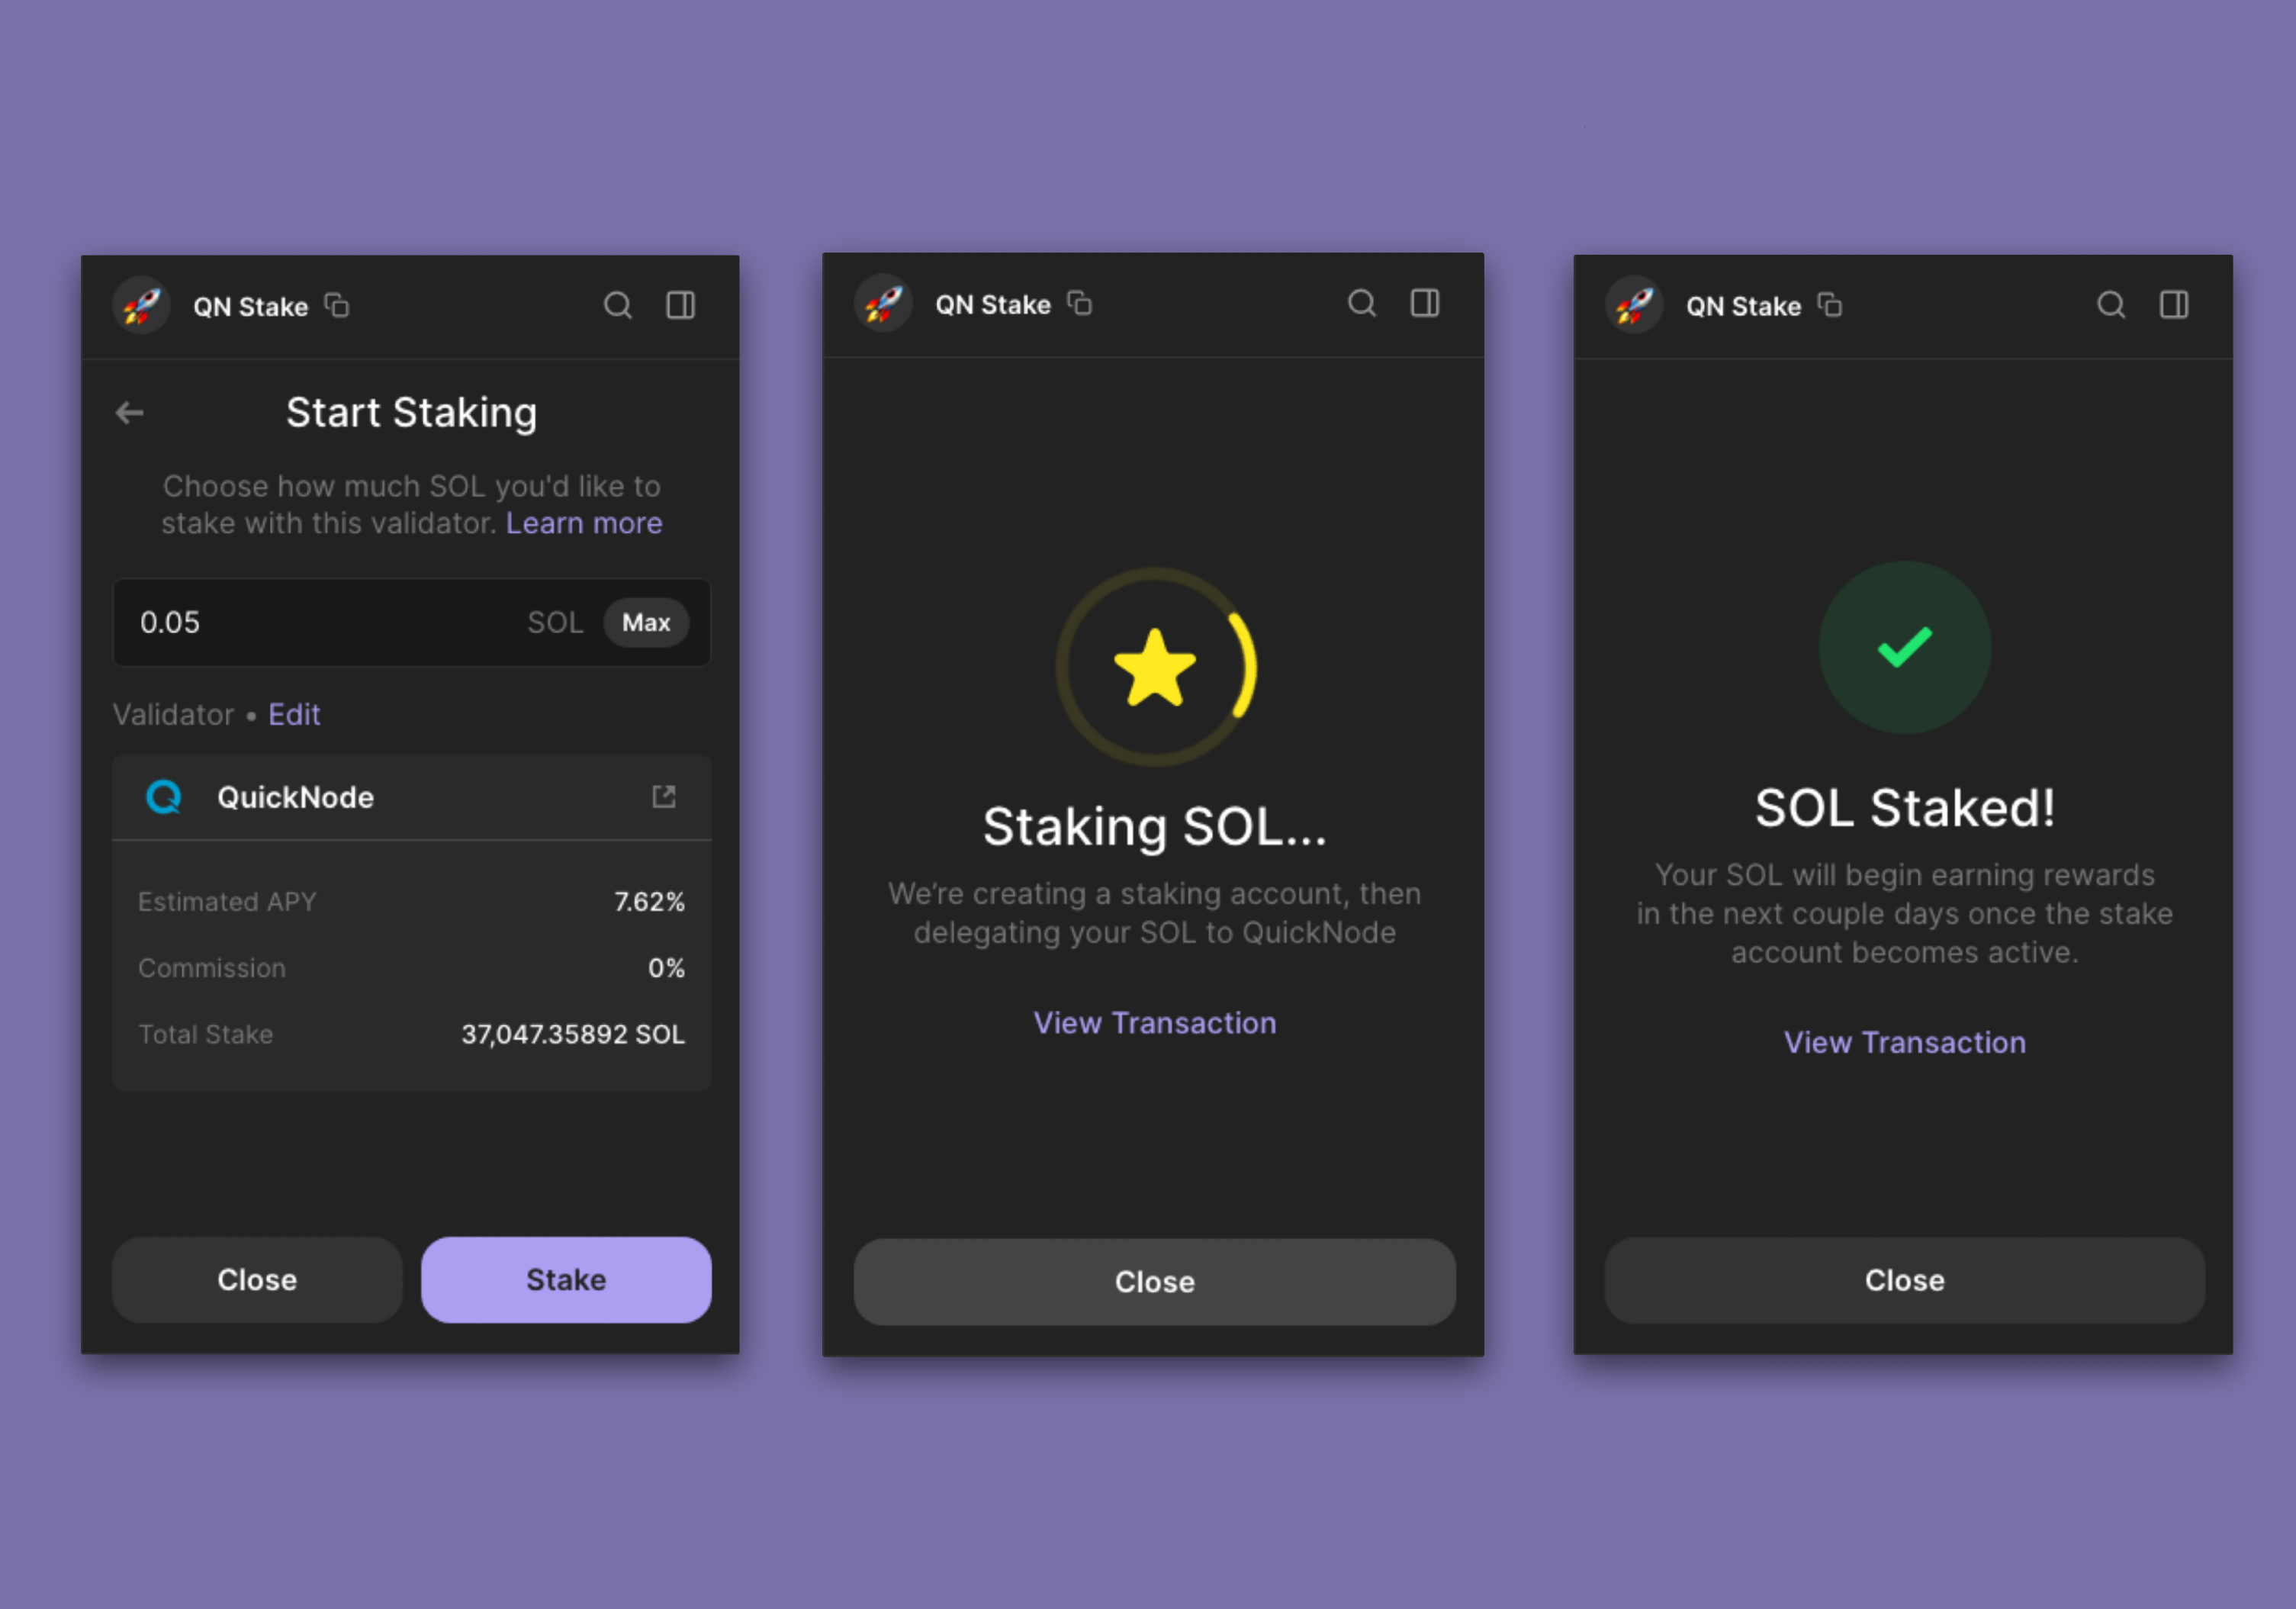
Search for "Quicknode" in the search bar to find our validator (or the validator name of your choice). You can also search by a validator's address (e.g., 5s3vajJvaAbabQvxFdiMfg14y23b2jvK6K2Mw4PYcYK). Click on the desired validator. You will be prompted to enter an amount to stake. Do so and click "Stake" to confirm. After a few moments, you will see a "SOL Staked!" success message:
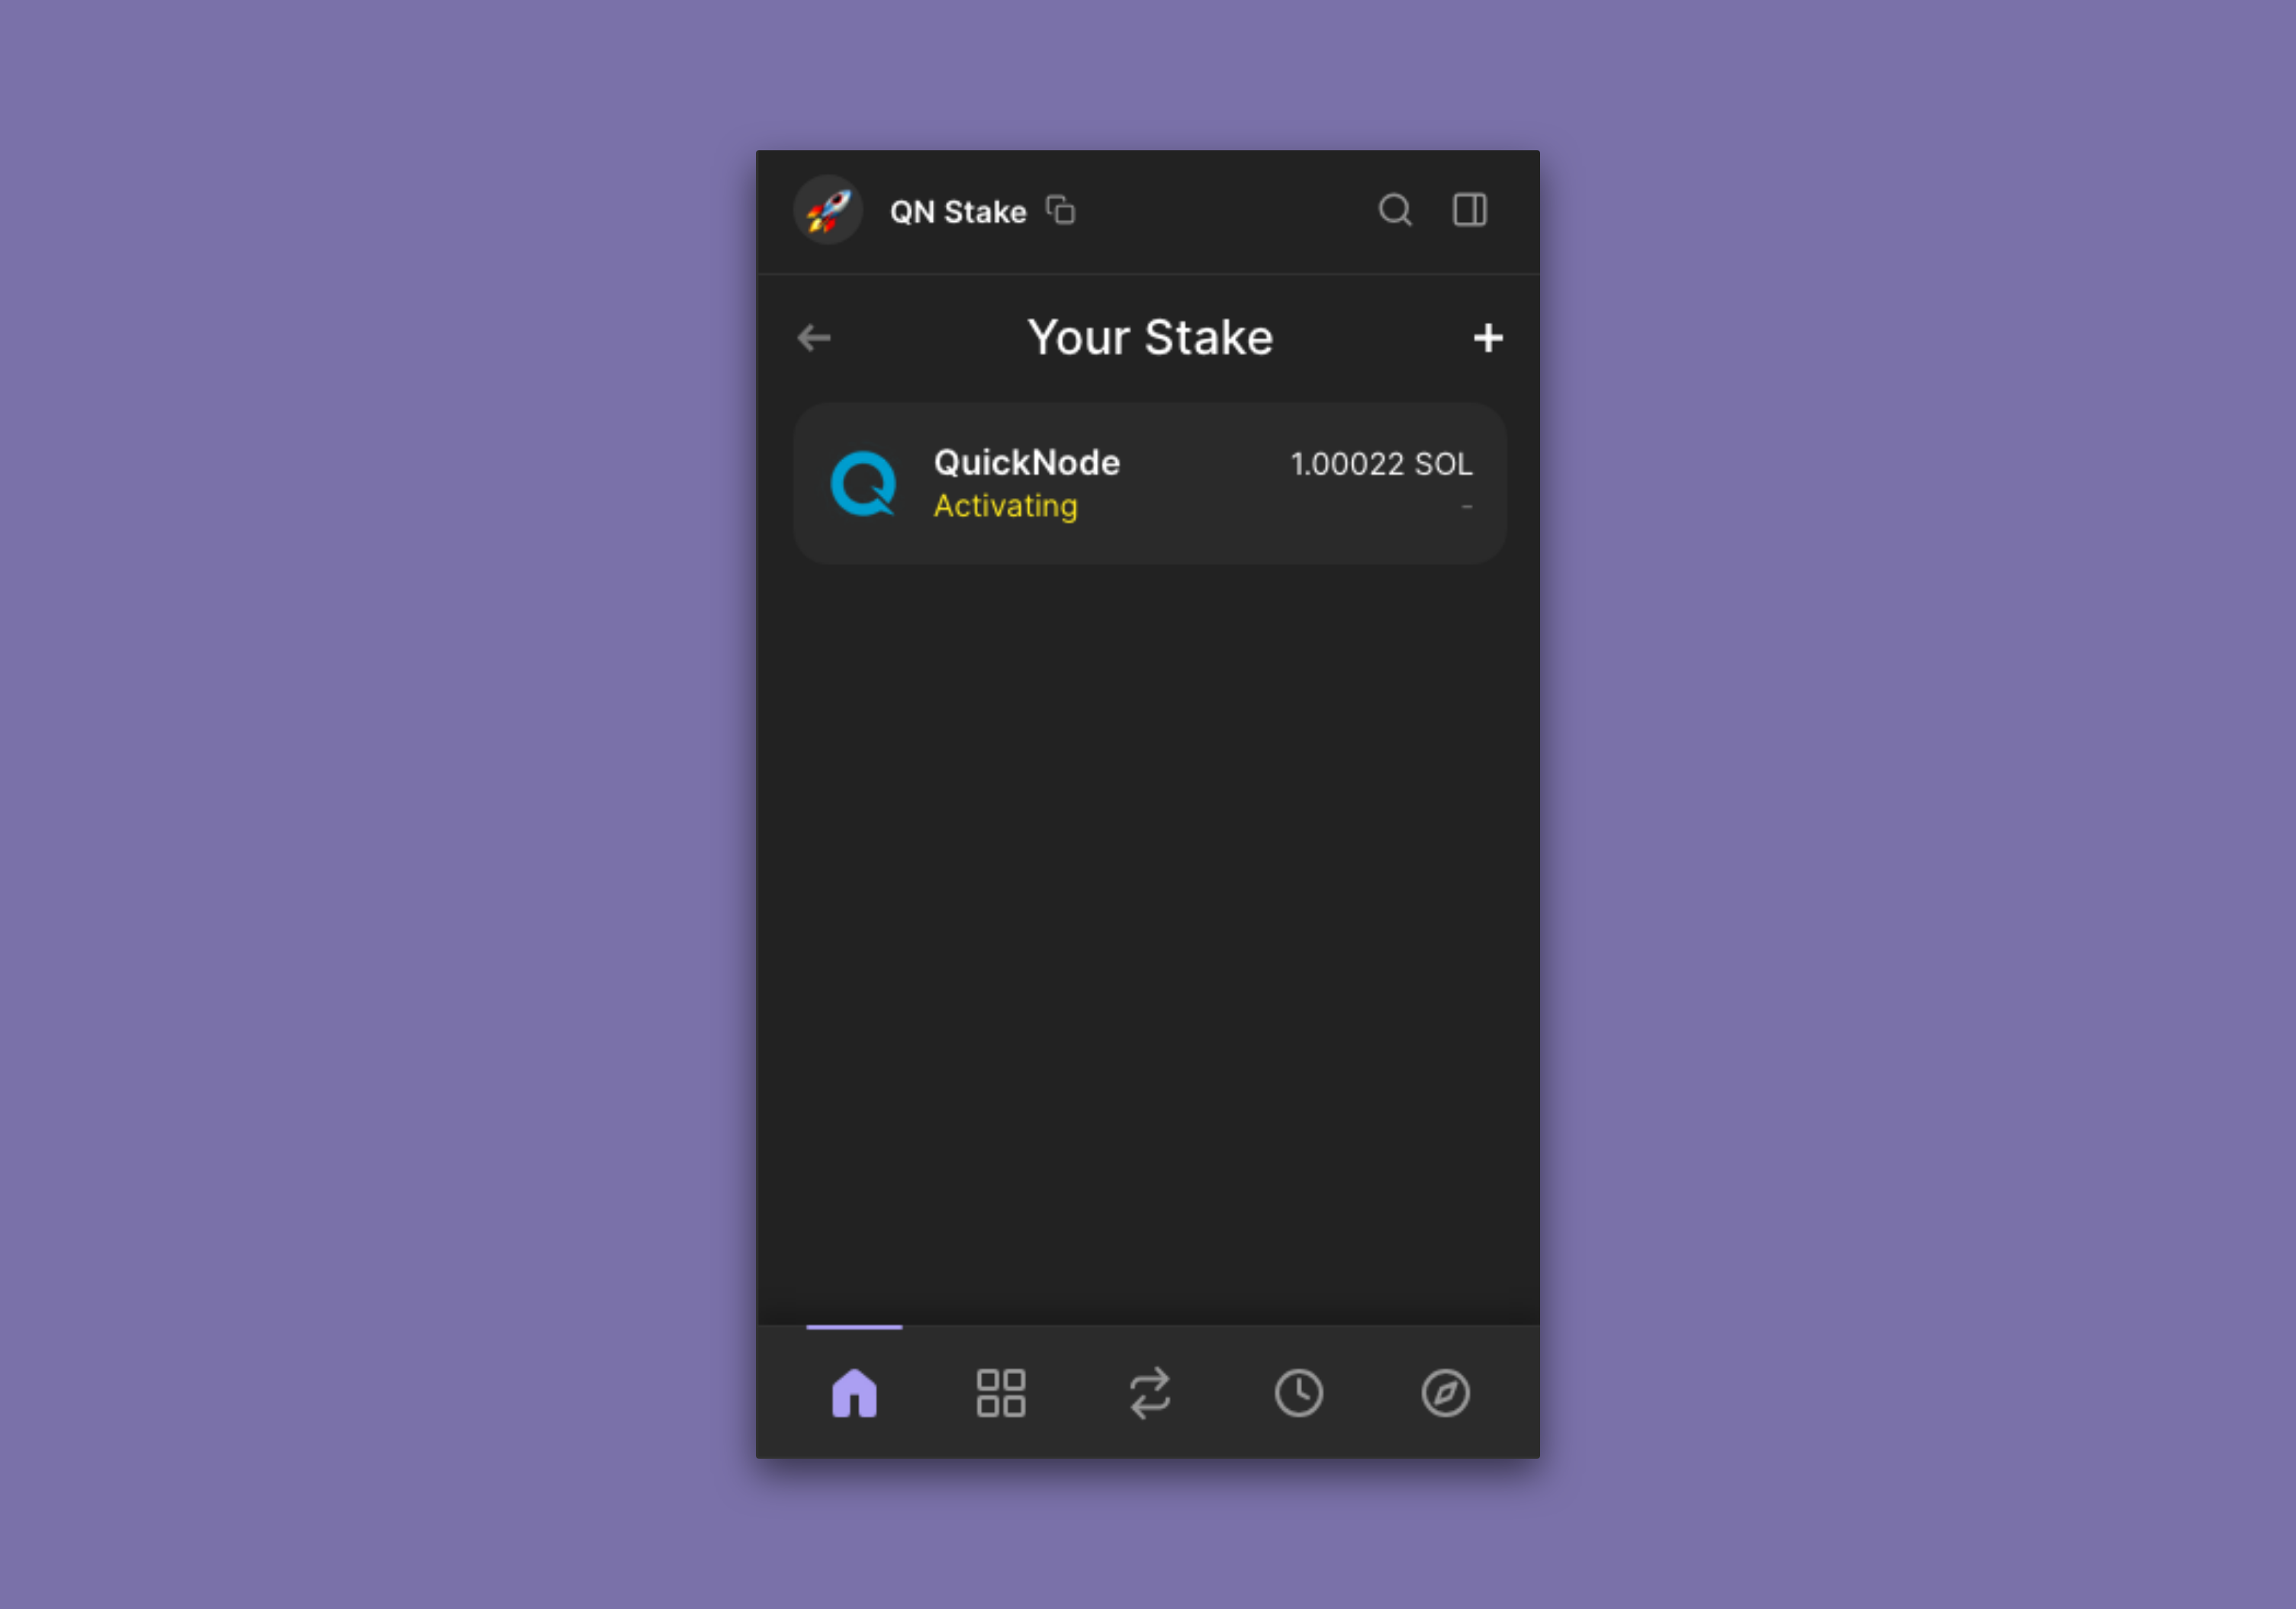
Your stake will finish activating at the start of the next epoch. You can check the status of your stake in your wallet (or any major Solana Explorer) by clicking on your Solana balance again. You should see your stake listed under "Staking":
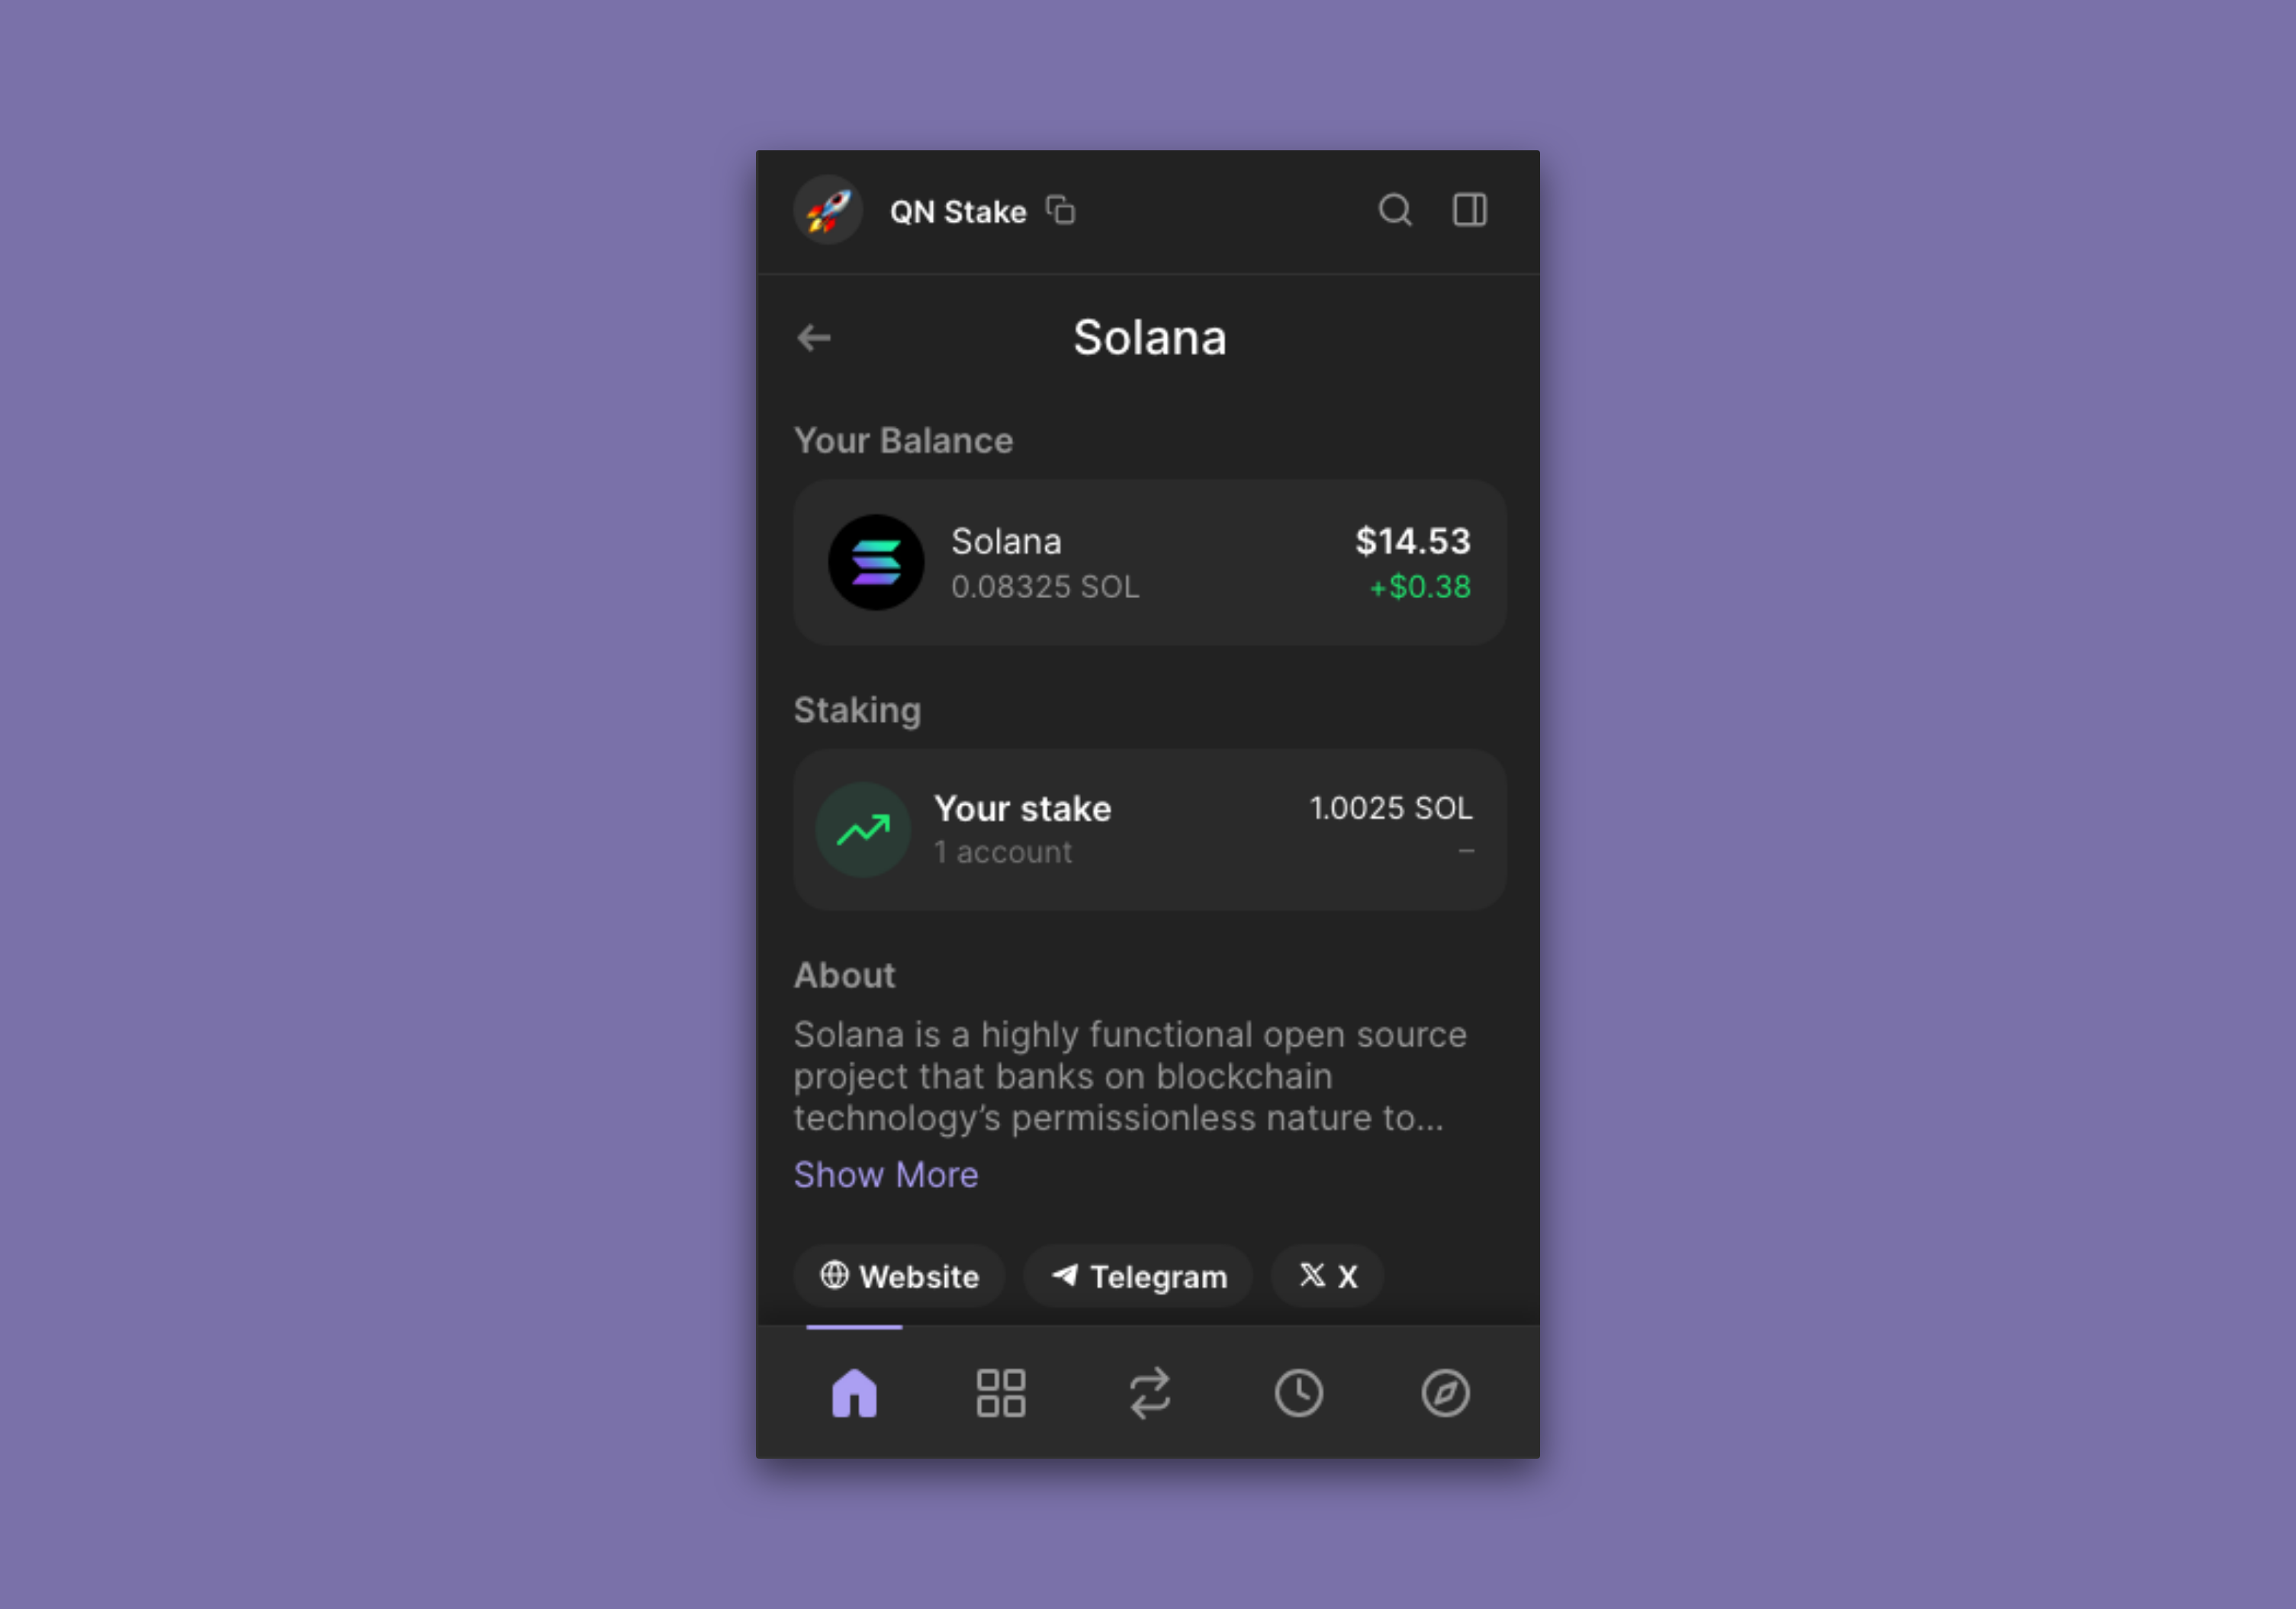
You can open that to see more details about your stake. You can also see your stake on Solana Beach.
That's it! You're now staking SOL with Phantom.
Stake with Solflare
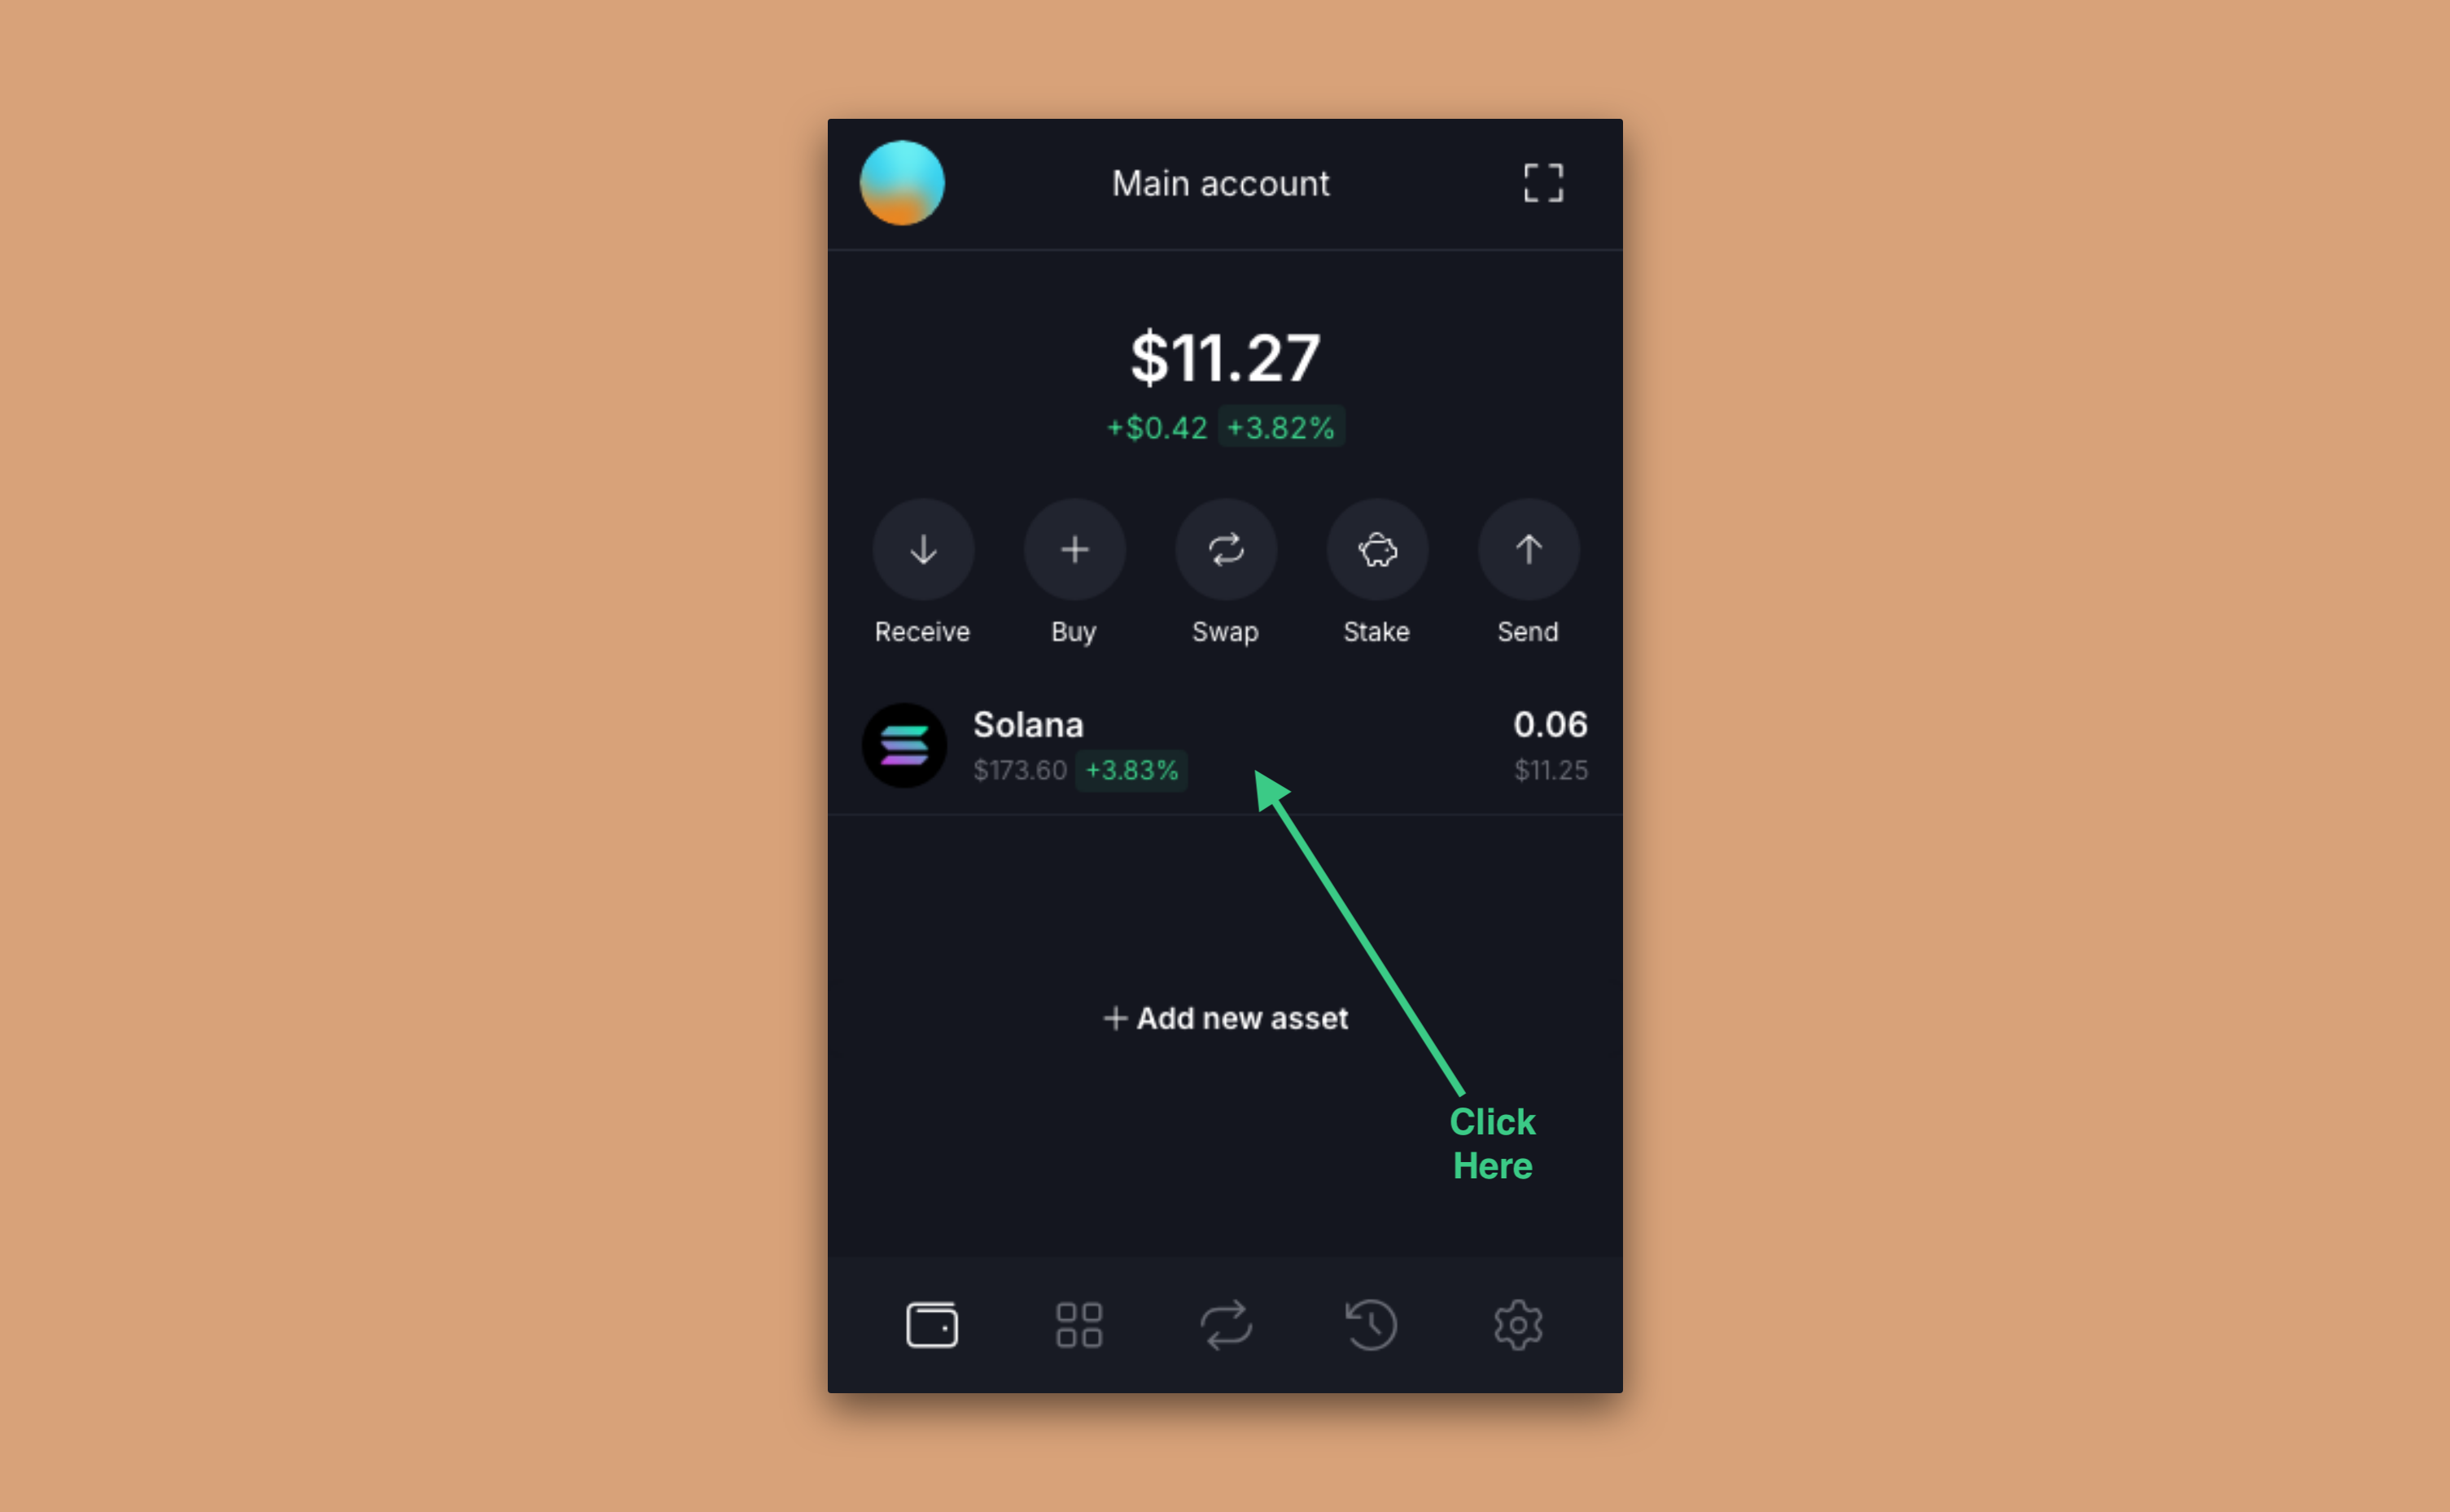
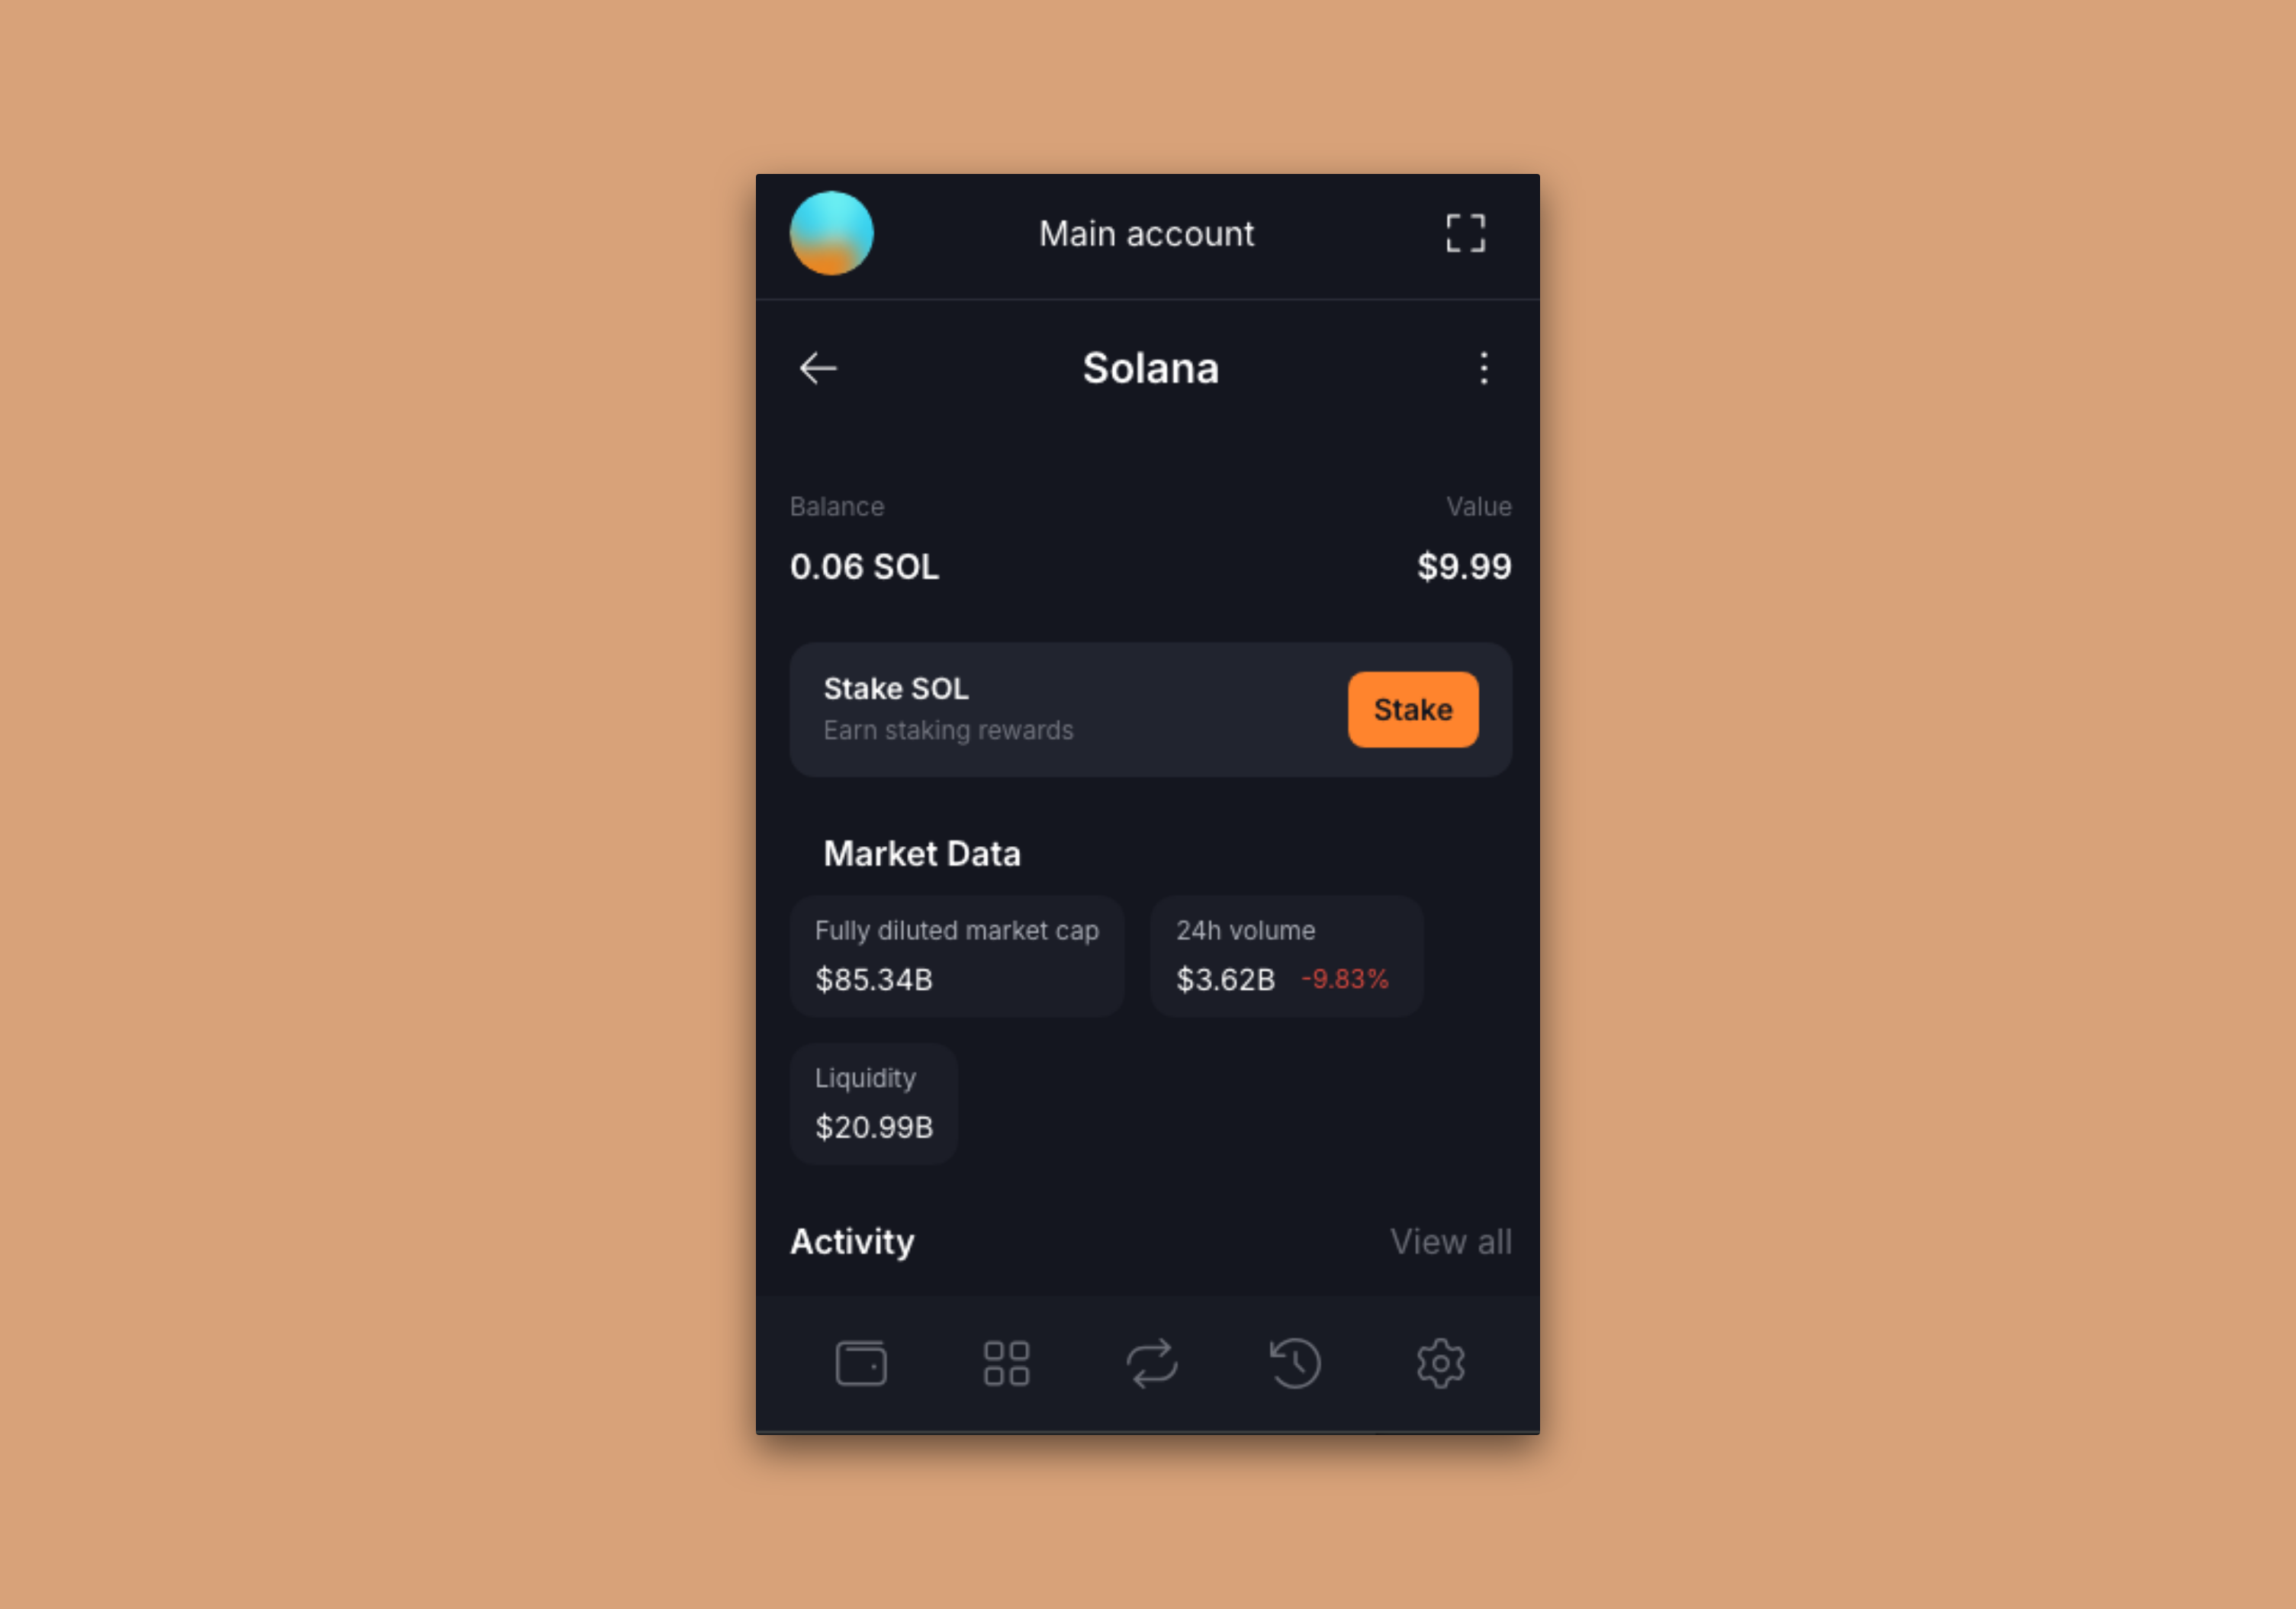
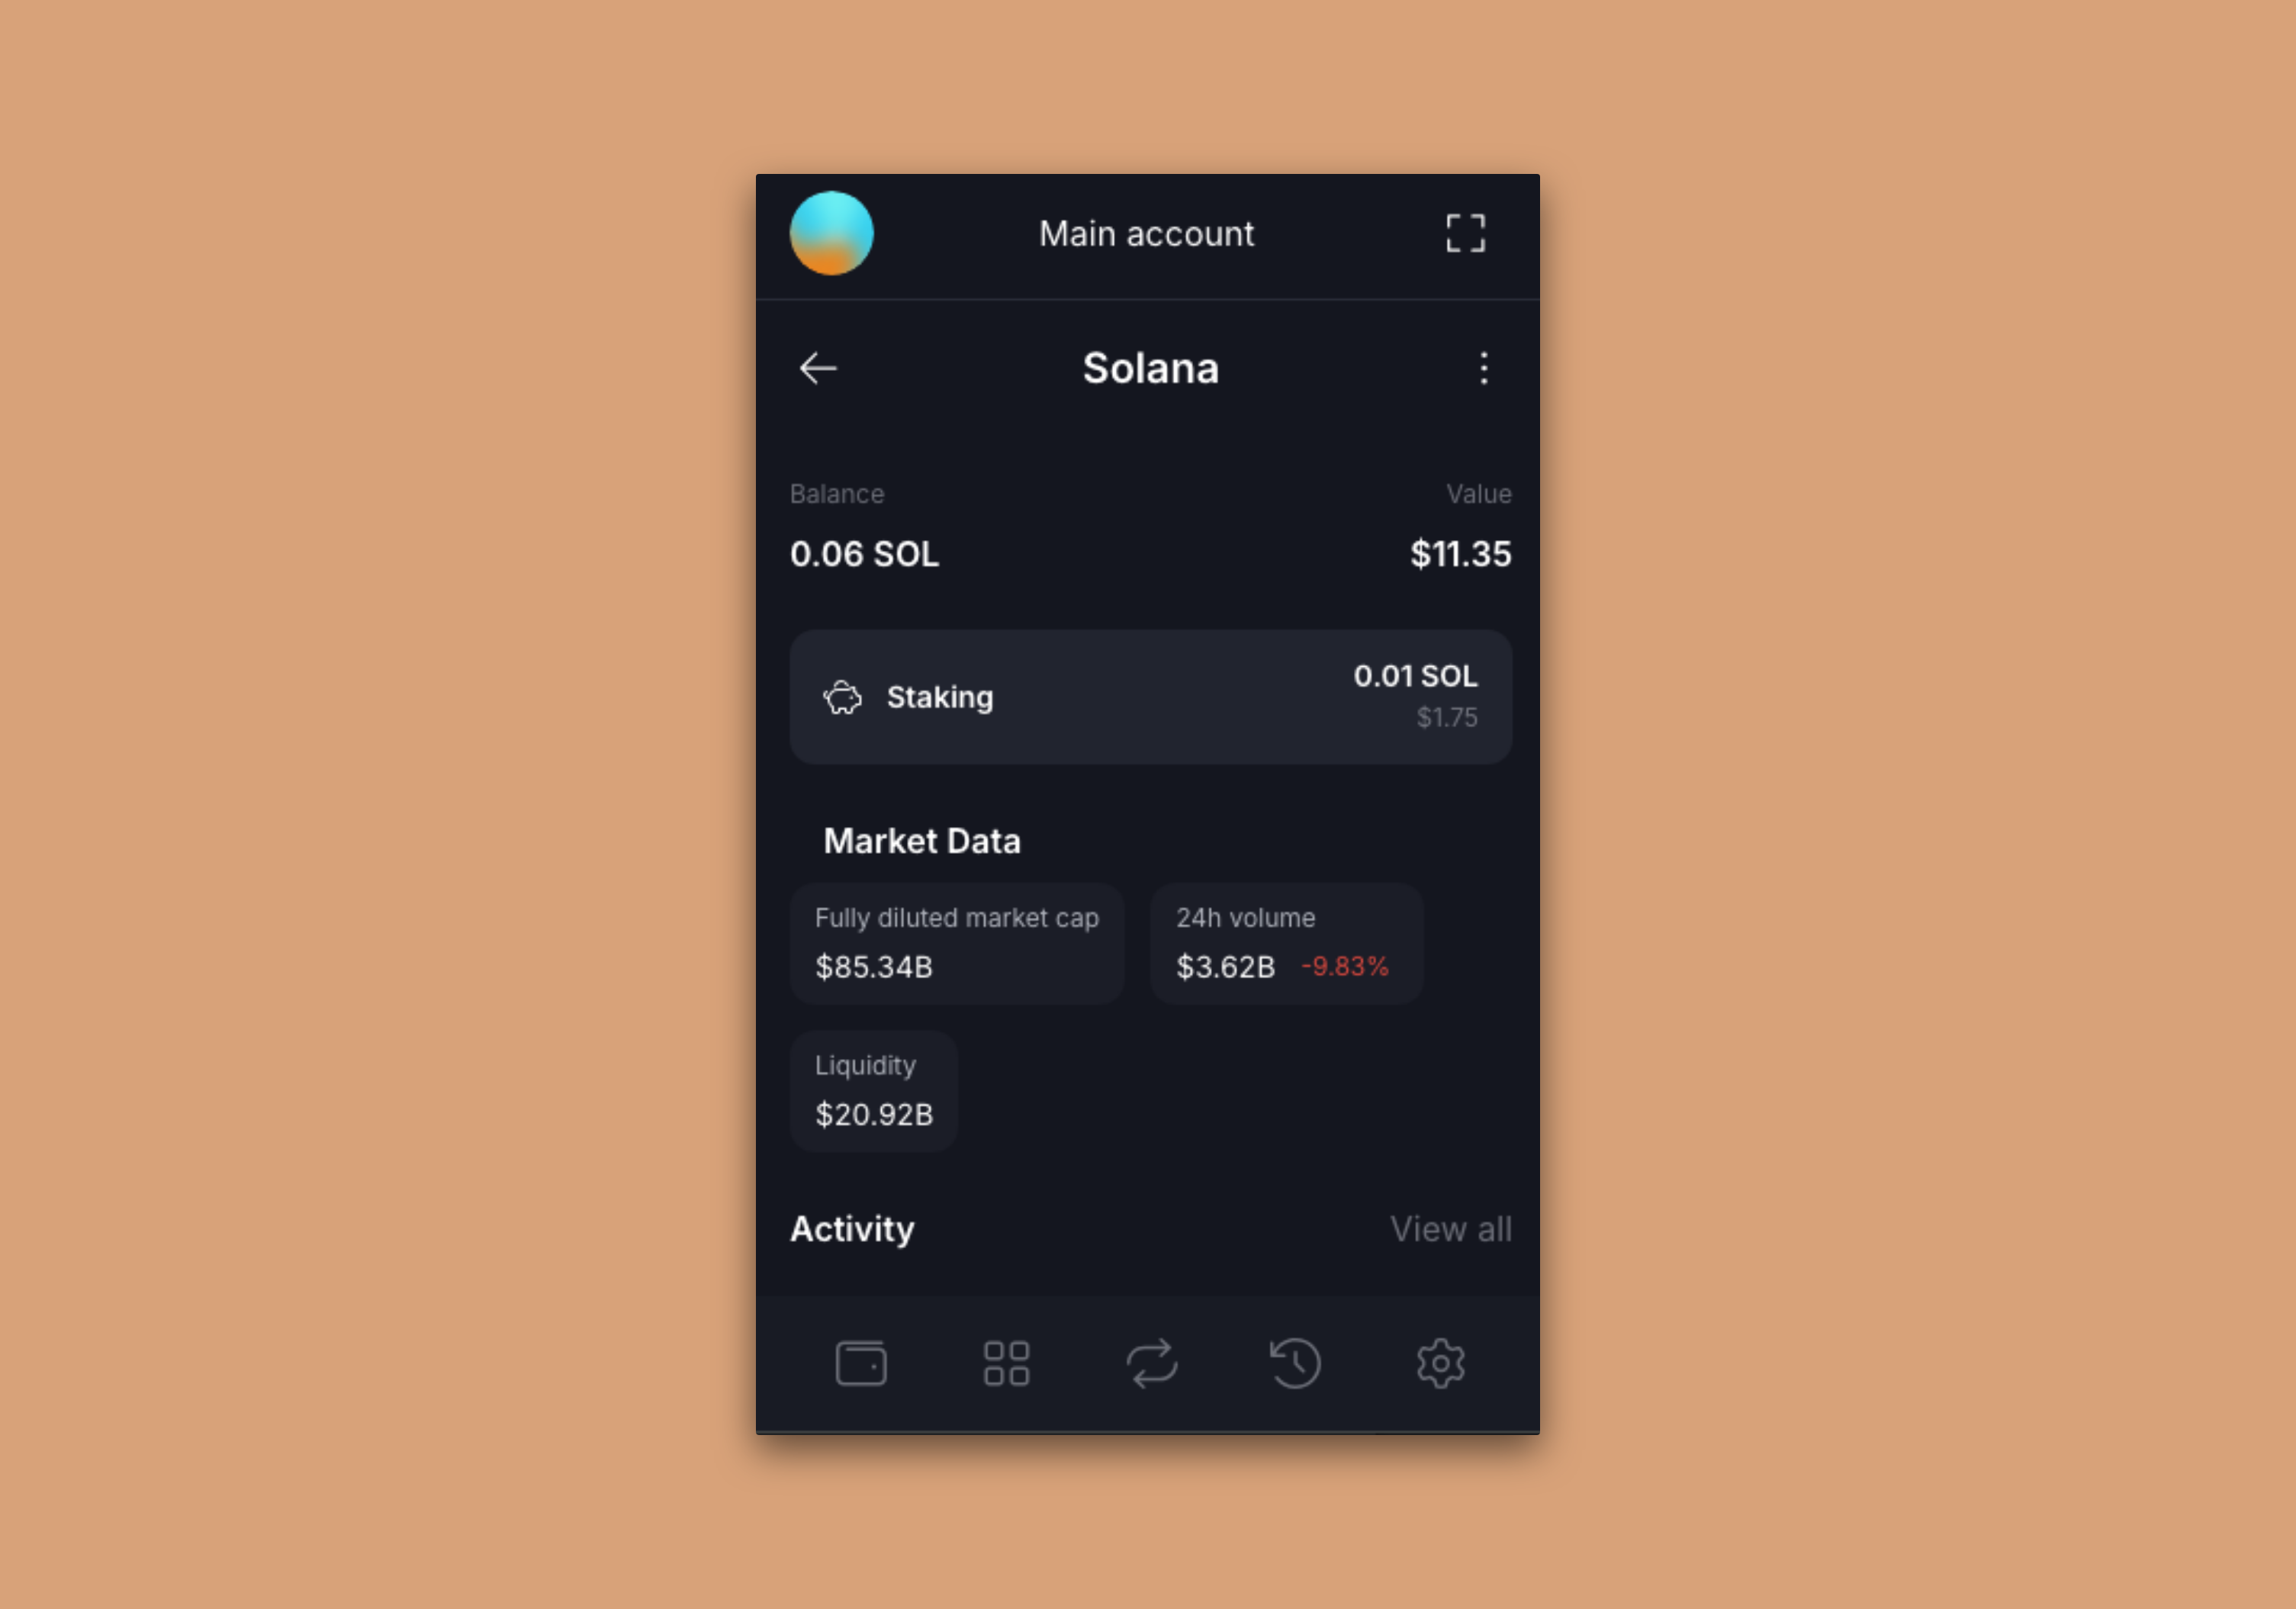
Solflare makes staking a breeze. Open your Solflare wallet, and click on your Solana balance. You'll be directed to a Solana details screen:
You should see a "Stake SOL" block. Click "Stake":
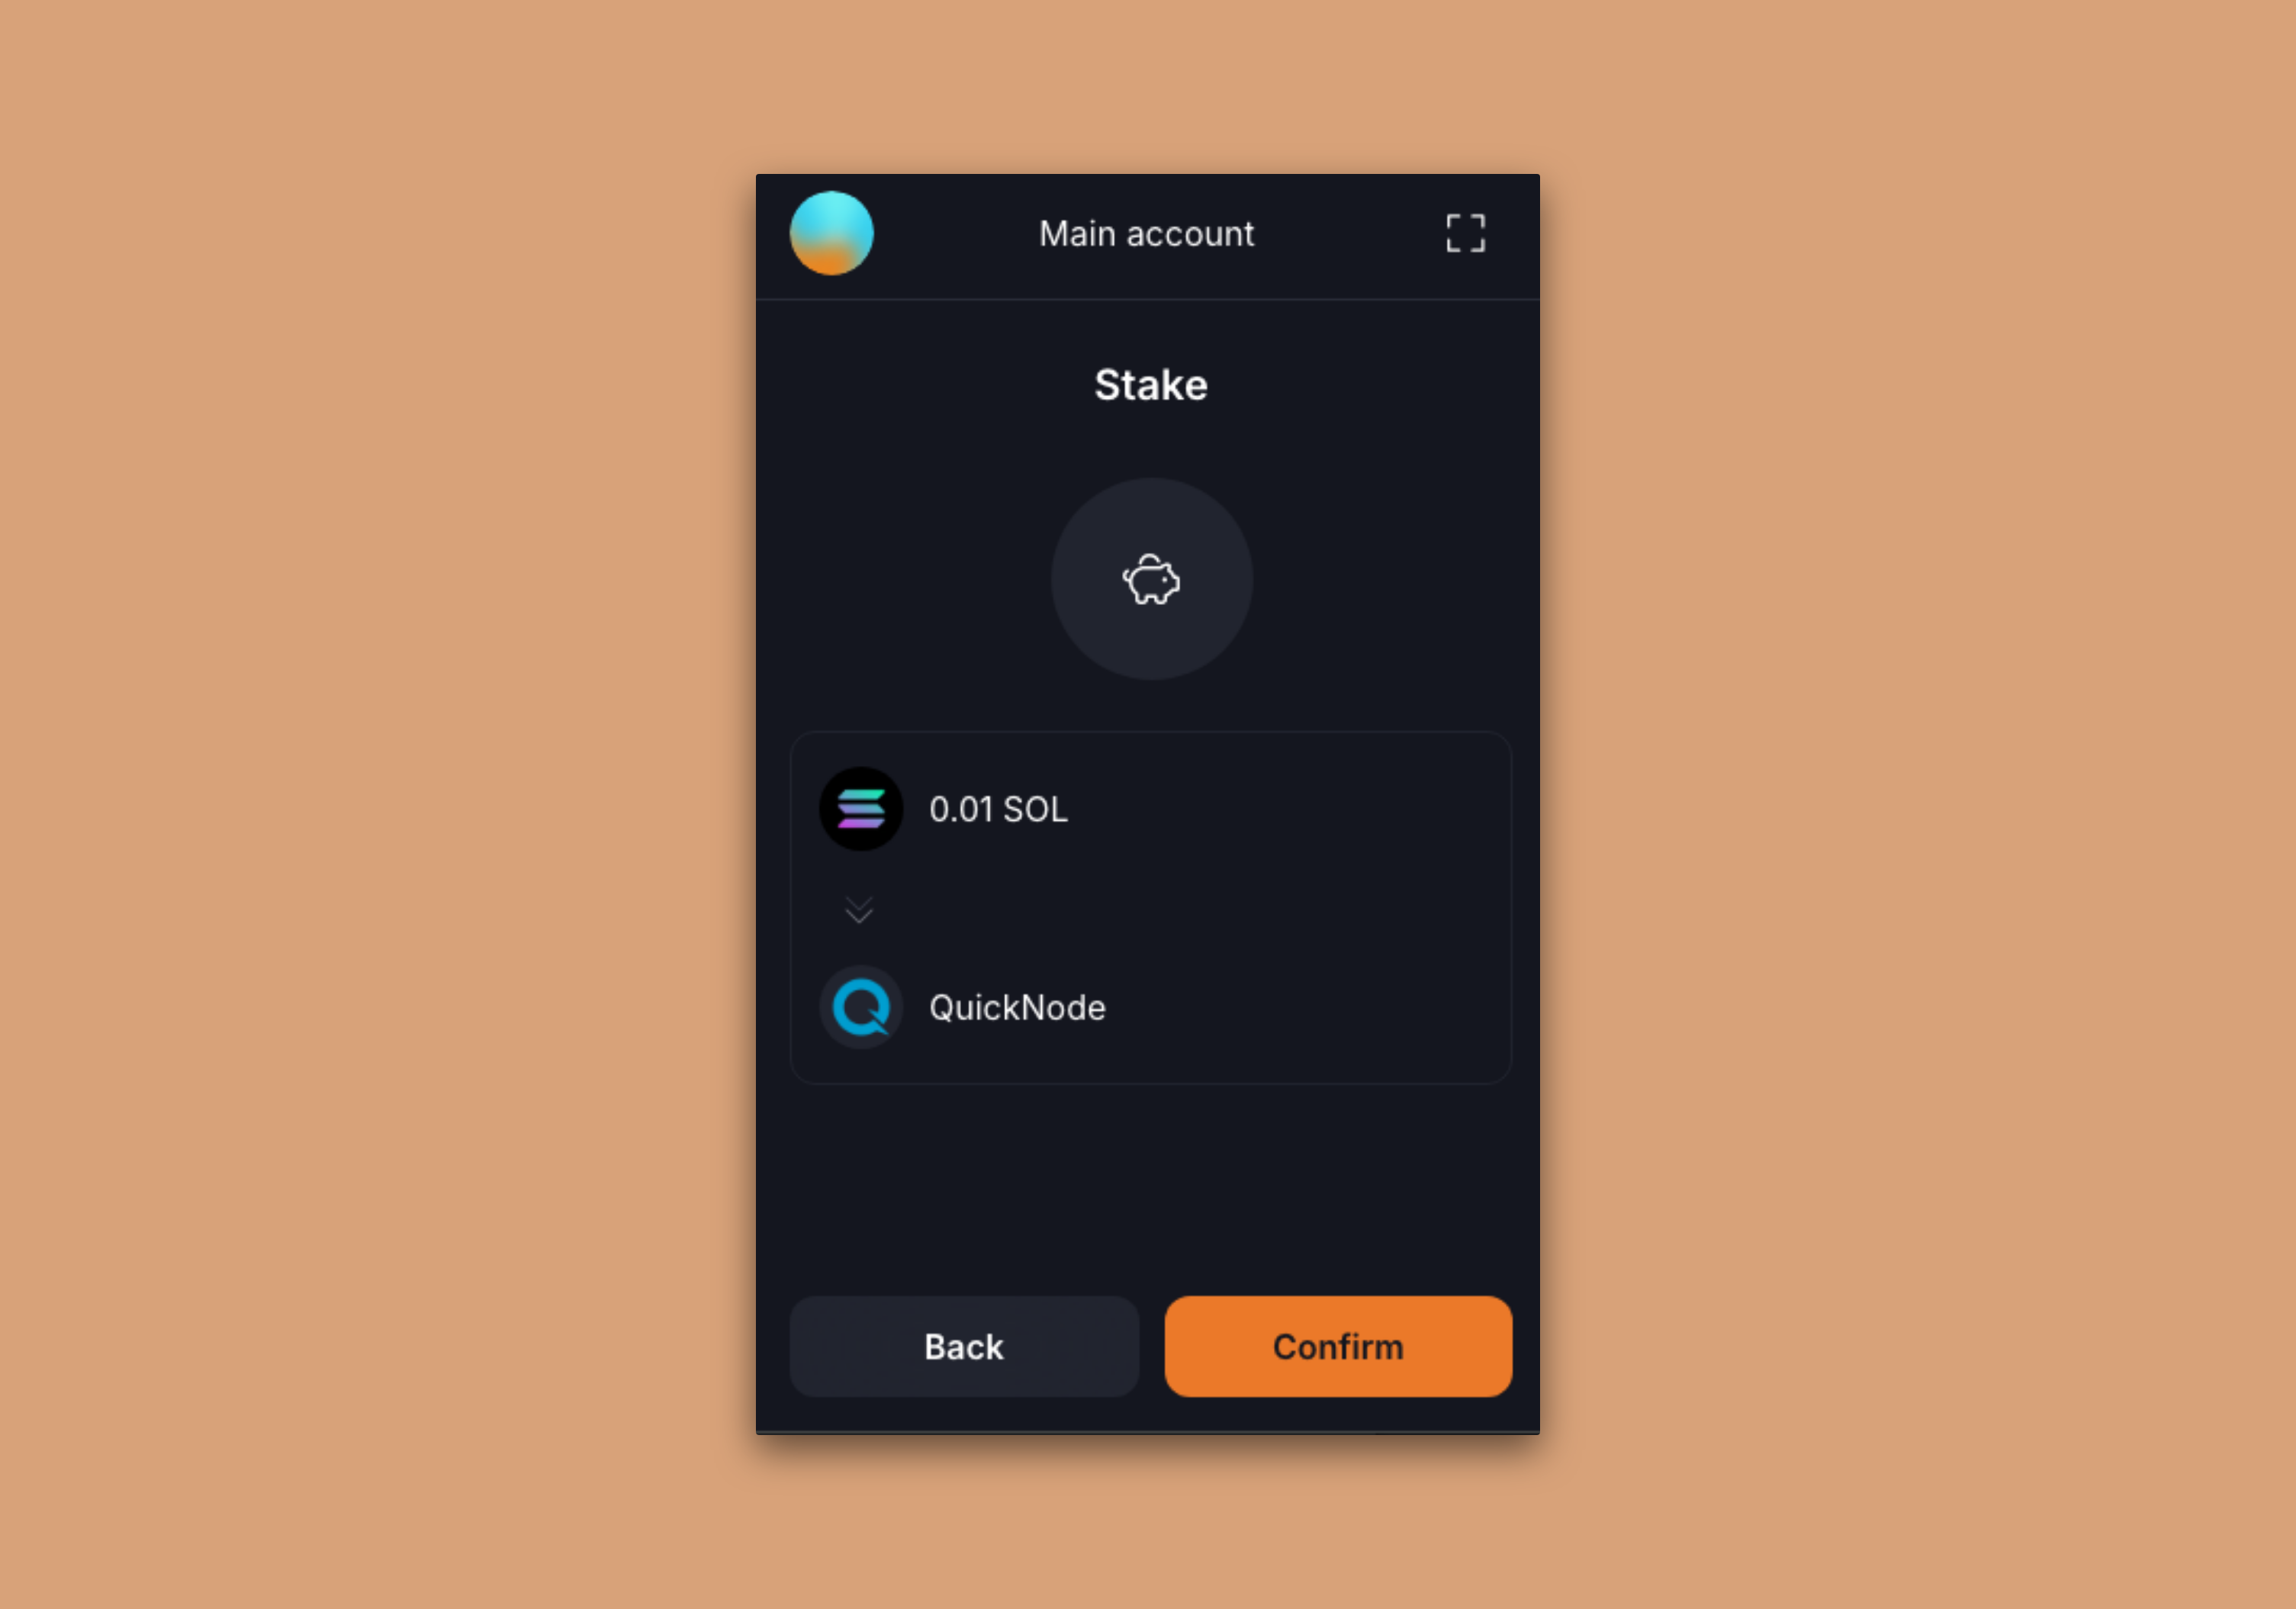
Search for the validator of your choice (e.g., "Quicknode" or "5s3vajJvaAbabQvxFdiMfg14y23b2jvK6K2Mw4PYcYK") and select your desired validator from the dropdown:

After entering the amount you would like to stake, click "Stake". You will be prompted to confirm the transaction:
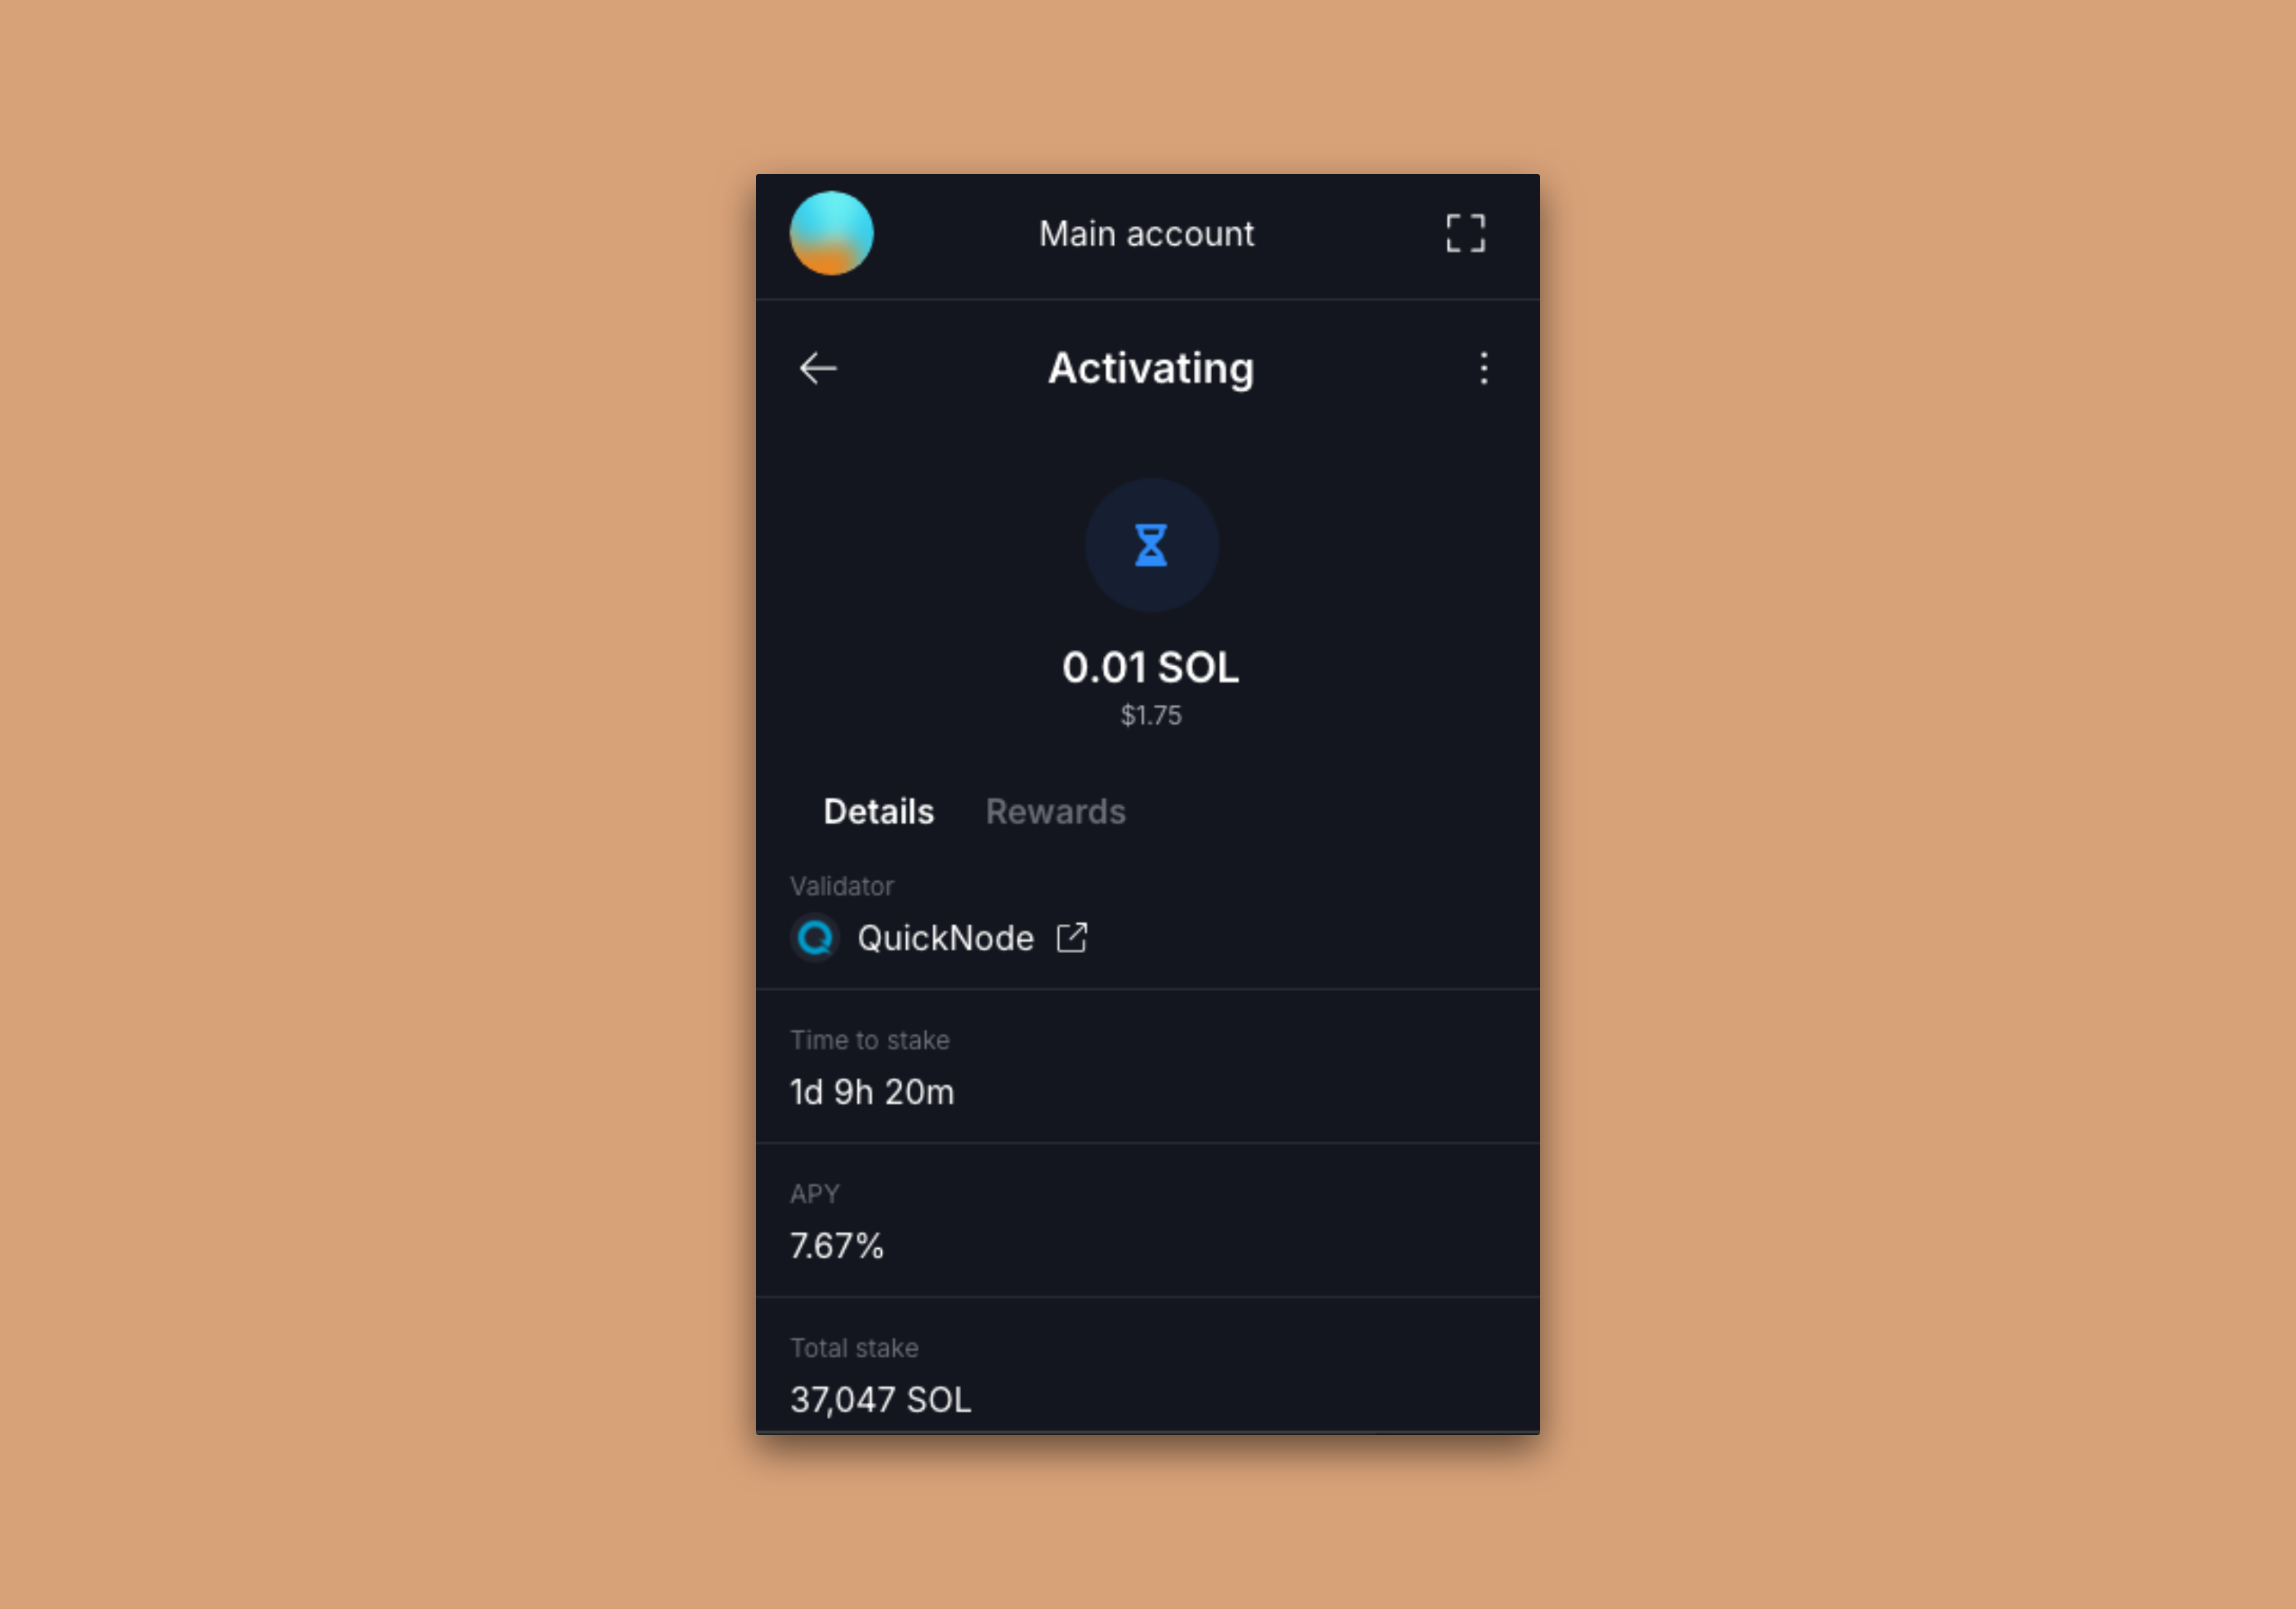
You can then return to your Solana balance details screen, and you will see a new "Staking" balance:
Click it to see the details of your stake that is being activated:
Great job! You're now staking SOL with Solflare. 🔥
Stake with Backpack
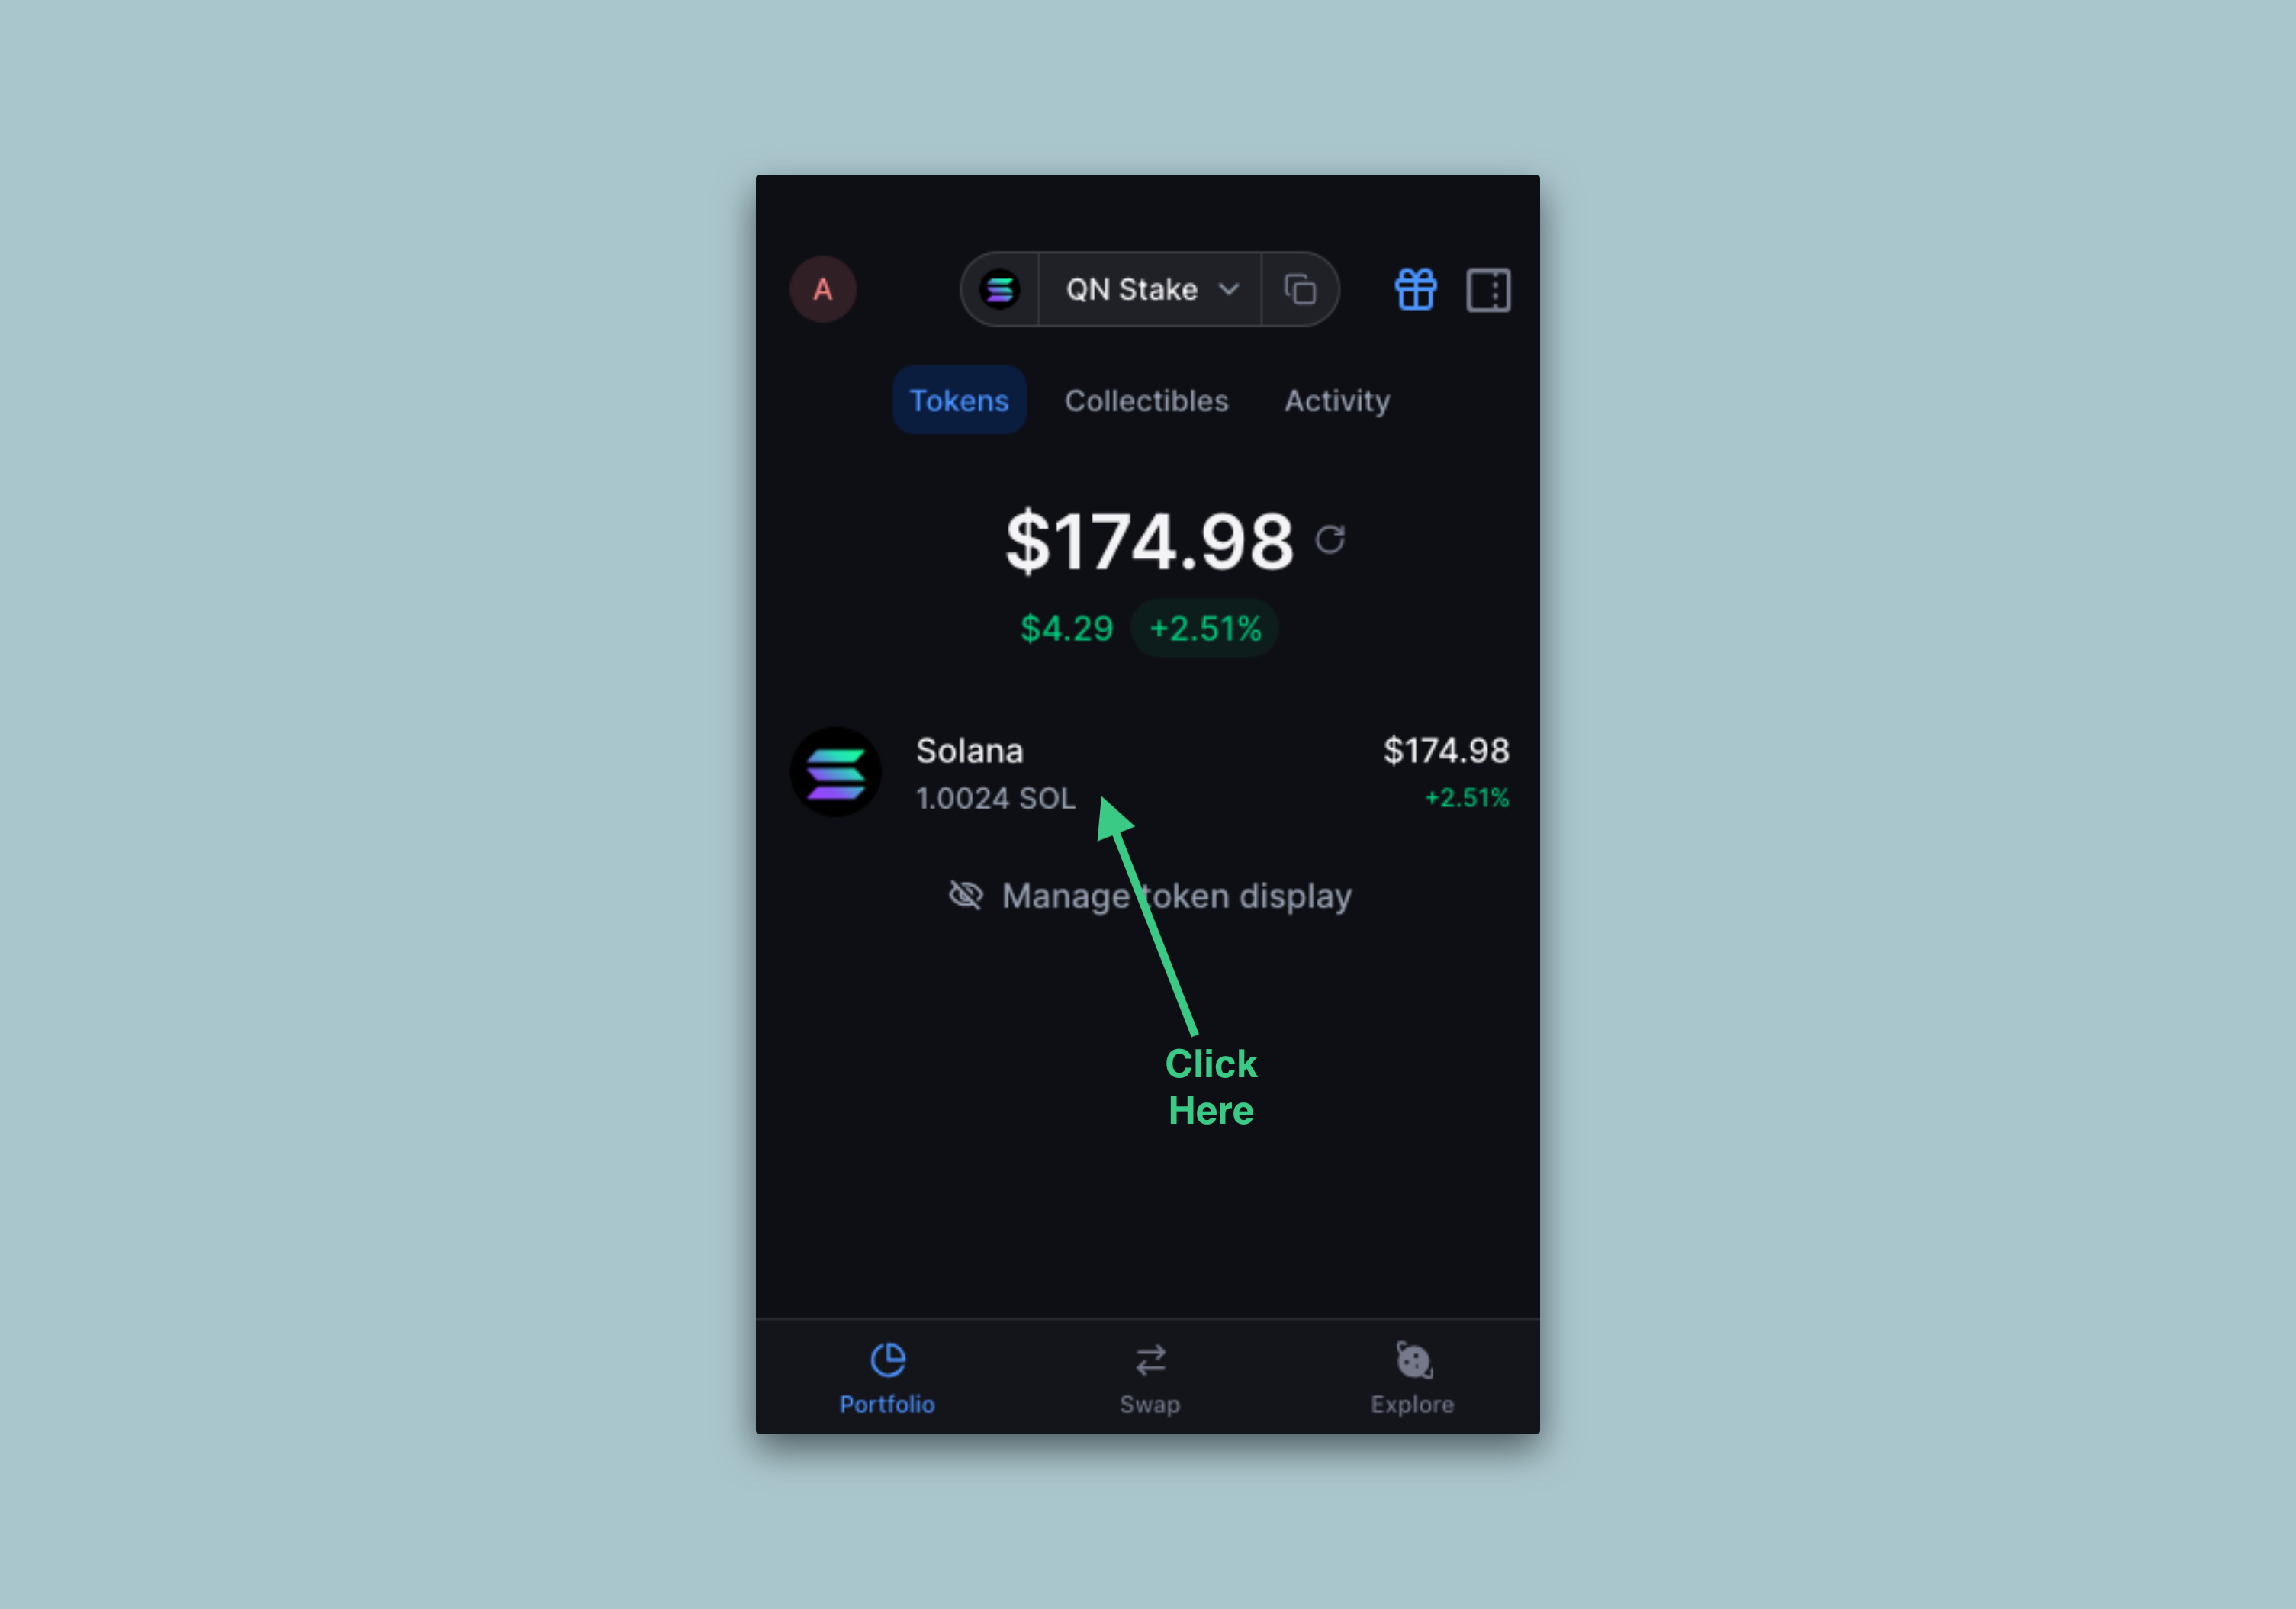
Backpack is another popular Solana wallet that allows you to stake your SOL without leaving the wallet. Open your Backpack wallet. Click on your Solana balance from the main screen:
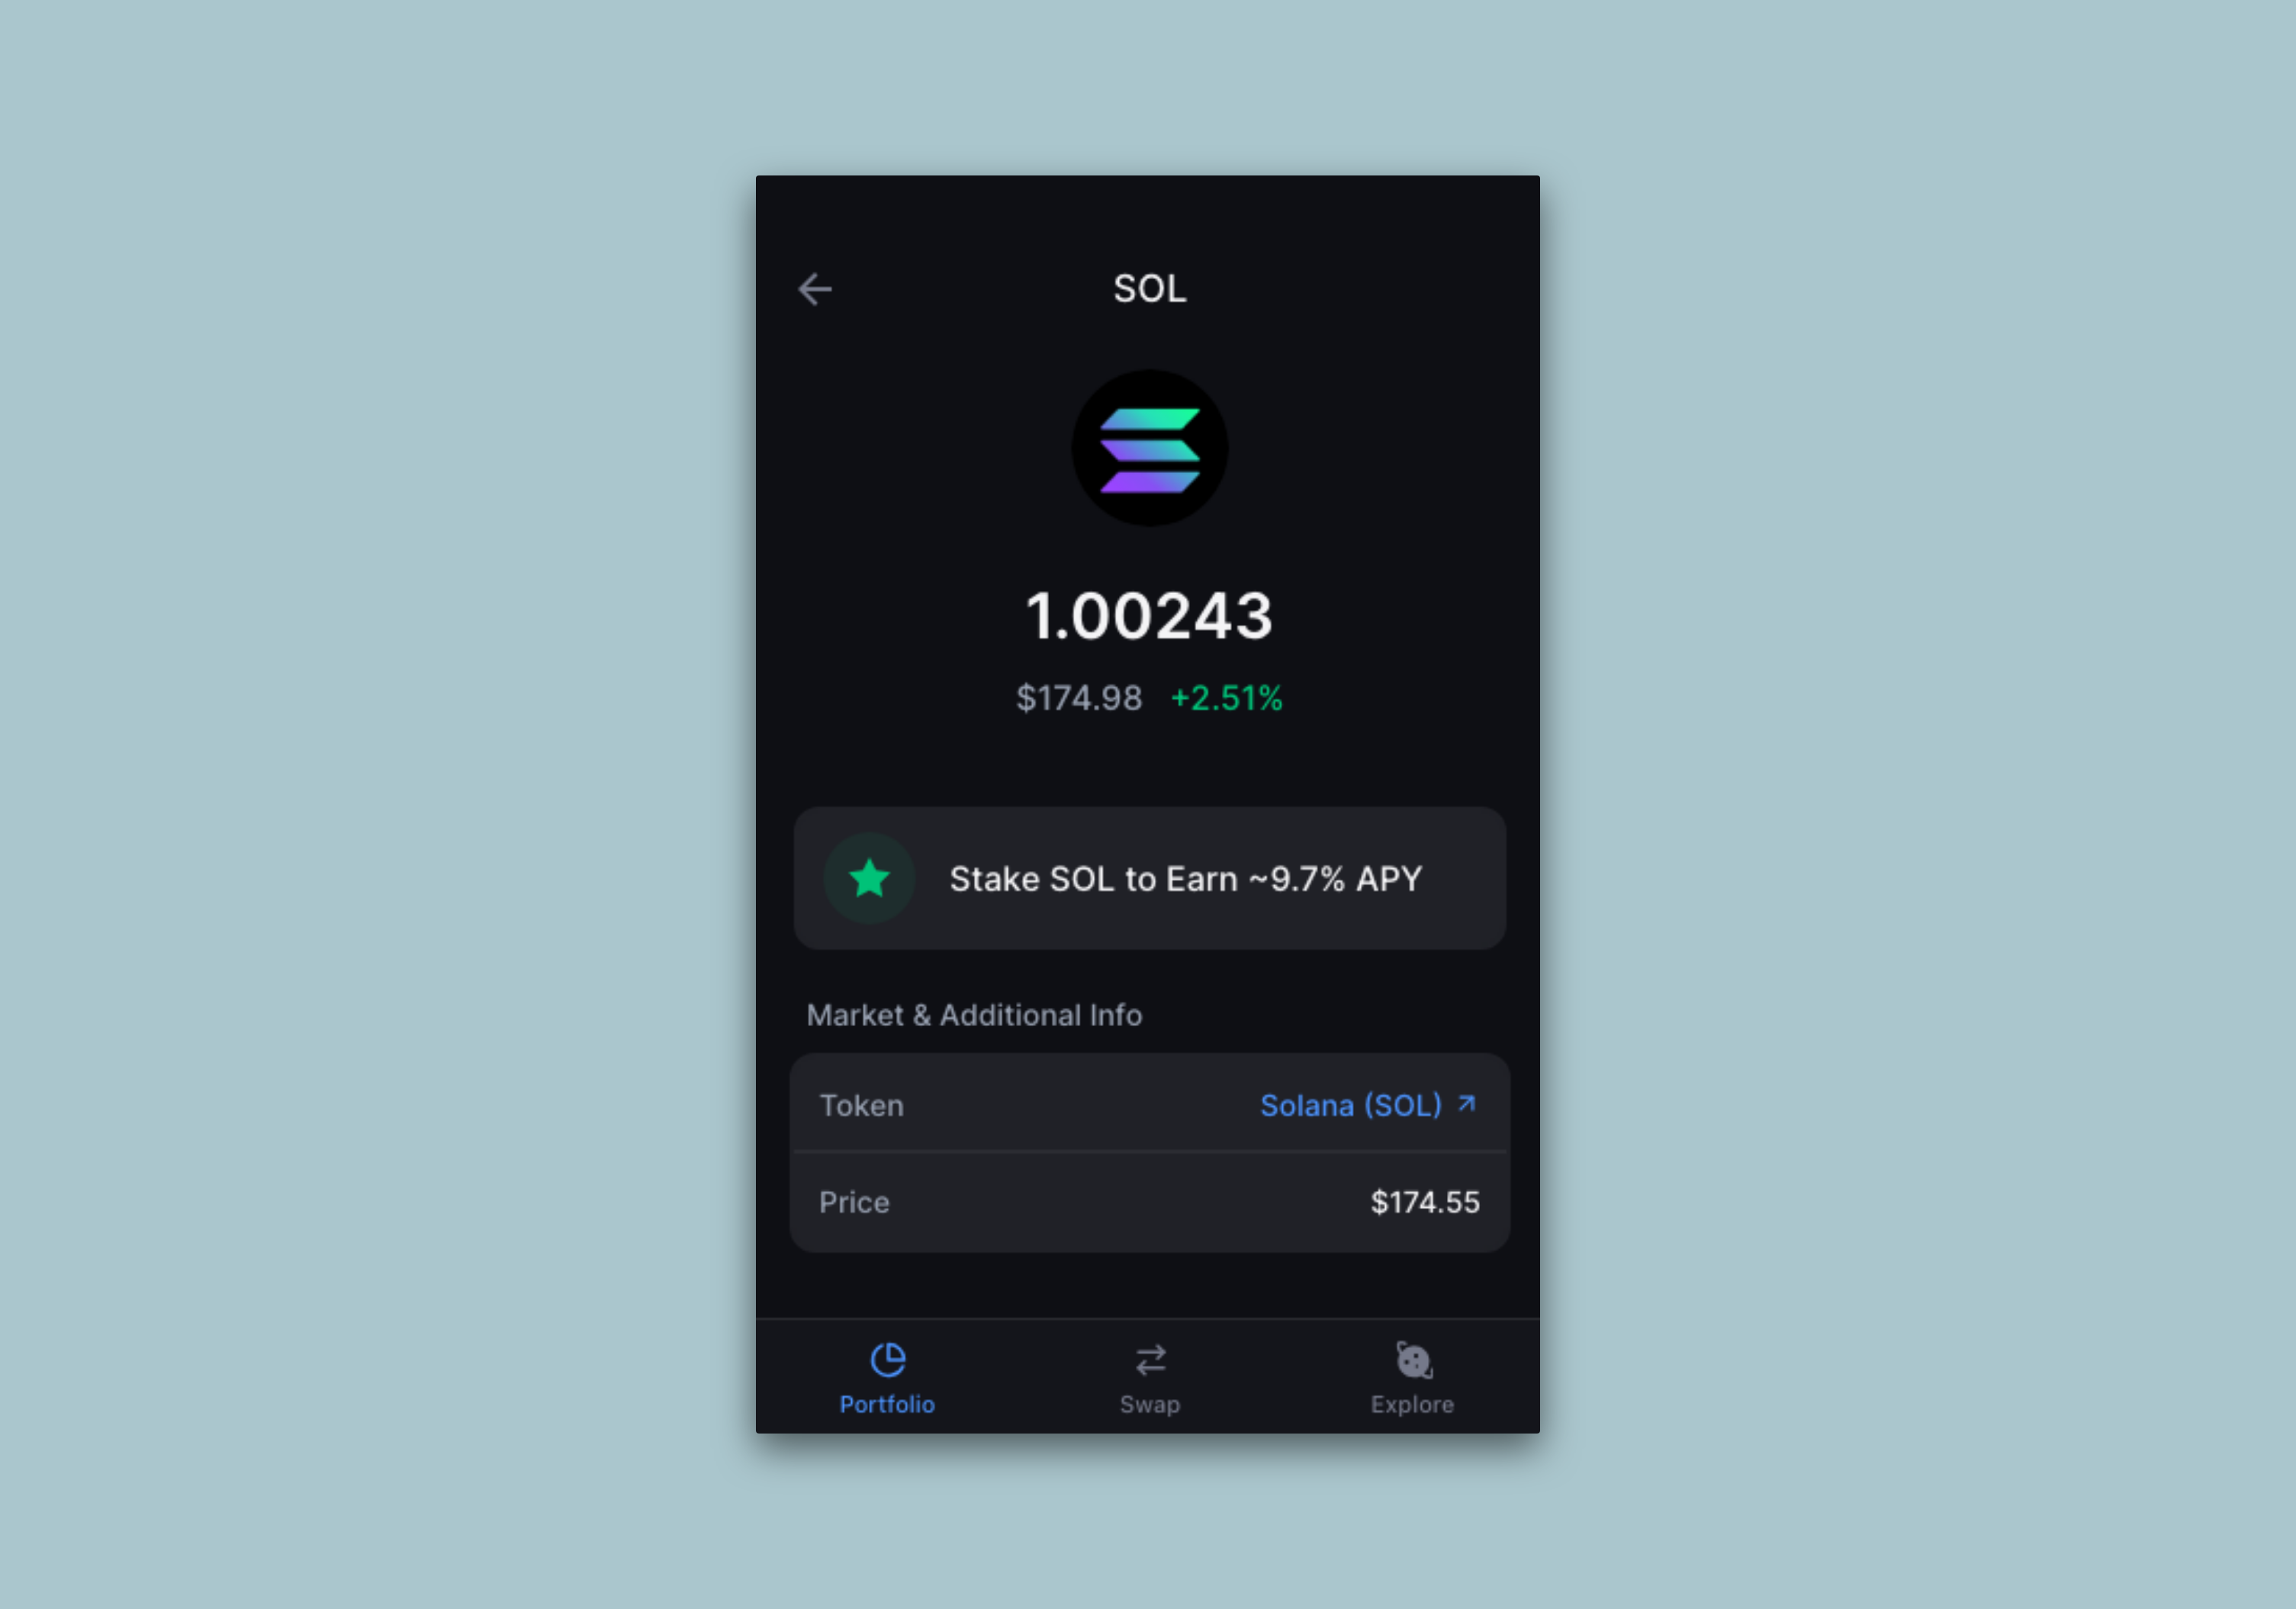
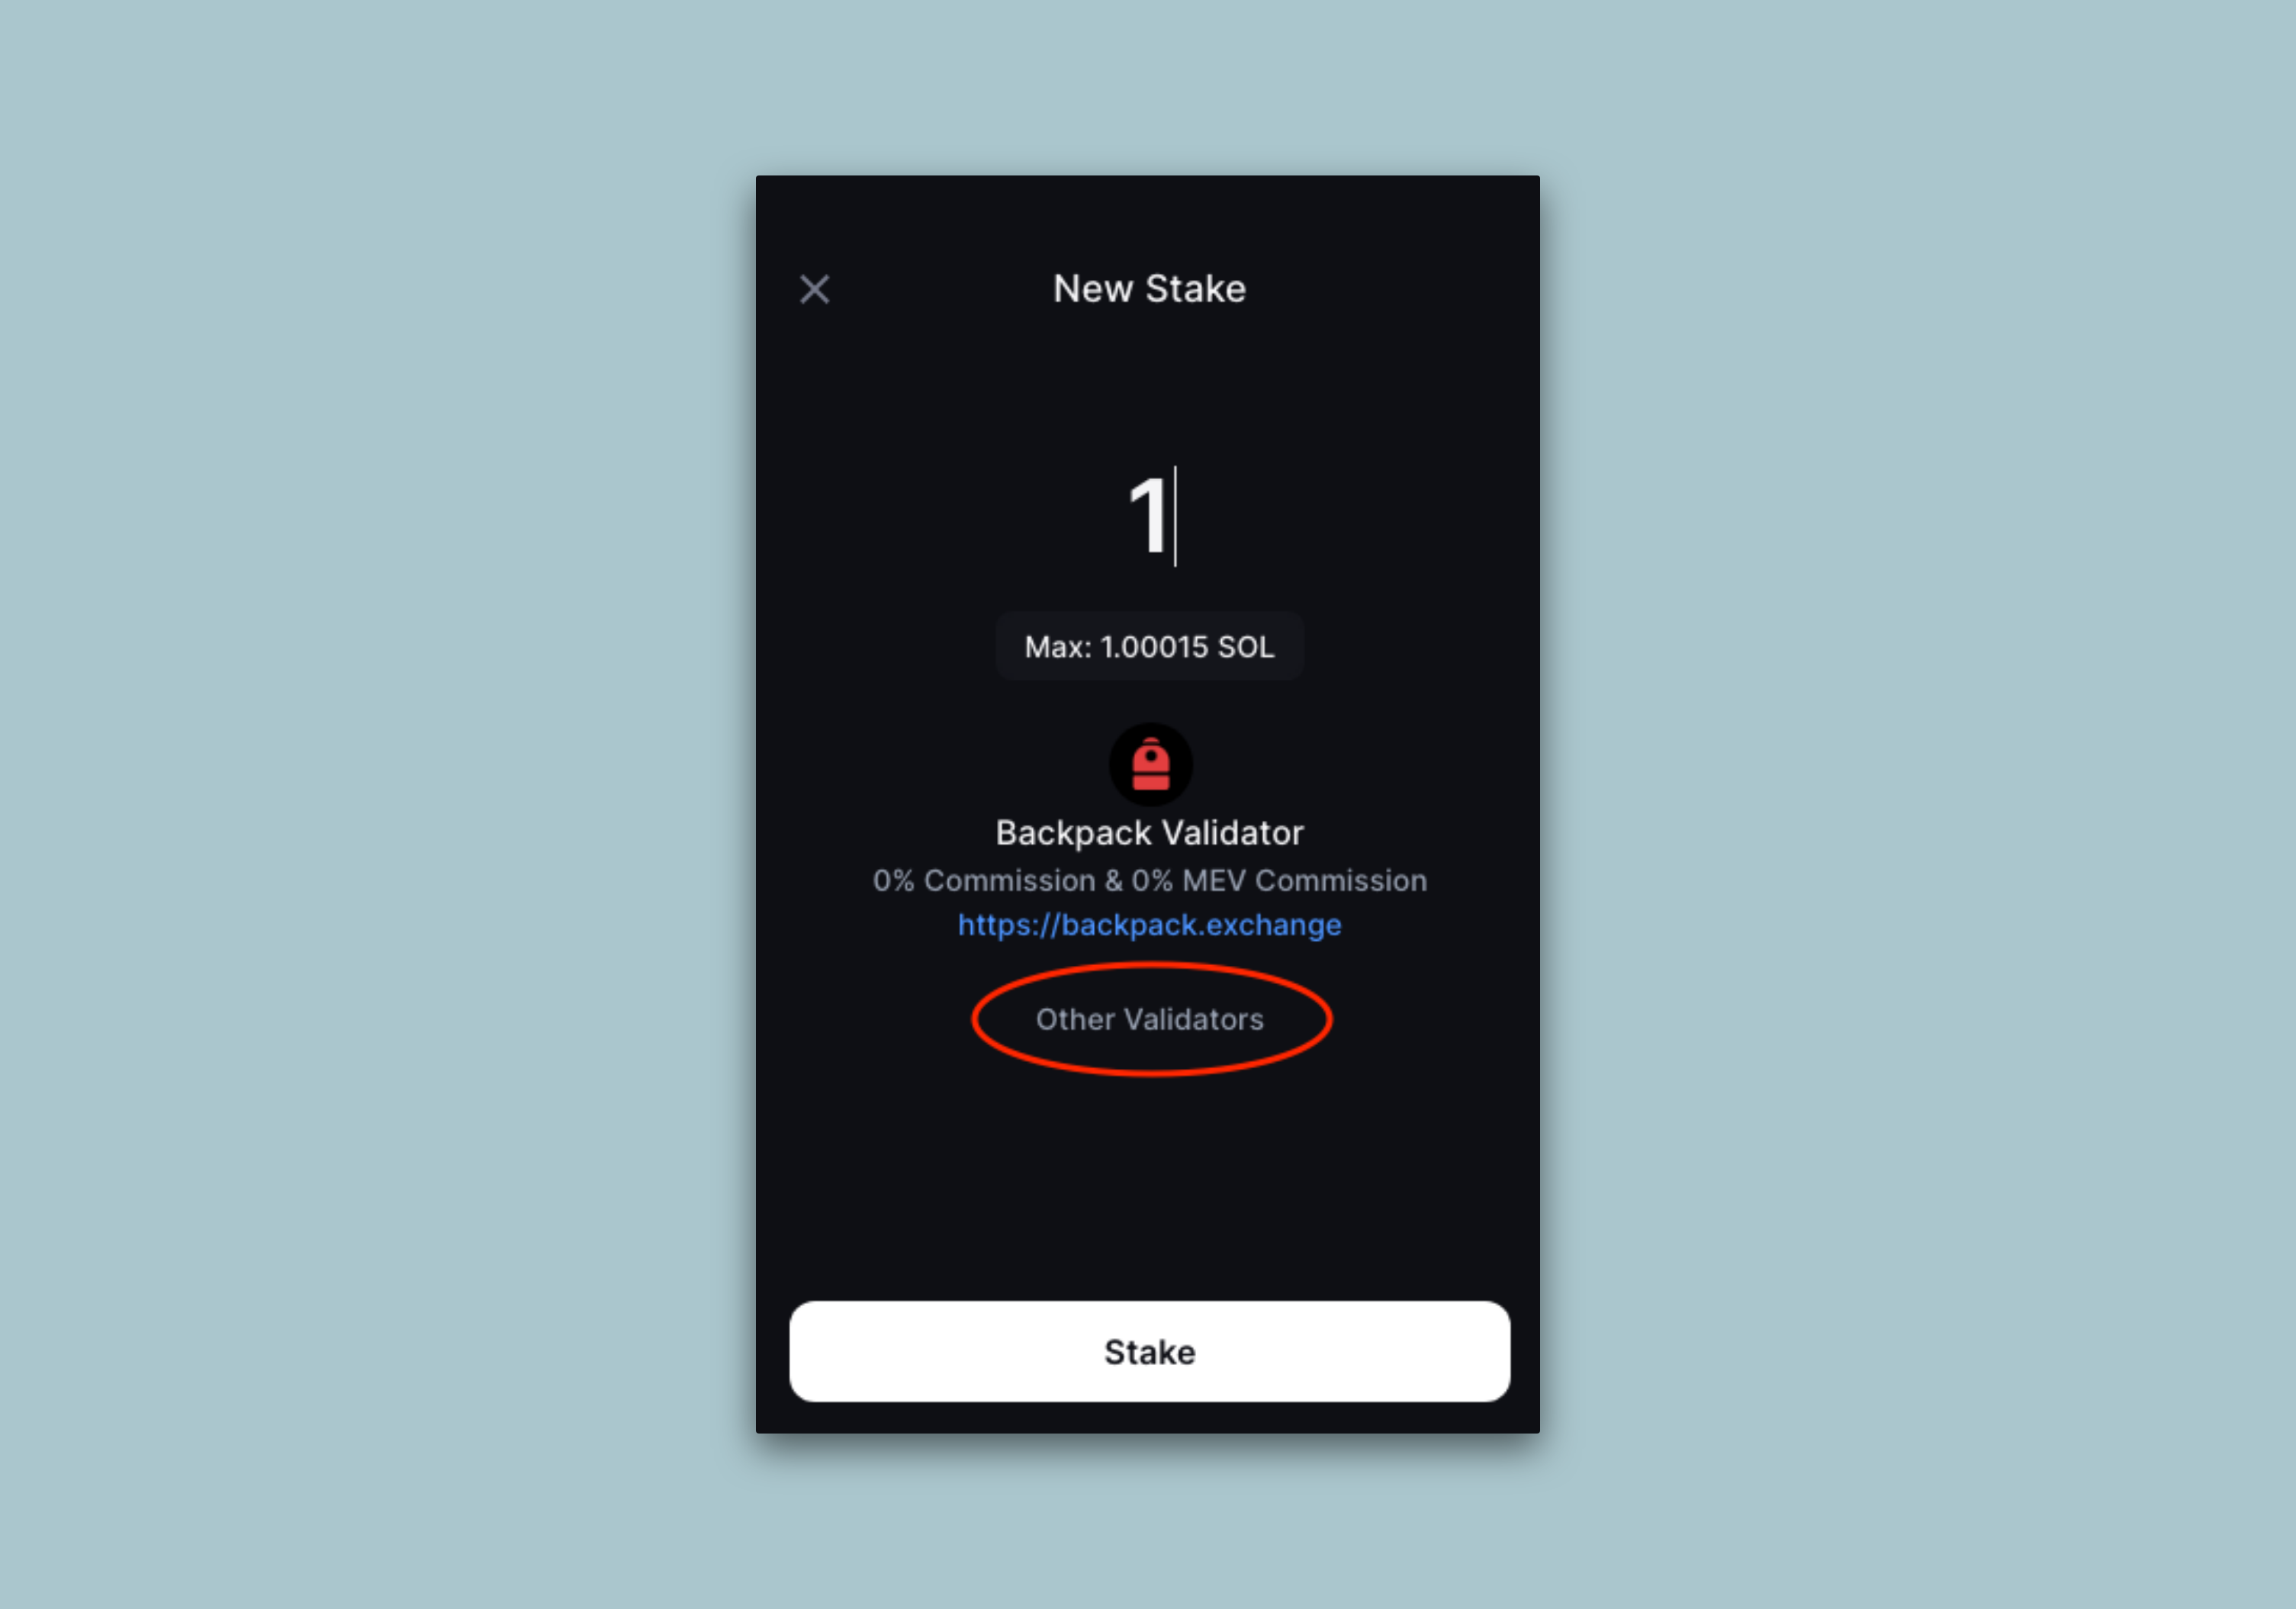
You will see your SOL balance with an option to "⭐️ Stake SOL to Earn". Click this button:
You'll be given an option to select your desired validator. Click "Other Validators" to search for a specific validator:
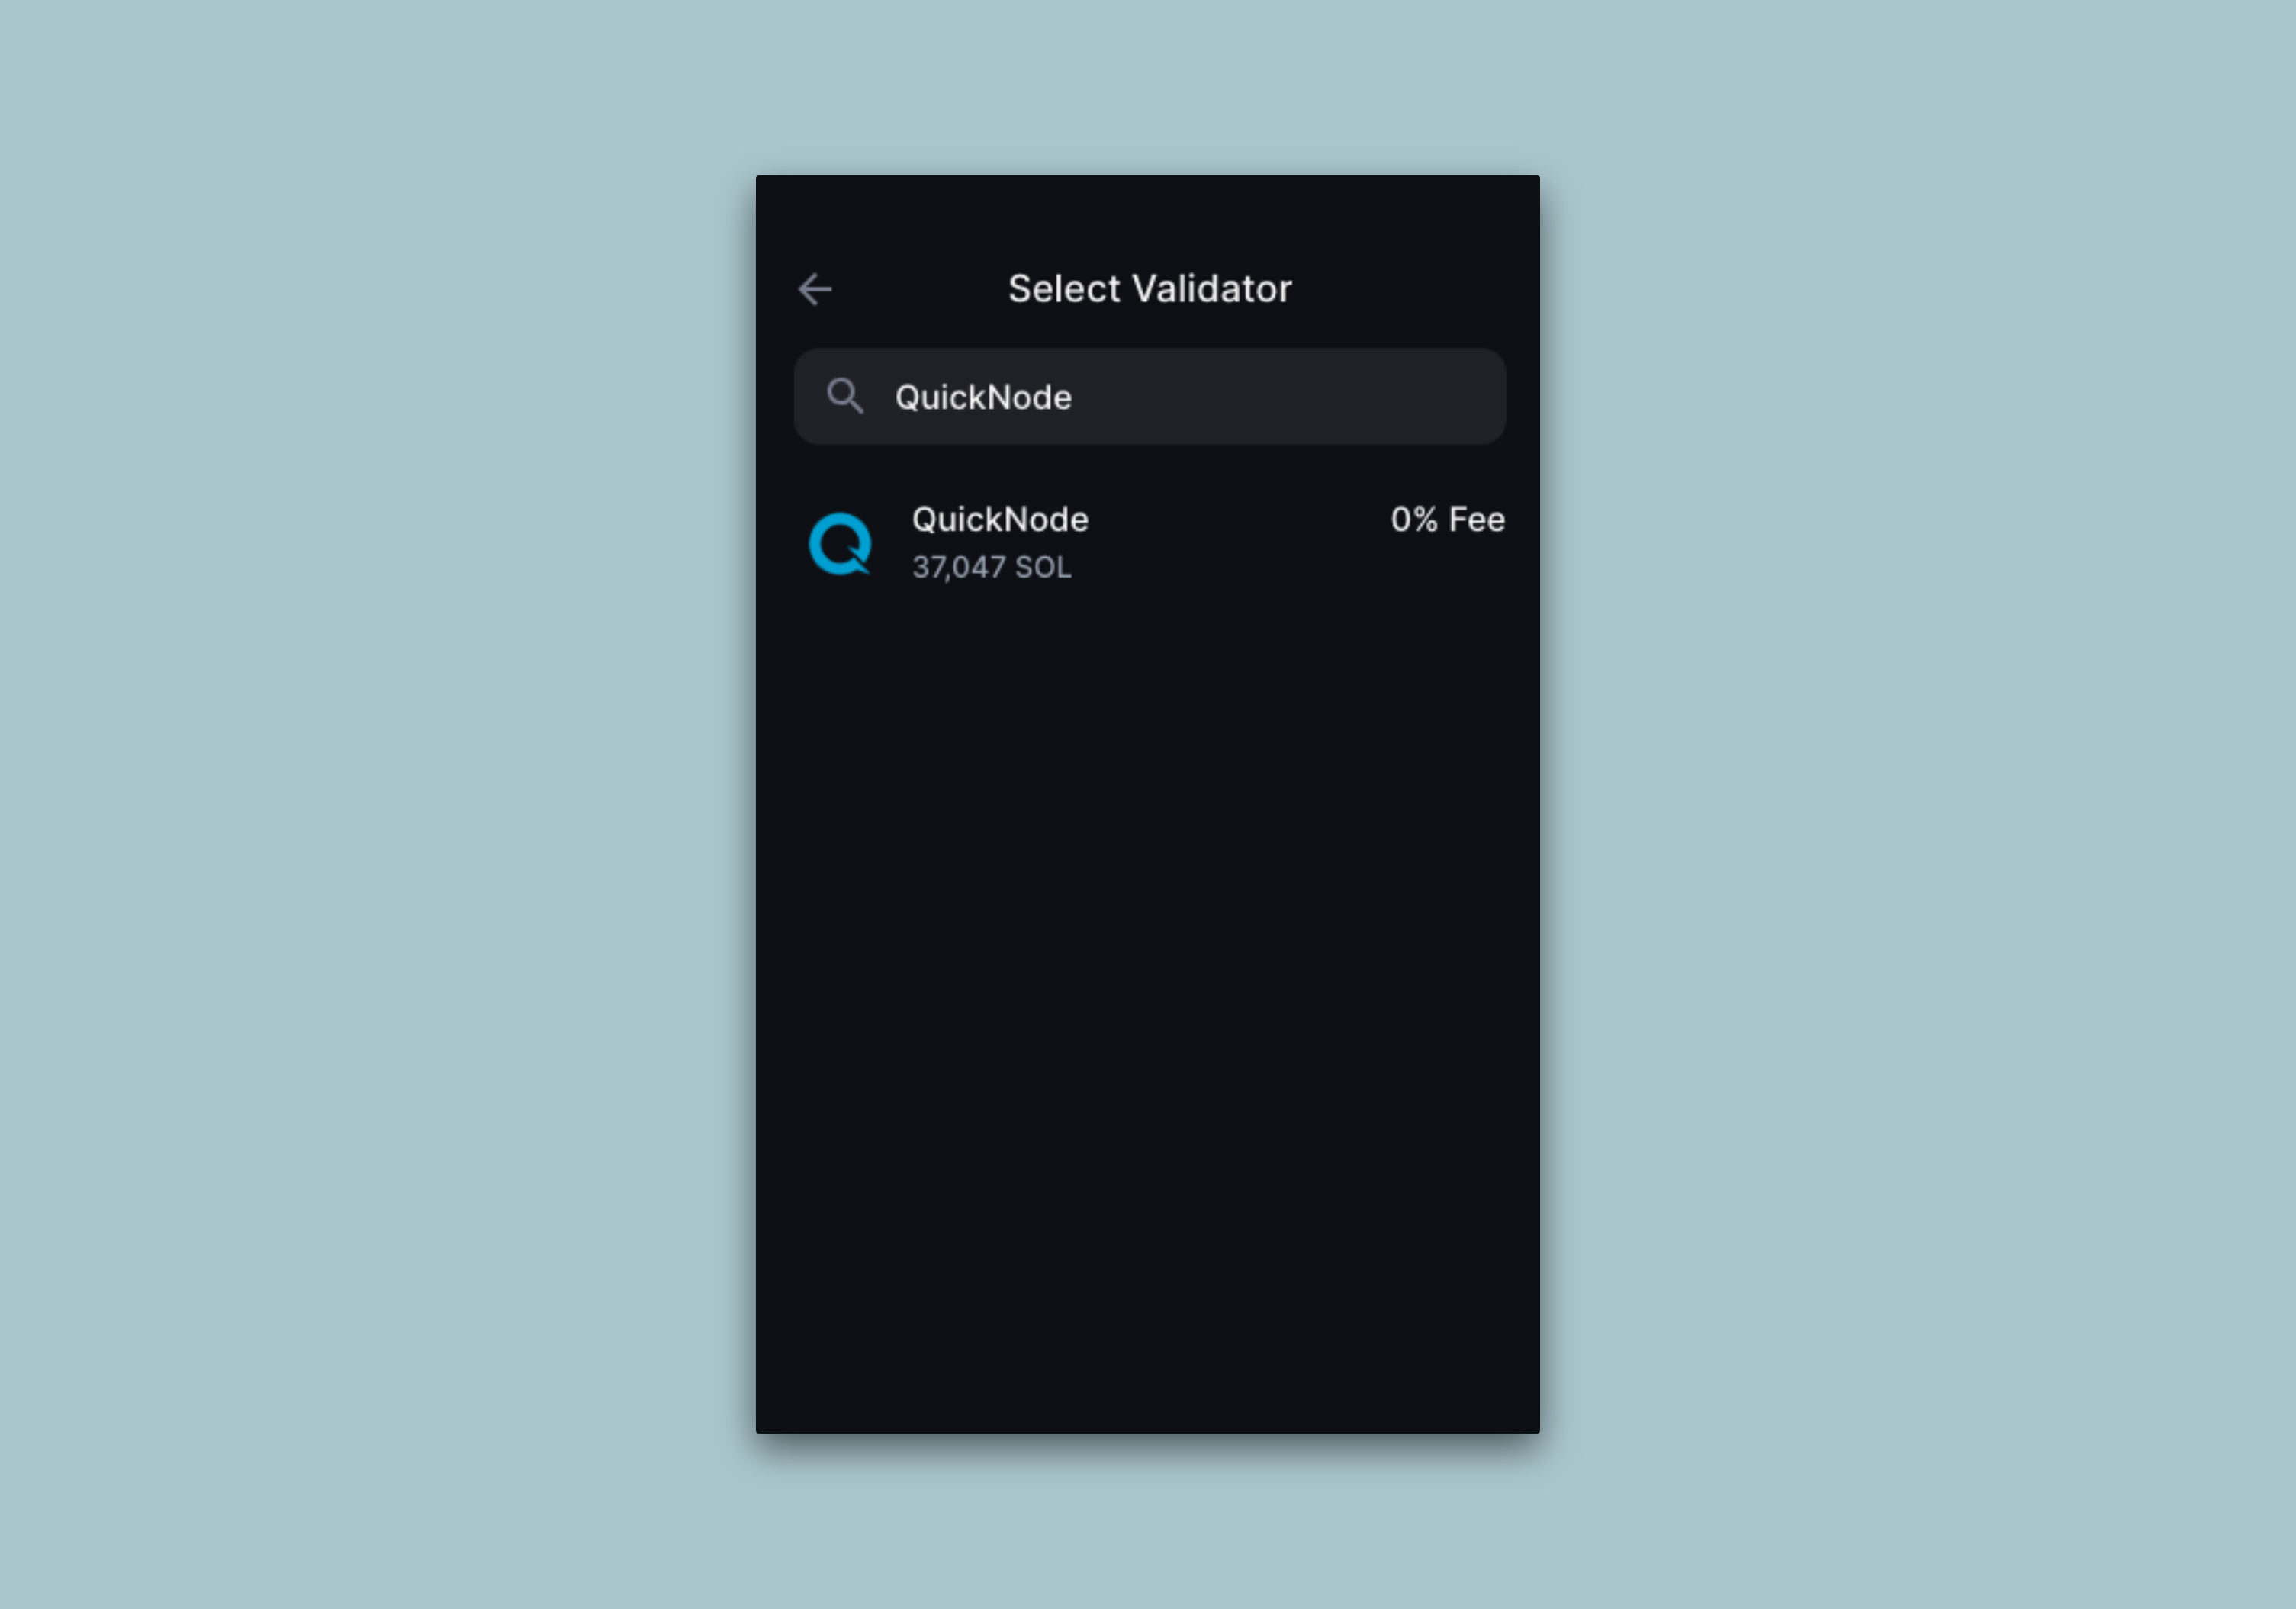
Search for your desired validator (e.g., "Quicknode" or "5s3vajJvaAbabQvxFdiMfg14y23b2jvK6K2Mw4PYcYK") and select it:
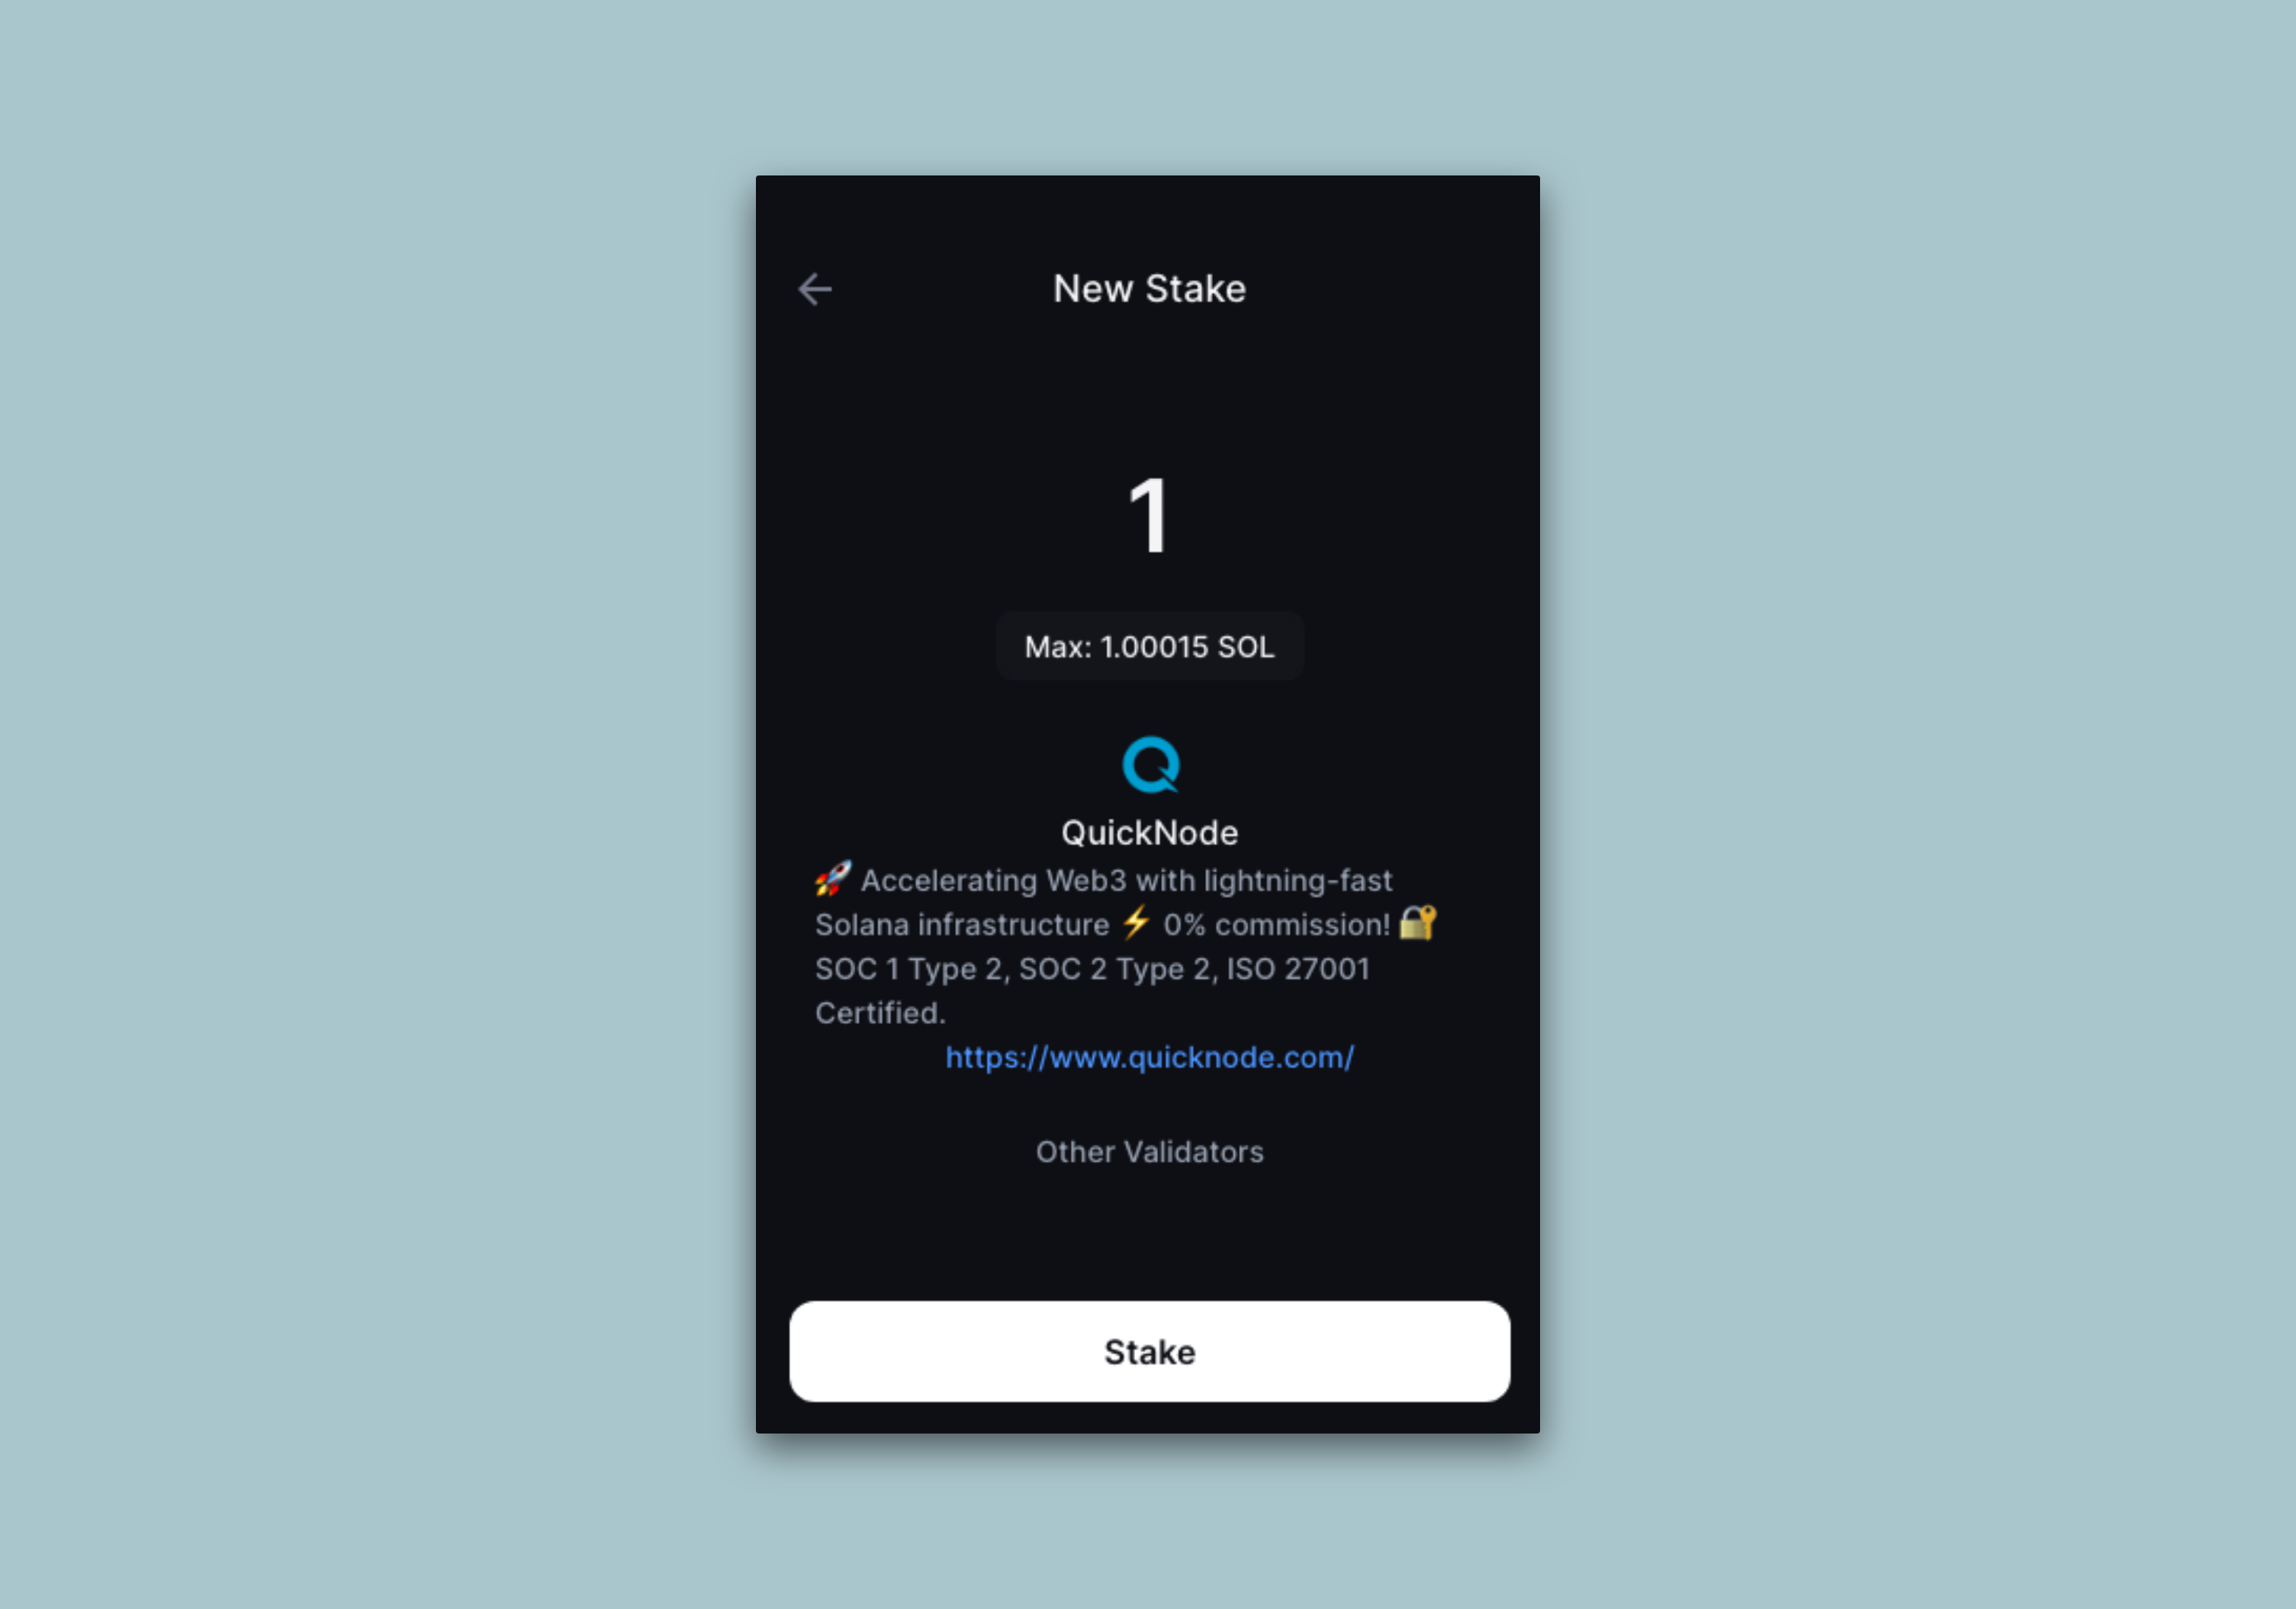
You'll return to the "New Stake" screen with the selected validator. Enter the amount you would like to stake and click "Stake":
You will be redirected to the SOL Balance page where you will see your new account listed under "Staking":
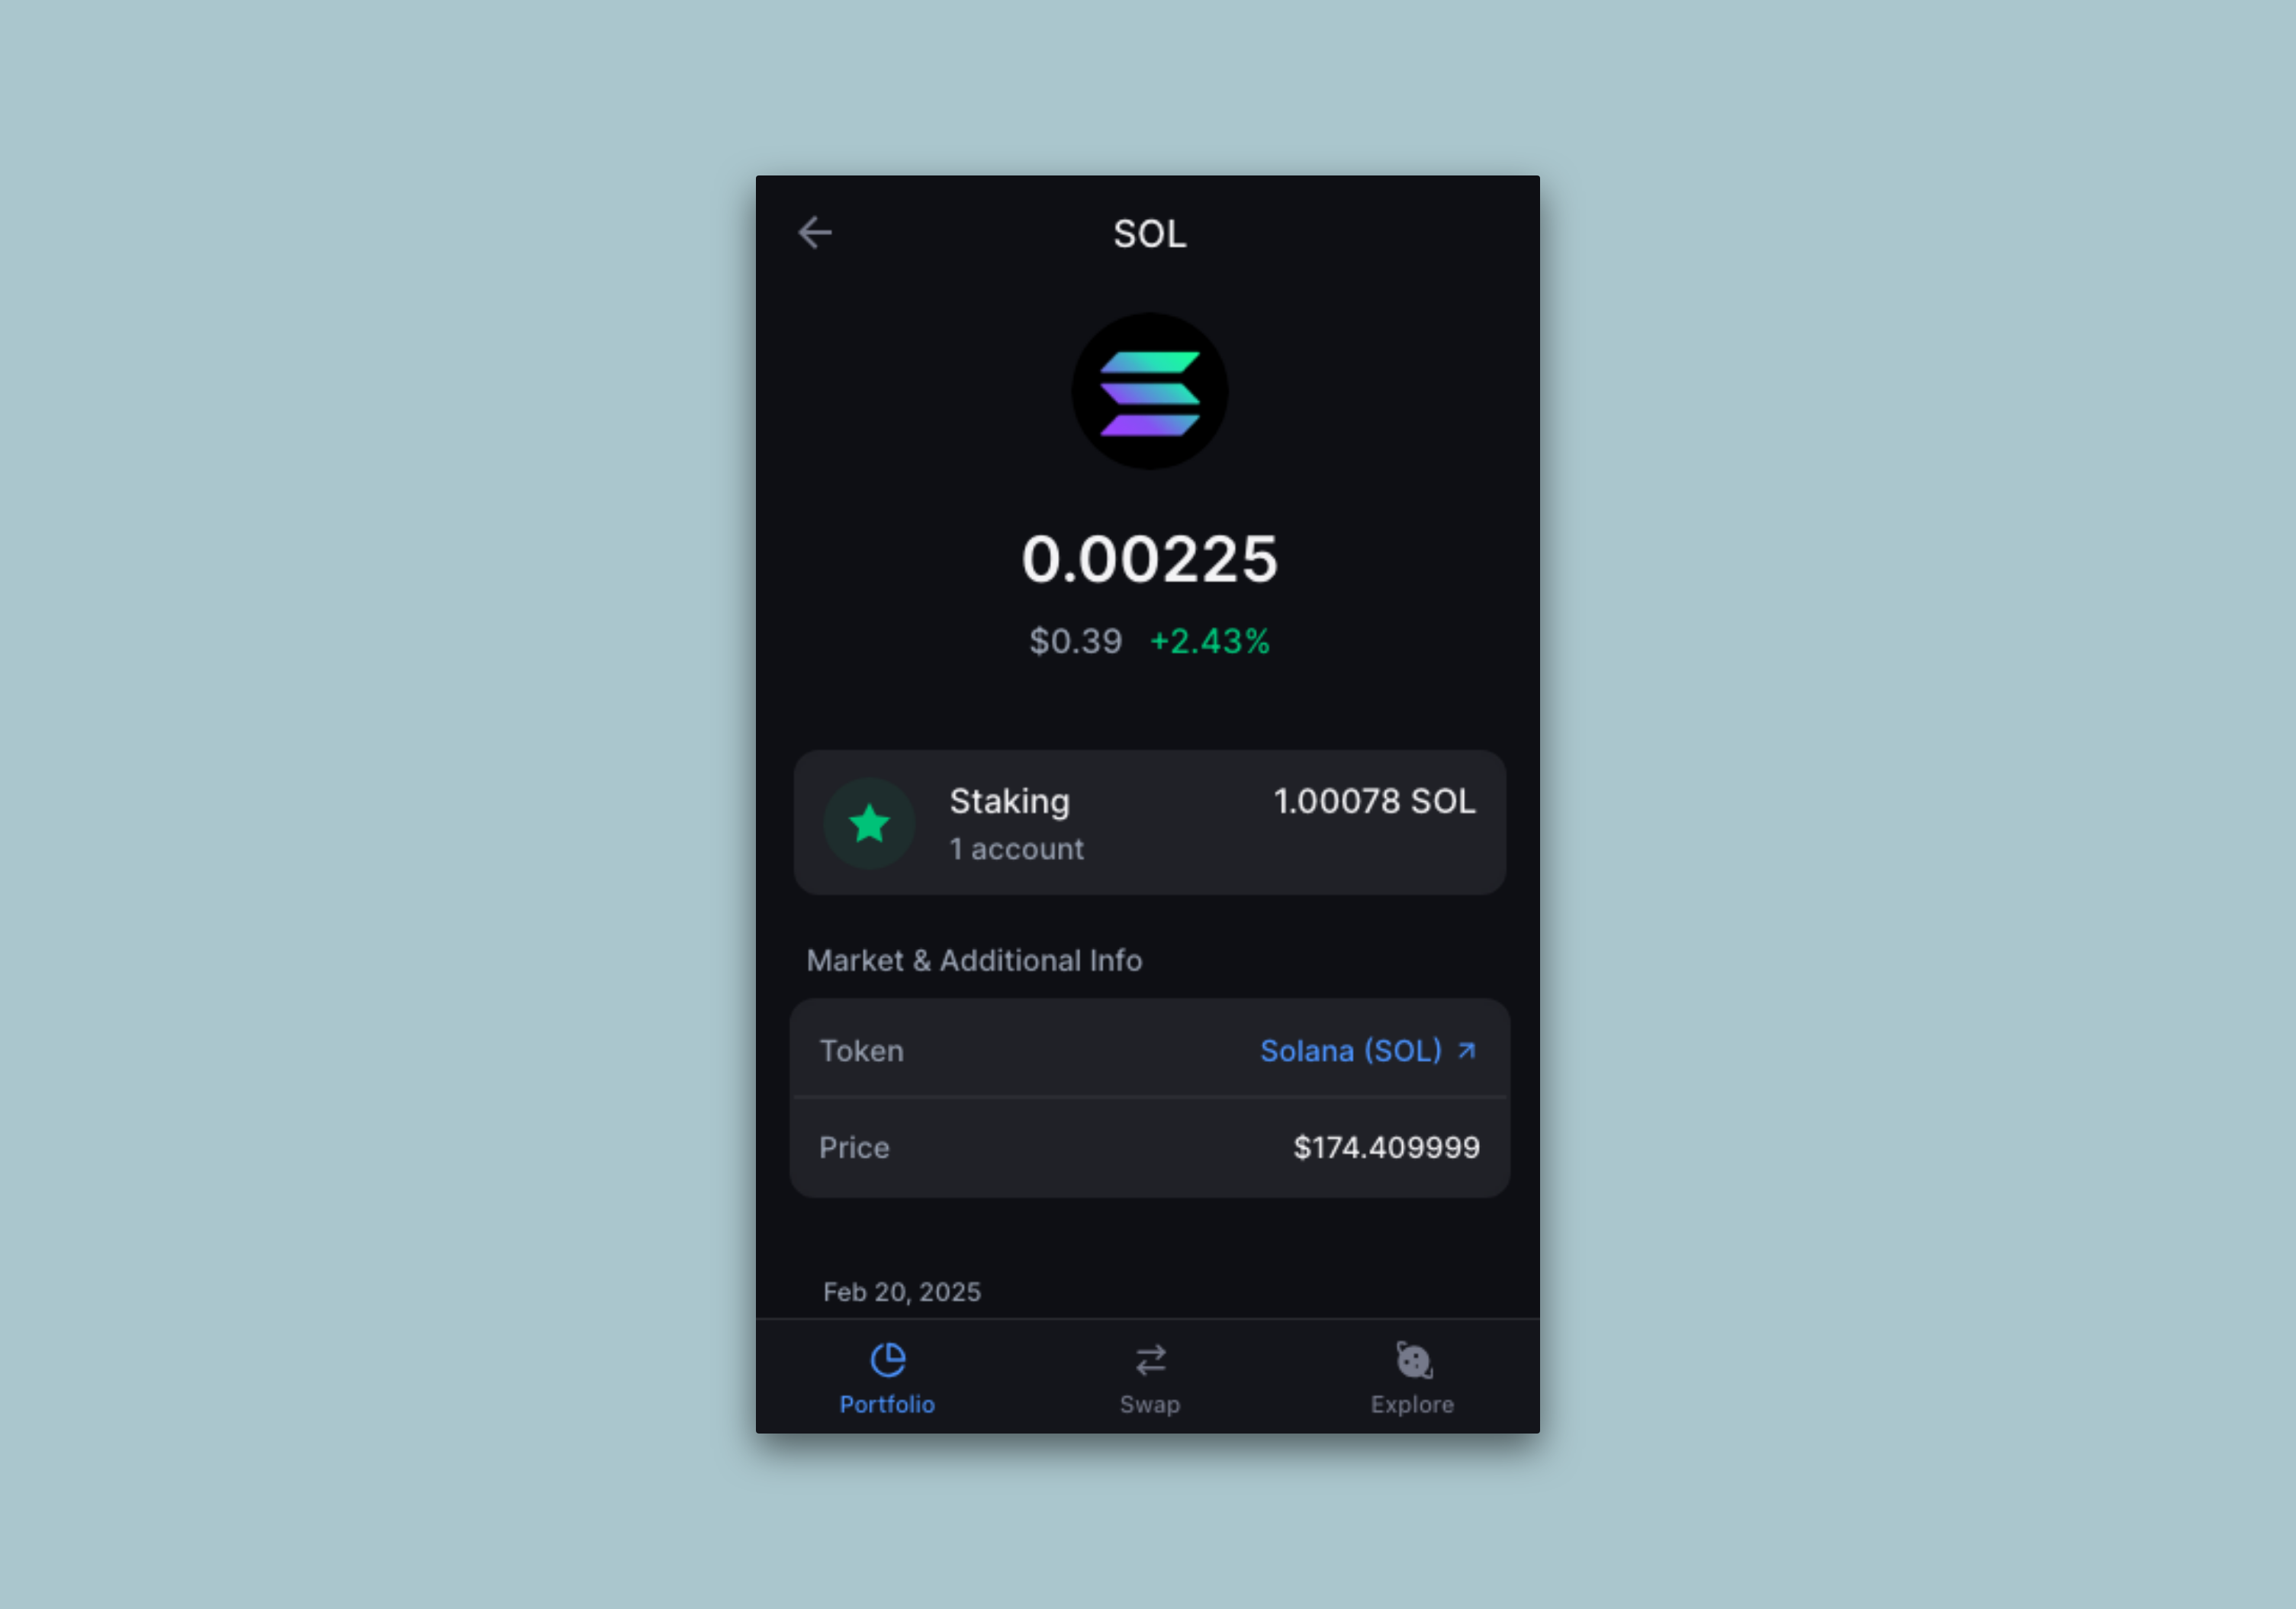
Your bags (🎒) are now packed with staked SOL!
Stake with Squads
Squads is an open-source smart contract wallet standard on Solana that allows teams and individuals to securely manage their digital assets. Squads users can stake their SOL directly from the Squads UI. Let's walk through the process.
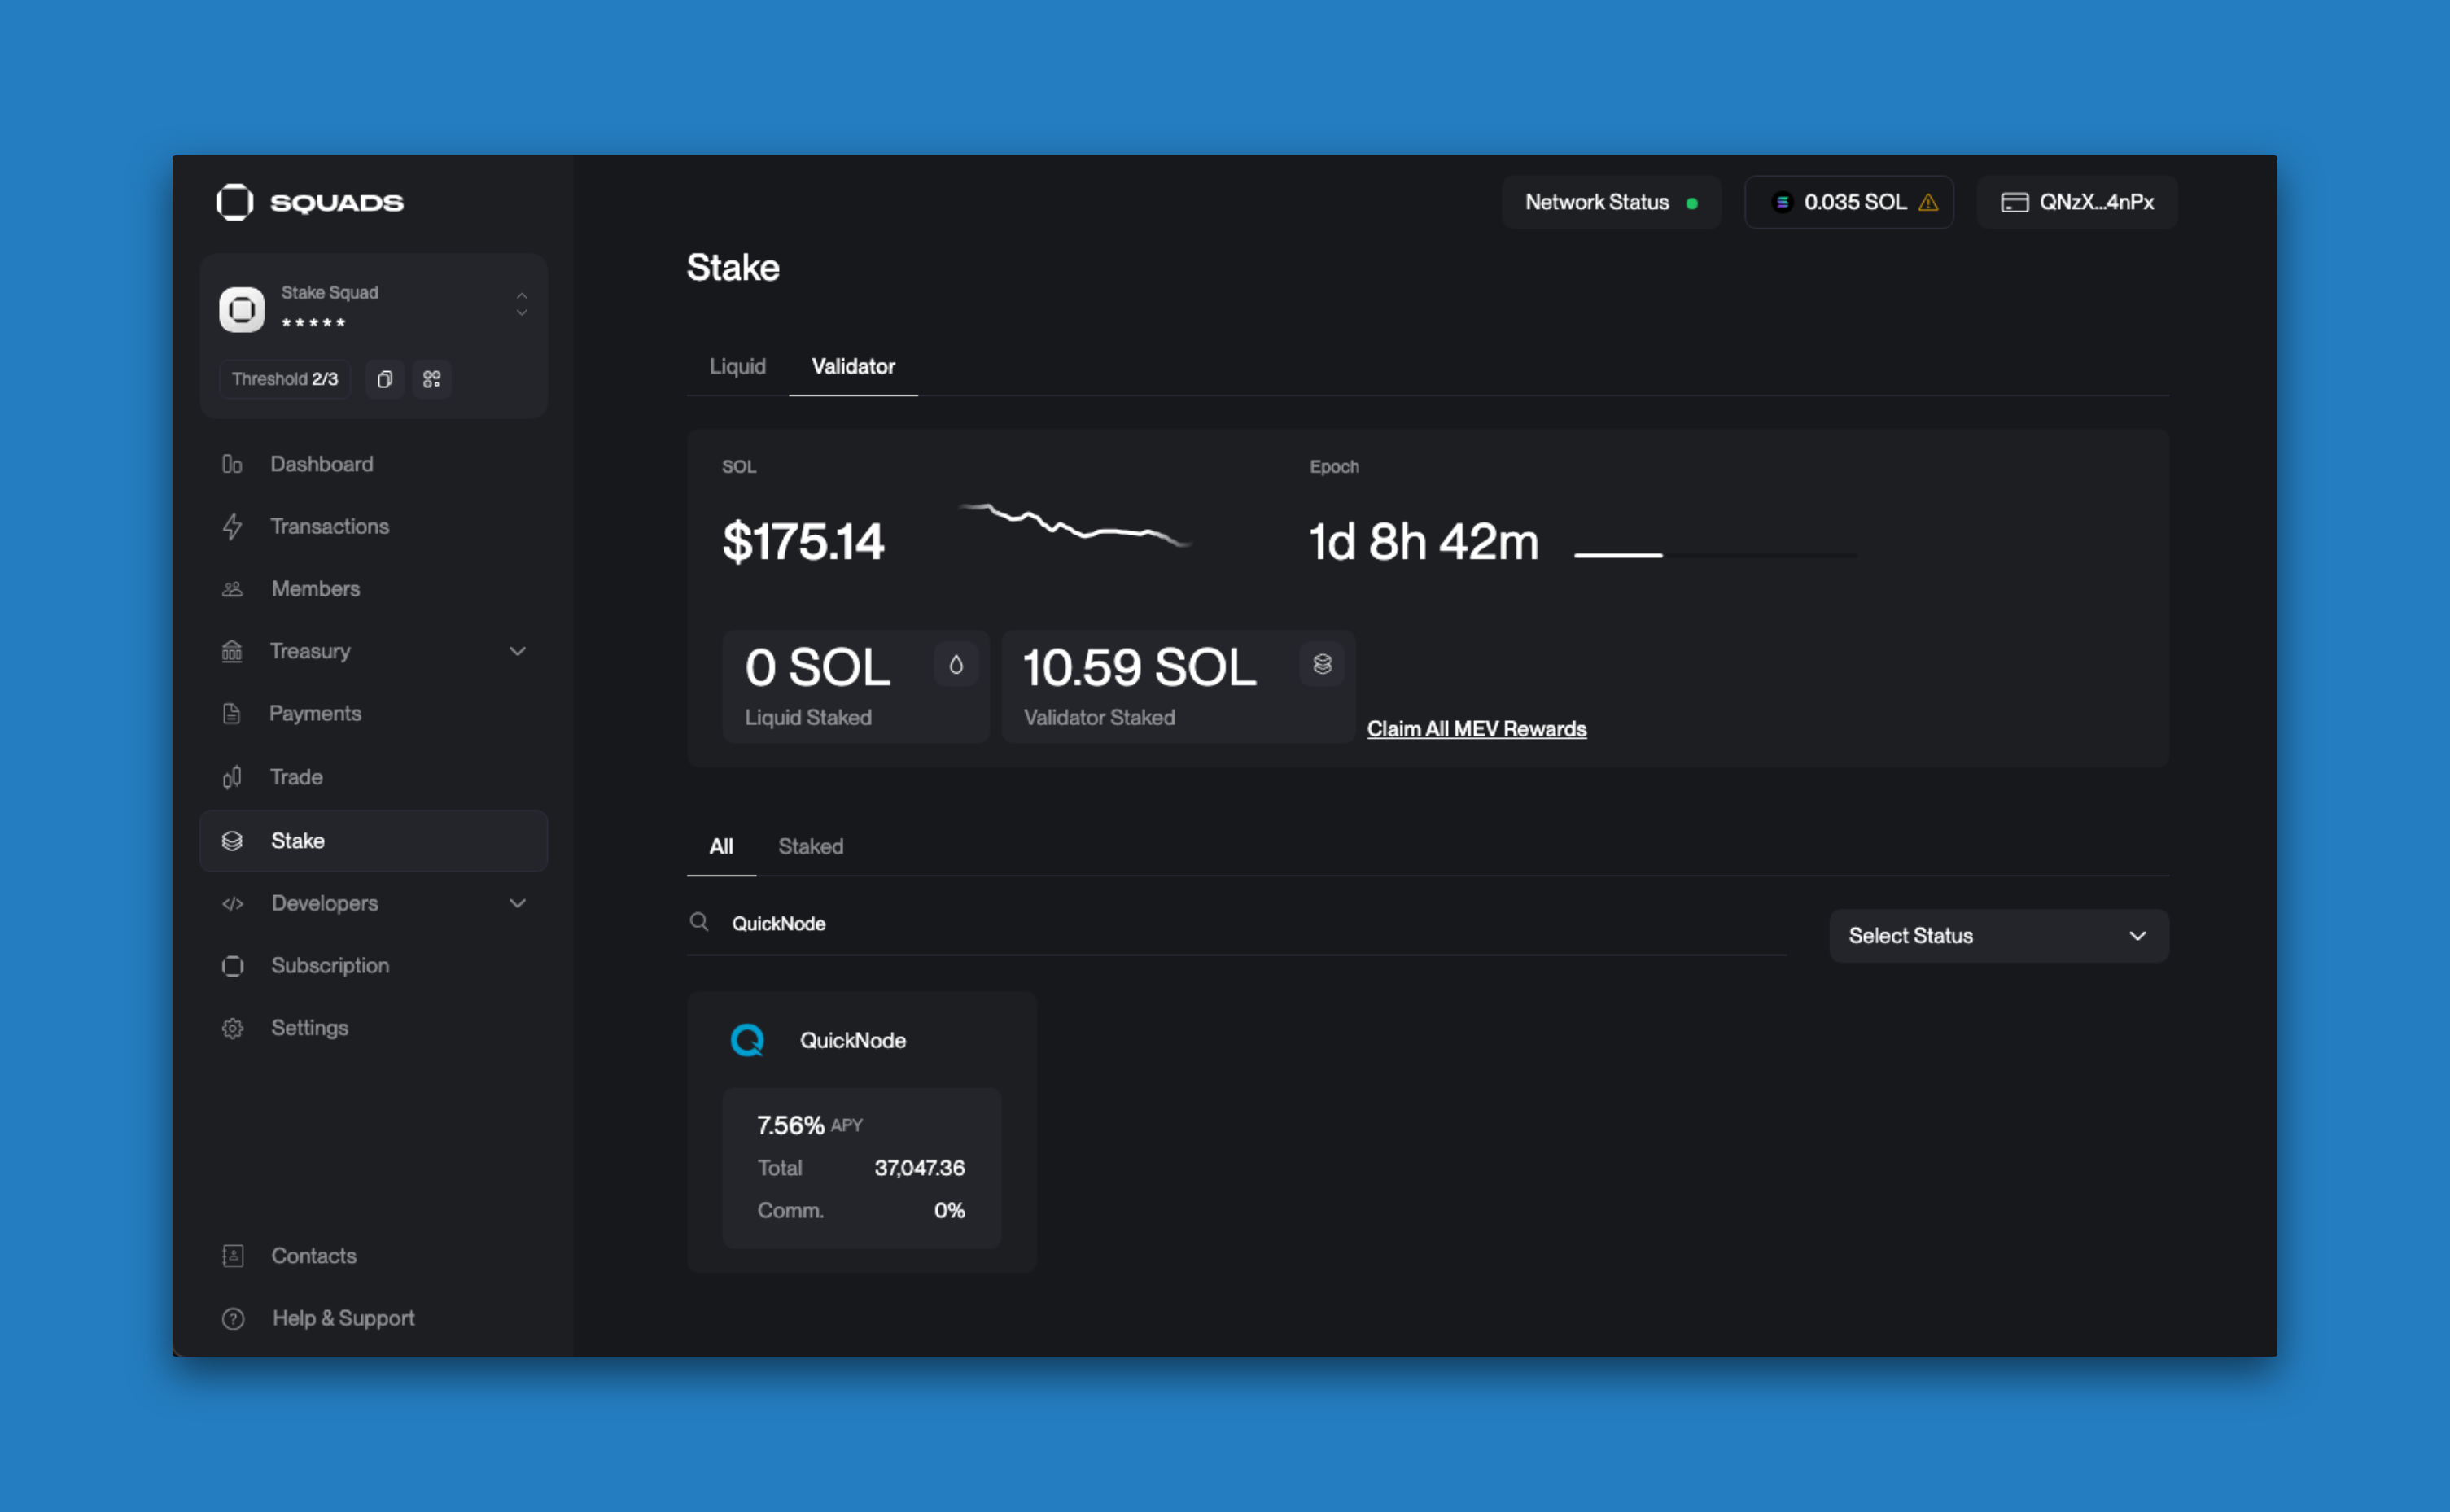
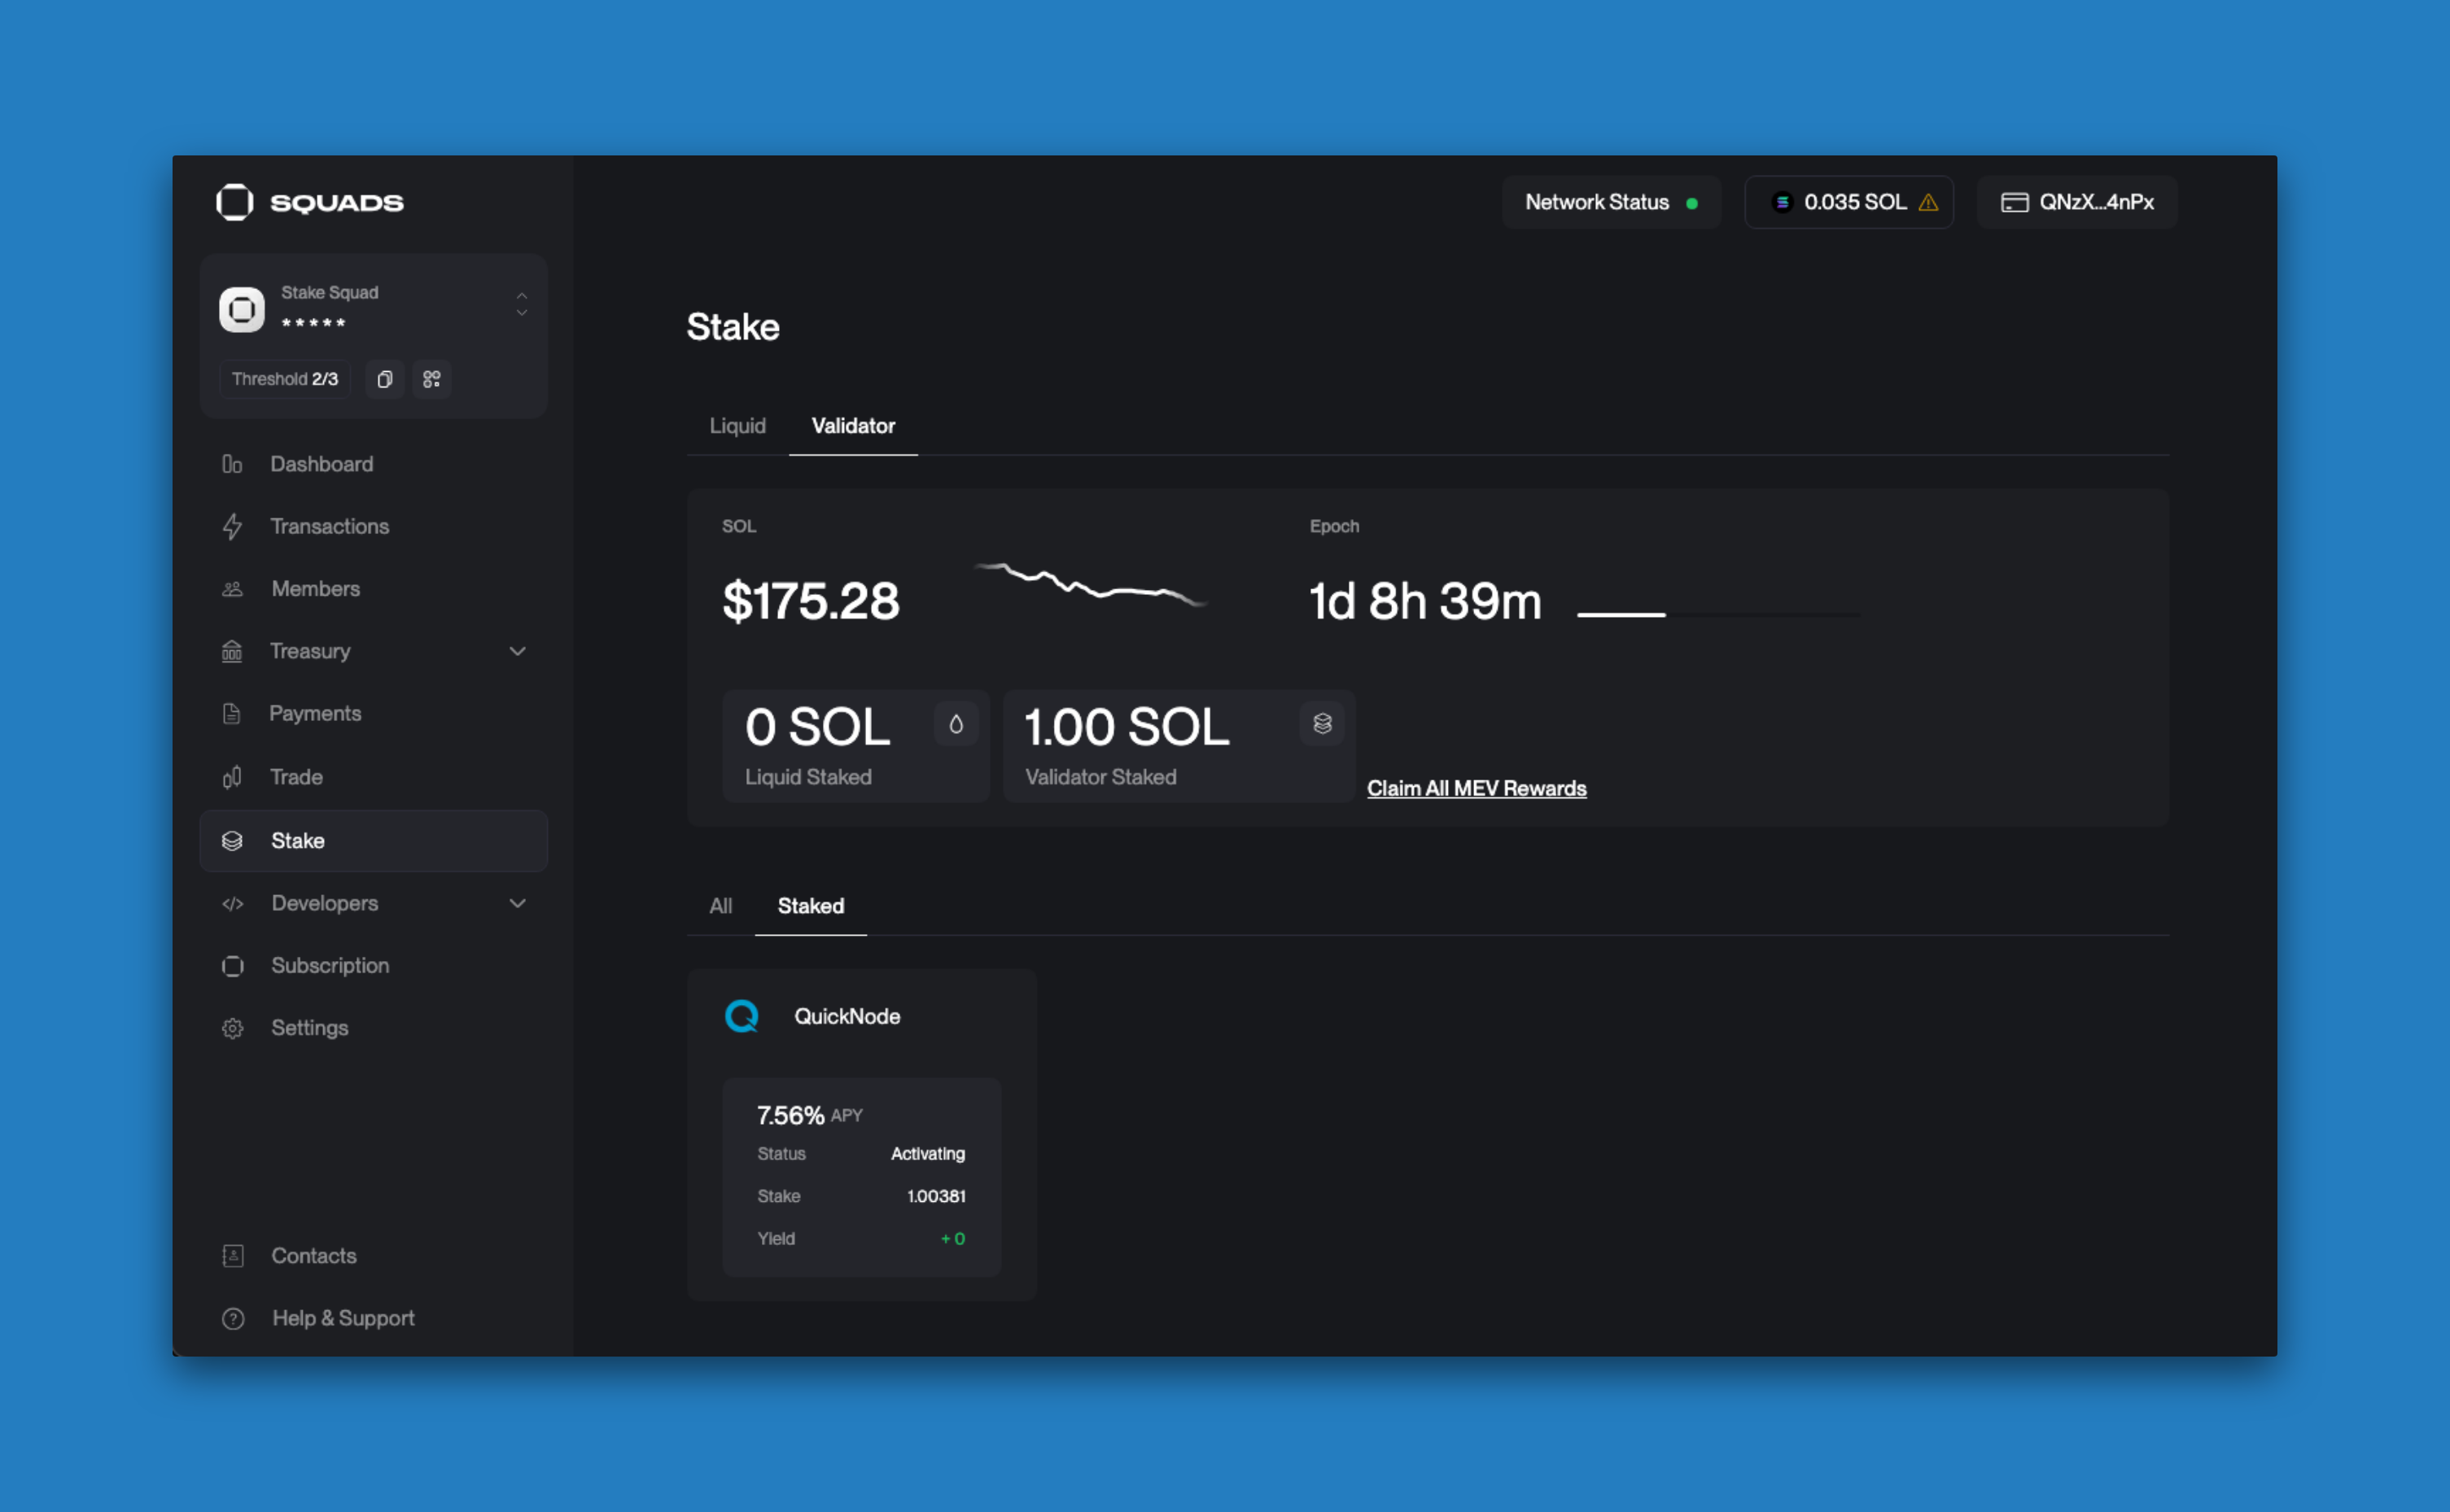
Open your Squads wallet, and connect to the Squad with the wallet of an authorized initiator. Click on the "Stake" tab on the left sidebar. There is a search bar at the bottom of the screen where you can search for a validator. Search for your desired validator (e.g., "Quicknode" or "5s3vajJvaAbabQvxFdiMfg14y23b2jvK6K2Mw4PYcYK"):
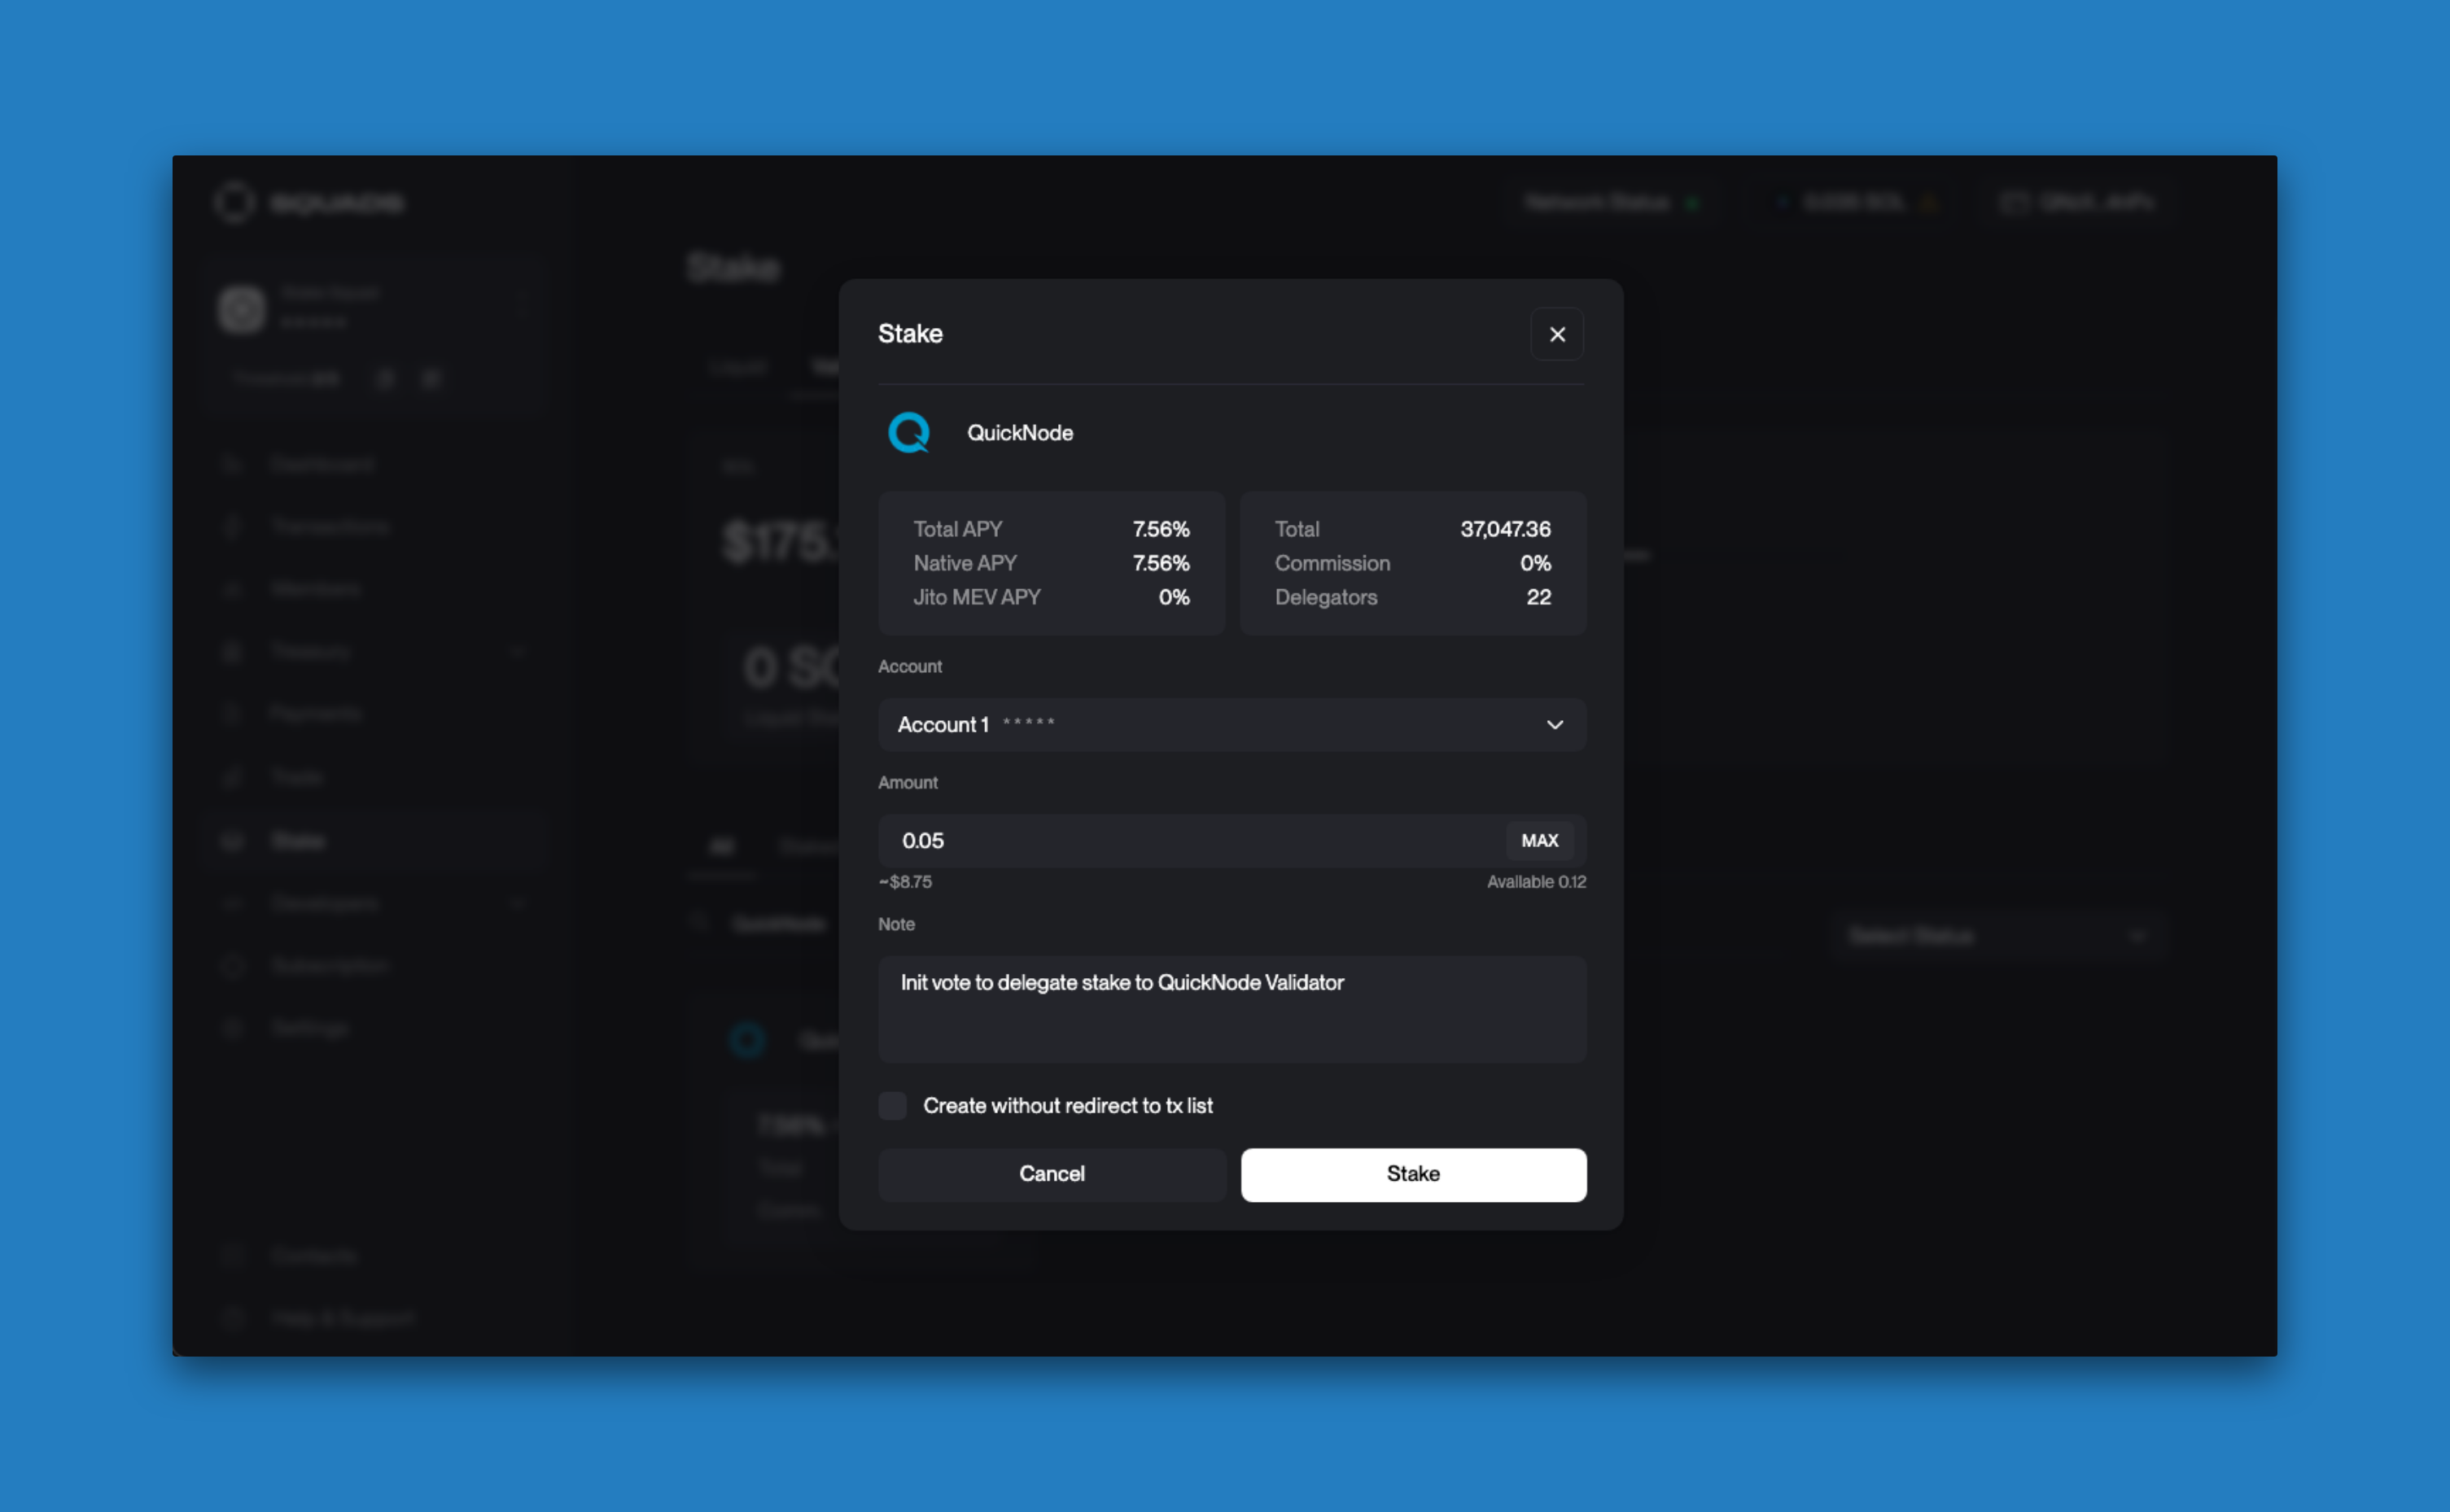
Click on your desired validator. You will be prompted to enter the amount you would like to stake:
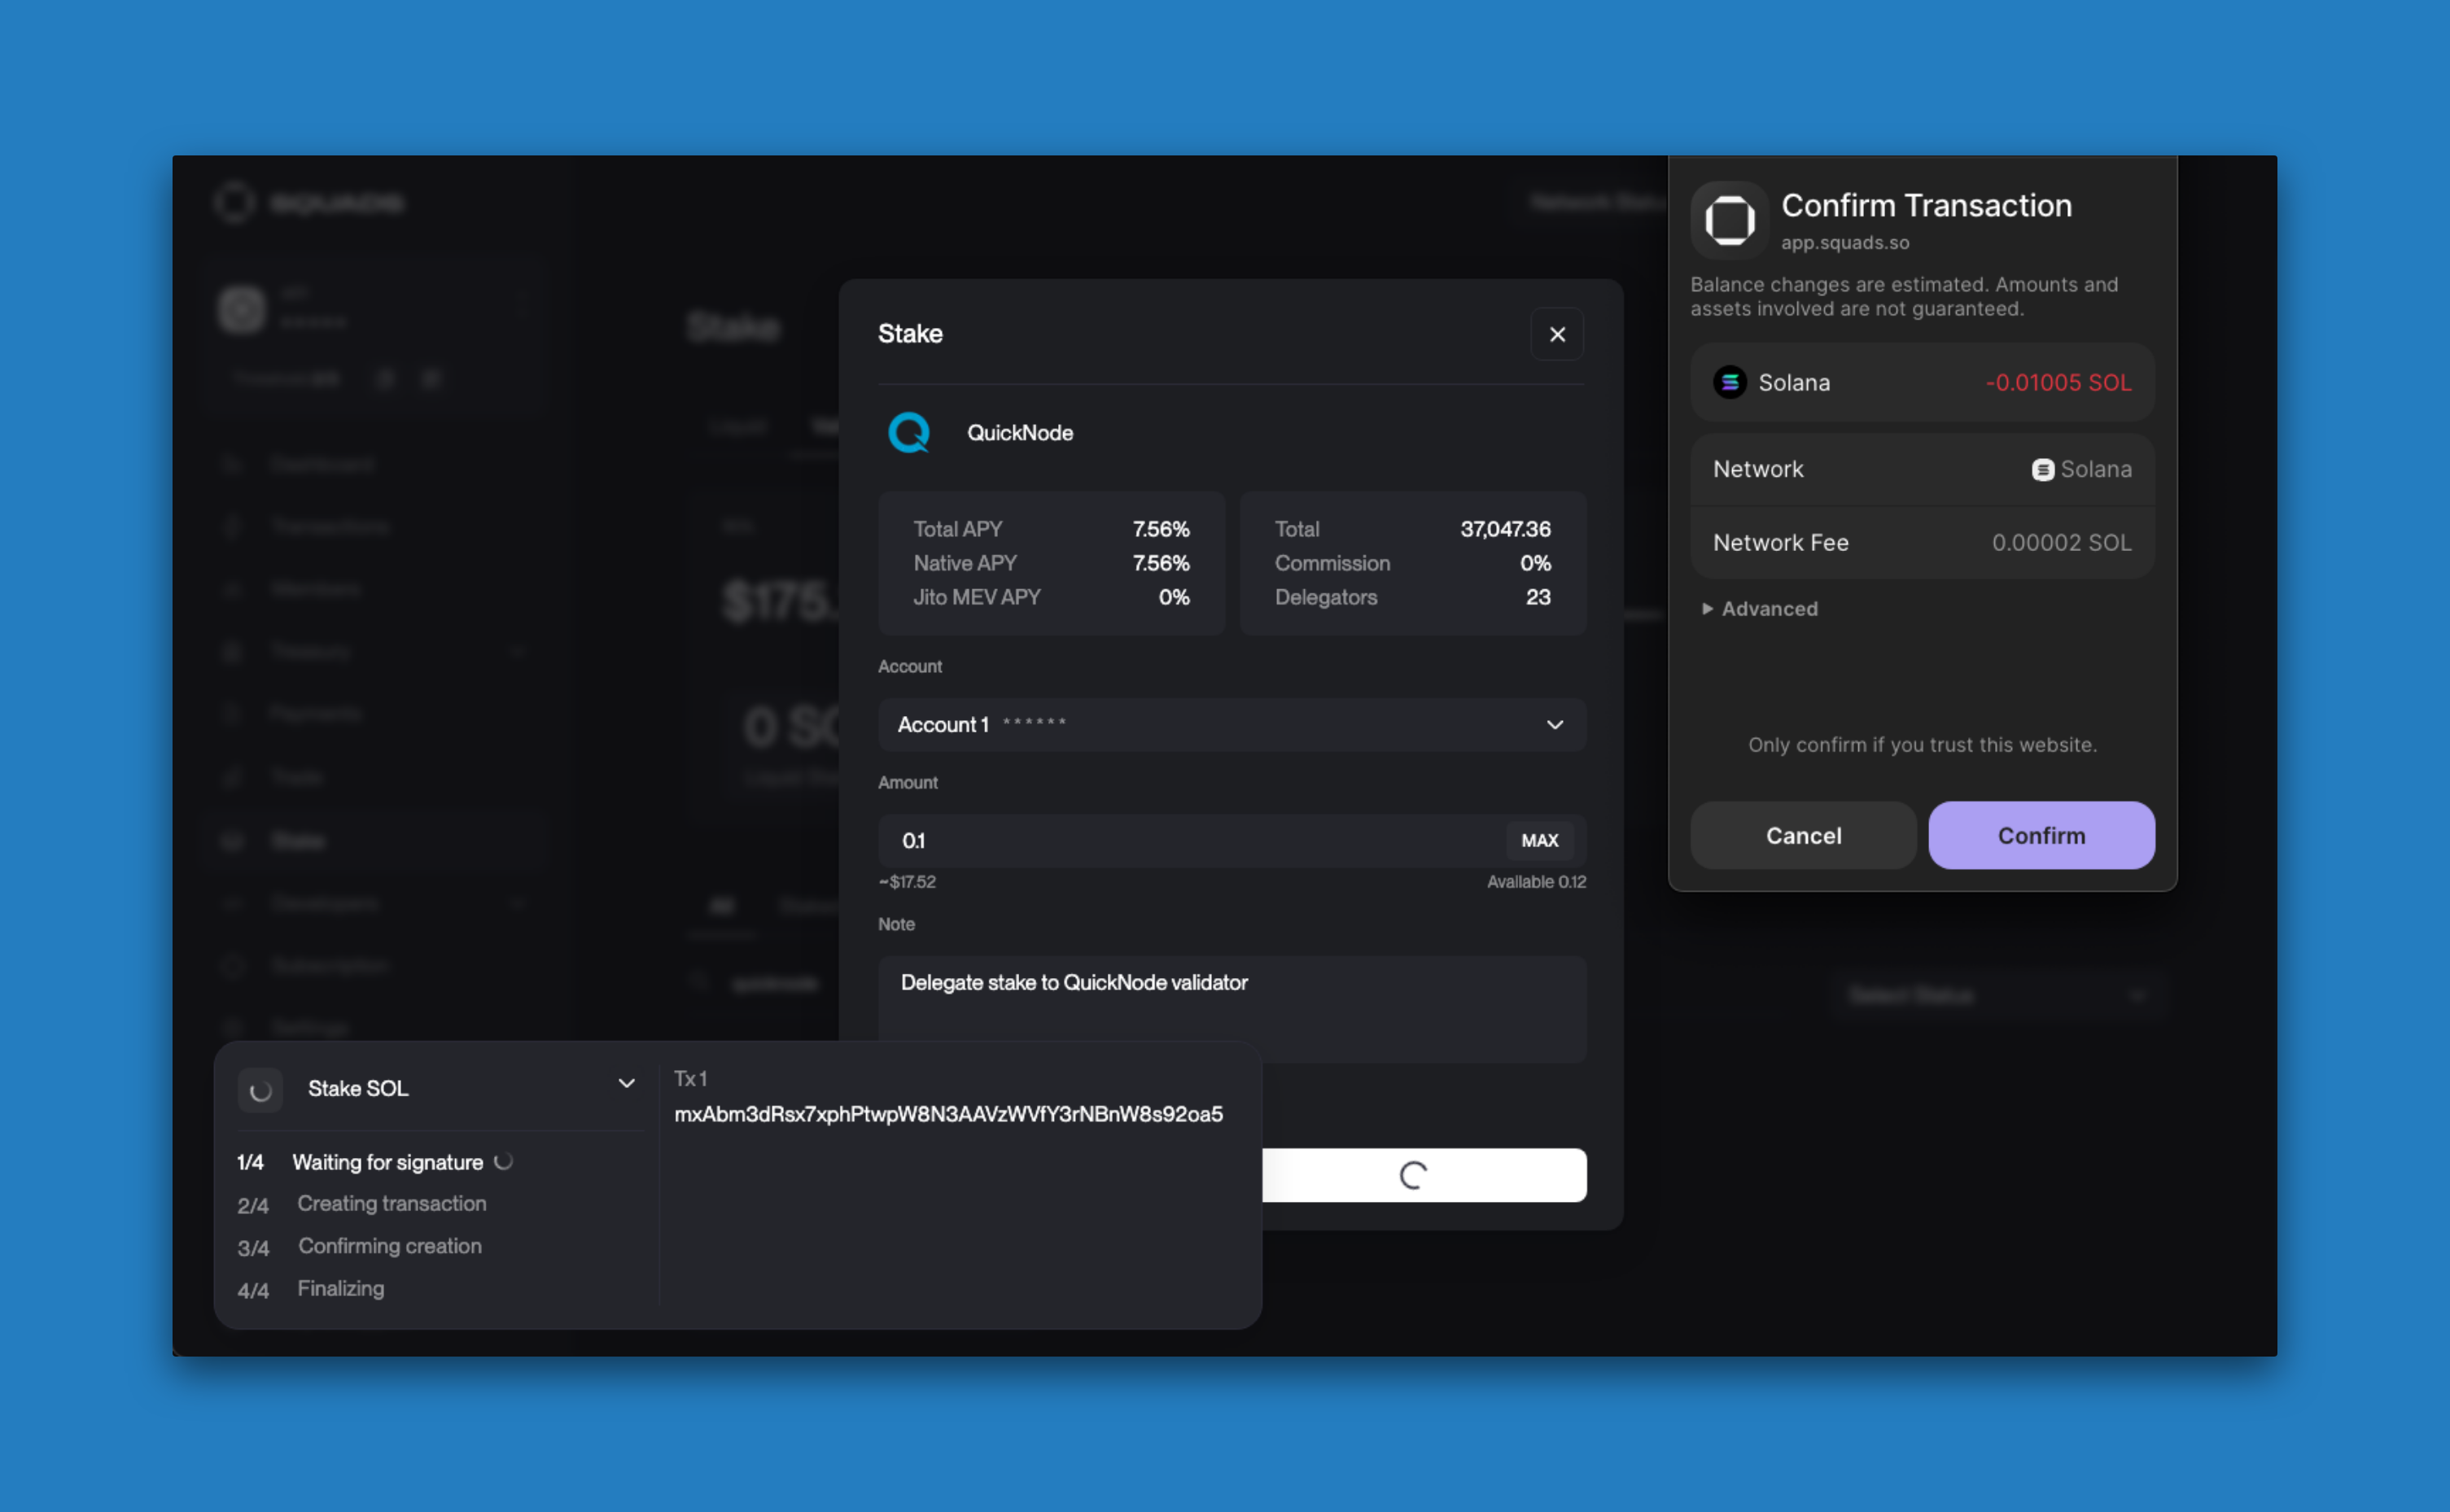
After entering the amount, click "Stake". You will be prompted to initiate the transaction for your Squad's approval:
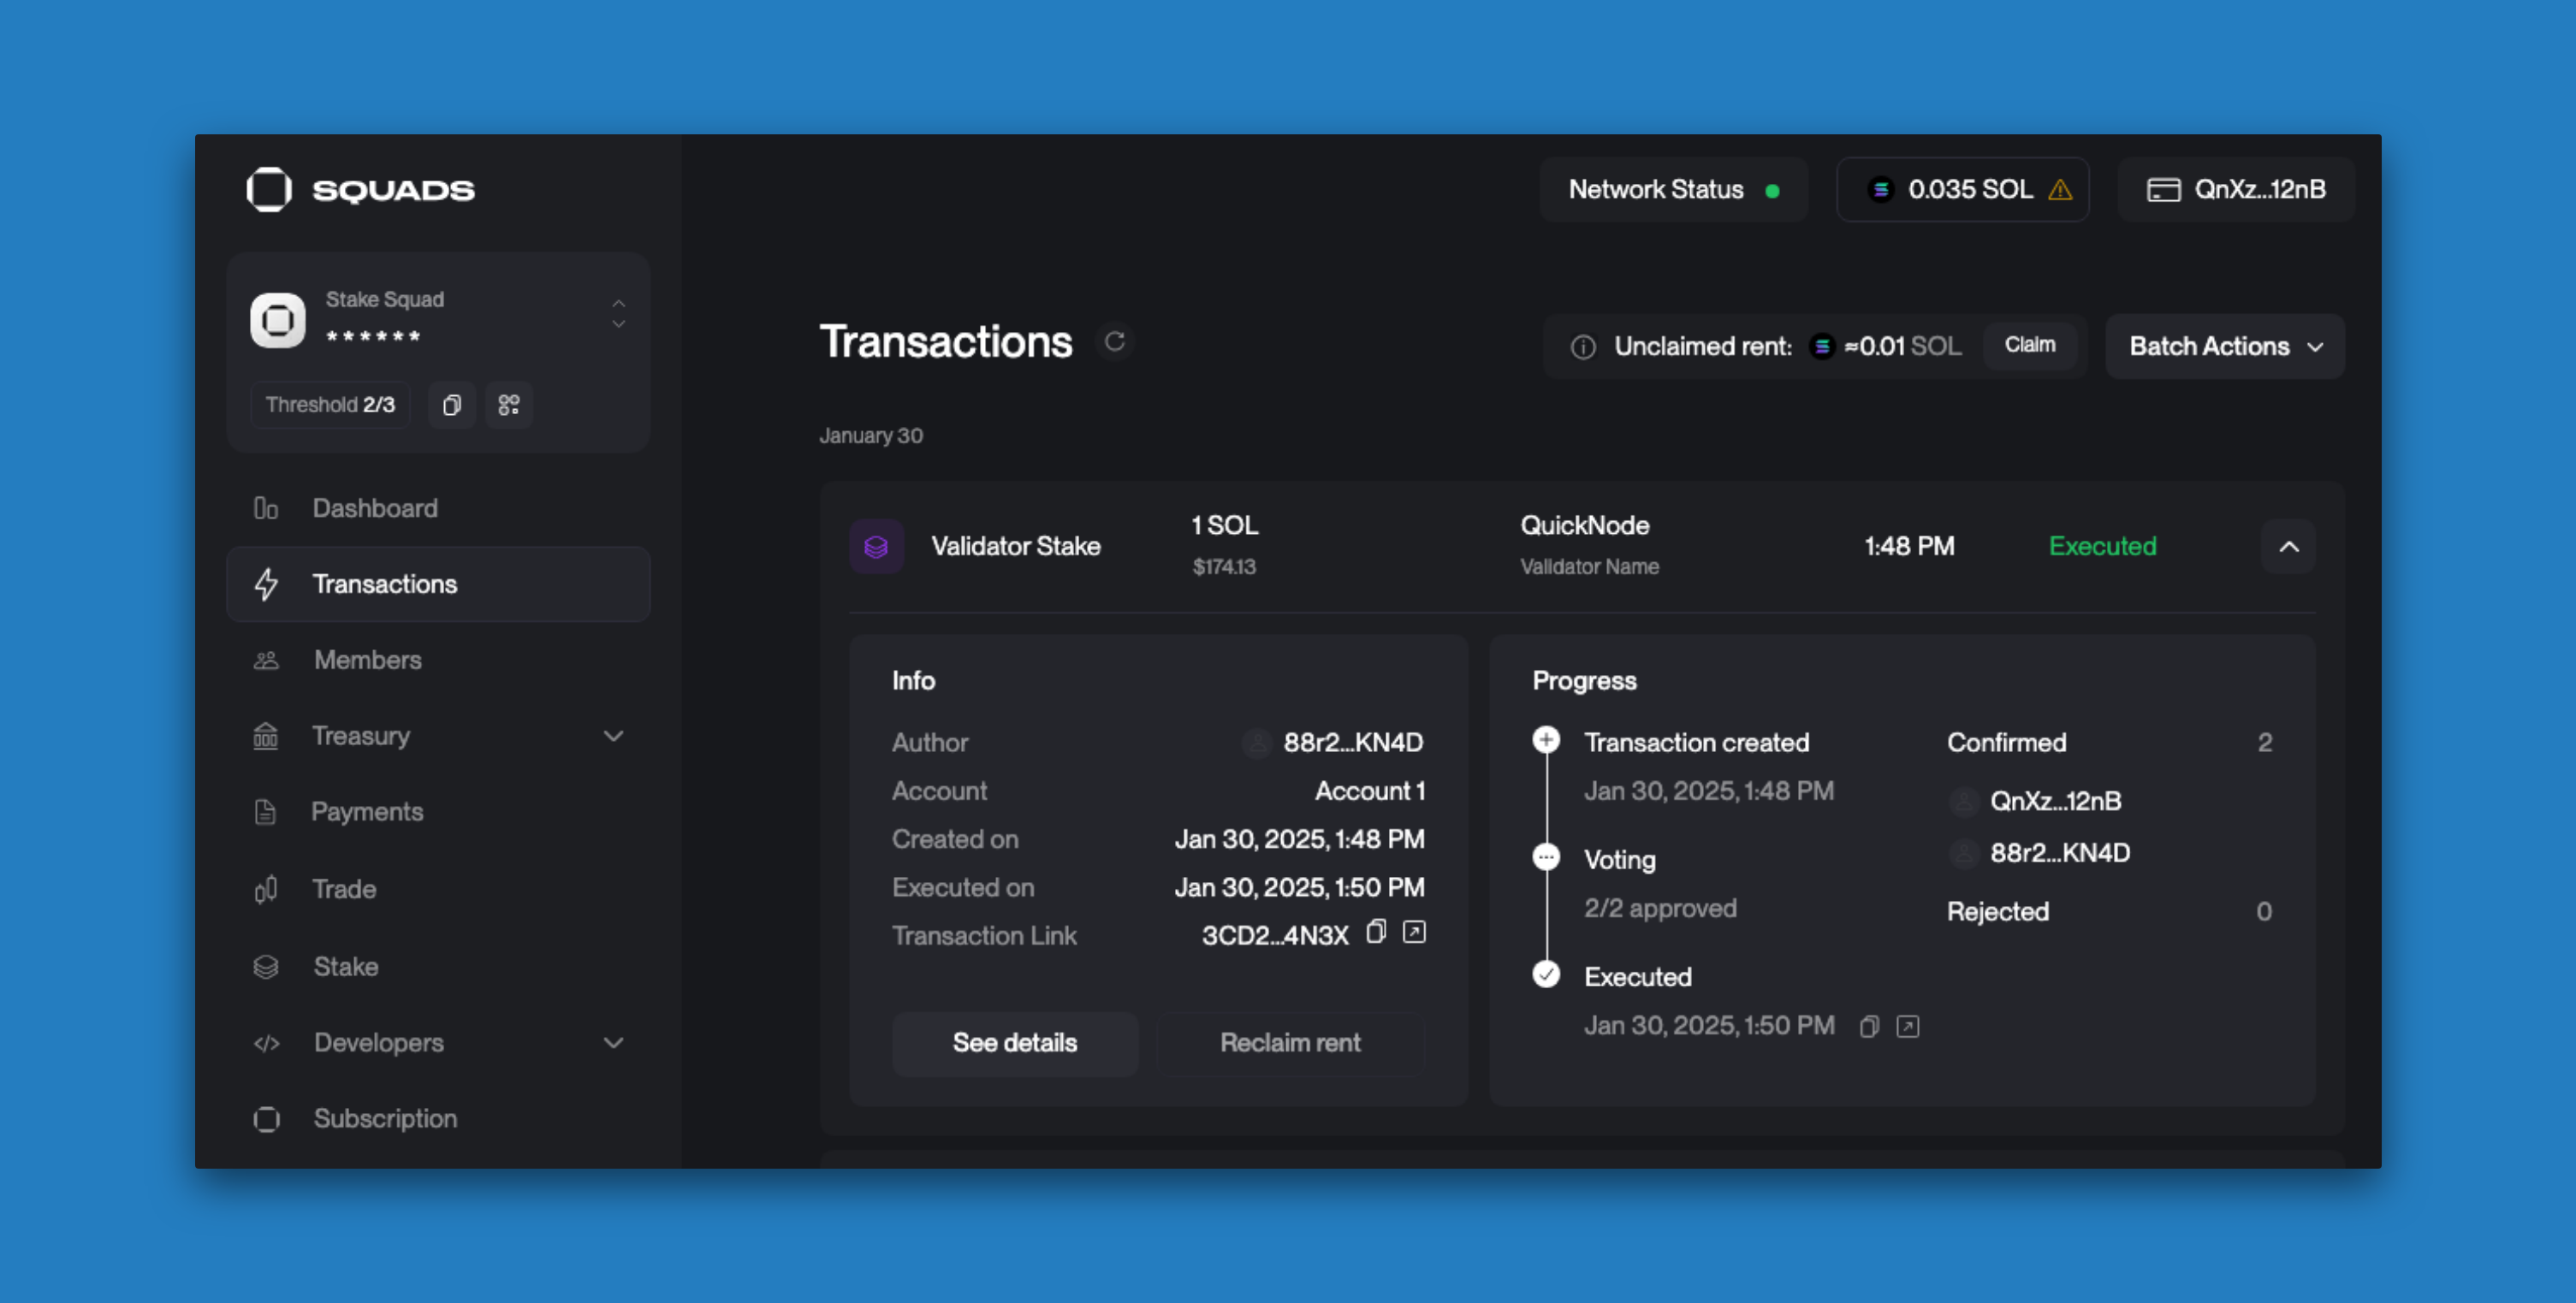
Navigate to your "Transactions" tab to see the open transaction. Share the proposal with your Squad members for approval. Once your vote threshold is realized, you will be able to "Execute" the transaction in your Squad:
You should now be able to return to the "Stake" tab and see your staked SOL:
You are now securing your assets and helping to secure the Solana network utilizing Squads!
Method 2 - Using Solana CLI
Let's start by creating a project directory with a folder for the CLI and a folder for the JavaScript API (which we will use later):
mkdir -p solana-staking/cli && mkdir -p solana-staking/web3js
cd solana-staking/cli
To stake using the Solana CLI, you will need a paper wallet. If you do not already have one, you can create one by entering the following command in your terminal:
solana-keygen new --no-passphrase -o wallet.json
This will create a new keypair and save it to a file called wallet.json. Your new PublicKey will be displayed in your terminal:
Generating a new keypair
Wrote new keypair to wallet.json
============================================================================
pubkey: Fzts...kjKb
===========================================================================
Make sure your paper wallet is funded with SOL. If you just created one, you can transfer funds from any wallet to the address displayed in your terminal.
Next, we need to create a stake account. Let's create another keypair called stake-account.json:
solana-keygen new --no-passphrase -s -o stake-account.json
Note: we use the -s flag here because we do not need a seed phrase for this account.
Now we can create a stake account using the stake-account.json keypair by using the create-stake-account command:
solana create-stake-account stake-account.json 100 \
    ----from wallet.json \
    --stake-authority wallet.json --withdraw-authority wallet.json \
    --fee-payer wallet.json \
    --url mainnet-beta  # or testnet, devnet, localhost, or your Quicknode URL
Make sure you replace the --url flag with the correct network. If you use mainnet-beta, real funds will be transferred from your wallet. For best results, we recommend using a Quicknode endpoint -- you can sign up for an account, here.
You should now be able to verify your account was created by running:
solana stake-account stake-account.json
You should see your stake account's information displayed in your terminal:
Balance: 100 SOL
Rent Exempt Reserve: 0.00228288 SOL
Stake account is undelegated
Stake Authority: FztsbEJLCmdaeQWuJKZrQ8MjN1j3yVMftynzA5e8kjKb
Withdraw Authority: FztsbEJLCmdaeQWuJKZrQ8MjN1j3yVMftynzA5e8kjKb
You will notice that our stake still needs to be delegated to a validator--let's delegate it.
First, we need to find a validator's address. You can find a list of validators here or by entering solana validators -um (or -ud for devnet) in your terminal. Find a validator and copy their Vote Account address.
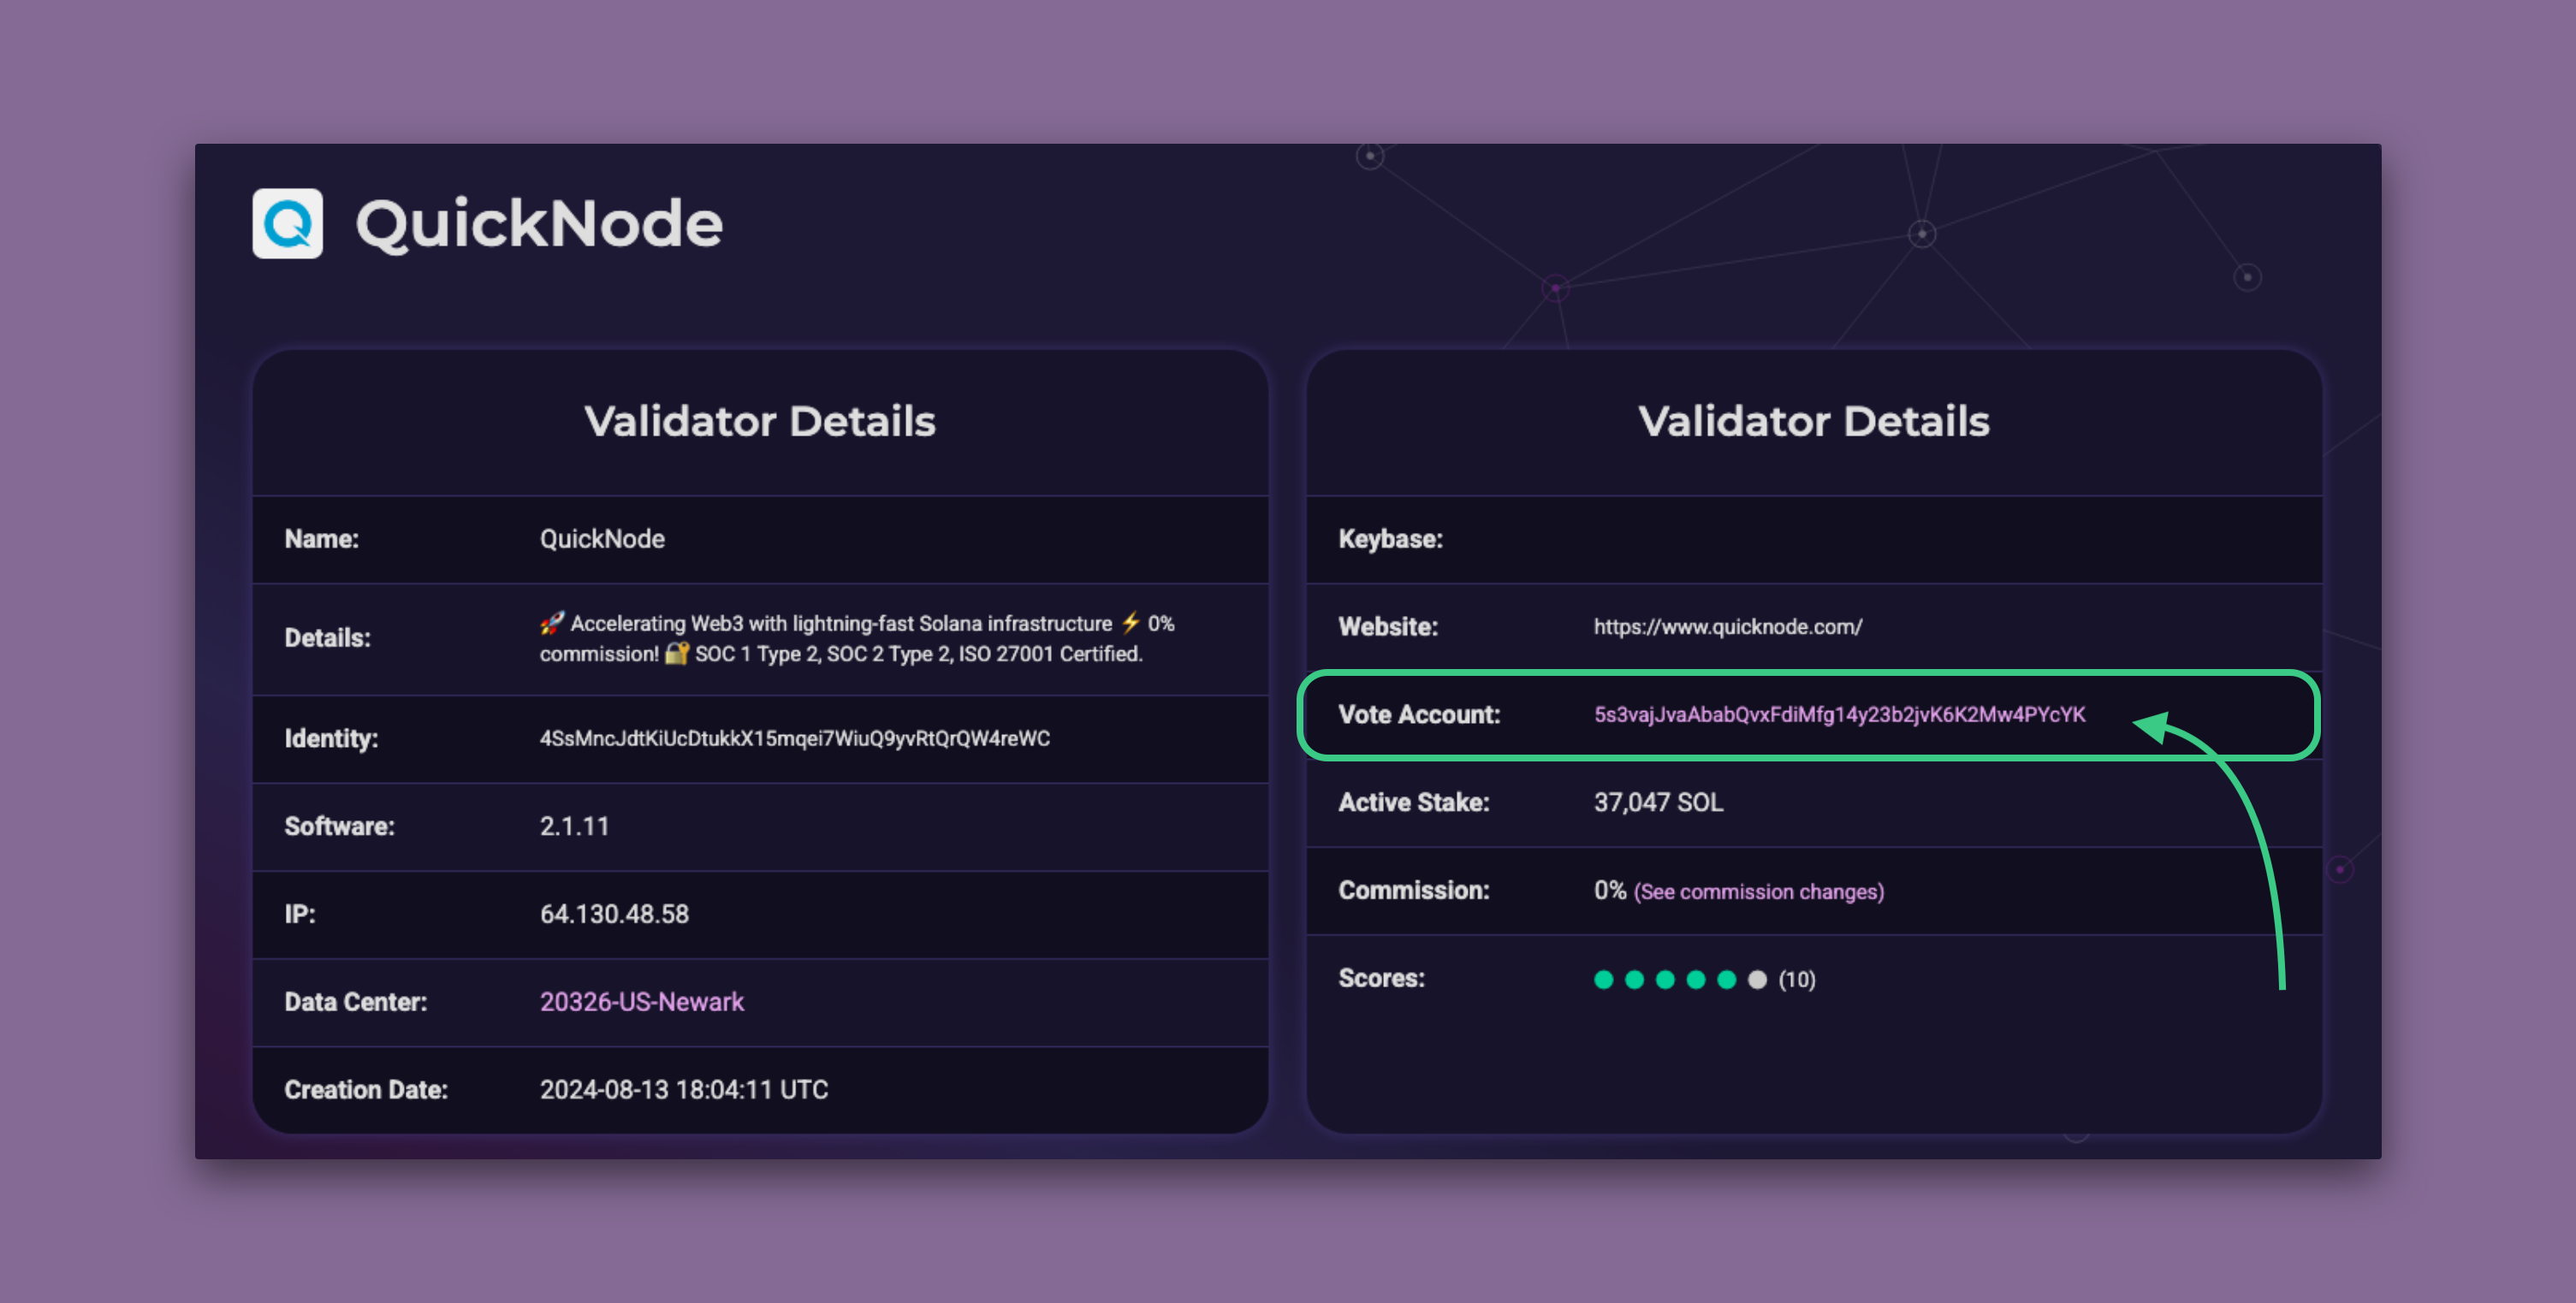
We will be using Quicknode's validator (5s3vajJvaAbabQvxFdiMfg14y23b2jvK6K2Mw4PYcYK on Mainnet).
Now you can delegate your stake by calling solana delegate-stake stake-account.json <VOTE_ACCOUNT>:
solana delegate-stake stake-account.json <VOTE_ACCOUNT> \ # replace <VOTE_ACCOUNT> with your validator's address
    --stake-authority wallet.json \
    --fee-payer wallet.json \
    --url https://example.solana-mainnet.quiknode.io/12345 \ # Replace with your Quicknode Endpoint or testnet, mainnet-beta, localhost
    --with-memo "Delegating stake test."
You should see a signature displayed in your terminal confirming the successful delegation. You can verify your stake was delegated by running solana stake-account stake-account.json -ud again:
Balance: 0.1 SOL
Rent Exempt Reserve: 0.00228288 SOL
Delegated Stake: 0.09771712 SOL
Active Stake: 0 SOL
Activating Stake: 0.09771712 SOL
Stake activates starting from epoch: 529
Delegated Vote Account Address: 5s3vajJvaAbabQvxFdiMfg14y23b2jvK6K2Mw4PYcYK
Stake Authority: FztsbEJLCmdaeQWuJKZrQ8MjN1j3yVMftynzA5e8kjKb
Withdraw Authority: FztsbEJLCmdaeQWuJKZrQ8MjN1j3yVMftynzA5e8kjKb
Nice job! Your stake should be activating and will start accruing rewards at the beginning of the next epoch.
Once your stake is active, you may want to deactivate the stake or withdraw some of the SOL from the account. You can use the deactivate-stake and withdraw-stake commands to do that.
To deactivate your stake, run:
solana deactivate-stake stake-account.json \
    --stake-authority wallet.json \
    --fee-payer wallet.json \
    --url https://example.solana-mainnet.quiknode.io/12345 \
And to withdraw some of the SOL from your stake account, run:
solana withdraw-stake stake-account.json <DESTINATION> <AMOUNT> \
    --withdraw-authority wallet.json  \
    --fee-payer wallet.json \
    --url https://example.solana-mainnet.quiknode.io/12345 \
Make sure to replace your --url with the appropriate network you are using (testnet, mainnet-beta, localhost, devnet, or your Quicknode URL).
You now have all the basics for staking SOL from the Solana command line. There are a few other commands that we did not cover here. Feel free to explore them independently by running solana -h in your terminal to see all the available commands.
Method 3 - Staking SOL with Solana's JavaScript API
To get started in JavaScript, let's navigate to our JS subdirectory that we created earlier. From your cli directory, run:
cd ../web3js
Create a tsconfig.json with .json importing enabled:
tsc -init --resolveJsonModule true
Install SolanaWeb3.js:
npm install @solana/web3.js@1 # or yarn add @solana/web3.js
Create a new file called app.ts:
echo > app.ts
Let's follow the same naming conventions we did in the previous section and create a new keypair called wallet.json:
solana-keygen new --no-passphrase -o wallet.json
Rather than having a single keypair for our stake account, we will use a keypair generator in our script to allow us to create multiple stake accounts.
Structure your project
Open app.ts in your favorite editor and add the following code:
import { Connection, PublicKey, Keypair, StakeProgram, LAMPORTS_PER_SOL, Authorized, TransactionSignature, TransactionConfirmationStatus, SignatureStatus } from '@solana/web3.js'
import walletSecret from './wallet.json'

const connection = new Connection('http://127.0.0.1:8899', 'confirmed');
const wallet = Keypair.fromSecretKey(new Uint8Array(walletSecret));
const stakeAccount = Keypair.generate();
const validatorVoteAccount = new PublicKey("TBD");

async function confirmTransaction(
    connection: Connection,
    signature: TransactionSignature,
    desiredConfirmationStatus: TransactionConfirmationStatus = 'confirmed',
    timeout: number = 30000,
    pollInterval: number = 1000,
    searchTransactionHistory: boolean = false
): Promise<SignatureStatus> {
    const start = Date.now();

    while (Date.now() - start < timeout) {
        const { value: statuses } = await connection.getSignatureStatuses([signature], { searchTransactionHistory });

        if (!statuses || statuses.length === 0) {
            throw new Error('Failed to get signature status');
        }

        const status = statuses[0];

        if (status === null) {
            await new Promise(resolve => setTimeout(resolve, pollInterval));
            continue;
        }

        if (status.err) {
            throw new Error(`Transaction failed: ${JSON.stringify(status.err)}`);
        }

        if (status.confirmationStatus && status.confirmationStatus === desiredConfirmationStatus) {
            return status;
        }

        if (status.confirmationStatus === 'finalized') {
            return status;
        }

        await new Promise(resolve => setTimeout(resolve, pollInterval));
    }

    throw new Error(`Transaction confirmation timeout after ${timeout}ms`);
}

async function main() {
    try {
        // Step 1 - Fund the wallet
        console.log("---Step 1---Funding wallet");
        await fundAccount(wallet, 2 * LAMPORTS_PER_SOL);
        // Step 2 - Create the stake account
        console.log("---Step 2---Create Stake Account");
        await createStakeAccount({ wallet, stakeAccount, lamports: 1.9 * LAMPORTS_PER_SOL });
        // Step 3 - Delegate the stake account
        console.log("---Step 3---Delegate Stake Account");
        await delegateStakeAccount({ stakeAccount, validatorVoteAccount, authorized: wallet });
        // Step 4 - Check the stake account
        console.log("---Step 4---Check Stake Account");
        await getStakeAccountInfo(stakeAccount.publicKey);
    } catch (error) {
        console.error(error);
        return;
    }
}

async function fundAccount(accountToFund: Keypair, lamports = LAMPORTS_PER_SOL) {

}
async function createStakeAccount({ wallet, stakeAccount, lamports }: { wallet: Keypair, stakeAccount: Keypair, lamports?: number }) {

}
async function delegateStakeAccount({ stakeAccount, validatorVoteAccount }: { stakeAccount: Keypair, validatorVoteAccount: PublicKey }) {

}
async function getStakeAccountInfo(stakeAccount: PublicKey) {

}

main();
What we are doing here is:
- Importing the necessary packages from SolanaWeb3.js and our wallet.json file
- Creating a connection to our local node (you may use a different cluster if you would like)
- Creating a new keypair for our stake account
- Creating a new PublicKey for our validator vote account (we have left this as "TBD" for now--we will need to replace this when we start our local validator)
- Create a helper function to confirm transactions
- Creating a
mainfunction that will run all of our functions in order - Creating four functions that we will fill in to fund, create, delegate, and get info about our stake account
Let's build out our functions one by one.
Step 1 - Fund the wallet
We will need some test SOL for implementing our transactions. Let's update the fundAccounts function with the following code:
async function fundAccount(accountToFund: Keypair, lamports = LAMPORTS_PER_SOL) {
    const { blockhash, lastValidBlockHeight } = await connection.getLatestBlockhash();
    try {
        const signature = await connection.requestAirdrop(accountToFund.publicKey, lamports);
        const result = await confirmTransaction(connection, signature, 'finalized');
        if (result.value.err) {
            throw new Error(`Failed to confirm airdrop: ${result.value.err}`);
        }
        console.log("Wallet funded", signature);
    }
    catch (error) {
        console.error(error);
    }
    return;
}
We simply pass a Keypair and request an airdrop of 1 SOL (or a user-specified amount) using the requestAirdrop method. We are waiting for the airdrop to be confirmed (finalized) on the network to ensure our funds are available for the subsequent steps.
Step 2 - Create the stake account
Next, we will create the stake account. Update the createStakeAccount function with the following code:
async function createStakeAccount({ wallet, stakeAccount, lamports }: { wallet: Keypair, stakeAccount: Keypair, lamports?: number }) {
    const transaction = StakeProgram.createAccount({
        fromPubkey: wallet.publicKey,
        stakePubkey: stakeAccount.publicKey,
        authorized: new Authorized(wallet.publicKey, wallet.publicKey),
        lamports: lamports ?? LAMPORTS_PER_SOL
    });
    try {
        const { blockhash, lastValidBlockHeight } = await connection.getLatestBlockhash();
        transaction.feePayer = wallet.publicKey;
        transaction.recentBlockhash = blockhash;
        transaction.lastValidBlockHeight = lastValidBlockHeight;
        transaction.sign(wallet, stakeAccount);
        const signature = await connection.sendRawTransaction(transaction.serialize());
        const result = await confirmTransaction(connection, signature, 'finalized');
        if (result.value.err) {
            throw new Error(`Failed to confirm airdrop: ${result.value.err}`);
        }
        console.log("Stake Account created", signature);
    }
    catch (error) {
        console.error(error);
    }
    return;
}
Let's break down what is happening here:
- First, we define our transaction using the
createAccountmethod from the StakeProgram class. We pass in the wallet's public key, the public key of the new stake account we generated earlier, the wallet's public key as the authorized staker, and the amount of SOL we want to stake (1 SOL by default). Note: if you have not used theStakeProgramclass before, we encourage you to browse the documentation to learn more about the methods available to you. - Next, we get the network's latest blockhash and last valid block height. We then set the fee payer, recent blockhash, and last valid block height on our transaction.
- We sign, send, and confirm the transaction using the wallet and stake account keypairs.
Now we have a funded stake account! Let's move on to the next step, delegating the stake account to a validator.
Step 3 - Delegate the stake account
Now that we have a funded stake account, we need to delegate it to a validator. Update the delegateStakeAccount function with the following code:
async function delegateStakeAccount({ stakeAccount, validatorVoteAccount, authorized }: { stakeAccount: Keypair, validatorVoteAccount: PublicKey, authorized: Keypair }) {
    const transaction = StakeProgram.delegate({
        stakePubkey: stakeAccount.publicKey,
        authorizedPubkey: authorized.publicKey,
        votePubkey: validatorVoteAccount
    });
    try {
        const { blockhash, lastValidBlockHeight } = await connection.getLatestBlockhash();
        transaction.feePayer = authorized.publicKey;
        transaction.recentBlockhash = blockhash;
        transaction.lastValidBlockHeight = lastValidBlockHeight;
        transaction.sign(authorized);
        const signature = await connection.sendRawTransaction(transaction.serialize());
        const result = await confirmTransaction(connection, signature, 'finalized');
        if (result.value.err) {
            throw new Error(`Failed to confirm airdrop: ${result.value.err}`);
        }
        console.log("Stake Account delegated to vote account", signature);
    }
    catch (error) {
        console.error(error);
    }
    return;
}
Like the previous step, we leverage the StakeProgram class to create our transaction. This time we call the delegate method and pass in the stake account's public key, the authorized staker's public key, and the validator vote account's public key. We then sign, send, and confirm the transaction using the authorized staker's keypair.
We should now have a funded and delegated stake account! Let's add one more function to verify that the stake account is activating.
Step 4 - Verify the stake account is activating
We can verify that the stake account is activating by calling the getStakeAccountInfo on the Connection class. Update the getStakeAccountInfo function with the following code:
async function getStakeAccountInfo(stakeAccount: PublicKey) {
    try {
        const info = await connection.getAccountInfo(stakeAccount);
        console.log(`Stake account exists.`);
    } catch (error) {
        console.error(error);
    }
    return;
}
We simply pass in the stake account's public key and log the status of the stake account. We can now call this function to verify that the stake account is activating.
Run the script
Now that we have all of our functions defined let's test it out.
First, let's make sure our local cluster is running. If you closed it after the CLI staking exercise or did not complete the CLI staking exercise, you can start it up again by running the following command:
solana-test-validator
Before running our script, we must find our validator's vote account public key. We can do this by running the following command:
solana validators -ul
The -ul flag will ensure we are looking at the local cluster. Copy the Vote Account public key:
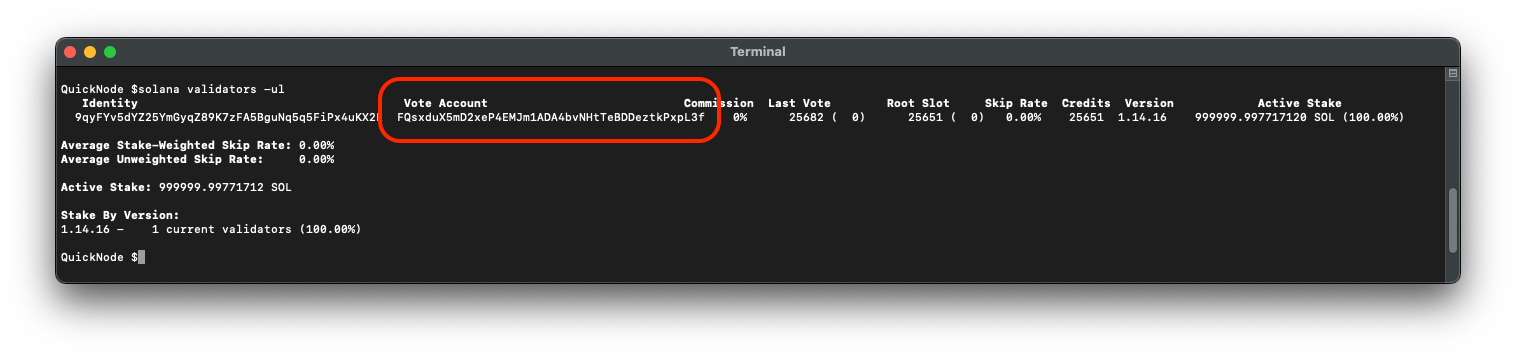
This is the voting account of our local validator. Let's update the validatorVoteAccount variable we defined earlier:
const validatorVoteAccount = new PublicKey("YOUR_VALIDATOR_VOTE_ACCOUNT");
In your second terminal, run the following command to execute the script:
ts-node app.ts
You should see the following output:
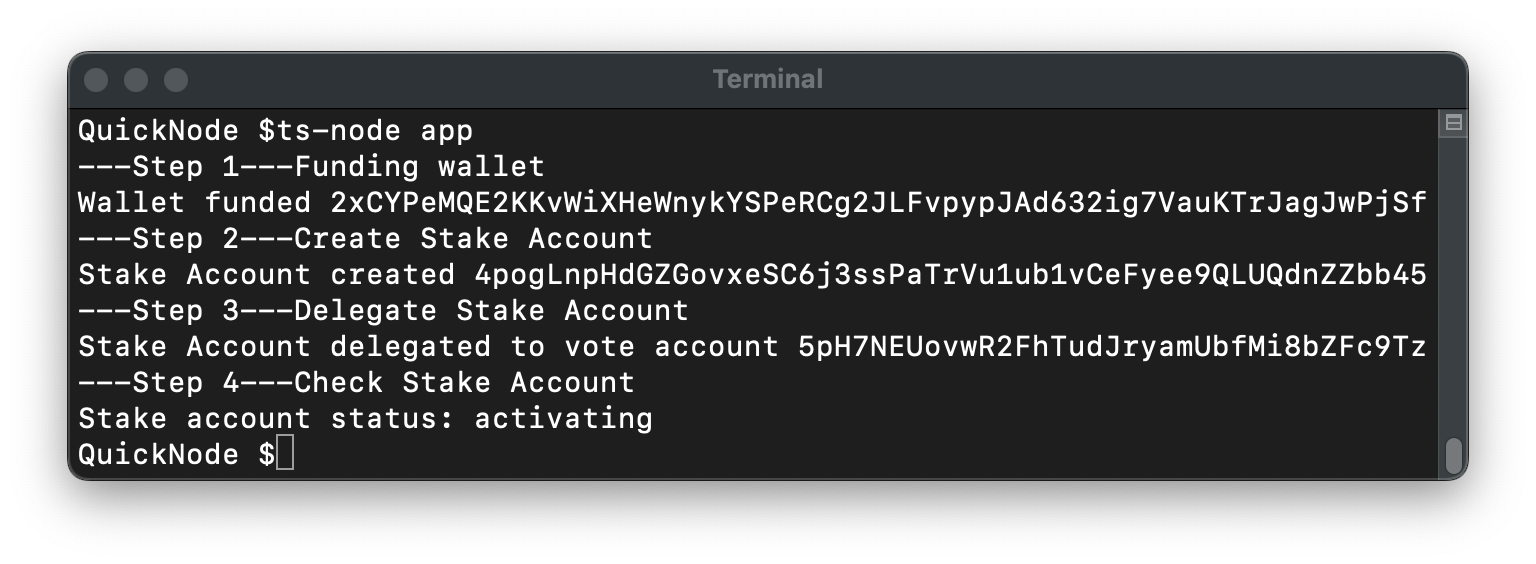
Congratulations! You have successfully created, funded, delegated, and activated a stake account using the Solana Web3.js library.
Method 4 - Liquid Staking
Liquid staking is a concept that allows users to stake their SOL while maintaining liquidity. Users can stake their SOL in exchange for a number of liquid staking tokens (e.g., mSOL, jitoSOL, etc.). This allows users to earn staking rewards while still being able to use their SOL in other applications. To deep dive into liquid staking, check out our guide.
Wrap Up
Staking SOL is a critical way to help secure the Solana network while earning rewards. You now have the tools to stake your own SOL or incorporate staking into your Solana dApps. Great job!
Show us what you are building on Twitter or Discord. We'd love to see what you are up to!
We ❤️ Feedback!
Let us know if you have any feedback or requests for new topics. We'd love to hear from you.