13 min read
Overview
Compliance with Anti-Money Laundering (AML) and Counter Financing of Terrorism (CFT) regulations is becoming a priority in decentralized finance (DeFi). Regulatory inspection is increasing, and blockchain projects must implement security measures to prevent illegal financial activities. The app you're about to build leverages Quicknode's Risk Assessment API to evaluate wallet risk profiles and Chainlink Functions to bring this offchain data into smart contracts.
This guide will walk you through building an AML and CFT-compliant staking dApp that integrates Quicknode’s Risk Assessment API and Chainlink Functions to enforce security policies at both the frontend and smart contract levels. Whether you're a developer new to compliance in decentralized finance (DeFi) or an experienced blockchain engineer, this guide will help you understand the why, what, and how of implementing compliance checks in a dApp.
The smart contracts and code provided in this guide are for educational purposes only and have not been audited. They should not be used in production environments without thorough testing, auditing, and security reviews.
What You Will Learn
- Why AML/CFT compliance is critical in DeFi
- How to evaluate wallet risk using Quicknode’s Risk Assessment API
- How to enforce compliance onchain using Chainlink Functions
- How to deploy an AML and CFT compliant staking dApp on Base Mainnet (or other EVM networks)
What You Will Need
- A Quicknode account with an enabled Risk Assessment API add-on
- Foundry for smart contract deployment
- A Chainlink Functions subscription with LINK tokens
- A browser-based EVM-compatible wallet (e.g., Rabby, MetaMask, Phantom)
Why AML and CFT Compliance Matters
The anonymous and permissionless nature of blockchain makes it attractive for both legitimate and illegal financial activities. Authorities worldwide are tightening regulations to combat fraud, sanctions violations, and terrorist financing in DeFi.
Compliance with AML and CFT regulations can be a strategic necessity for blockchain projects. Here’s why:
- Regulatory Requirements: Governments and financial regulators are increasingly focusing on cryptocurrency and DeFi. Non-compliance can lead to legal actions, fines, or even project shutdowns.
- Risk Mitigation: Without compliance checks, dApps can become conduits for money laundering or terrorism financing, exposing platforms to illicit activities and reputational damage.
- User Trust: Implementing compliance measures demonstrates a commitment to security and legality, fostering trust among users and institutions.
- Future-Proofing: As regulations tighten, embedding compliance into your dApp now can simplify adaptation to future requirements.
Quicknode's Security Add-on
Quicknode Marketplace provides a security add-on to help developers enforce compliance:
- Risk Assessment API:
This add-on analyzes offchain data (e.g., transaction patterns, known associations) to assign a risk score (0–100) to wallet addresses. A lower score indicates higher risk, with additional details like severity and entity type (e.g., "Sanction list"). It’s the add-on used in the app you’re about to build. The Risk Assessment API provides risk scores and entity labels via simple API calls, making it easy to integrate into applications for compliance checks. It focuses on AML/CFT compliance, leveraging offchain data to evaluate wallet risks.
Challenges of Onchain Compliance
Blocking user interactions on the frontend using this add-on is as simple as making an API call and checking the response. However, enforcing compliance at the smart contract level requires bridging the gap between offchain data and onchain logic, since they operate in an isolated environment and cannot directly access external data sources like APIs.
To overcome this, we need a secure, decentralized solution to fetch and deliver offchain data to the smart contract. This is where Chainlink Functions steps in.
How Chainlink Functions Works
Chainlink Functions is a decentralized oracle solution designed to connect smart contracts with external data sources and offchain computation.
For developers unfamiliar with Chainlink Functions, it extends the capabilities of Chainlink's oracle network by allowing custom JavaScript code to be executed offchain in a secure, decentralized environment. This code can interact with APIs, process data, and return results to the blockchain, all while maintaining the trustlessness and reliability of a decentralized oracle network.
 Source: Chainlink Functions Documentation
In the context of the AML and CFT Compliant dApp, Chainlink Functions plays a critical role in enabling onchain compliance by bridging the gap between the smart contract and the Quicknode Risk Assessment API. Here's how it works:
- Custom JavaScript Execution: Chainlink Functions allows developers to write JavaScript code (e.g., in
source.js) that runs offchain. In this dApp, the code calls the Risk Assessment API with a wallet address, extracts thescorefield from the response (e.g.,{"score": 1, "severity": "CRITICAL_RISK"}), and returns the numeric risk score to the blockchain. - Decentralized Execution: The JavaScript job is executed by the Chainlink Decentralized Oracle Network (DON), ensuring that the computation is performed in a decentralized and tamper-proof manner, avoiding single points of failure.
- Secure Callback Mechanism: Once the risk score is retrieved, Chainlink Functions delivers it to the smart contract via the
fulfillRequestcallback function. This updates theriskScoresmapping in theRiskBasedStaking.solcontract, enabling onchain compliance enforcement. - Secrets Management: Chainlink Functions makes it easy to use secrets, such as Quicknode Endpoint URL, with either DON-hosted or user-hosted hosting methods. This ensures that API credentials remain confidential and are not exposed onchain, enhancing security.
- Subscription Model: Chainlink Functions has a subscription model that allows the smart contract to make calls without requiring LINK token transfers for each request.
Project Architecture and Data Flow
The dApp’s architecture integrates frontend, smart contract, and oracle components seamlessly. Here’s the data flow:
- User Interaction: A user connects their wallet to the Next.js frontend and initiates a risk check.
- Frontend API Call: The frontend triggers a request to the
/api/check-riskroute. - Chainlink Functions Request: The API route uses the Chainlink Functions Toolkit to send a request to the Chainlink network.
- API Invocation: Chainlink Functions runs a JavaScript job to call the Risk Assessment API with the wallet address.
- Risk Score Retrieval: The API returns the risk score (e.g.,
{ "score": 1, "severity": "CRITICAL_RISK" }). - Smart Contract Update: Chainlink Functions calls the smart contract’s
fulfillRequestfunction, updating the wallet’s risk score. - Compliance Enforcement: The smart contract enforces staking rules (e.g., risk score < threshold).
- Frontend Update: The frontend reflects the updated risk score and staking status.
Understanding the Smart Contract and Chainlink Function
Before moving to the deployment section, it’s crucial to understand the components of the smart contract and the Chainlink Functions integration. This section provides more details on how the smart contract and API work together.
Smart Contract Overview: RiskBasedStaking.sol
The RiskBasedStaking.sol smart contract manages staking operations while enforcing compliance through risk scores fetched via Chainlink Functions. It ensures that only wallets with acceptable risk levels can stake ETH.
Key State Variables
stakedBalances: A mapping (address => uint256) tracking the ETH staked by each user.riskScores: A mapping (address => uint256) storing the risk score for each wallet. A score of0indicates the wallet hasn’t been checked yet.riskThreshold: Auint256value (e.g., 30) representing the minimum risk score required to stake. Lower scores indicate higher risk.pendingRequests: A mapping (address => bool) preventing duplicate risk check requests for the same user.s_lastRequestId,s_lastResponse,s_lastError: Variables storing the most recent Chainlink Functions request ID, response, and error for debugging purposes.
Core Functions
-
isAllowedToStake(address user)- Purpose: Checks if a user can stake.
- Logic: Returns
trueif the user’sriskScores[user]is greater than0(i.e., checked) and at least equal toriskThreshold. - Usage: Called by
stake()to enforce compliance.
-
sendRequest(...)- Purpose: Initiates a Chainlink Functions request to fetch a risk score.
- Access: Restricted to the contract owner (
onlyOwner). - Parameters: Includes
source(JavaScript code),args(user’s address),subscriptionId, andgasLimit. - Logic:
- Ensures exactly one argument (the user’s address) is provided.
- Prevents duplicate requests if
pendingRequests[user]istrue. - Initializes and sends the request using Chainlink’s
FunctionsRequestlibrary. - Tracks the request by mapping
s_lastRequestIdto the user’s address.
- Events: Emits
RiskCheckRequested(user, requestId).
-
fulfillRequest(bytes32 requestId, bytes memory response, bytes memory err)- Purpose: Processes the Chainlink Functions response.
- Access: Internal, called automatically by Chainlink.
- Logic:
- Retrieves the user’s address from
requestToUser[requestId]. - Clears
pendingRequests[user]. - If no error (
err.length == 0), decodes theresponseas auint256risk score, updatesriskScores[user], and emitsRiskScoreUpdated(user, score). - Stores the response/error and emits
Response(requestId, response, err).
- Retrieves the user’s address from
-
stake()- Purpose: Allows users to stake ETH if they pass the risk check.
- Logic:
- Checks if
riskScores[user]is0:- If
pendingRequests[user]istrue, reverts withPendingRiskCheck. - Otherwise, reverts with
NoRiskScore.
- If
- If
riskScores[user] < riskThreshold, reverts withRiskyAddress. - Updates
stakedBalances[user]andtotalStaked, then emitsStaked(user, amount).
- Checks if
-
withdraw(uint256 amount)- Purpose: Allows users to withdraw staked ETH.
- Logic:
- Ensures
stakedBalances[user] >= amount, otherwise reverts withInsufficientBalance. - Updates balances and transfers ETH to the user.
- Emits
Withdrawn(user, amount).
- Ensures
Chainlink Functions Integration: /api/check-risk
The /api/check-risk route connects the frontend to the smart contract, using the Chainlink Functions Toolkit to trigger risk assessments. It handles the offchain request process and updates the contract with the result.
Key Configuration
routerAddress: The Chainlink Functions router address (e.g.,0xf9B8fc078197181C841c296C876945aaa425B278for Base mainnet).donId: The Decentralized Oracle Network (DON) ID (e.g.,fun-base-mainnet-1).gatewayUrls: URLs for uploading secrets to the Chainlink gateway.source.js: JavaScript code executed by Chainlink Functions to call the Risk Assessment API and return a risk score.secrets: An object containing sensitive data (e.g.,QUICKNODE_ENDPOINT), encrypted and uploaded to the DON.
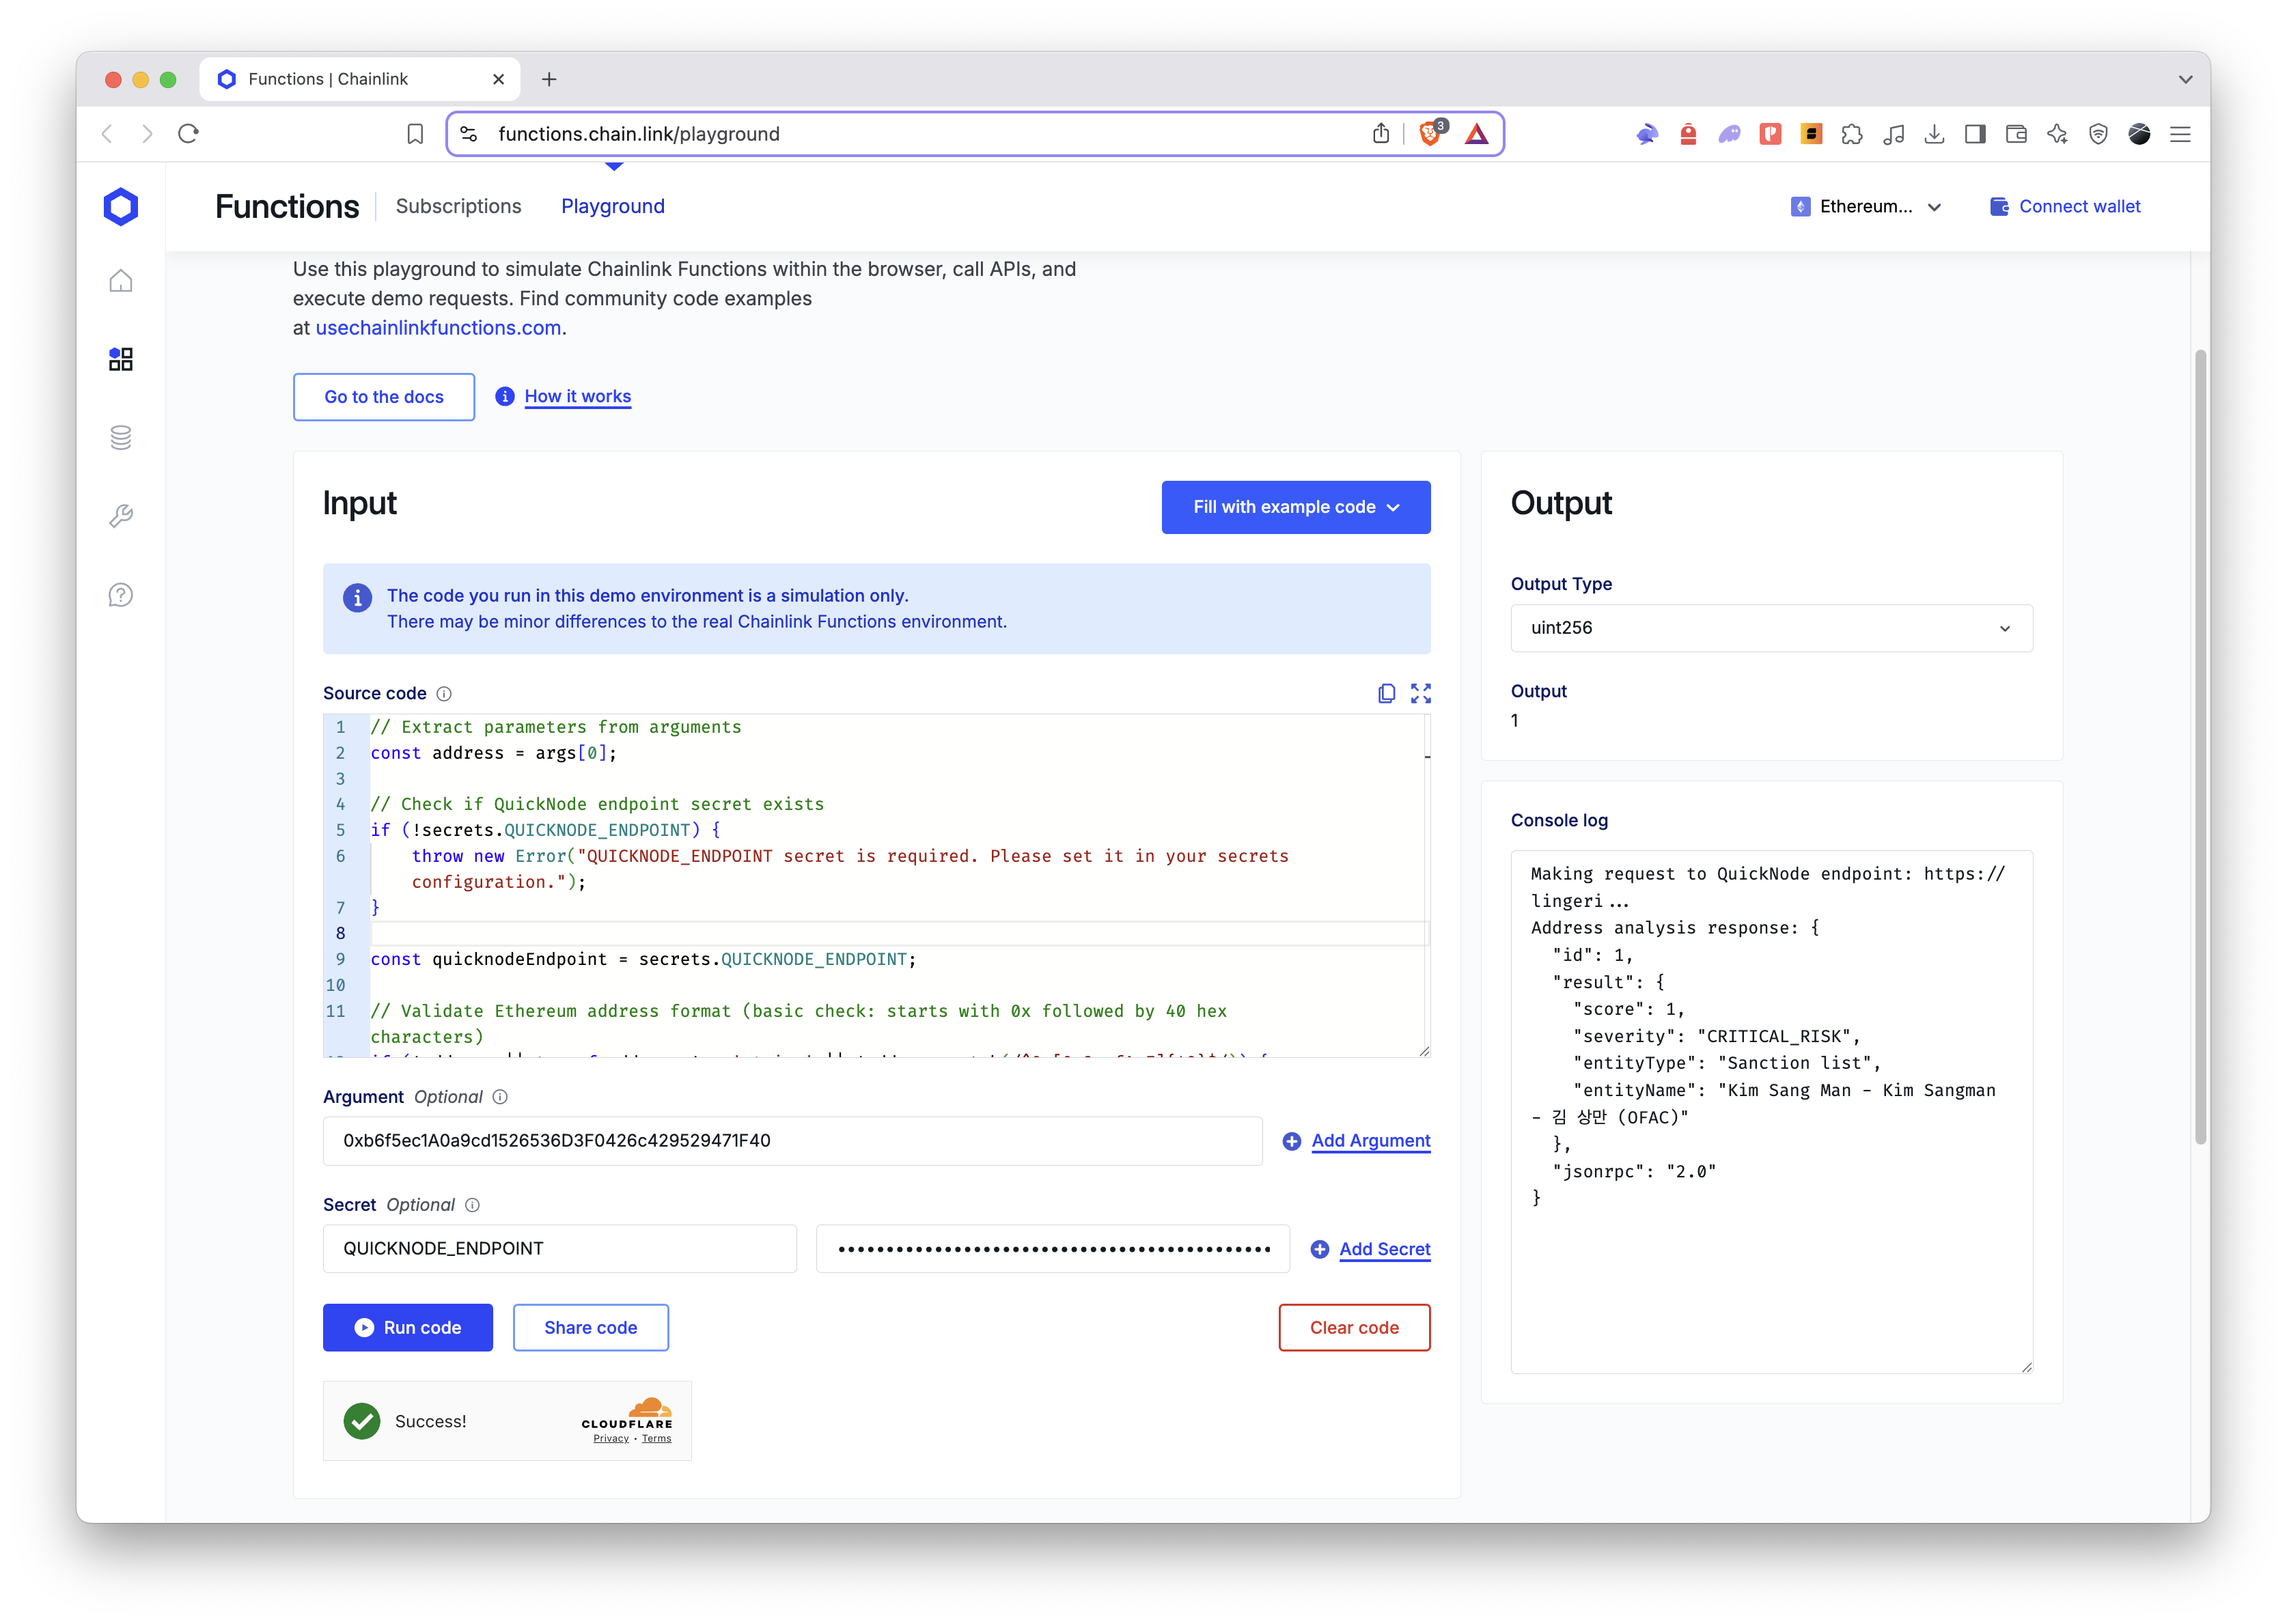
Chainlink Functions Playground is a great tool for testing and debugging source code. You can use it to simulate requests and view the responses.
Process Flow
-
Reading the Source Code: The route reads
source.jsfrom the filesystem, which defines the logic to call the Risk Assessment API with the user’s address and extract the risk score. -
Setting Up the Signer: Uses
ethers.jsto create a wallet fromPRIVATE_KEY(stored in.env) and connects it to the Quicknode provider (QUICKNODE_ENDPOINT). -
Managing Secrets: The
SecretsManagerencrypts thesecretsobject (e.g.,QUICKNODE_ENDPOINT) and uploads it to the DON with a specifiedslotIdand expiration time. -
Sending the Request: Calls
sendRequeston the smart contract with:- The
source.jscode. - Encrypted secrets reference (
slotIdandversion). - The user’s address as
args. - Chainlink subscription ID and gas limit.
- The
-
Listening for the Response: The
ResponseListenerwaits for Chainlink’s response from the transaction. Decodes theresponseBytesHexstringas auint256risk score usingdecodeResult. -
Error Handling: Handles errors like invalid addresses or API failures, returning appropriate JSON responses (e.g.,
{ success: false, error: "Invalid wallet address" }).
Now that you understand the architecture and components of the dapp, let’s walk through the process of setting it up on your local machine or preferred network.
Setting Up the Project
While Chainlink Functions supports testnets for experimentation (e.g., Sepolia), Quicknode’s security add-on (the Risk Assessment API) is designed to operate on mainnets (you can confirm supported networks on its add-on page). For this guide, we’ll deploy on Base mainnet to ensure full compatibility with the Risk Assessment API.
Follow these detailed steps to set up the dApp locally or on your preferred network:
Step 1: Clone the Repository
git clone https://github.com/quiknode-labs/qn-guide-examples.git
cd qn-guide-examples/sample-dapps/aml-and-cft-compliant-dapp
Step 2: Set Up Your Quicknode Endpoint
- Sign up at Quicknode and create an endpoint (e.g., Base mainnet).
- Enable the Risk Assessment API add-on in your endpoint. This enables
sc_getAddressAnalysisandsc_getTransactionAnalysismethods through your endpoint. - Save your endpoint URL.
Step 3: Configure Foundry and Deploy the Smart Contract
- Install Foundry:
curl -L https://foundry.paradigm.xyz | bash
foundryup
This installs Foundry, a toolkit for Ethereum smart contract development, which we'll use to compile and deploy our contract.
- Navigate to Foundry Directory:
cd foundry
- Install Dependencies: Install the required dependencies for Chainlink Functions integration and Foundry standards:
forge install smartcontractkit/foundry-chainlink-toolkit --no-commit
forge install foundry-rs/forge-std --no-commit
These libraries provide tools for interacting with Chainlink Functions and standard utilities for smart contract development.
- Create the Remappings File:
Generate a
remappings.txtfile to map the installed dependencies correctly in Foundry:
forge remappings > remappings.txt
- Import Your Wallet: Securely import your wallet into Foundry for deployment:
cast wallet import your-wallet-name --interactive
Replace your-wallet-name with a name for your wallet (e.g., deployer). You'll be prompted to enter your private key and set a password for encryption. The --interactive flag ensures the private key isn't saved in your shell history for security.
- Set Environment Variables:
Copy .env.sample to .env and update:
BASE_RPC_URL=<your-quicknode-endpoint>
BASESCAN_API_KEY=<your-basescan-api-key>
Replace BASE_RPC_URL with your Quicknode endpoint URL and BASESCAN_API_KEY with your BaseScan API key.
Check BaseScan API Keys docs for instructions on how to obtain your BaseScan API key.
Source the variables:
source .env
- Update Deployment Script:
Modify the script/RiskBasedStaking.s.sol file by updating the Chainlink Functions router address to match your selected network. Refer to the Chainlink Functions Supported Networks documentation for the appropriate address.
Ensure you use a checksummed Ethereum address to avoid deployment errors. If you're uncertain about checksum validation, utilize a tool like the Address Checksum Tool to generate and verify the correct checksummed format.
// Chain-specific Chainlink Functions Router addresses
address router = 0xf9B8fc078197181C841c296C876945aaa425B278;
- Deploy the Contract: Deploy the RiskBasedStaking smart contract to Base mainnet (or your chosen network):
forge script script/RiskBasedStaking.s.sol:RiskBasedStakingScript --rpc-url $BASE_RPC_URL --account your-wallet-name --broadcast --verify -vvv
The --verify flag verifies the contract on the explorer (e.g., Basescan); remove it if you don’t want to verify.
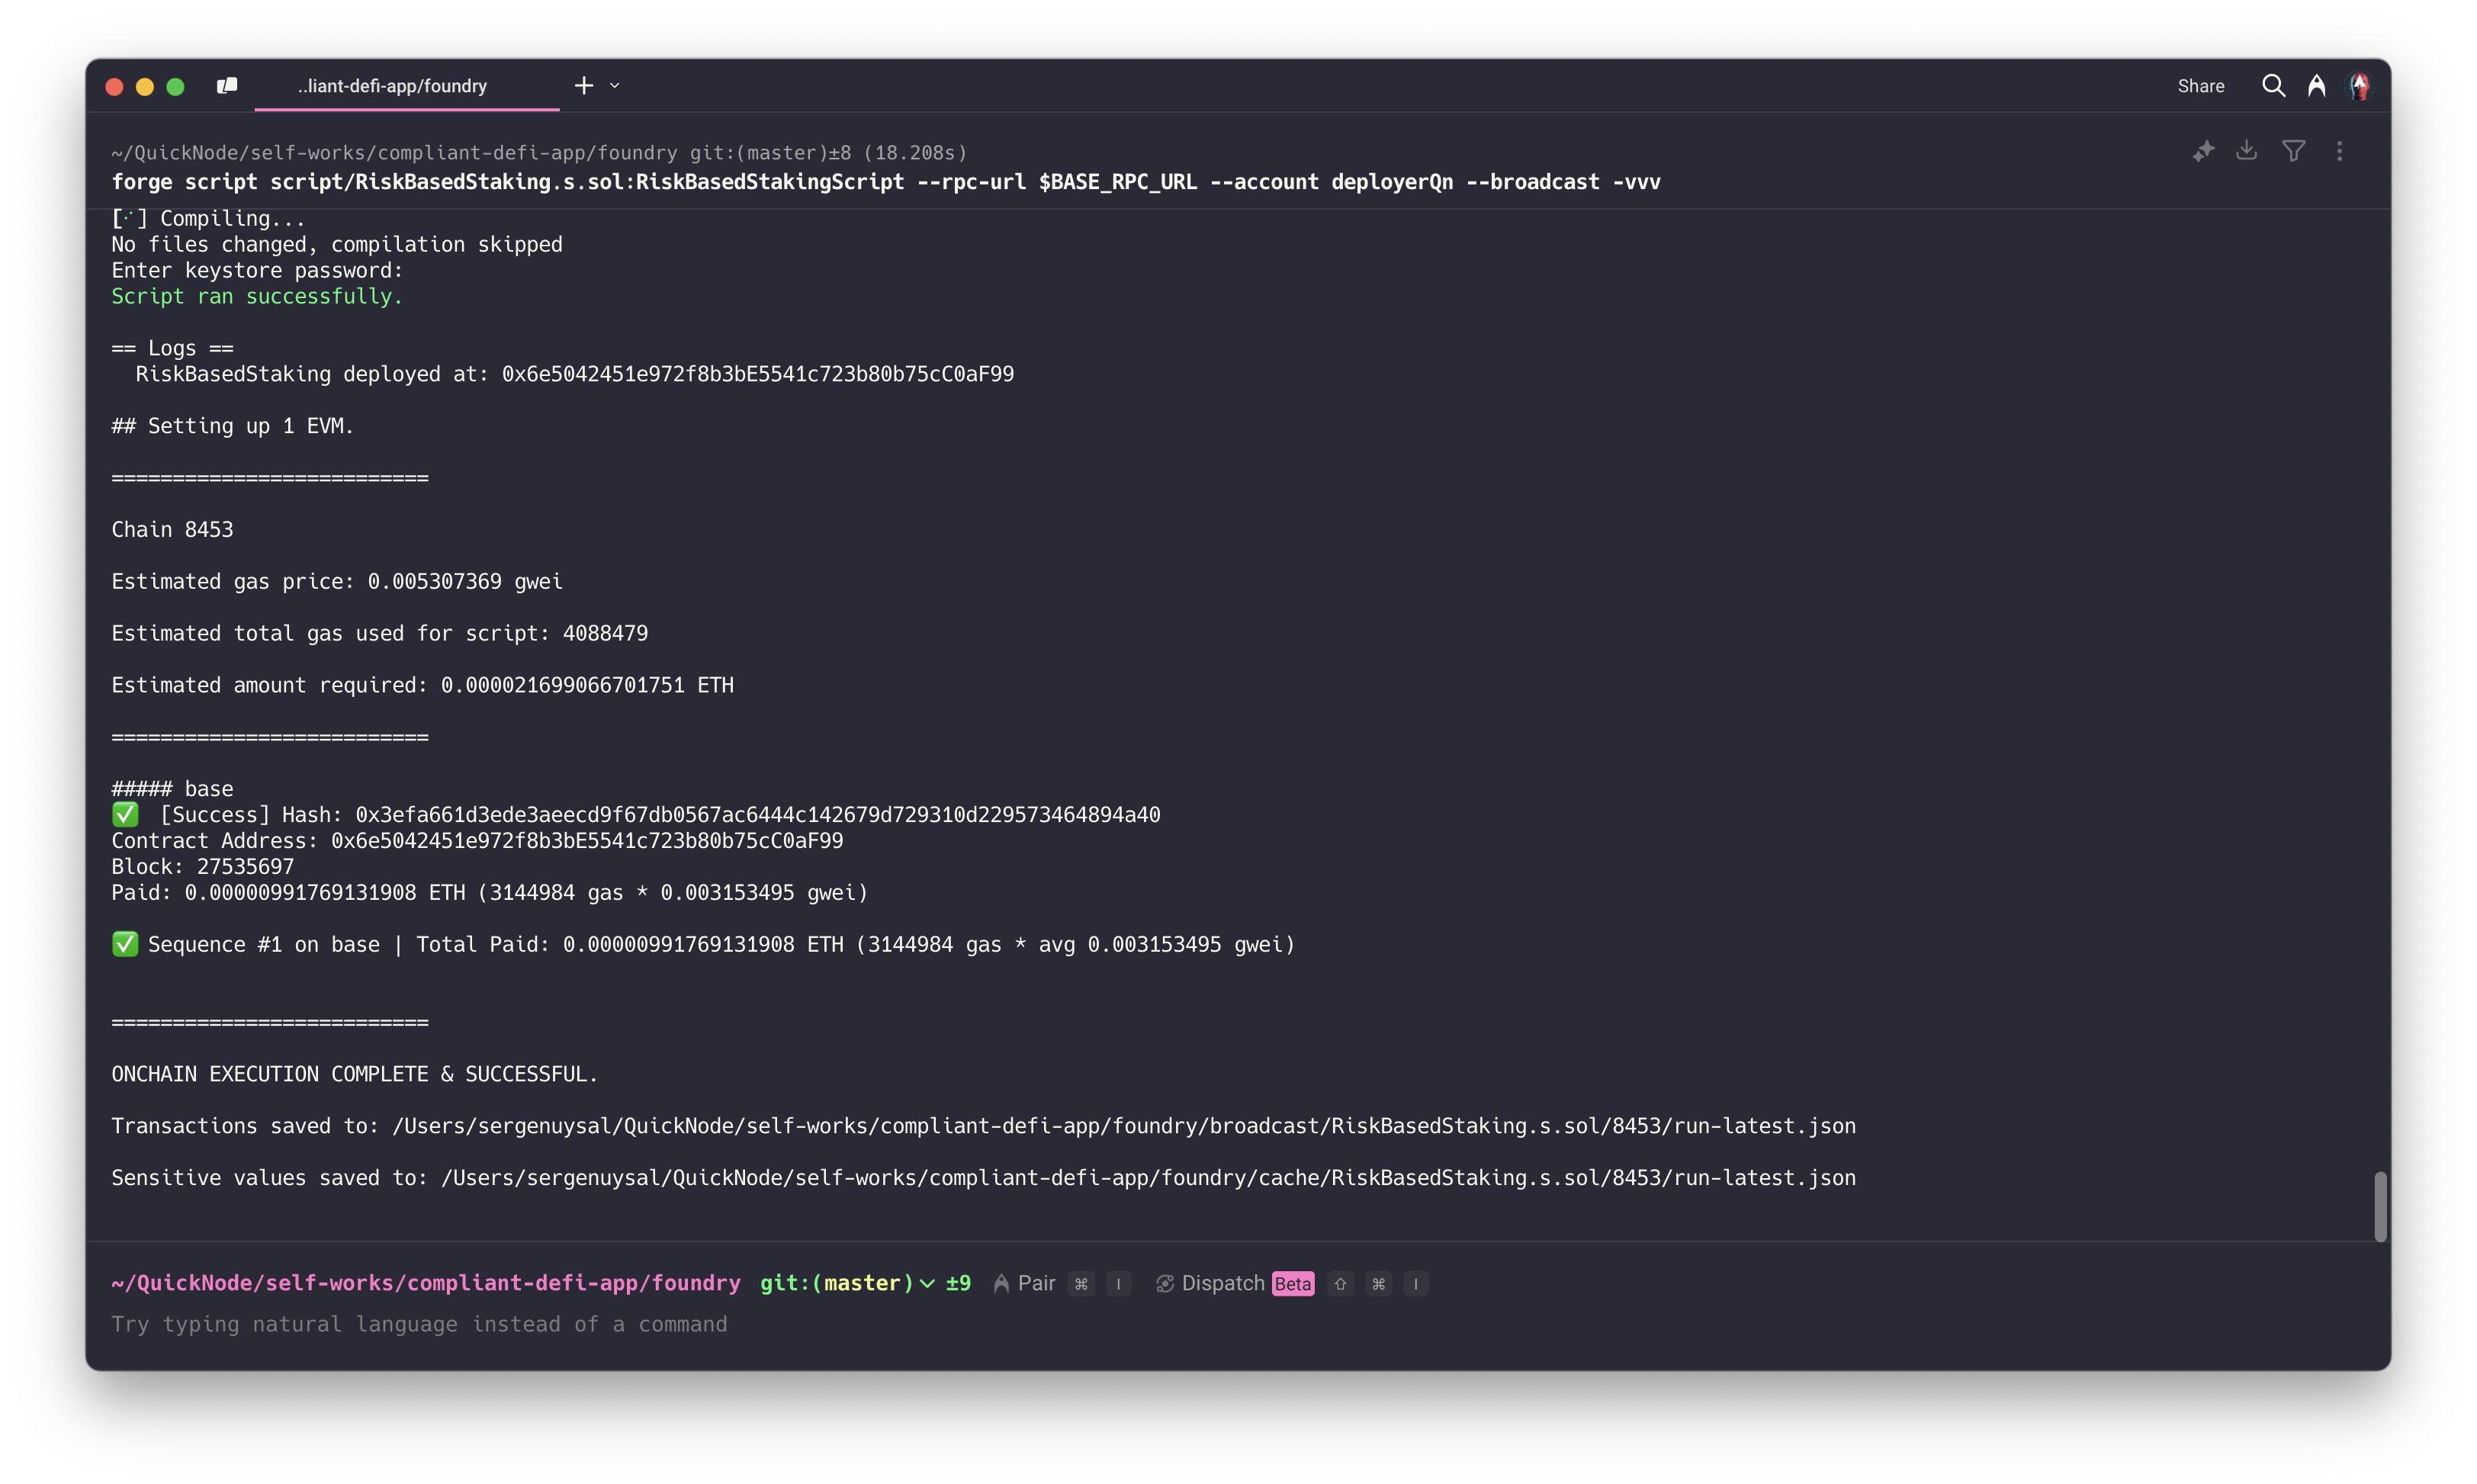
Note the deployed contract address from the output—you’ll need it for Chainlink Functions and frontend setup.
Step 4. Set Up Chainlink Functions Subscription
After deploying the smart contract, you need to set up a Chainlink Functions subscription to allow the contract to request risk assessments. Follow these steps:
-
Create a Chainlink Functions Subscription
- Go to the Chainlink Functions UI for your desired network.
- Follow the instructions to create a new subscription.
- Fund the subscription with LINK tokens (you can bridge LINK if needed, see LINK token docs).
-
Add Your Smart Contract as a Consumer
- Once the subscription is set up, add your deployed contract address as a consumer.
- This allows the contract to make requests via Chainlink Functions.
-
Check Network-Specific Details
- Each network has its own Functions router address and DON ID (Decentralized Oracle Network).
- Refer to the Chainlink Functions Supported Networks page to find the correct values for your network.
-
Get Your Subscription ID
- Visit Chainlink Functions UI and select your subscription.
- Copy the Subscription ID from the URL, as you'll need it in the next step.
For a detailed setup guide, refer to the Chainlink Functions Documentation.
Step 5: Configure and Run the Frontend
We use Next.js with TypeScript for type safety, Wagmi and Viem for wallet connectivity and smart contract interactions, and Mantine UI for a polished UI design.
- Navigate to Next.js Directory:
cd ../next-app
This directory contains the frontend code, structured with Next.js for server-side rendering and API routes.
- Install Dependencies:
npm install
This command installs all required packages listed in package.json. Key dependencies include:
nextandreact: Core libraries for building the Next.js application.wagmiandviem: Libraries for Ethereum wallet connectivity and smart contract interactions, enabling seamless integration with the blockchain.@mantine/coreand@mantine/hooks: Mantine UI components and hooks for building a modern, responsive interface.@chainlink/functions-toolkit: A toolkit for interacting with Chainlink Functions, used in the/api/check-riskroute to trigger risk assessment requests.ethers: A library for Ethereum utilities, used for signing transactions and interacting with the smart contract.
Why both
viemandethers? Becauseethersis a dependency of chainlink-functions-toolkit, andviemis a dependency of wagmi. We need both to interact with the blockchain and perform wallet operations.
- Set Environment Variables:
-
Create a
.envfile in thenext-appdirectory to store environment variables: -
Add the following variables:
WALLETCONNECT_PROJECT_ID=<your-walletconnect-id>
PRIVATE_KEY=<your-private-key>
QUICKNODE_ENDPOINT=<your-quicknode-endpoint>
CONTRACT_ADDRESS=<deployed-contract-address>
SUBSCRIPTION_ID=<chainlink-subscription-id>
Explanation of Variables and How to Obtain Them:
WALLETCONNECT_PROJECT_ID: This is your WalletConnect project ID, required for enabling wallet connections in the frontend. Sign up at WalletConnect Cloud to create a project and obtain your ID (e.g.,a1b2c3d4...).PRIVATE_KEY: The private key of a designated wallet used to sign Chainlink Functions requests. This ensures only authorized requests are made, preventing abuse of your Chainlink subscription. You can use the same wallet imported in Step 3 (e.g.,your-wallet-name). Export the private key securely using a tool like MetaMask or a wallet CLI, but never expose it publicly.QUICKNODE_ENDPOINT: Your Quicknode RPC endpoint URL with the Risk Assessment API enabled. You obtained this in Step 2 when setting up your Quicknode endpoint (e.g.,https://your-endpoint.quicknode.com).CONTRACT_ADDRESS: The address of the deployedRiskBasedStaking.solcontract. You noted this in Step 3 after running the deployment script (e.g.,0x1234...).SUBSCRIPTION_ID: The Chainlink Functions subscription ID, which funds the risk assessment requests. You’ll obtain this in Step 4 when setting up your Chainlink subscription (e.g.,1234).
- Update Chainlink Functions Configuration
Update the src/app/api/check-risk/route.ts file with the correct router address and DON ID for your chain and network.
  // Chainlink Functions configuration
  const routerAddress = "0xf9B8fc078197181C841c296C876945aaa425B278";
  const donId = "fun-base-mainnet-1";
  const gatewayUrls = [
    "https://01.functions-gateway.chain.link/",
    "https://02.functions-gateway.chain.link/",
  ];
- Run the Application: Start the Next.js development server:
npm run dev
This command launches the app in development mode, with hot reloading enabled for easier debugging.
Testing the Application
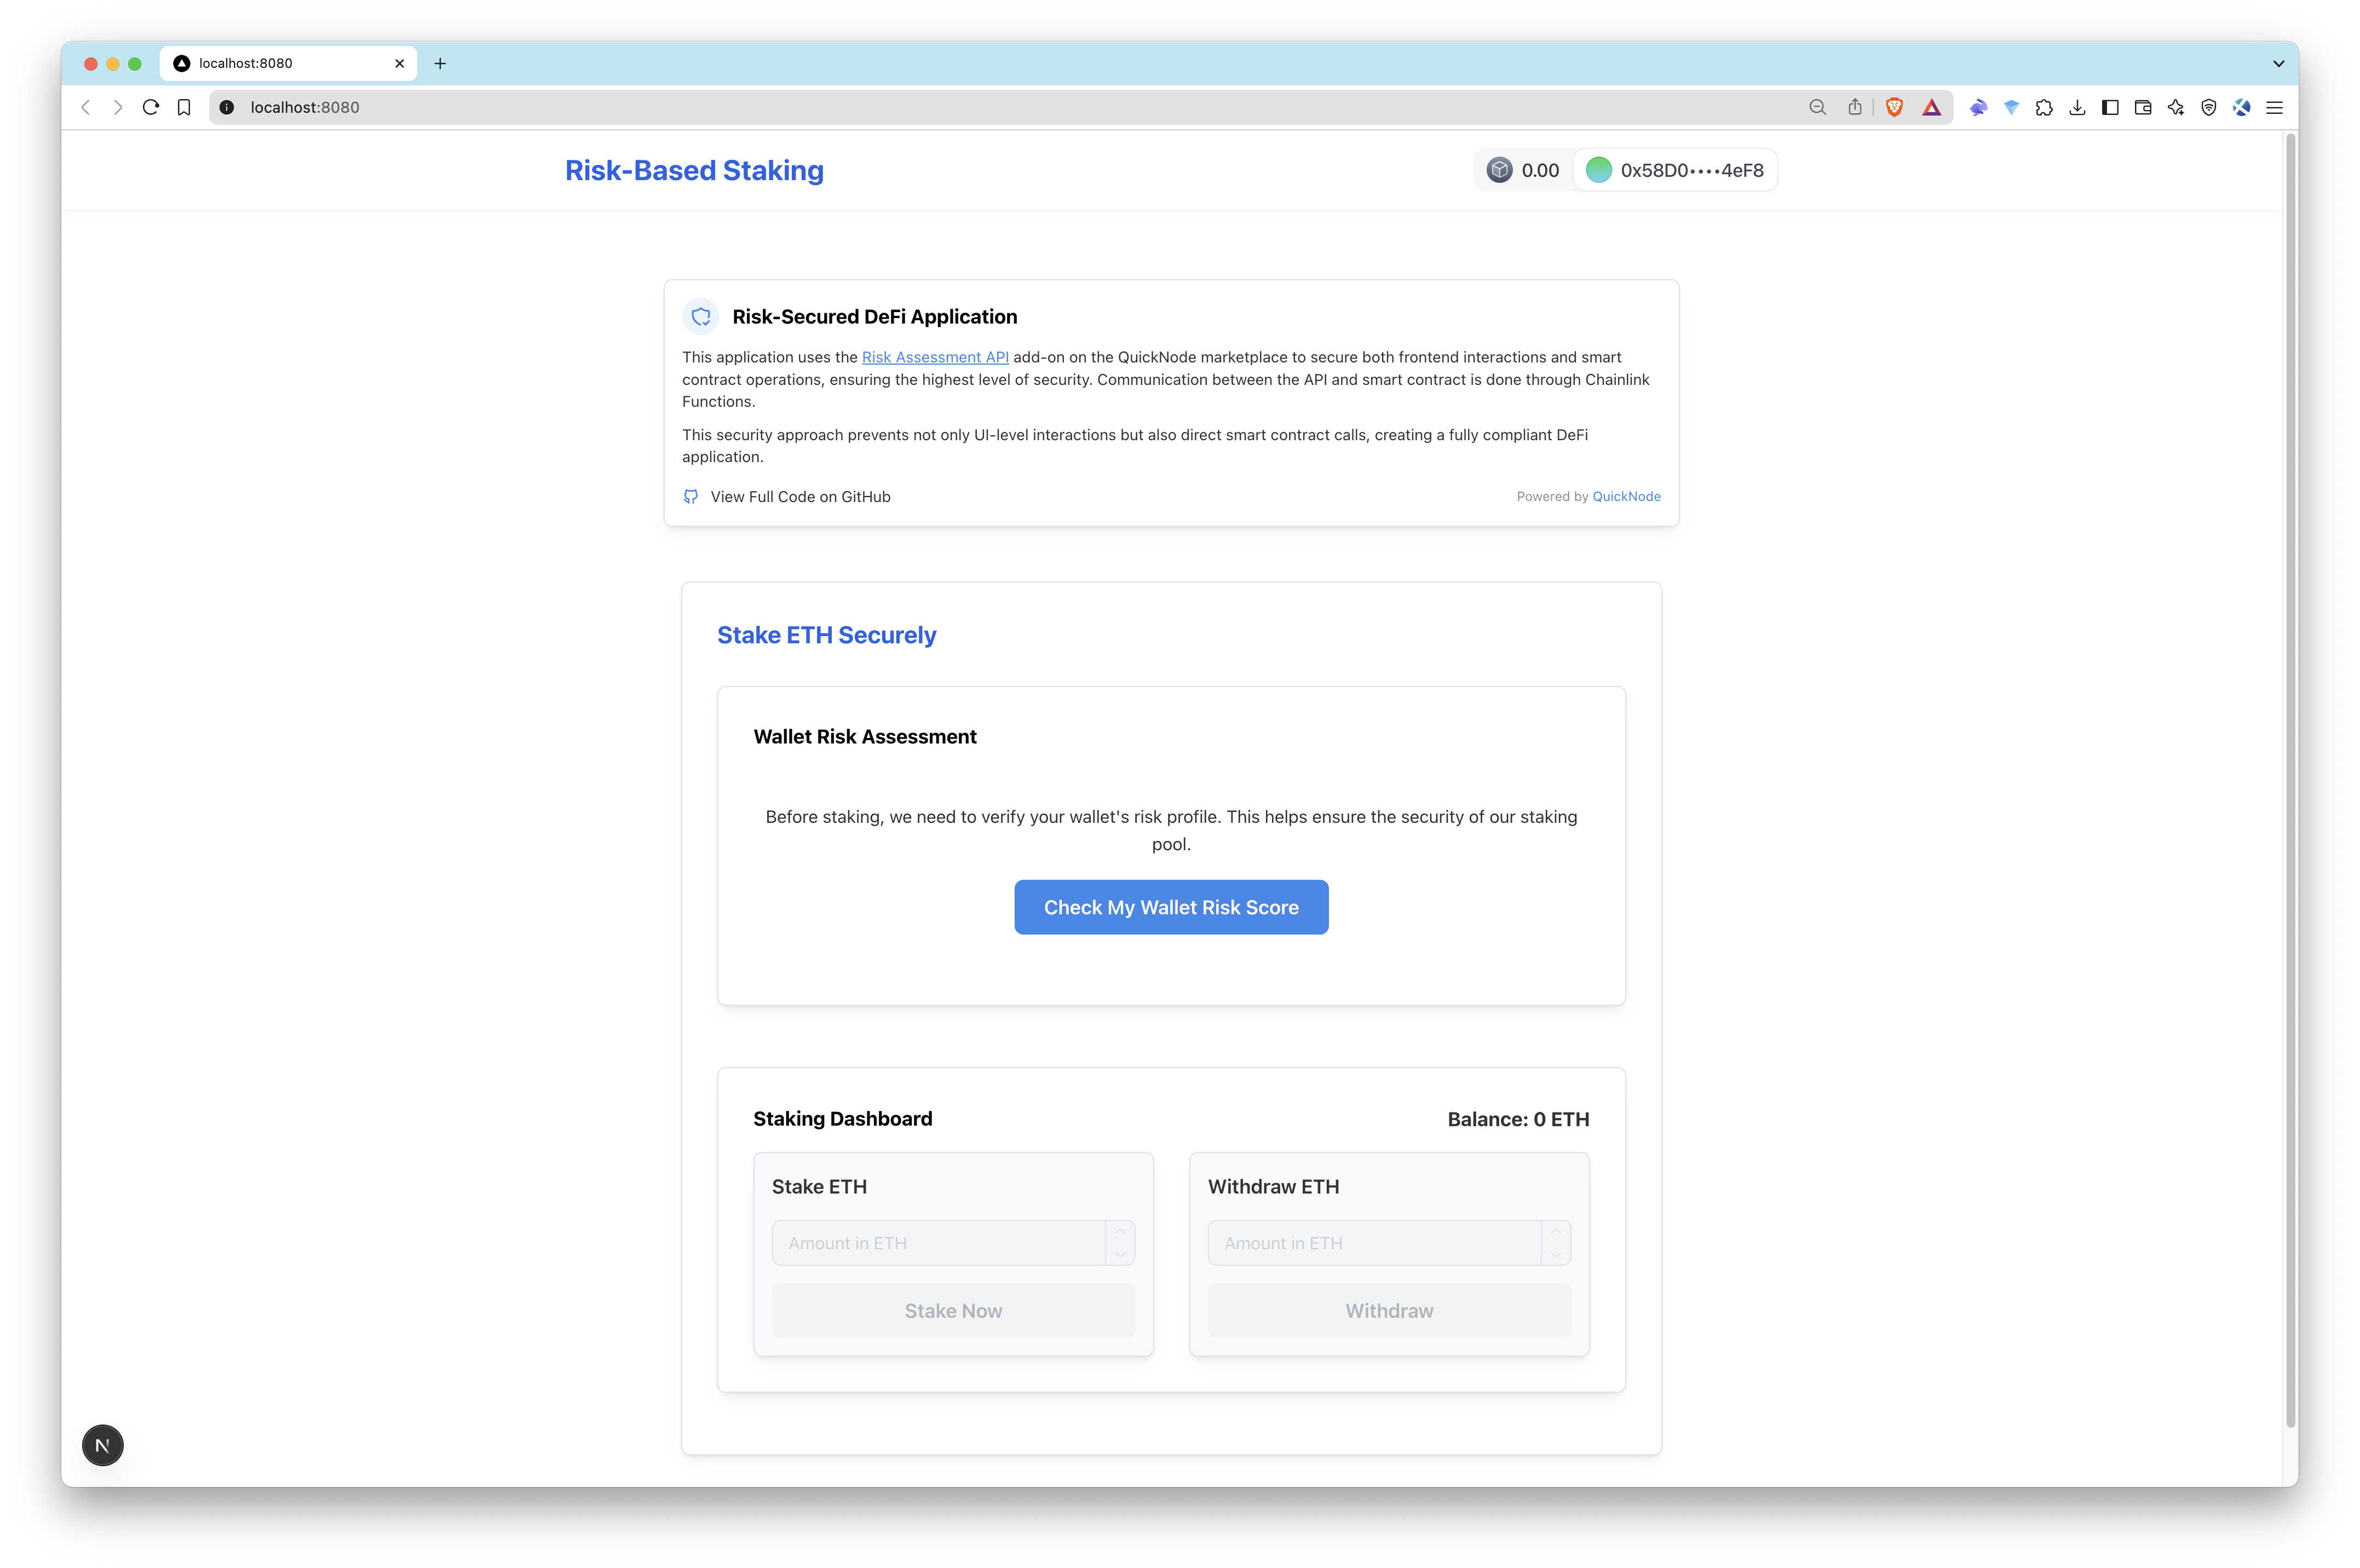
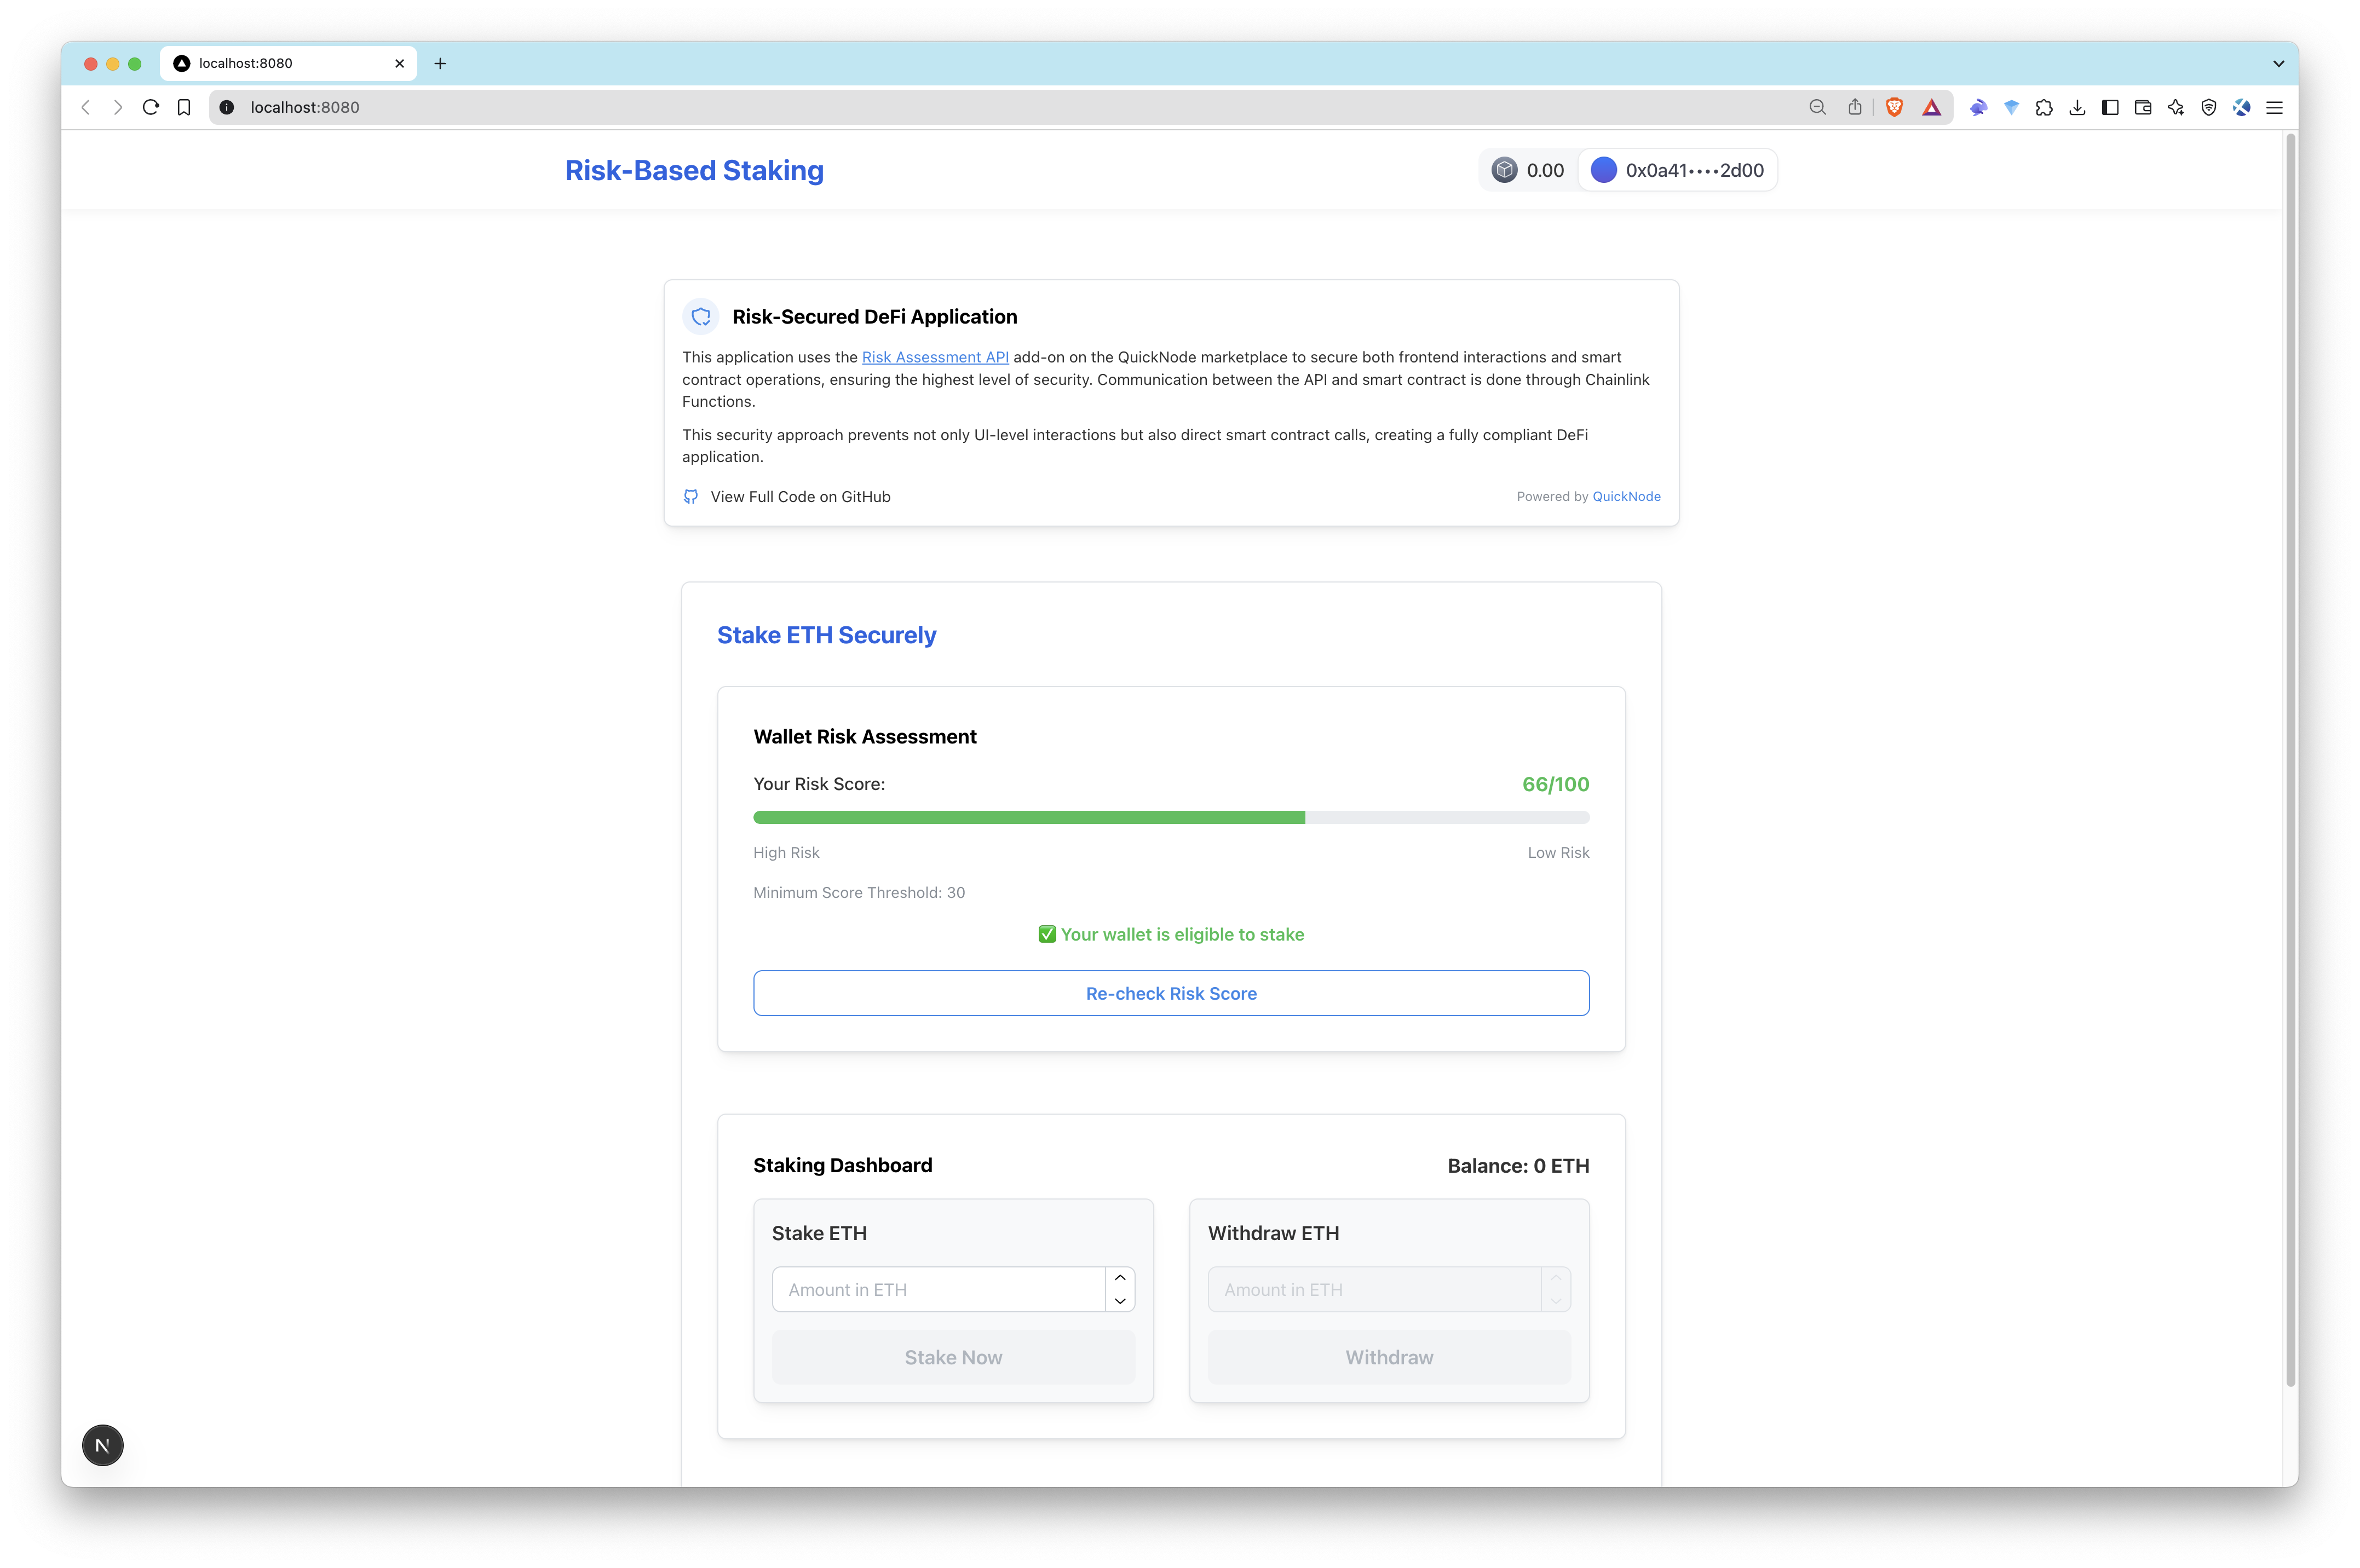
Once your dApp is set up, you can access and interact with it through a browser interface.
- Access the Application: Open your browser and navigate to http://localhost:3000 to interact with the dApp. Check your score to test functionality of the app.
| App Overview | App Overview with a Score |
|---|---|
 |  |
- Verify Chainlink Functions Subscription:
- Head to the Chainlink Functions UI to monitor your subscription.
- Check the request history to ensure your risk check requests are processing successfully.
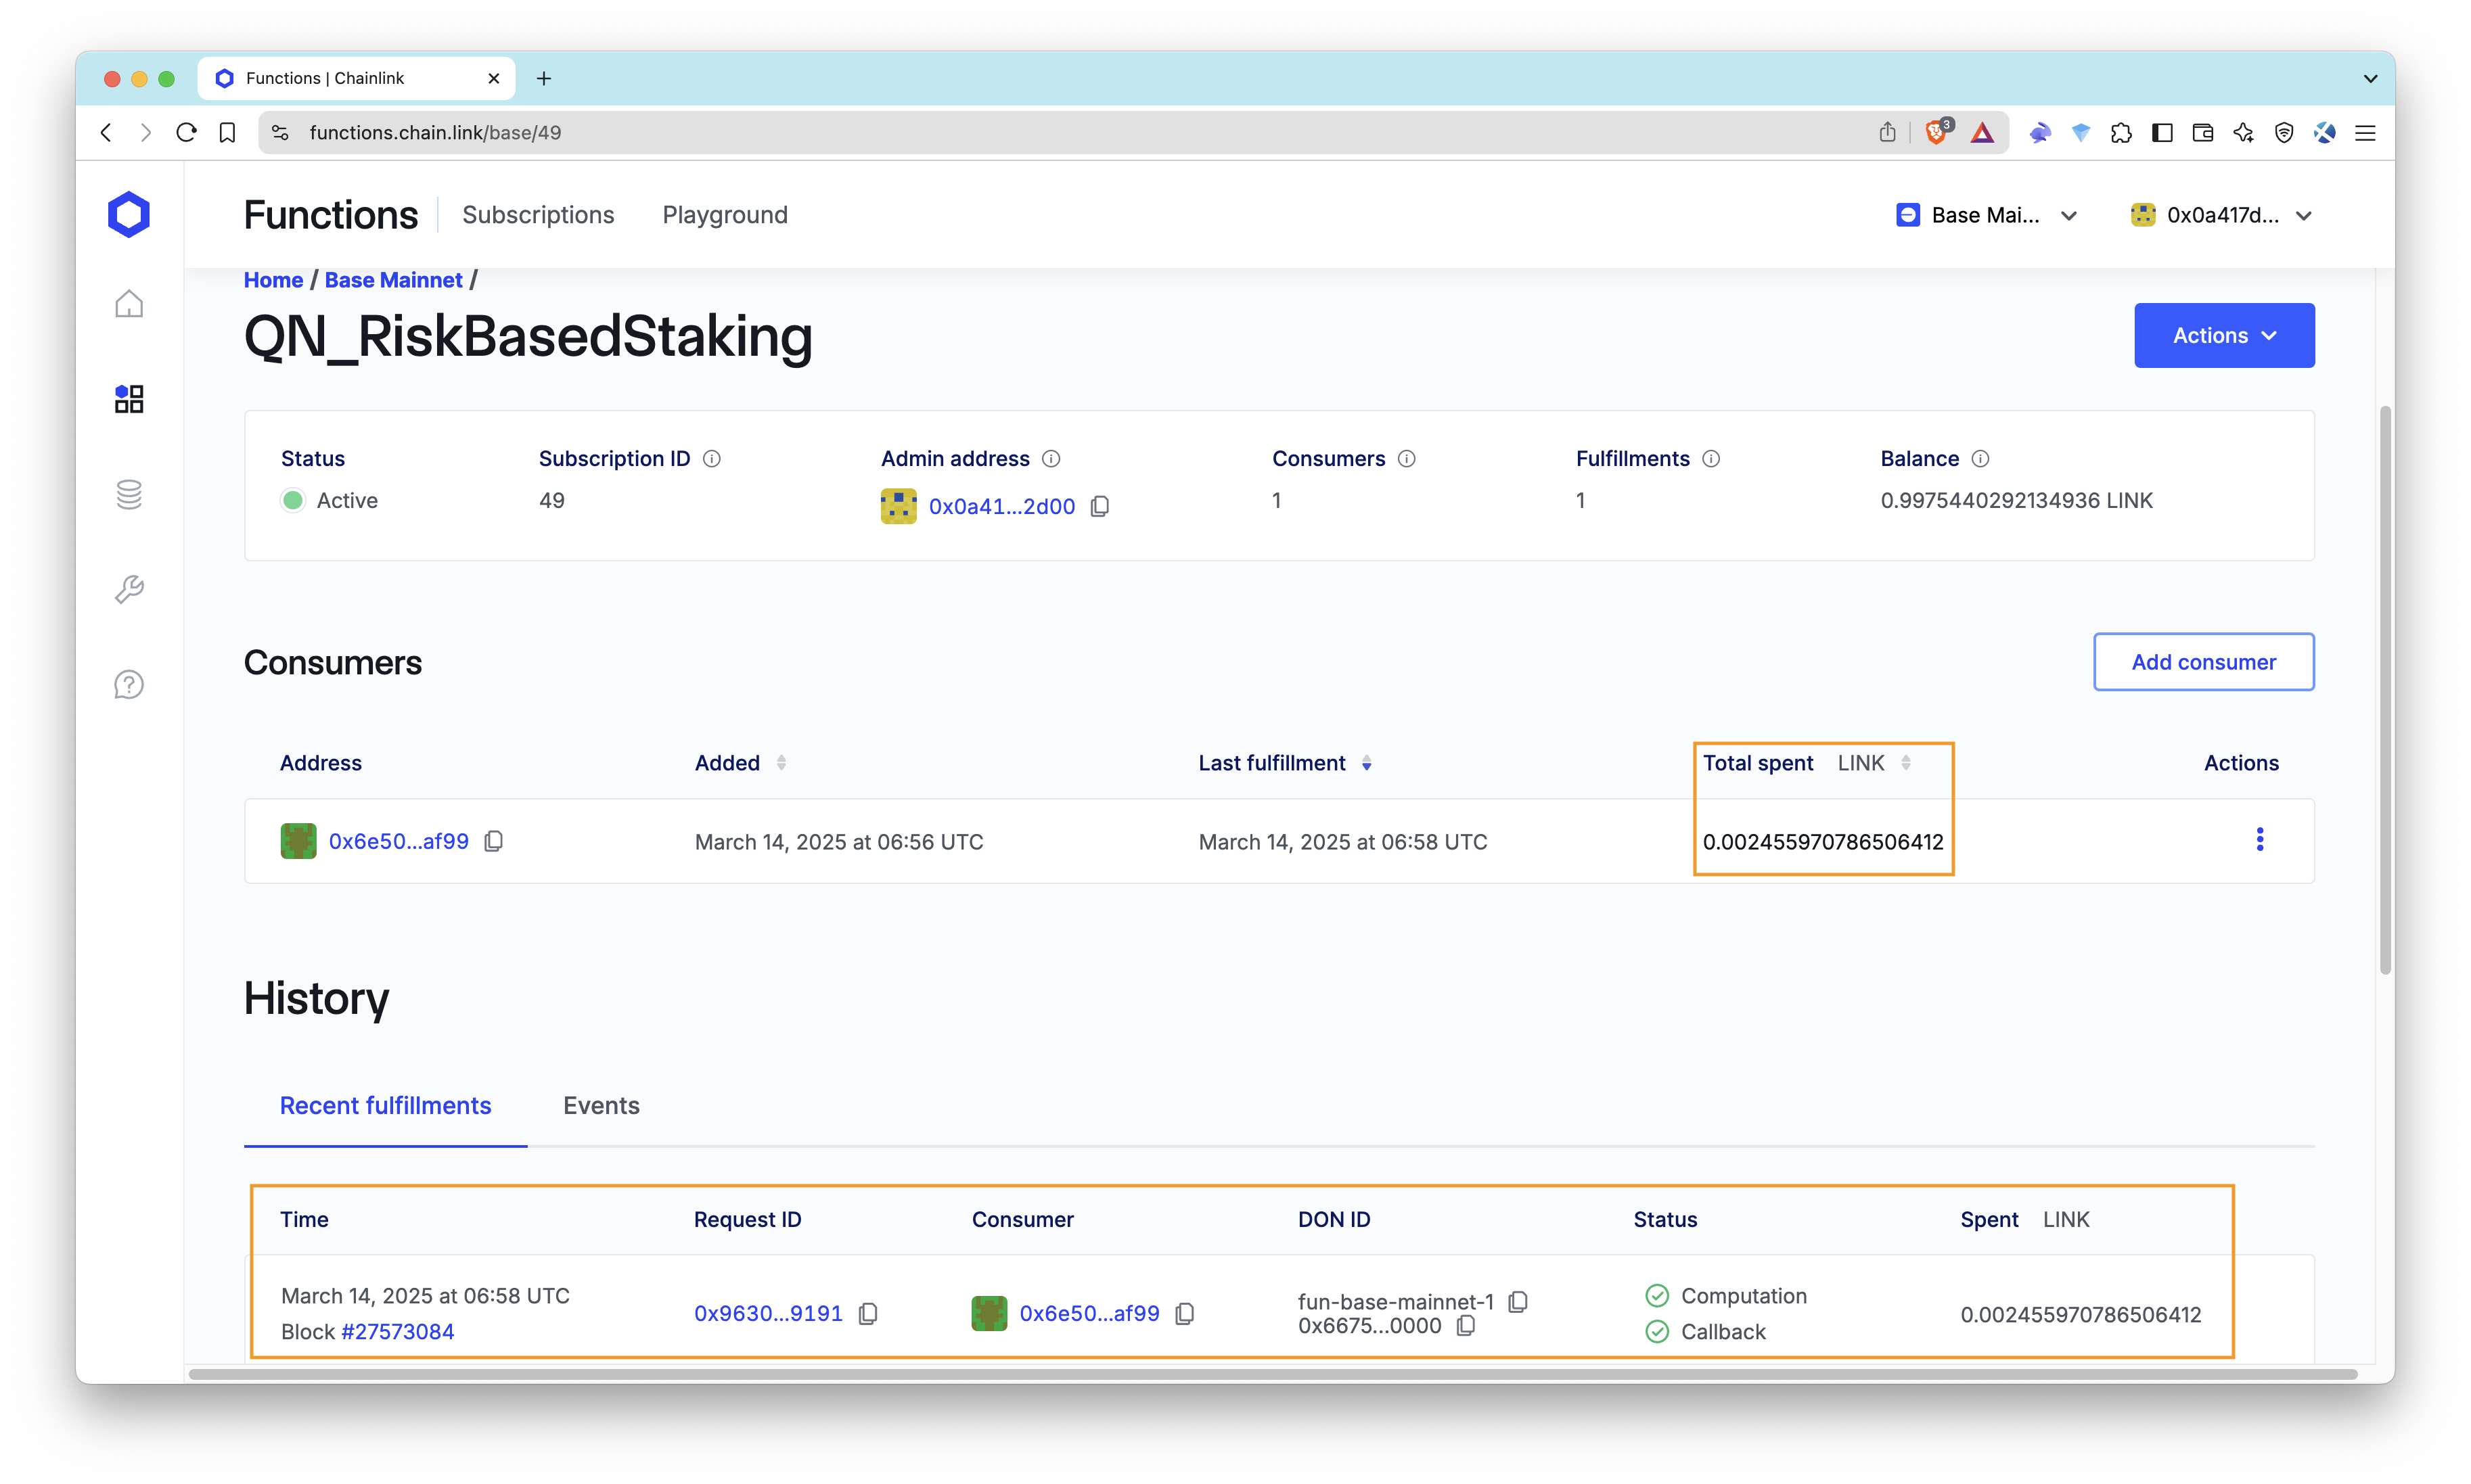
- Interact with the Smart Contract:
Query the riskScores mapping in the smart contract to confirm your risk score is updated correctly:
If you’re new to interacting with smart contracts, follow our guide on interacting with smart contracts for detailed instructions on how to read and write to the contract using tools like ethers.js or a block explorer’s interface.
This verification ensures that the risk score from the Risk Assessment API is properly reflected onchain.
Additional Steps
To elevate your dApp from a working prototype to a production-ready application, consider these practical improvements:
-
Audit and Security:
- Conduct a thorough security audit of your smart contract and Chainlink Functions integration to identify and address any potential vulnerabilities. This will help ensure the safety and reliability of your application.
-
Rate Limiting for Risk Checks:
- Prevent abuse by limiting how often users can request risk checks. For example, enforce a 24-hour cooldown per wallet address to avoid draining your Chainlink subscription’s LINK balance unnecessarily.
- This can be implemented in the smart contract with a timestamp check.
-
Optimizing LINK and Transaction Costs:
- LINK Costs: Monitor LINK usage in your Chainlink subscription and set up balance alerts. Reduce costs by batching requests or lowering the frequency of risk checks where possible.
- Gas Fees: Optimize gas usage by setting an appropriate
gasLimitfor Chainlink Functions requests and minimizing onchain operations.
-
User Experience Enhancements:
- Add a loading indicator or real-time notification during risk checks to keep users informed.
- Provide feedback if a risk score fails the threshold, leveraging metadata (e.g.,
severityorentityType) from the Risk Assessment API.
-
Security Best Practices:
- Securely manage your
PRIVATE_KEY—never expose it in client-side code. Use a dedicated signer wallet with minimal funds for Chainlink requests. - Consider adding access controls or multi-signature requirements for critical updates, like changing the
riskThreshold.
- Securely manage your
-
Testing and Validation:
- Test extensively on a testnet (if available) to iron out bugs, then pursue a professional audit to ensure your dApp is secure and reliable.
Conclusion
This guide has equipped you with the steps to build an AML and CFT compliant dApp using Quicknode’s Risk Assessment API and Chainlink Functions. You’ve set up a staking interface, verified your Chainlink subscription and smart contract interactions, and explored ways to enhance your solution. By implementing the additional steps above, you can create a dApp that’s not only compliant but also efficient, secure, and user-friendly.
If you have any questions, feel free to use our Discord server or provide feedback using the form below. Stay up to date with the latest by following us on Twitter and our Telegram announcement channel.
We ❤️ Feedback!
Let us know if you have any feedback or requests for new topics. We'd love to hear from you.