7 min read
This guide includes references to the Goerli testnet, which is no longer actively maintained. While specific steps related to this chain may not be applicable, the overall process may be valid for other chains. We recommend exploring current alternatives for your implementation. If you’d like to see an updated version of this guide, please let us know!
Overview
Smart contracts are the most popular feature of the Ethereum network. Smart contracts have functions that sometimes need to be accessed by other smart contracts. Before understanding smart contracts' interactions, let's brush up on our basics about smart contracts.
In this guide, we'll learn about smart contracts, understand why we want to call other smart contracts from our smart contract and deploy two separate contracts that interact with each other.
What is a Smart Contract?
Smart contracts are computer code, otherwise known as apps, deployed on the Blockchain network. Just like any other app, these smart contracts have information and conditions or rules. The main difference is that a smart contract's functions can be executed by anyone, anytime for any reason.
In the real-life, whenever an agreement between various stakeholders is supposed to occur, a third-party examines and validates it. For instance, a notary will ensure the identity of both signers on a contract. This makes it a time consuming and complicated process. Smart contracts eliminate the need for a third-party and enable the stakeholders to transact directly, and in this way, the process gets automated and more secure.
The smart contract gives the ability to transact with anyone globally without worrying about the trustworthiness and a middleman. Smart contracts inherit many Blockchain properties as they are designed and implemented on the blockchain, Being immutable is one of them which means smart contracts can never be changed and no one can break a contract.
Solidity is the standard language to write a smart contract, Learn more about Solidity, and write your first Solidity Smart Contract.
The following are the benefits of a smart contract:
Accuracy – Filling out forms manually can result in some errors, whereas working with automated contracts can be faster, cheaper, and accurate.
Trust – The contracts are deployed and stored on the blockchain nodes' network in an encoded format. They can never be lost.
Autonomy – Using smart contracts, you are the one making agreements; there's no need to be dependent on a broker, lawyer, or any third-party intermediaries.
Speed – Processing documents manually can require a considerable amount of paperwork and demand time. Since smart contracts are actually just computer programs, they can be automated - which is fast.
Backup – Imagine if a financial firm's data centre crashes and all the data of its customer's assets are gone. On the Ethereum Blockchain, each and everyone on the network has a copy of the data and smart contracts. In this way, the data is backed up and never lost.
Savings – Whenever a third-party is involved in the agreement, a notable amount is paid to them for their services, but since smart contracts eliminate the need for a third-party, the cost of transacting is reduced.
Why do Contracts need to interact with other contracts?
Just like an application or computer program can access other applications data through an API, a smart contract can make use of functions in other smart contracts that have been deployed on the blockchain. This reusability can save time and space on the blockchain since you don't need to write or copy and paste a function and you don't need to store a duplicate of the function on chain.
Getting some testnet ETH
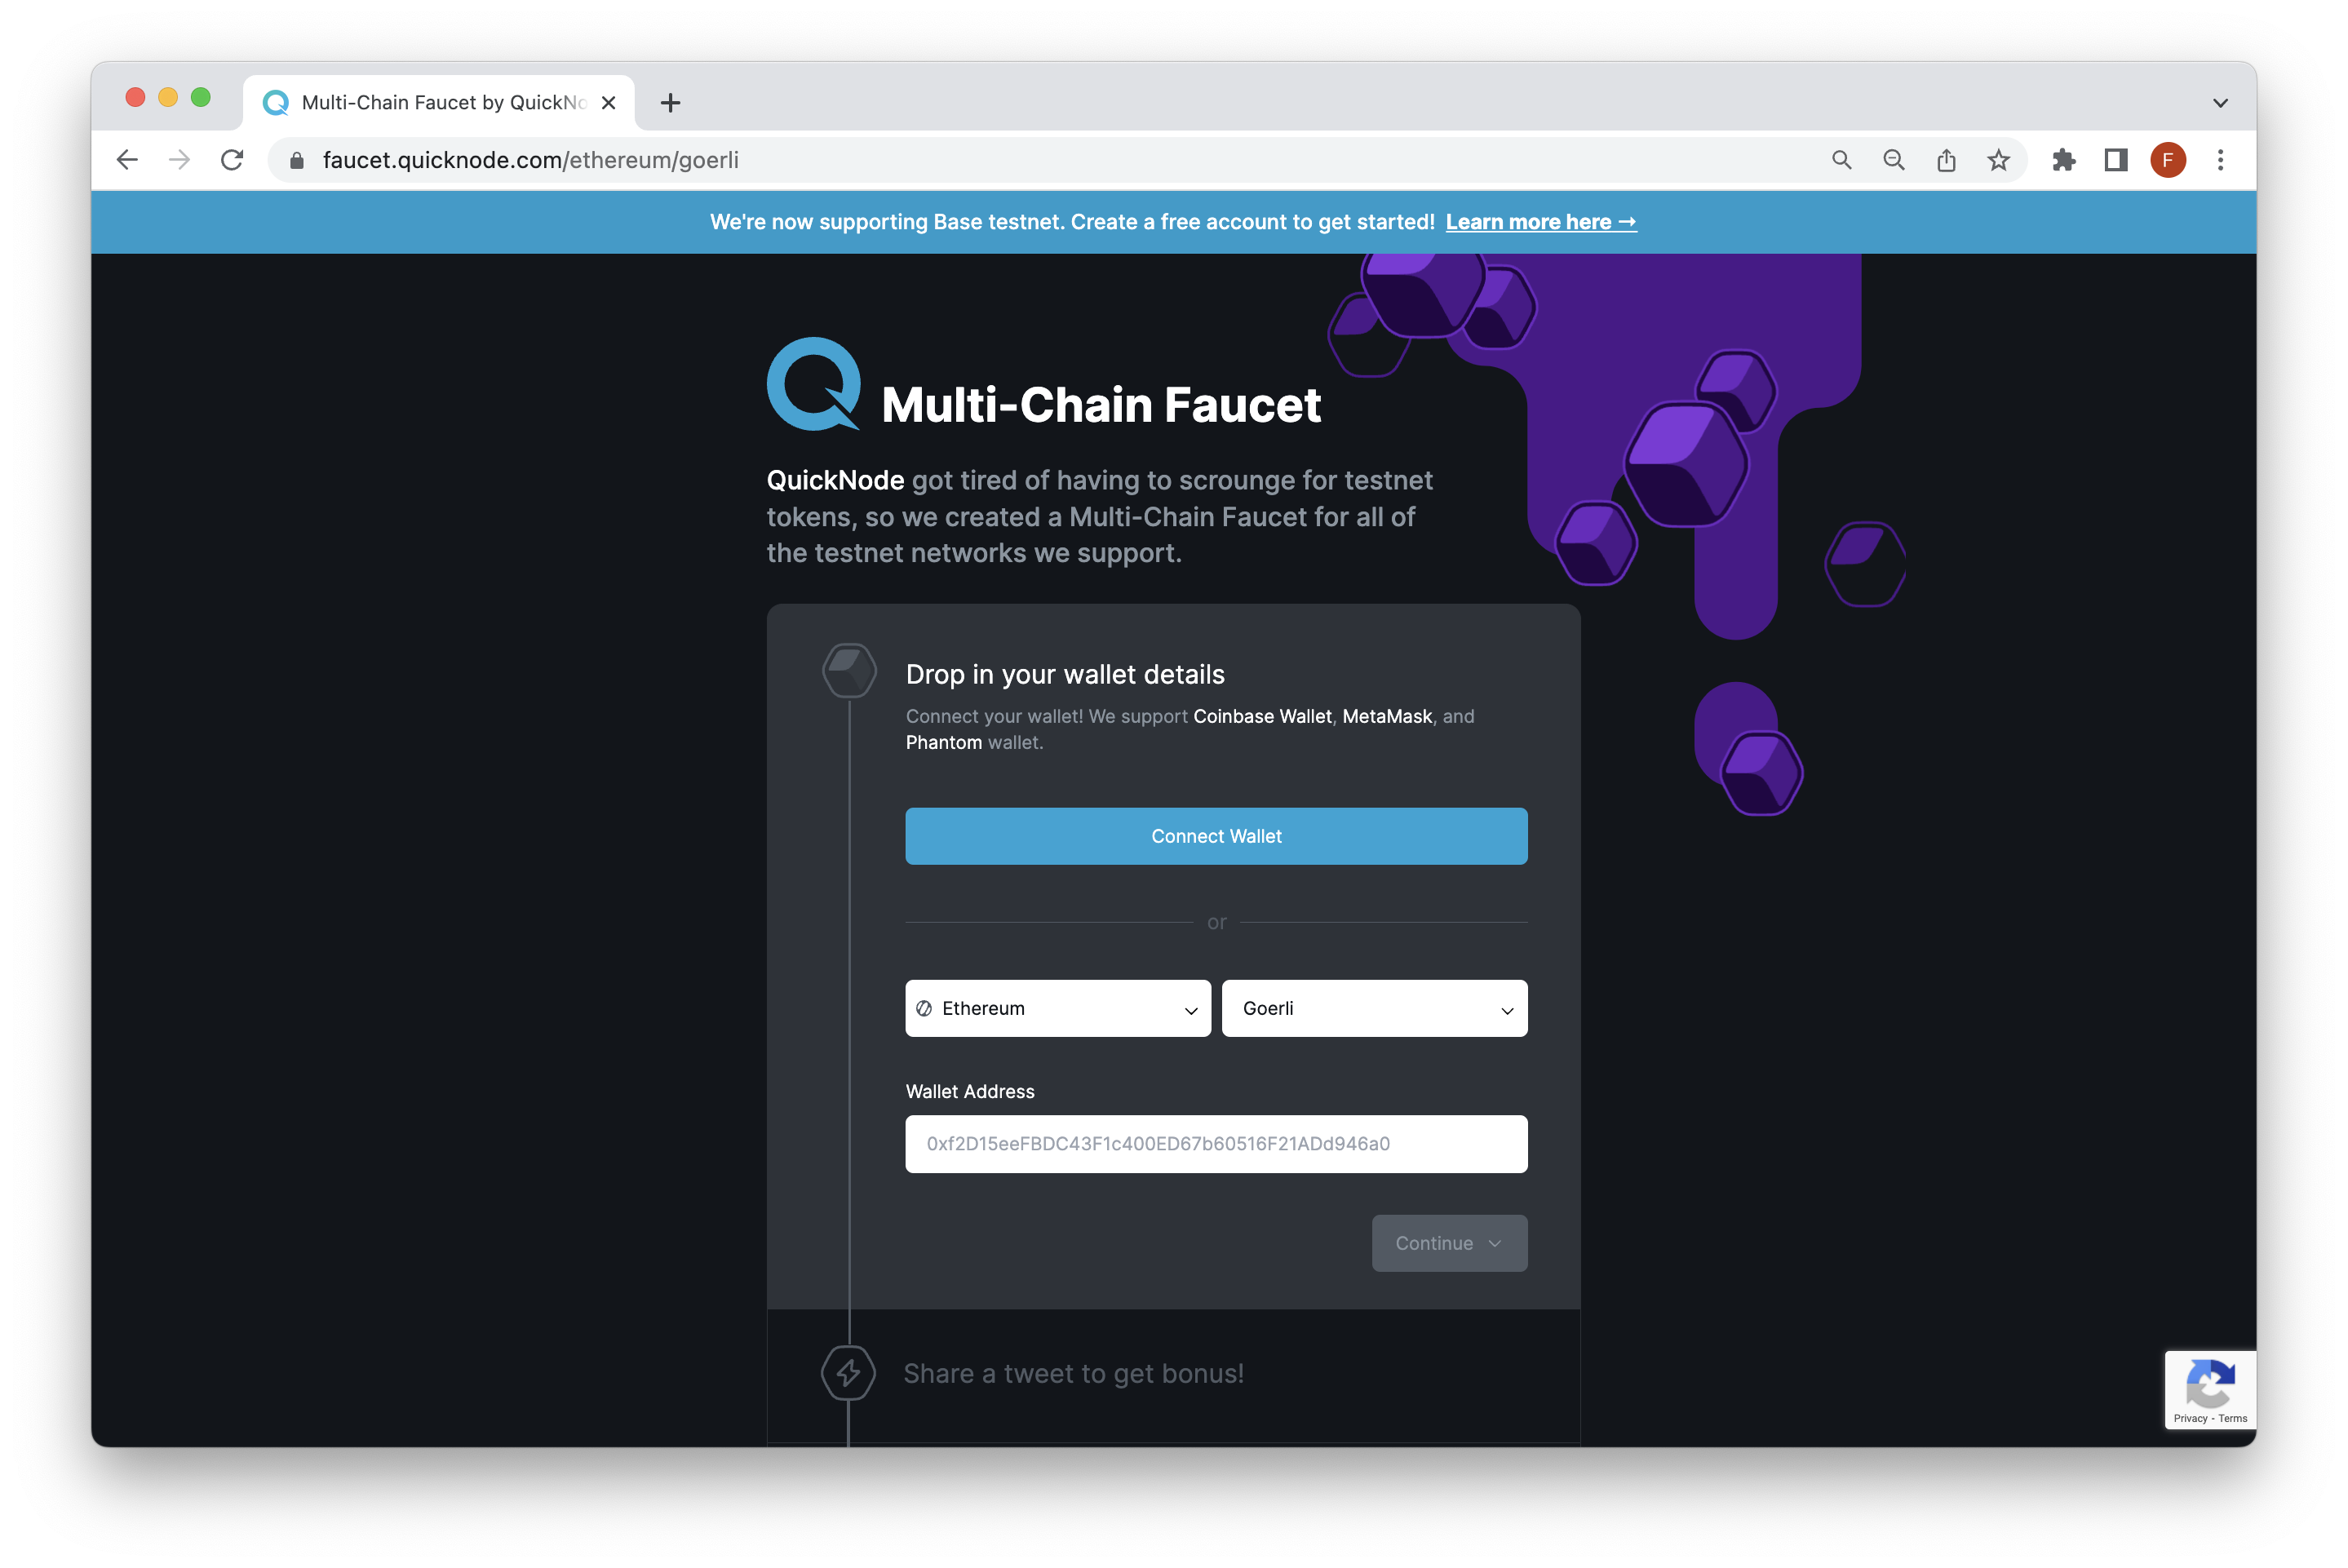
We’ll deploy our contracts on the Goerli testnet. To get started, you will need the Metamask browser extension to create an ETH wallet and some test ETH, which you can get by going to QuickNode Multi-Chain Faucet. You'll need to connect your wallet or paste in your wallet address and then request testnet funds. You can also share a tweet to get 5x bonus!
Deploying our contracts (Counter.sol & Interface.sol)
Now to achieve our goal we'll make two contracts in Solidity.
-
'Counter.sol' will be deployed first, a short counter incrementing script.
-
'Interface.sol' we will use the Solidity interface pattern and supply the function signature of the counter from the deployed contract 'Counter.sol'.
Head over to the Ethereum Remix IDE and make a new Solidity file Counter.sol
Paste the following code into your new Solidity script:
pragma solidity ^0.6.8;

// SPDX-License-Identifier: MIT

contract Counter {
    uint public count;

    function increment() external {
        count += 1;
    }
}
You can now access Logs for your RPC endpoints, helping you troubleshoot issues more effectively. If you encounter an issue with your RPC calls, simply check the logs in your QuickNode dashboard to identify and resolve problems quickly. Learn more about log history limits on our pricing page.
Explanation of the code above:
Line 1: Declaring the solidity version
Line 3: Specifying SPDX license type, which is an addition after Solidity ^0.6.8, Whenever the source code of a smart contract is made available to the public these licenses can help resolve/avoid copyright issues. If you do not wish to specify any license type, you can use a special value UNLICENSED or simply skip the whole comment (it won’t result in an error, just a warning).
Line 5: Starting our Contract named Counter
Line 6: Creating a public variable count of unsigned integer type, which will store the value of increment.
Line 8-10: Creating a function increment with an external modifier, increasing the value of count by one. External functions are part of the contract interface, which means they can be called from other contracts and via transactions - this is key for our goal of calling one contract from another.
Compile the smart-contract and deploy it using Injected Web3, you might also want to change the version of the compiler to 0.6.12 using the menu on the left.
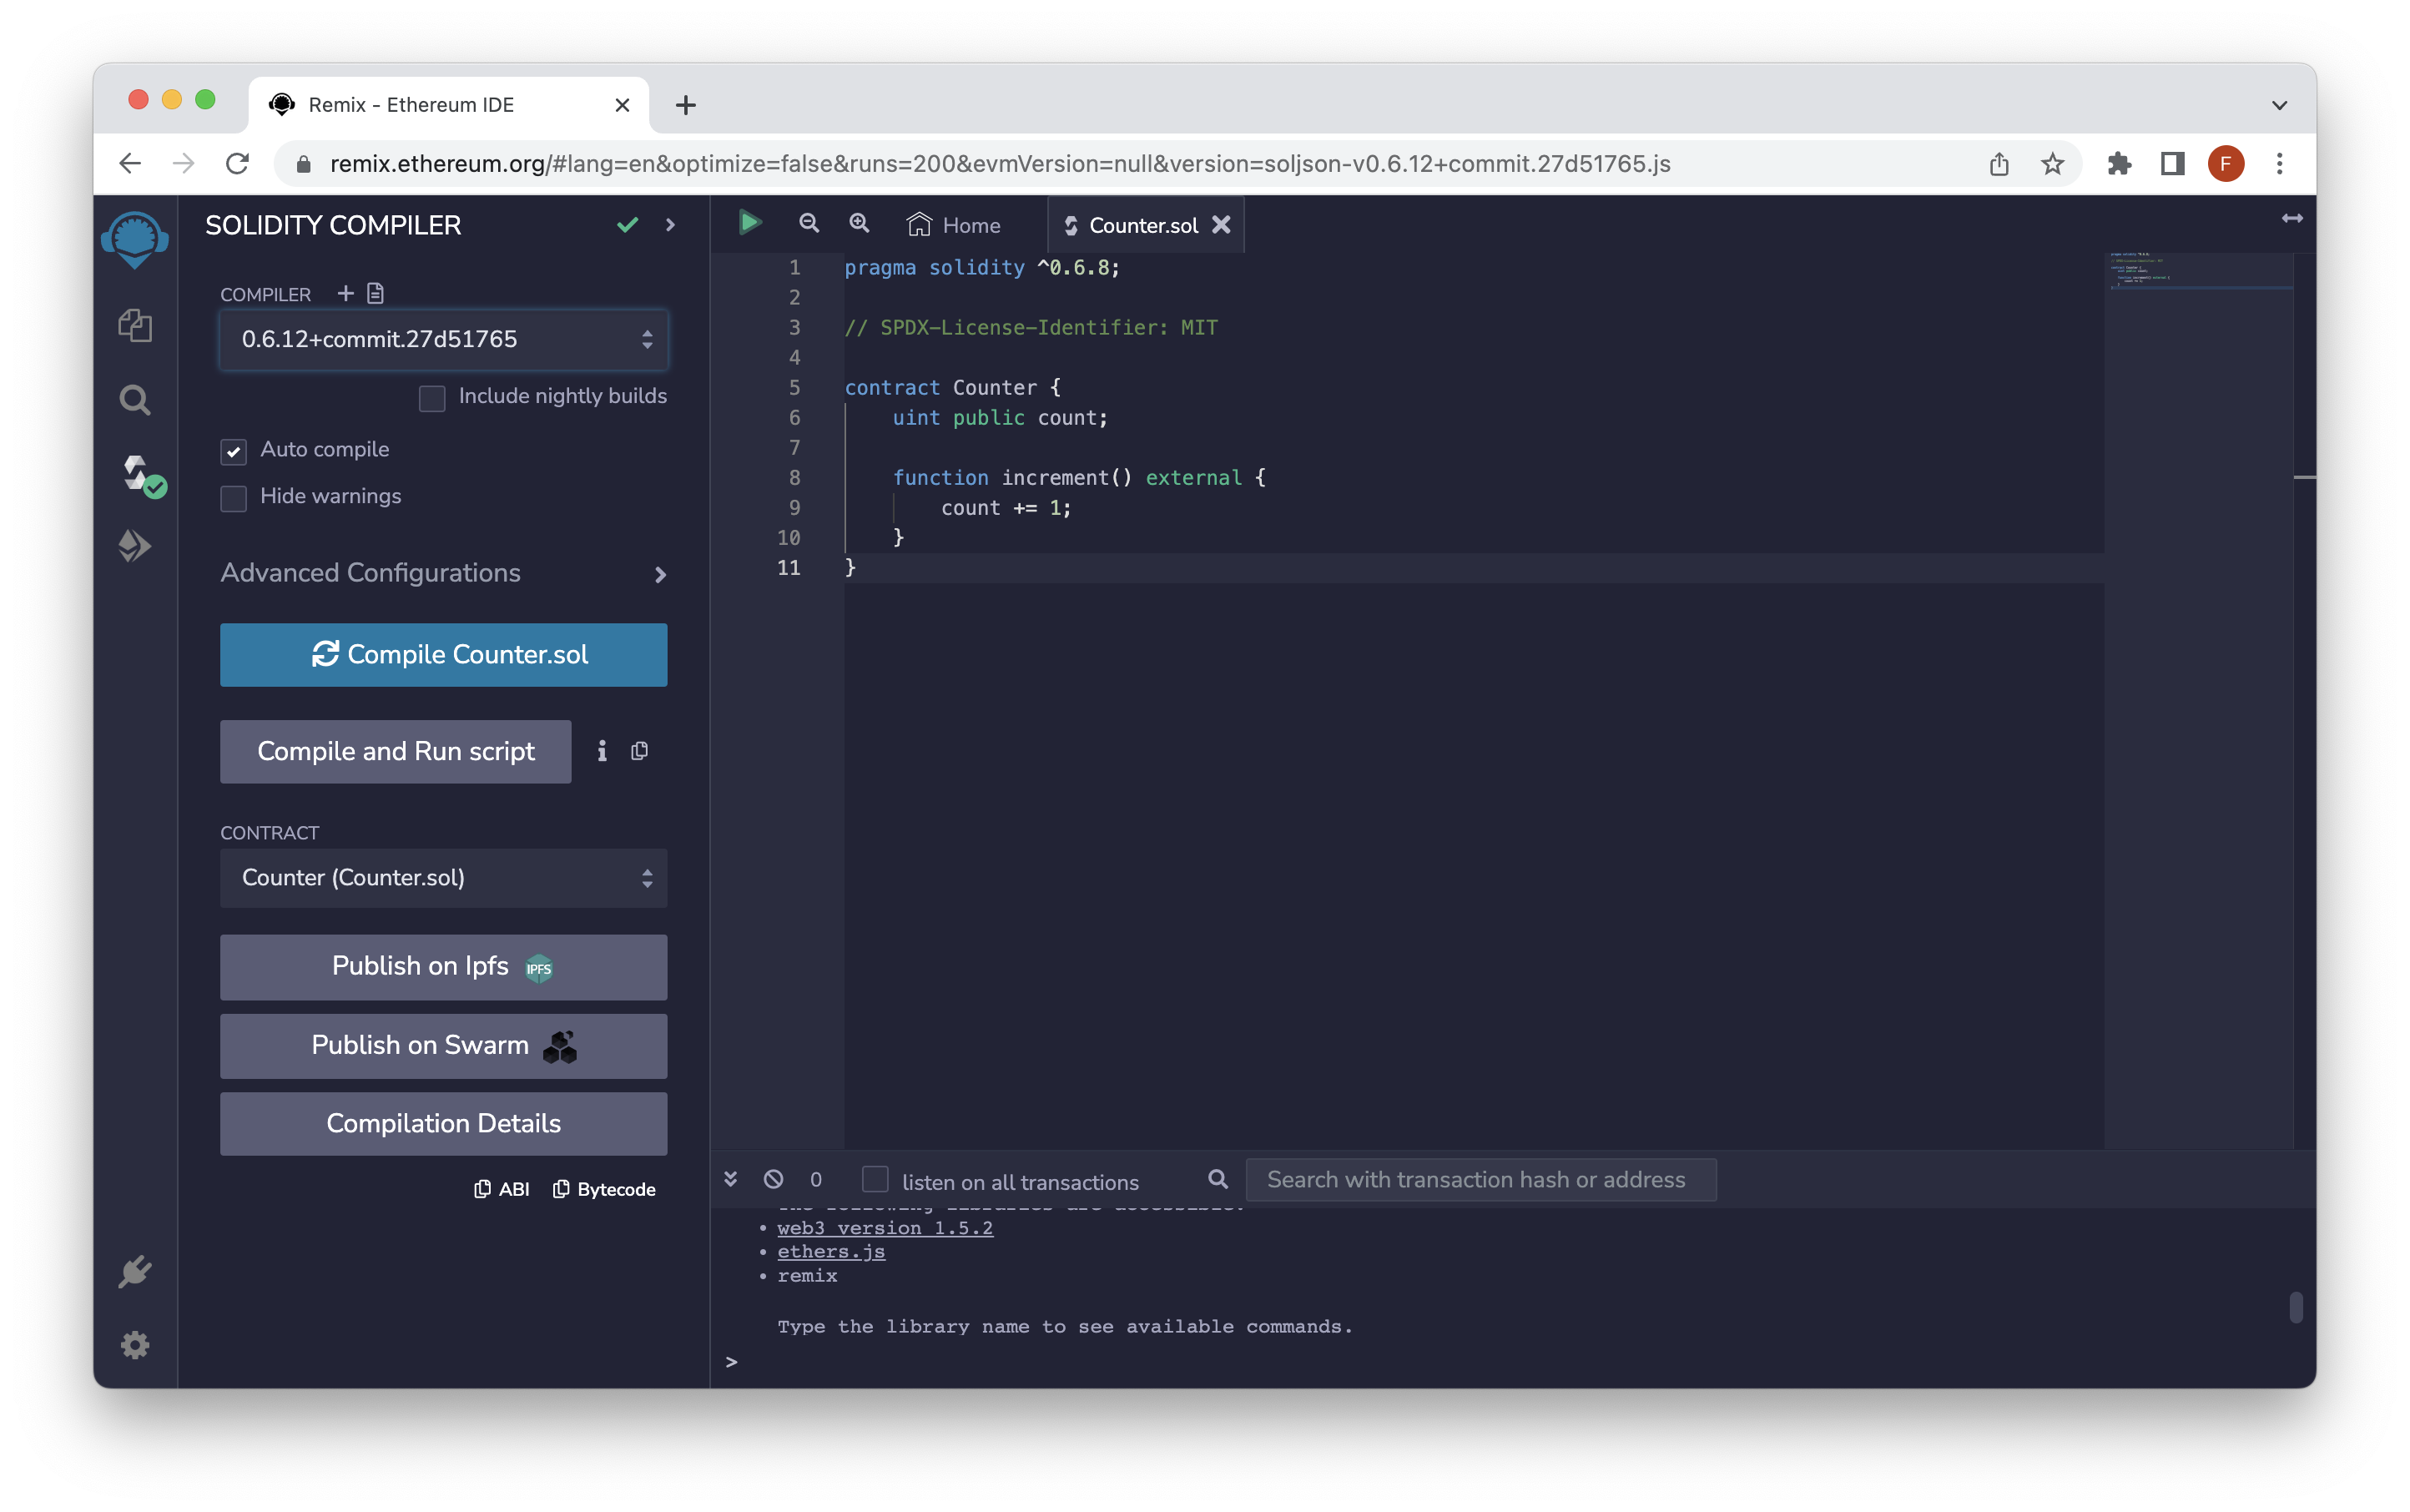
Now that we have our 1st contract deployed, let's create another contract to use the Counter.sol contract's functions.
Create a new Solidity file Interface.sol, Paste the following code into your new Solidity script:
pragma solidity ^0.6.0;

// SPDX-License-Identifier: MIT

interface ICounter {
    function count() external view returns (uint);
    function increment() external;
}

contract Interaction {
    address counterAddr;

    function setCounterAddr(address _counter) public payable {
       counterAddr = _counter;
    }

    function getCount() external view returns (uint) {
        return ICounter(counterAddr).count();
    }
}
Explanation of the code above:
Line 1: Declaring the solidity version.
Line 3: Specifying SPDX license type, which is an addition after Solidity ^0.6.8, Whenever the source code of a smart contract is made available to the public these licenses can help resolve/avoid copyright issues. If you do not wish to specify any license type, you can use a special value UNLICENSED or simply skip the whole comment (it won’t result in an error, just a warning).
Line 5-8: Creating an Interface ICounter with the function signatures of the contract Counter.sol, supplying two function signatures count and increment.
Line 10: Starting our contract named Interaction.
Line 11: Declaring a private variable `counterAddr` to store the address of the contract we want to call a function on.
Line 13-15: Creating a function setCounterAddr which accepts `_counter` as an argument. `_counter` will be the address we want to set `counterAddr` to - which will be stored on chain.
Line 17-19: Declaring the `getCount` function which is the reason we started this journey in the first place, instantiating the interface with the `counterAddr` address and immediately calling the `count` function on it to fetch the count from the deployed `Counter.sol` contract. getCount is a view type method and has external state, view and pure methods (which includes getters for public state variables) can be called without making a transaction.
Compile the smart-contract and deploy it using Injected Web3.
Note: make sure to select Interaction under the Contract section from the left menu before deploying
Setting the counter contract address
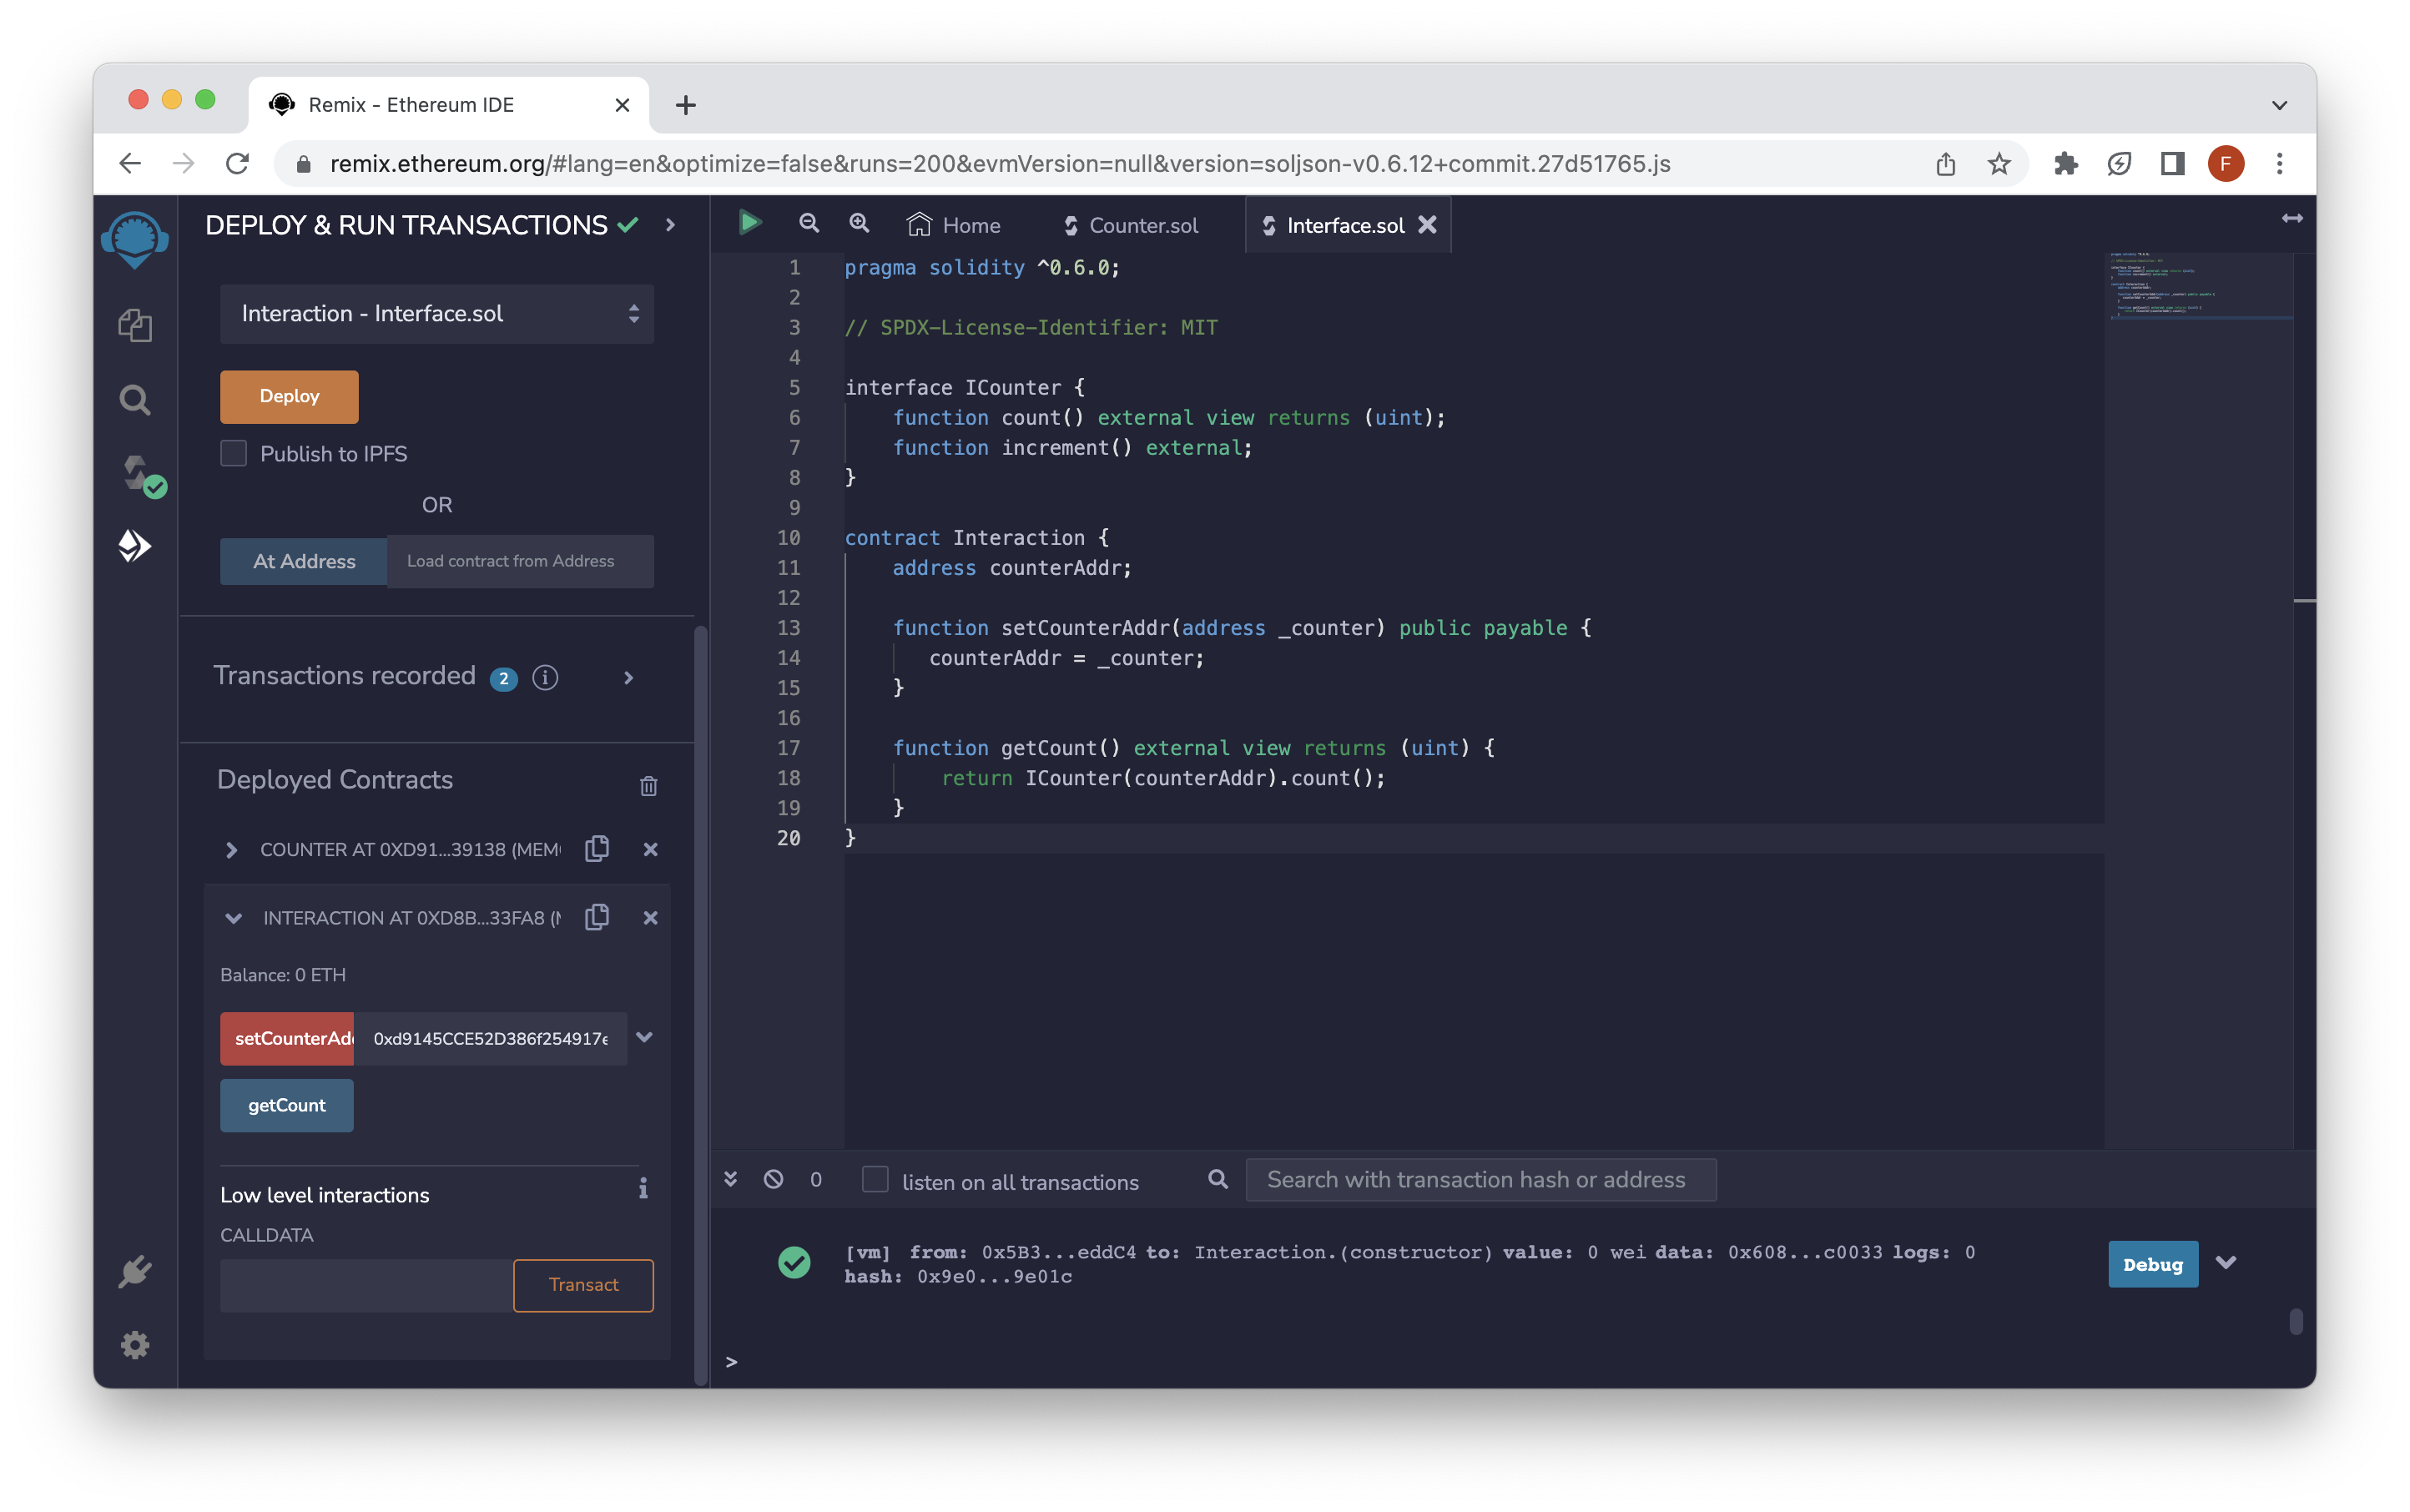
Now you will see two contracts under the "Deployed Contracts" section in Remix. Copy the address of deployed contract COUNTER from the copy button beside the contract's name, expand the INTERACTION contract, paste the address in the input box near the setCounterAddr button, and click on setCounterAddr - this will write the address of the previously deployed smart contract to the variable counterAddr on the blockchain. This transaction will require some gas.
Updating the count in Counter.sol
Now let's update the value of count on the COUNTER contract, click on increment; this will send a write request to the chain and require some gas. Then click on count. You must see the value of count increased by one.
Note: You will need to wait for the transaction to be confirmed on the blockchain (which can take up to 45 seconds or so) before clicking count.
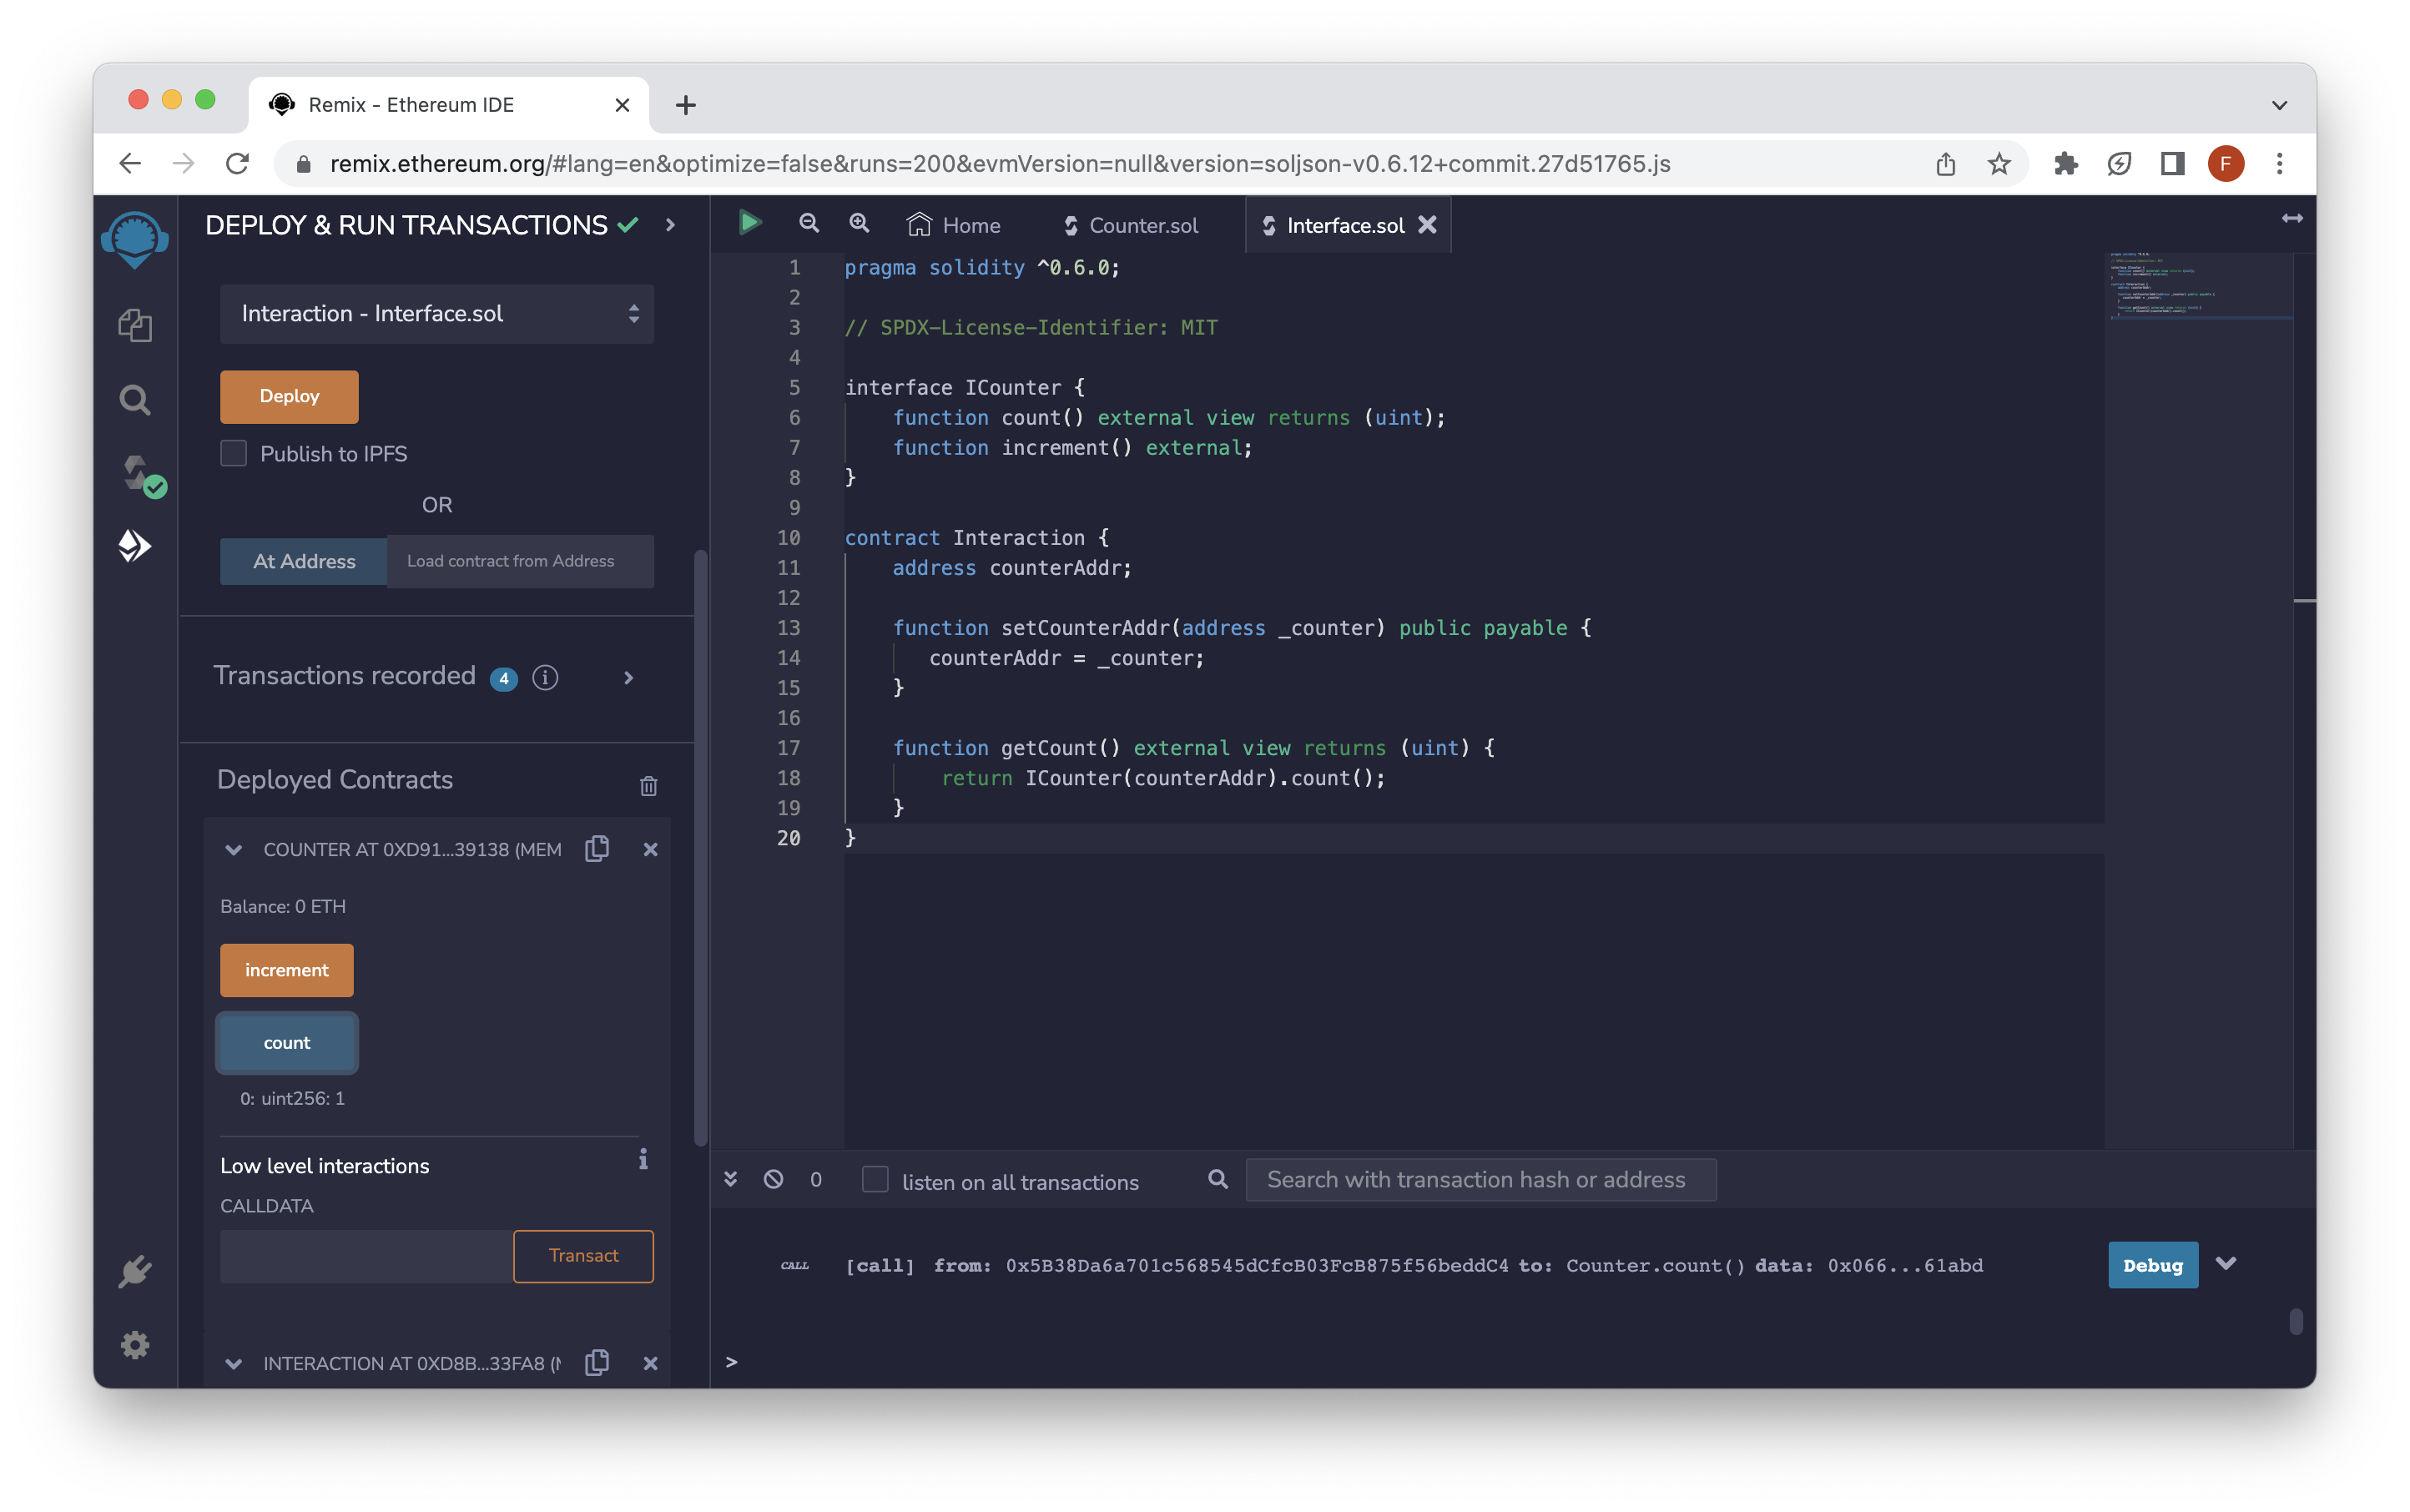
Seeing the updated value
Let's check if the INTERFACE contract can fetch the updated value of count, click on getCount button under the INTERACTION contract and you must see the updated value.
Note: This assumes the transaction from the previous section is confirmed.
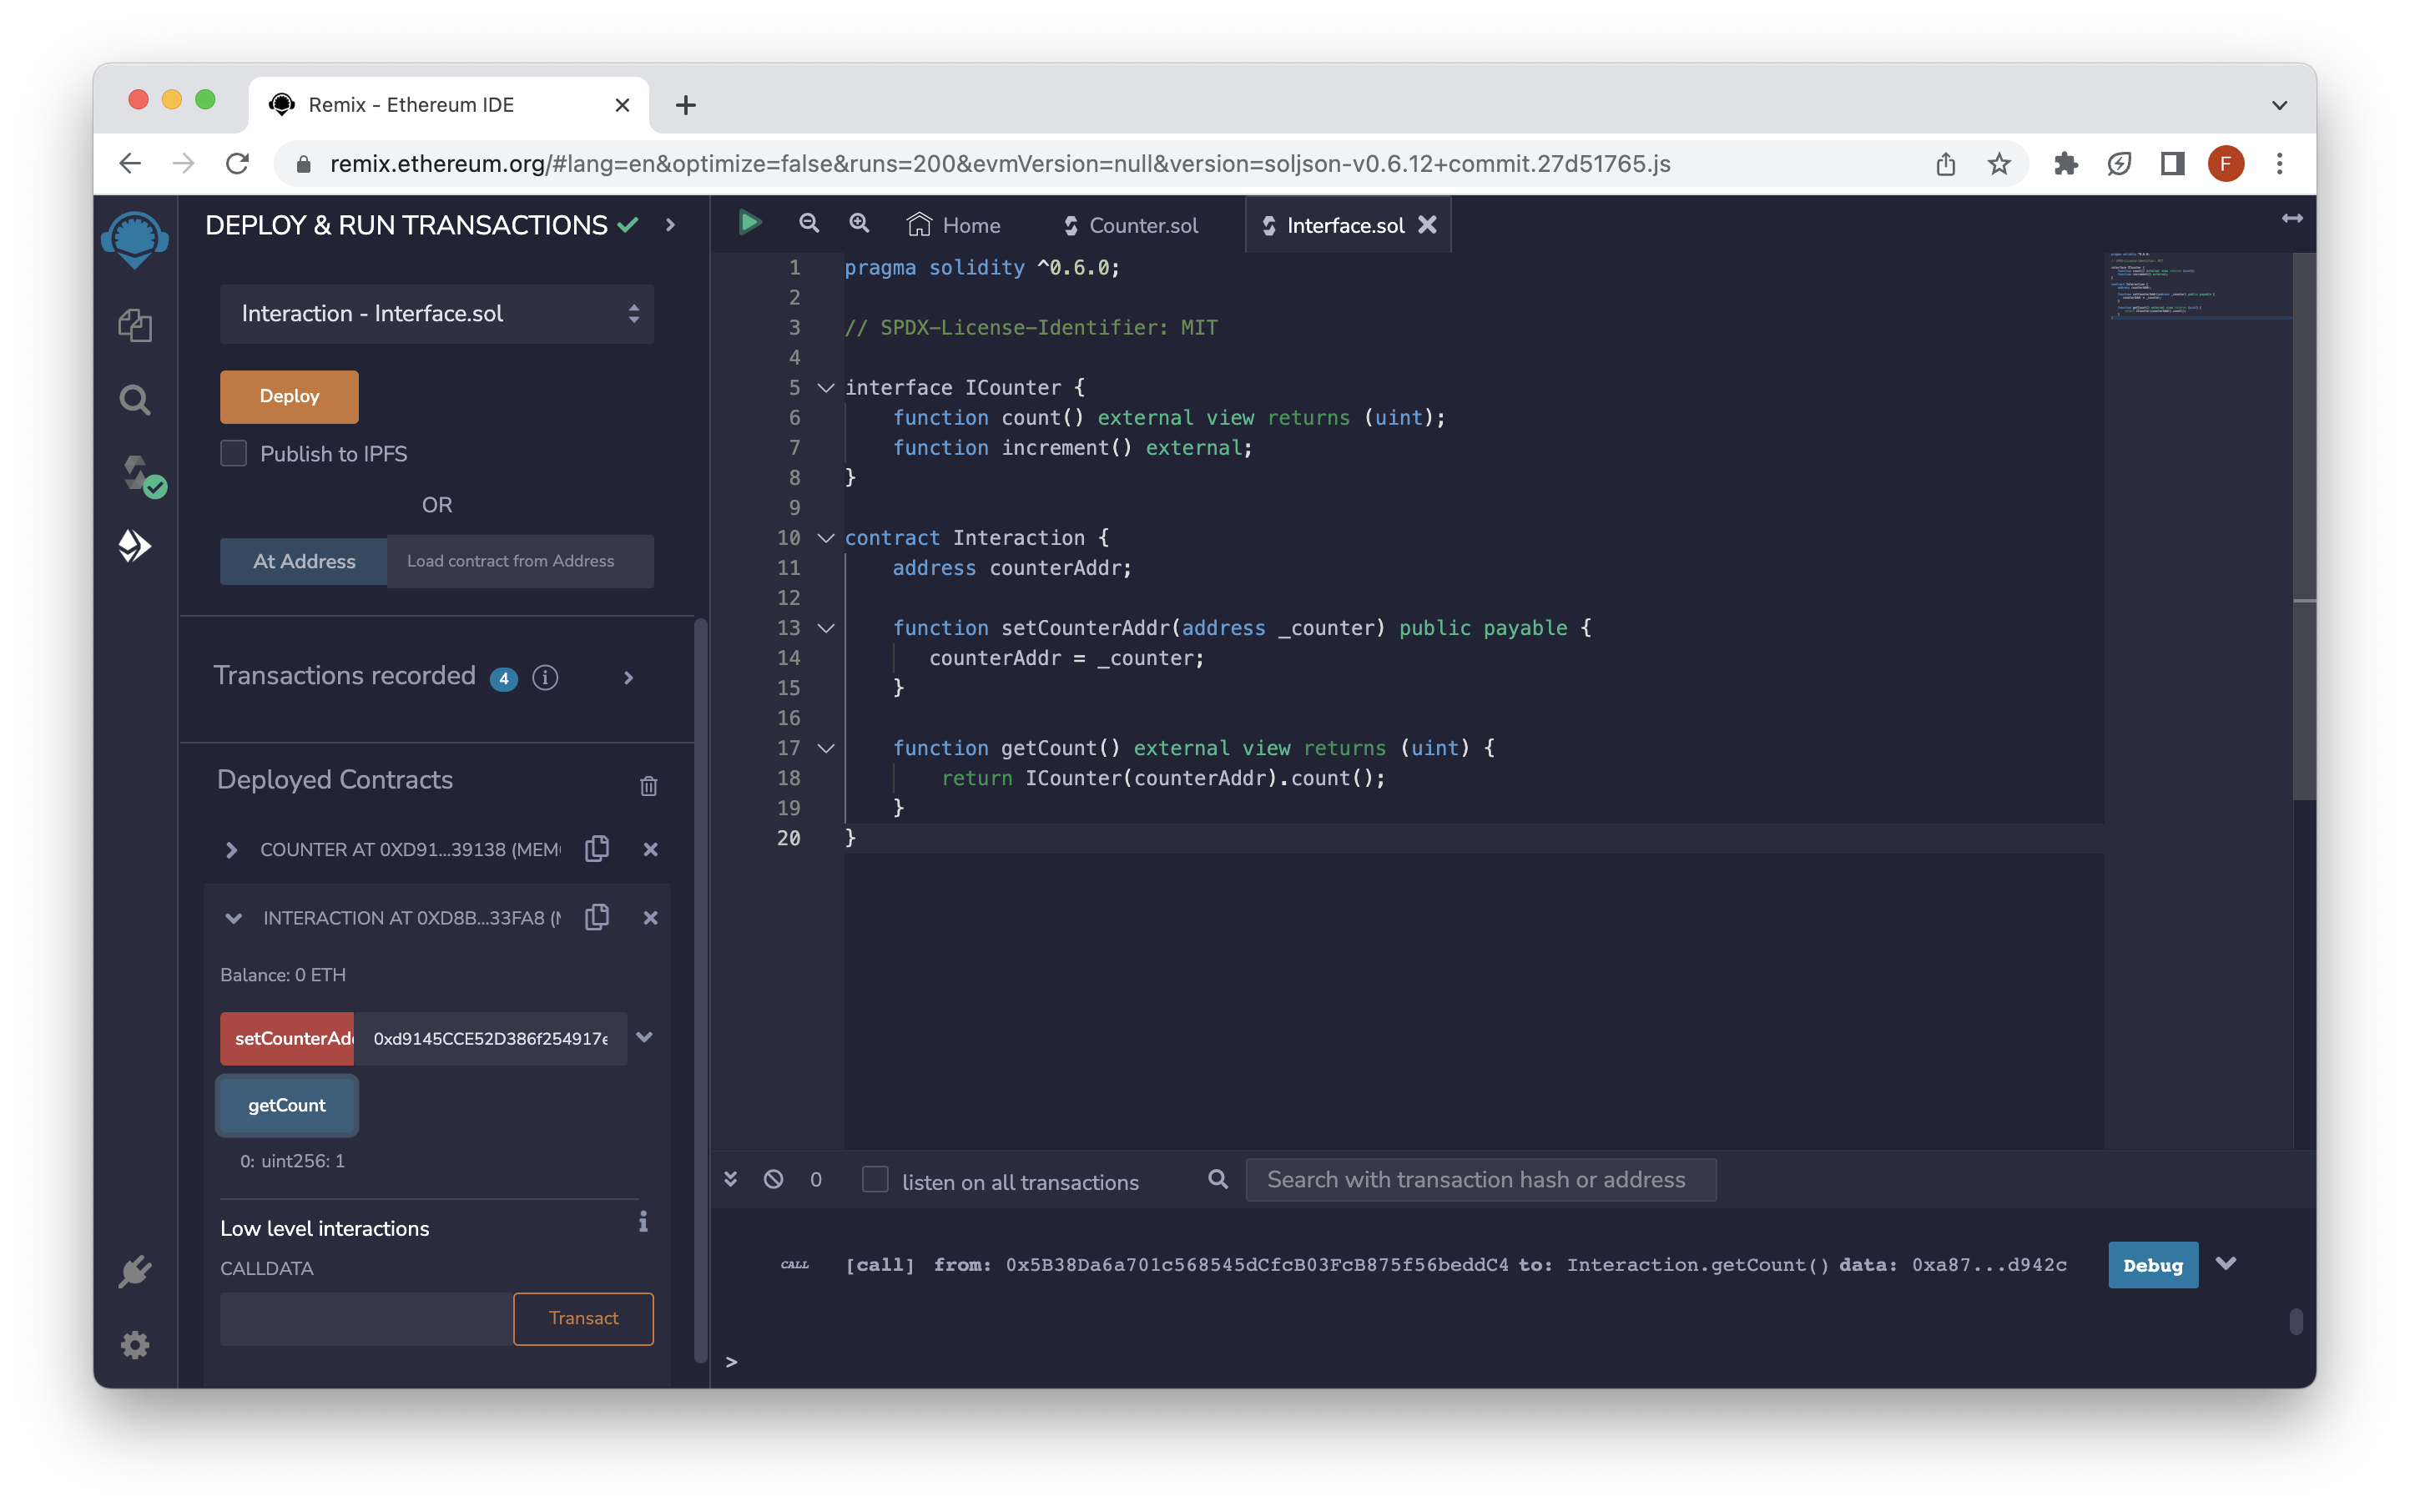
Use of interface allows users to use a deployed contract’s functionality. If someone wishes to use a contract’s function, they can get the interface of that contract from its creator and integrate it into their contract without implementing everything from scratch.
Conclusion
Here we successfully saw how we can call another smart contract's function using Solidity.
Subscribe to our newsletter for more articles and guides on Ethereum. If you have any feedback, feel free to reach out to us via Twitter. You can always chat with us on our Discord community server, featuring some of the coolest developers you'll ever meet :)