6 min read
This guide includes references to the Ropsten testnet, which is no longer actively maintained. While specific steps related to this chain may not be applicable, the overall process may be valid for other chains. We recommend exploring current alternatives for your implementation. If you’d like to see an updated version of this guide, please let us know!
Overview
This article is intended for developers new to Ethereum development. In this article, we will talk about Solidity and smart contracts, What they are and what role they actually play in the ethereum development with the end goal of writing a smart contract using Solidity
What is Ethereum?
Before getting started with smart contracts or Solidity let us first get an overview of what Ethereum is: Ethereum is a decentralized open-source blockchain with support for a Turing-complete programming language, Solidity. What we normally call computer programs are called smart contracts in Ethereum. Launched in 2015, Ethereum has been gaining significant popularity the last 5 years. It is a permissionless, public blockchain, which means anyone can use the blockchain, though for every write operation you need to pay ETH (Gas).
What is a Smart Contract?
The smart contract term was coined by Nick szabo in 1997. Smart contracts are nothing but programs that exist on the blockchain. These "smart contracts" can be used by making outside method calls or calls from other smart contracts. These smart contracts execute in the EVM (Ethereum virtual machine). Smart contracts can reduce malicious exceptions, fraudulent losses, and a need for trusted intermediator, when properly written and audited.
Ethereum supports Turing complete smart contracts, which means you can perform almost any type of operation you want. (Remember, you need to pay ETH for every write operation).
What is Solidity?
As we saw that smart contracts are nothing but programs and you need a programming language to write these programs. Ethereum core contributors invented a programming language called Solidity to write smart contracts (aka computer programs that run on the blockchain). Solidity is a high-level, object-oriented language inspired by JavaScript, C++, and Python - it has syntax very similar to JavaScript. There are other blockchains and Ethereum forks that support Solidity - such as Tron. Solidity is not the only language you can use to write smart contracts though. There are other languages that can be used to write smart contracts, like Vyper, the most popular and adopted smart contract language after solidity.
Your first Smart contract
Now, let's write a simple smart contract. Our contract will allow us to store an unsigned integer and retrieve it.
// SPDX-License-Identifier: MIT
pragma solidity >=0.4.0 <0.7.0;
contract SimpleStorage {
    uint storedData;
    function set(uint x) public {
        storedData = x;
    }
    function get() public view returns (uint) {
        return storedData;
    }
}
You can now access Logs for your RPC endpoints, helping you troubleshoot issues more effectively. If you encounter an issue with your RPC calls, simply check the logs in your QuickNode dashboard to identify and resolve problems quickly. Learn more about log history limits on our pricing page.
The code snippet above is a smart contract written in Solidity language. Let’s take a moment to understand what the code we wrote in our smart contract is doing line by line.
Line 1: Specifying SPDX license type, which is an addition after Solidity ^0.6.8; whenever the source code of a smart contract is made available to the public, these licenses can help resolve/avoid copyright issues. If you do not wish to specify any license type, you can use a special value UNLICENSED or simply skip the whole comment (it won’t result in an error, just a warning).
Line 2: On the first line we are declaring which Solidity compiler we want to use. For instance, we are targeting any version between ≥ 0.4.0 and <0.7.0 .
Line 3: We are declaring our contract here and naming it as Simplestorage. It is normal practice to use the same filename as the contract name. For example - this contract will be saved in the file name SimpleStorage.sol (.sol is the file extension for solidity smart contracts).
Line 4: We are declaring a uint (Unsigned Integer) variable named storedData, this variable will be used to store data.
Line 5-7: Next, we will add a set function, using which we will change the value of our variable storeData. Here set function is accepting a parameter x whose value, we are storing into storeData. In addition, the function is marked as public which means that the function can be called by anyone.
*
Line 8-10*: We will add a get function to retrieve the value of storeData variable. This function is marked as view which tells Solidity compiler that this is a read-only function.
Other than that the get function also has returns (uint), which means that the function will return a uint.
Deploying the Smart contract
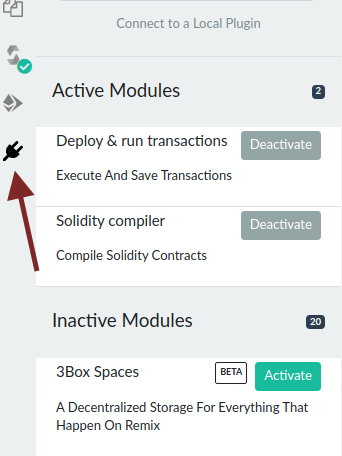
After writing a smart contract it needs to be deployed on the ethereum network, we will deploy our smart contract using Remix. There are other ways to deploy smart contracts, but to make it beginner-friendly, we will use Remix. Remix is an online web Ethereum IDE. It’s simple and supports many functionalities. So open Remix using this link. Remix has plugins, we need to activate two plugins for compiling and deploying our smart contract which you can see in the image below.
Here, you can see we have activated both plugins
Next, create a file on Remix with the name SimpleStorage.sol and copy/paste our smart contract code.
// SPDX-License-Identifier: MIT
pragma solidity >=0.4.0 <0.7.0;
contract SimpleStorage {
    uint storedData;
    function set(uint x) public {
        storedData = x;
    }
    function get() public view returns (uint) {
        return storedData;
    }
}
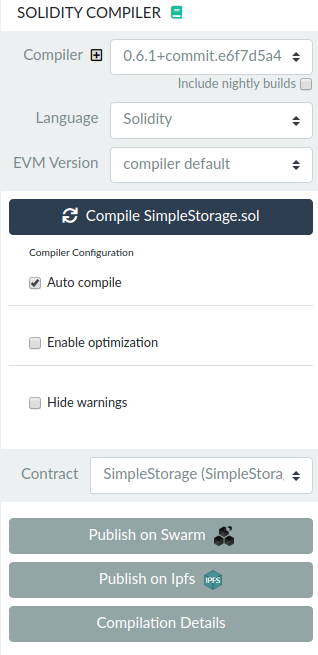
Now, lets compile our smart contract using the Remix plugin.
Click on “Compile SimpleStorage.sol” to compile the contract
Finally, we can now deploy our SimpleStorage smart contract. We will deploy our smart contract on Ropsten testnet. Blockchains have multiple public networks. One is the main public network, which we usually call mainnet. Others are for testing purposes, which we usually call testnets.
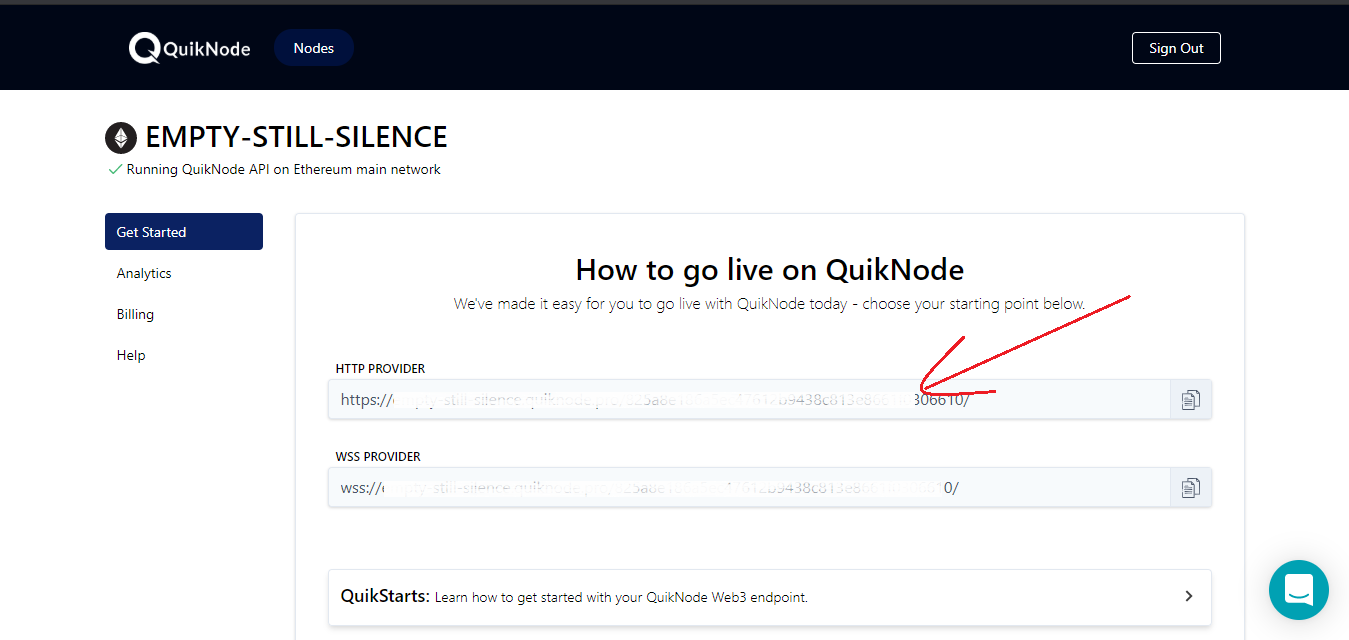
We could use pretty much any Ethereum client, such as Geth or OpenEthereum (fka Parity), for our purposes today. Since that is a bit too involved for fetching logs, we'll just create a free QuickNode account here and easily set up an Ethereum endpoint. We’ll need a Ropsten endpoint to get data from the chain as we’ve deployed our contract on the Ropsten testnet. After you've created your free Ethereum endpoint, copy your HTTP Provider endpoint:
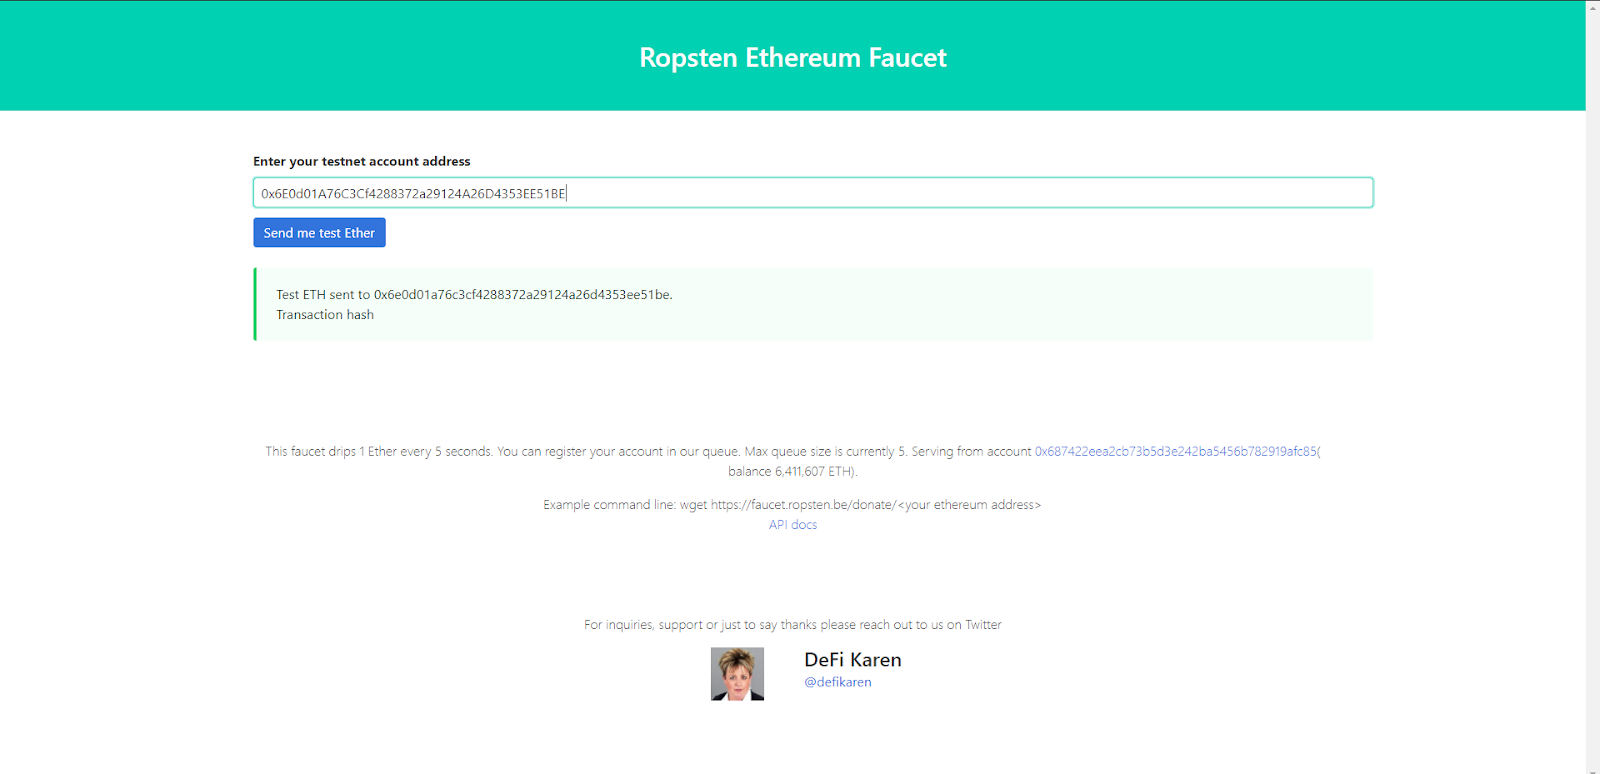
We’ll deploy our contract on the Ropsten testnet. To get started, you will need the Metamask browser extension to create an ETH wallet and some test ETH, which you can get by going to the Ropsten faucet. You'll need to select Ropsten Test Network on your Metamask wallet and copy-paste the wallet address into the text field in the faucet, then click Send me test Ether.
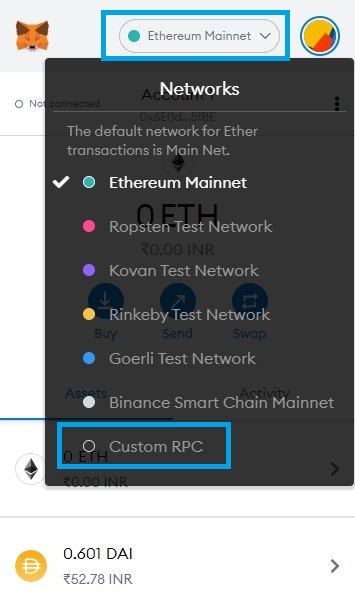
Now, let's add our node to Metamask:
Step 1: Open Metamask, click on the network menu on top, and select custom RPC.
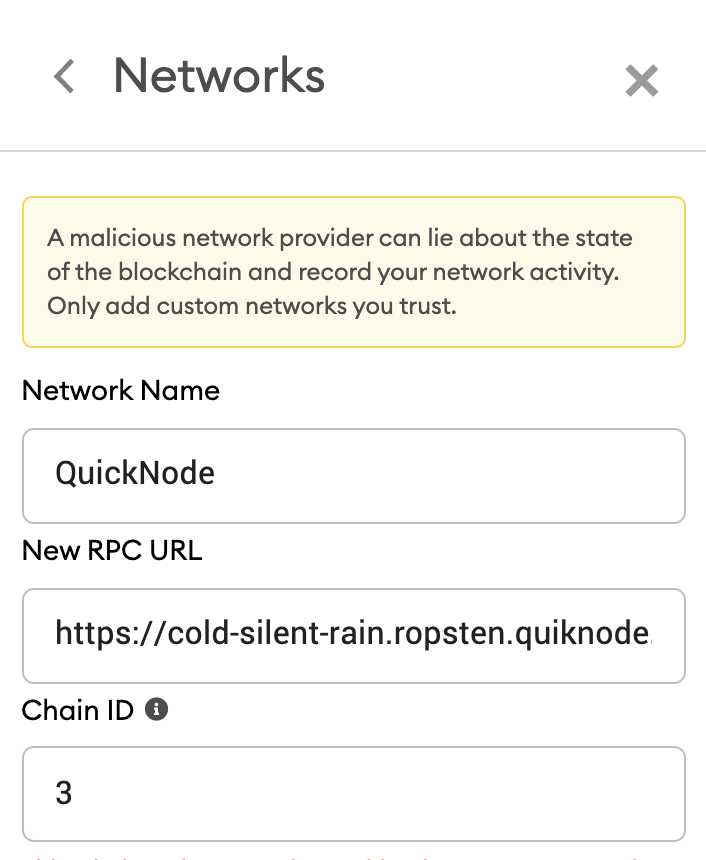
Step 2: Enter the network name (It can be any name of your choice, QuickNode in this example), Paste your QuickNode endpoint URL in the second field that says New RPC URL, Enter the Chain ID, which is also known as the network id (3 here as we are using an Ethereum Ropsten endpoint), and click on save.
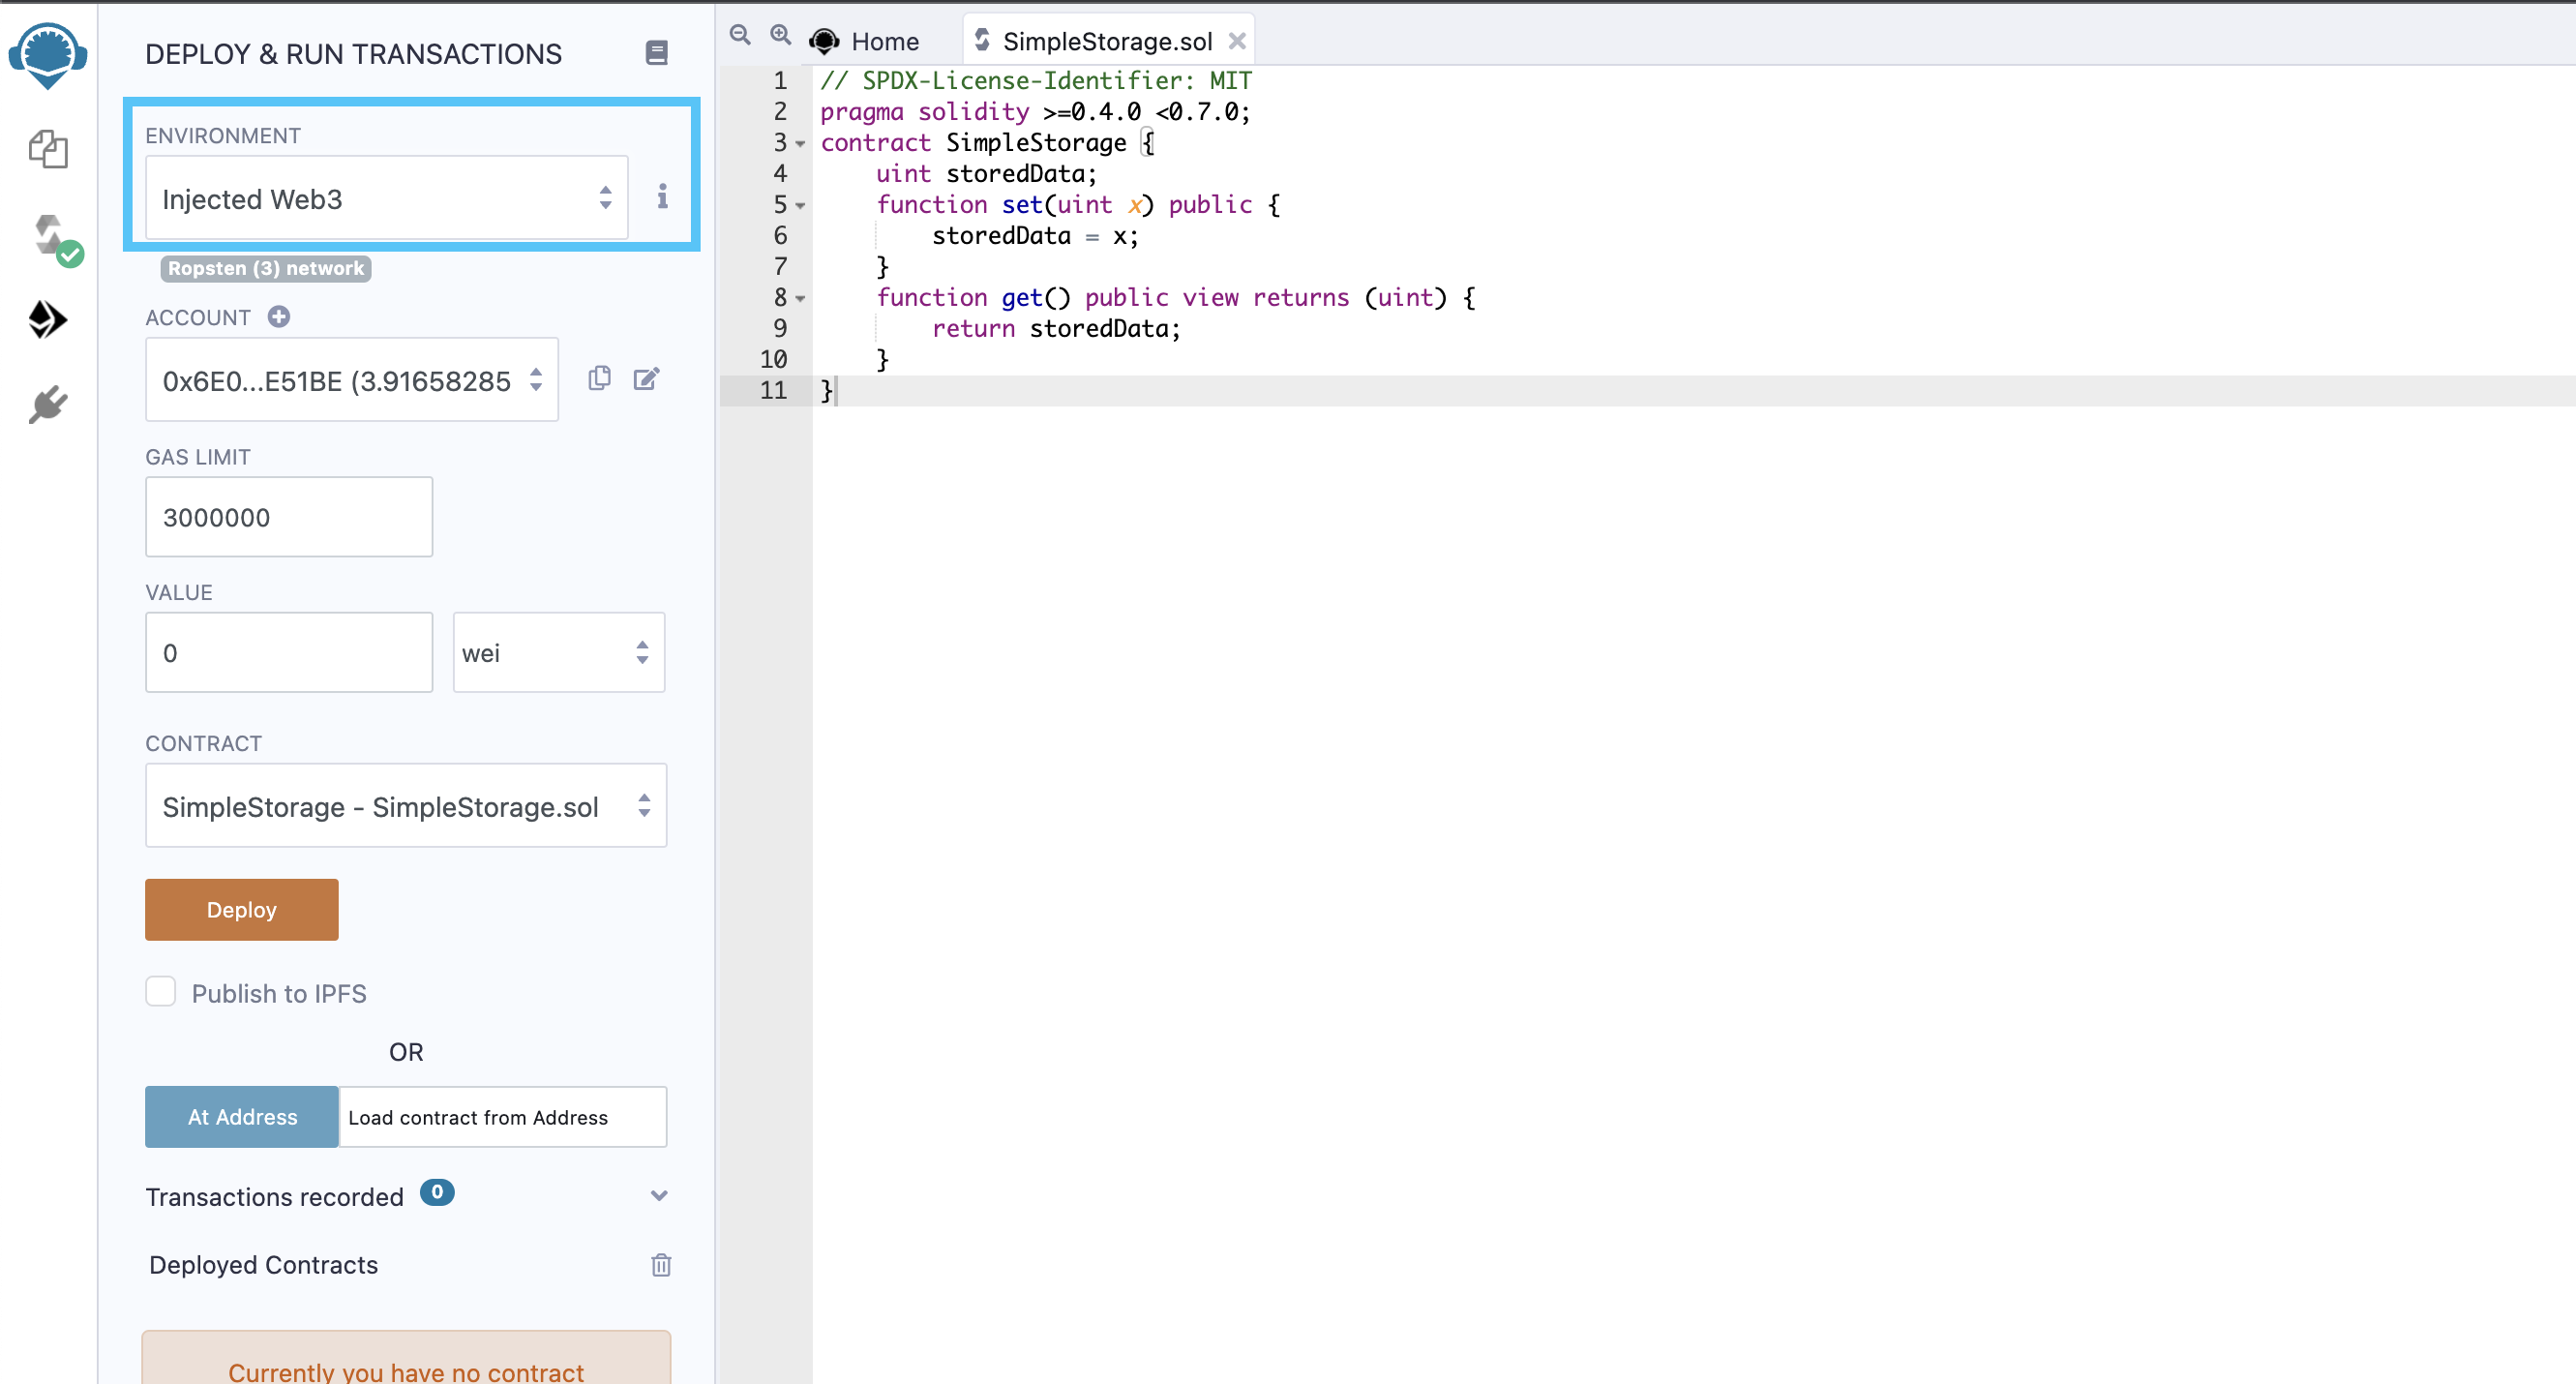
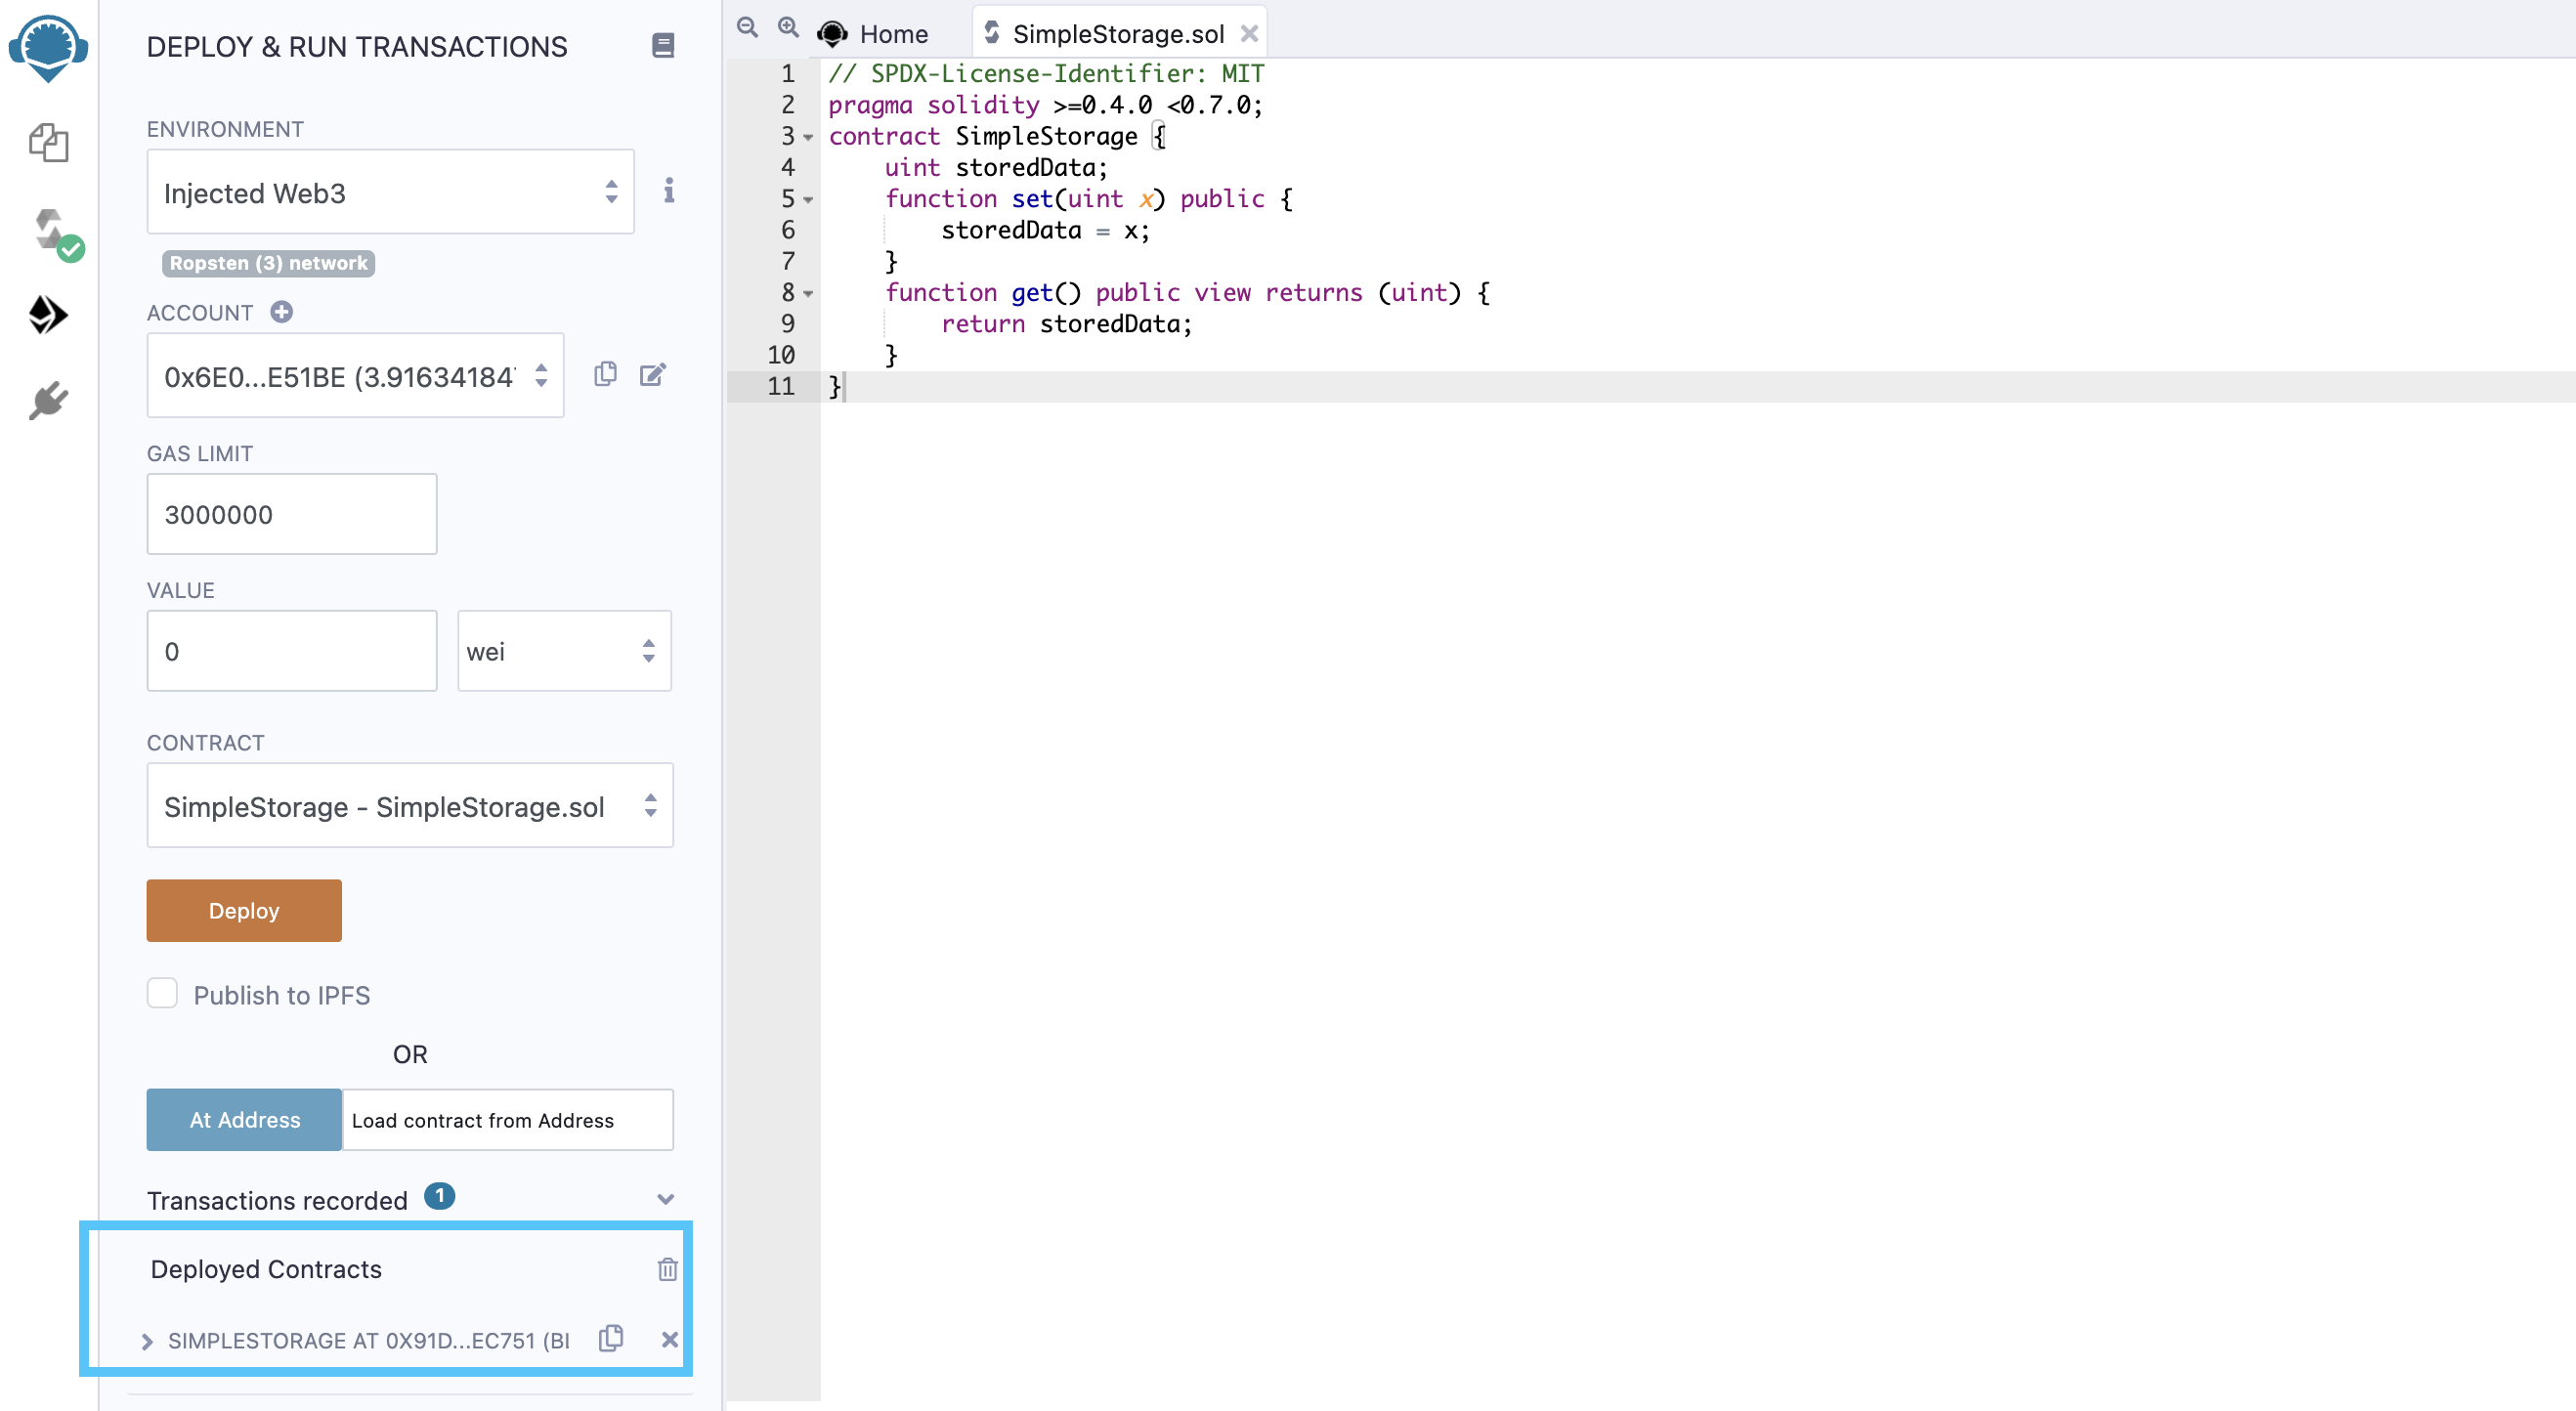
Now, go back to remix, go to the third tab on the left menu, and select Injected Web3 under the ENVIRONMENT option.
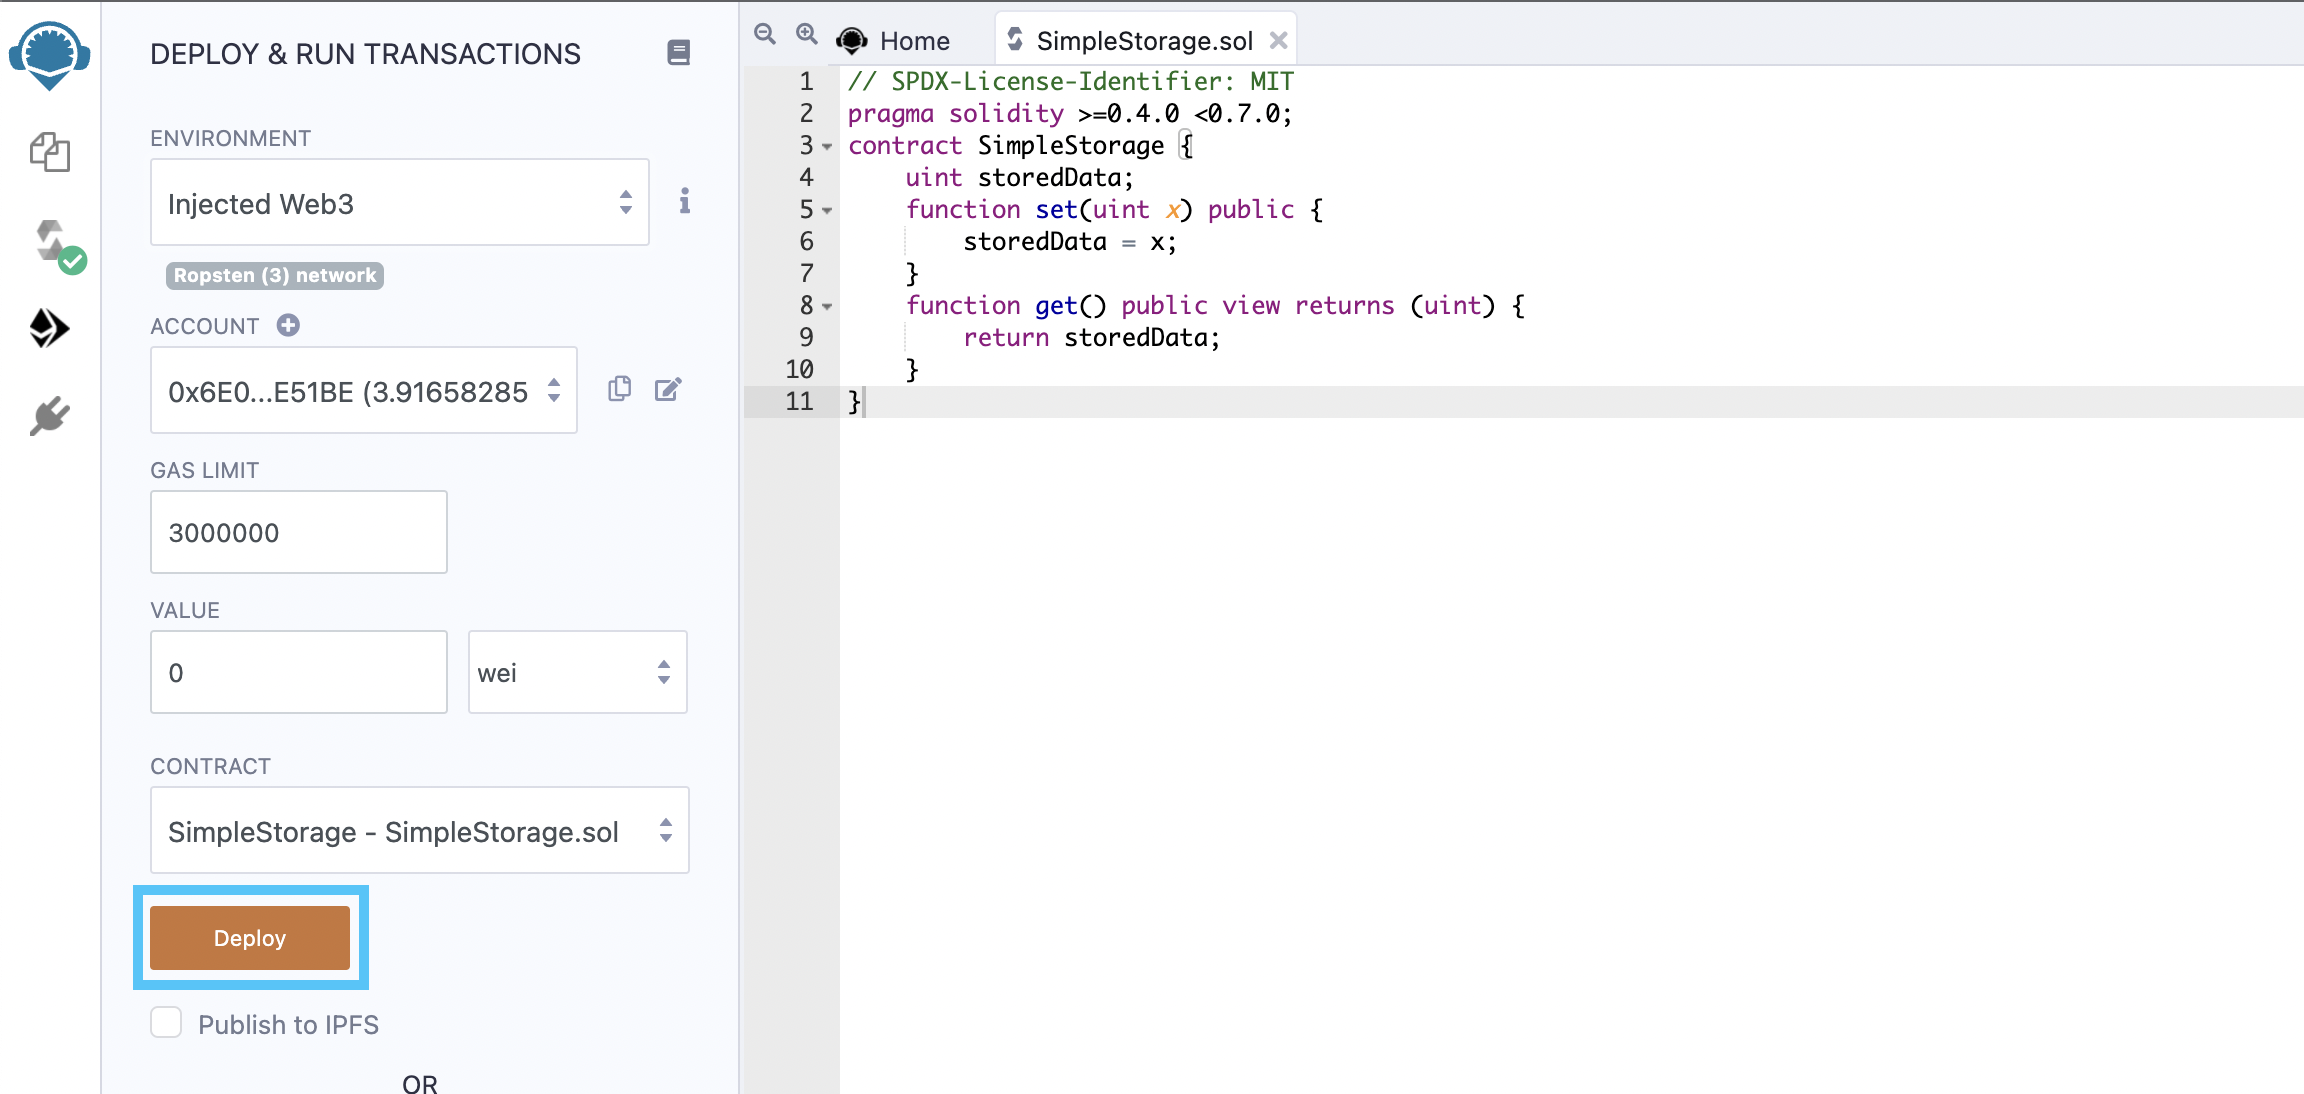
Click on deploy, and now a Metamask window must open up to confirm the transaction.
After you click on confirm, it might take some time for the transaction to get approved. Once confirmed, you must see a transaction confirmed message in the remix console and the deployed contract under the Deployed Contracts section.
Conclusion
So we have successfully created and deployed our smart contract written in Solidity to the blockchain, You can refer the Solidity Documentation for more.
Subscribe to our newsletter for more articles and guide on Ethereum. If you have any feedback, please feel free to reach out to us via Twitter and you can always chat with us if you have a question via our community server on Discord, thanks :)
